¶ Device Installation
¶ Unpacking
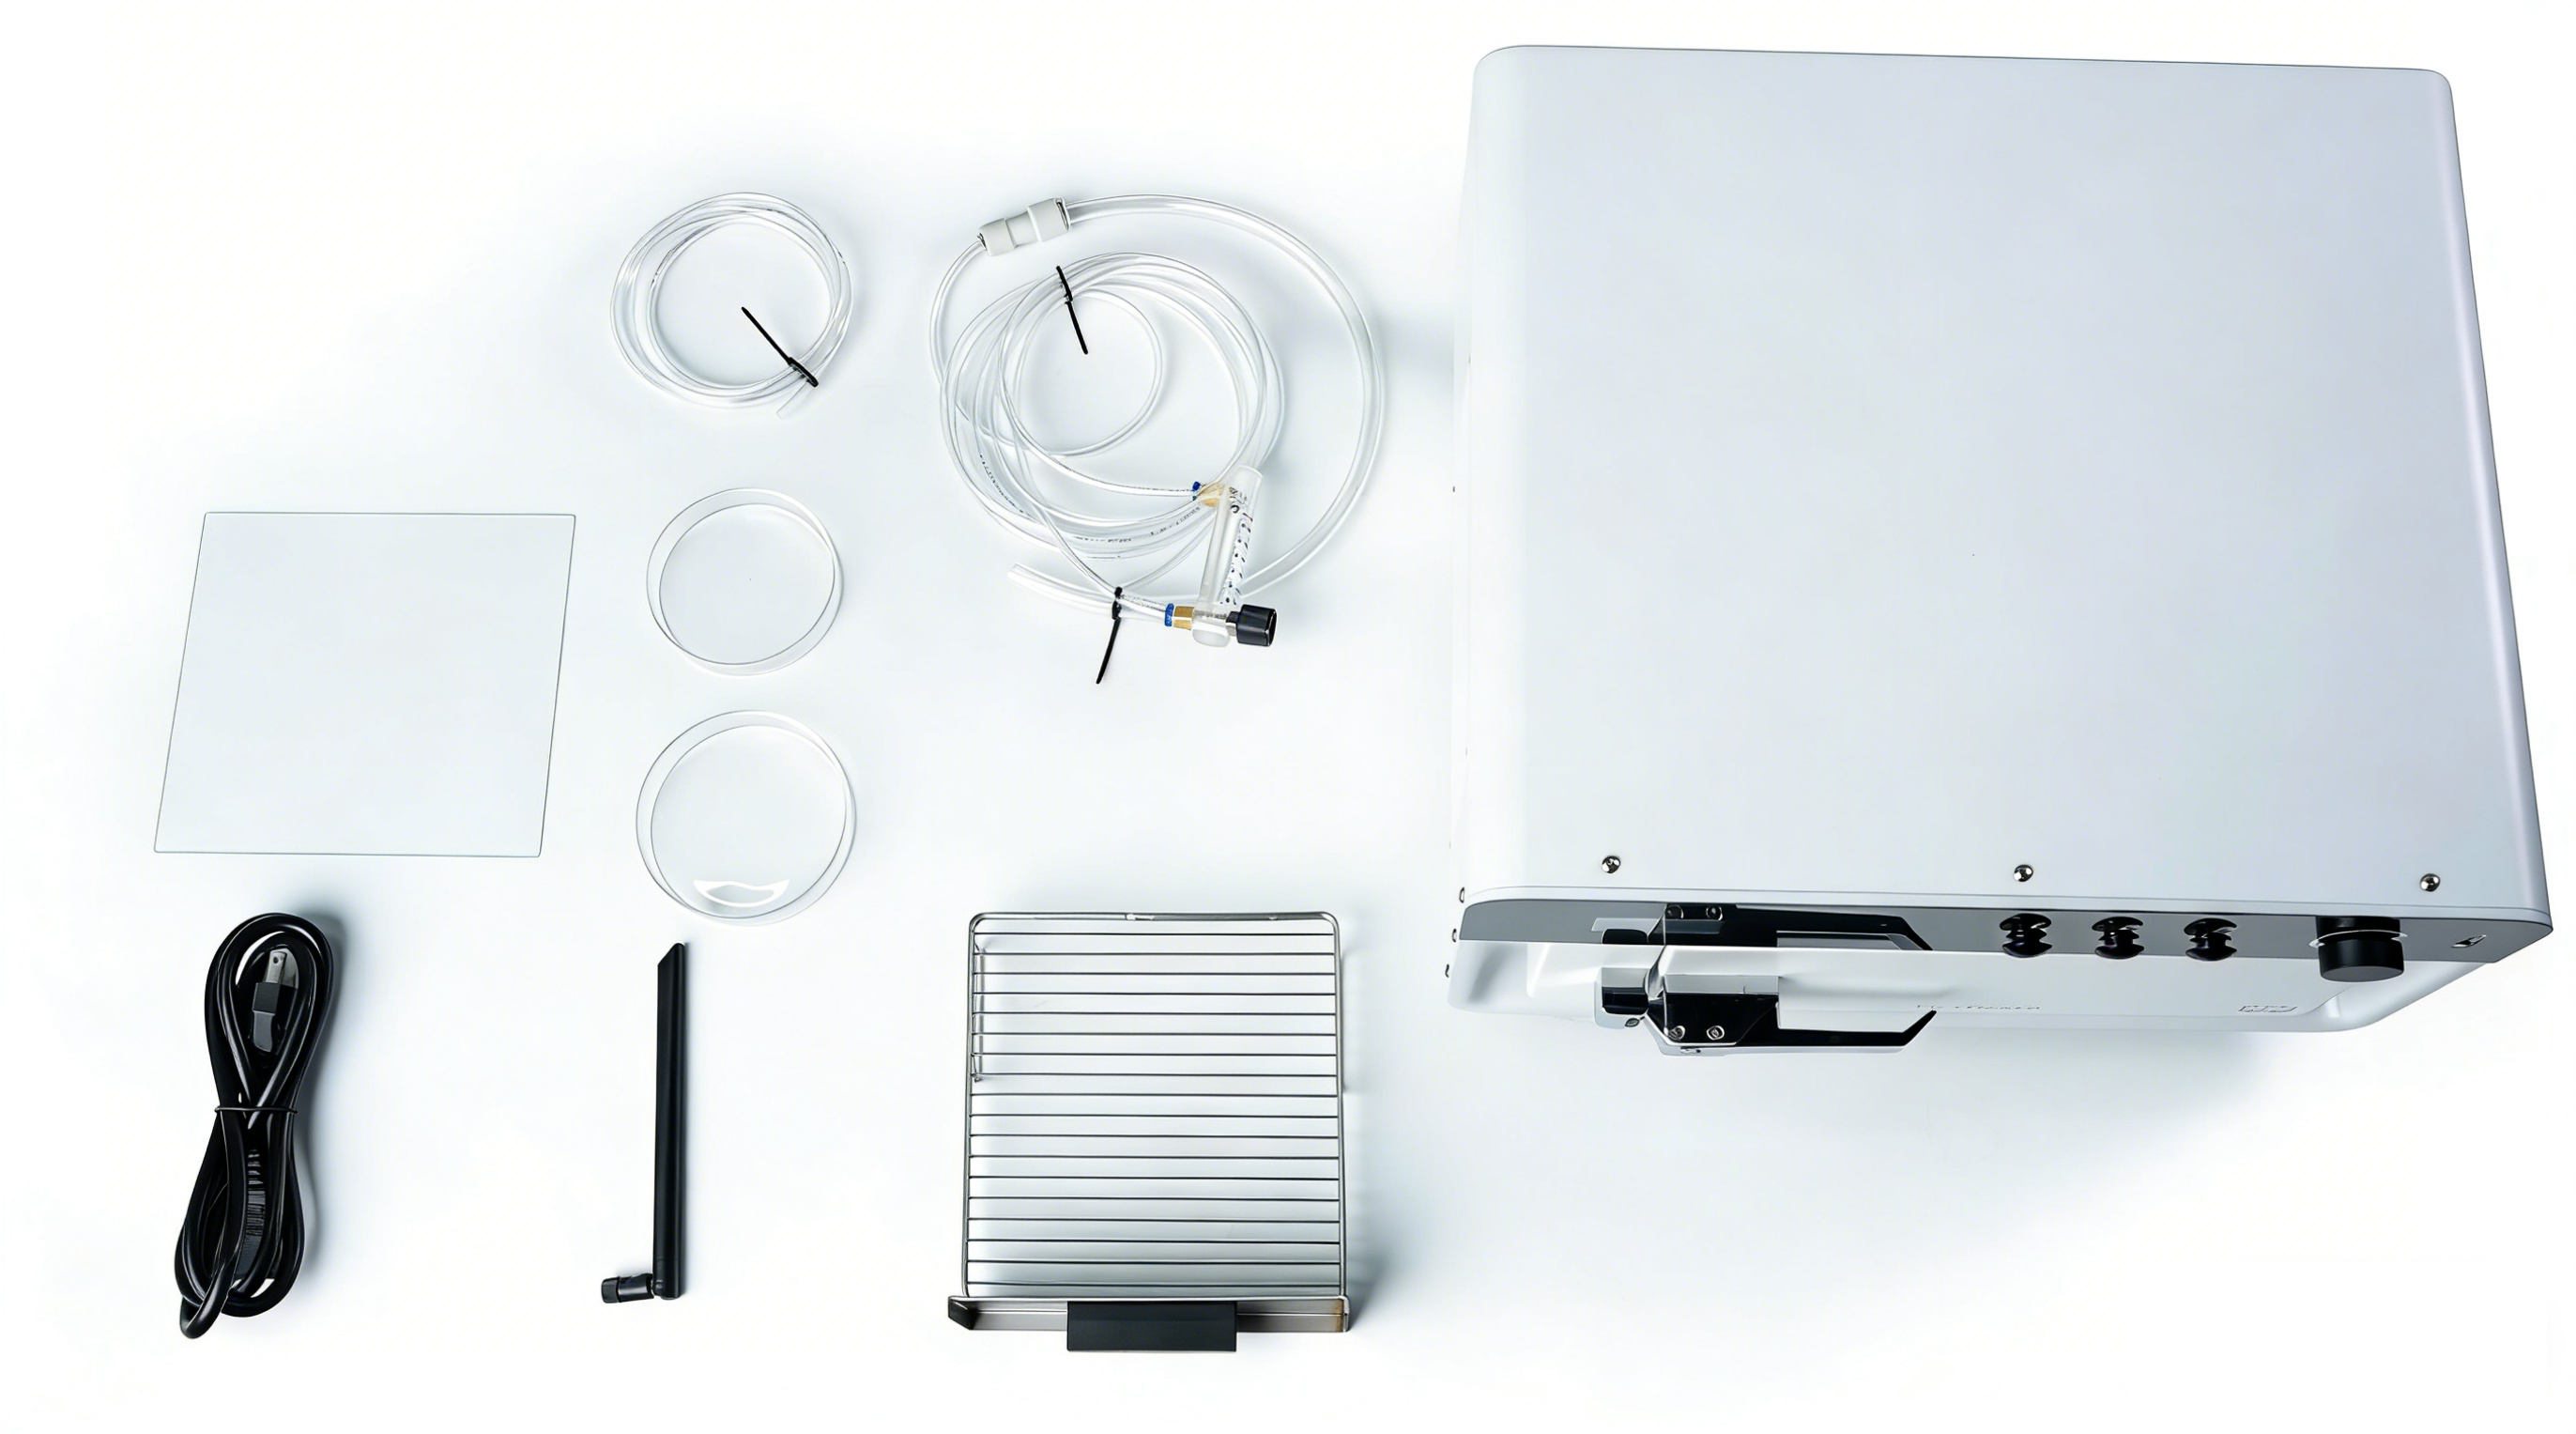
Remove the accessories from the packaging.
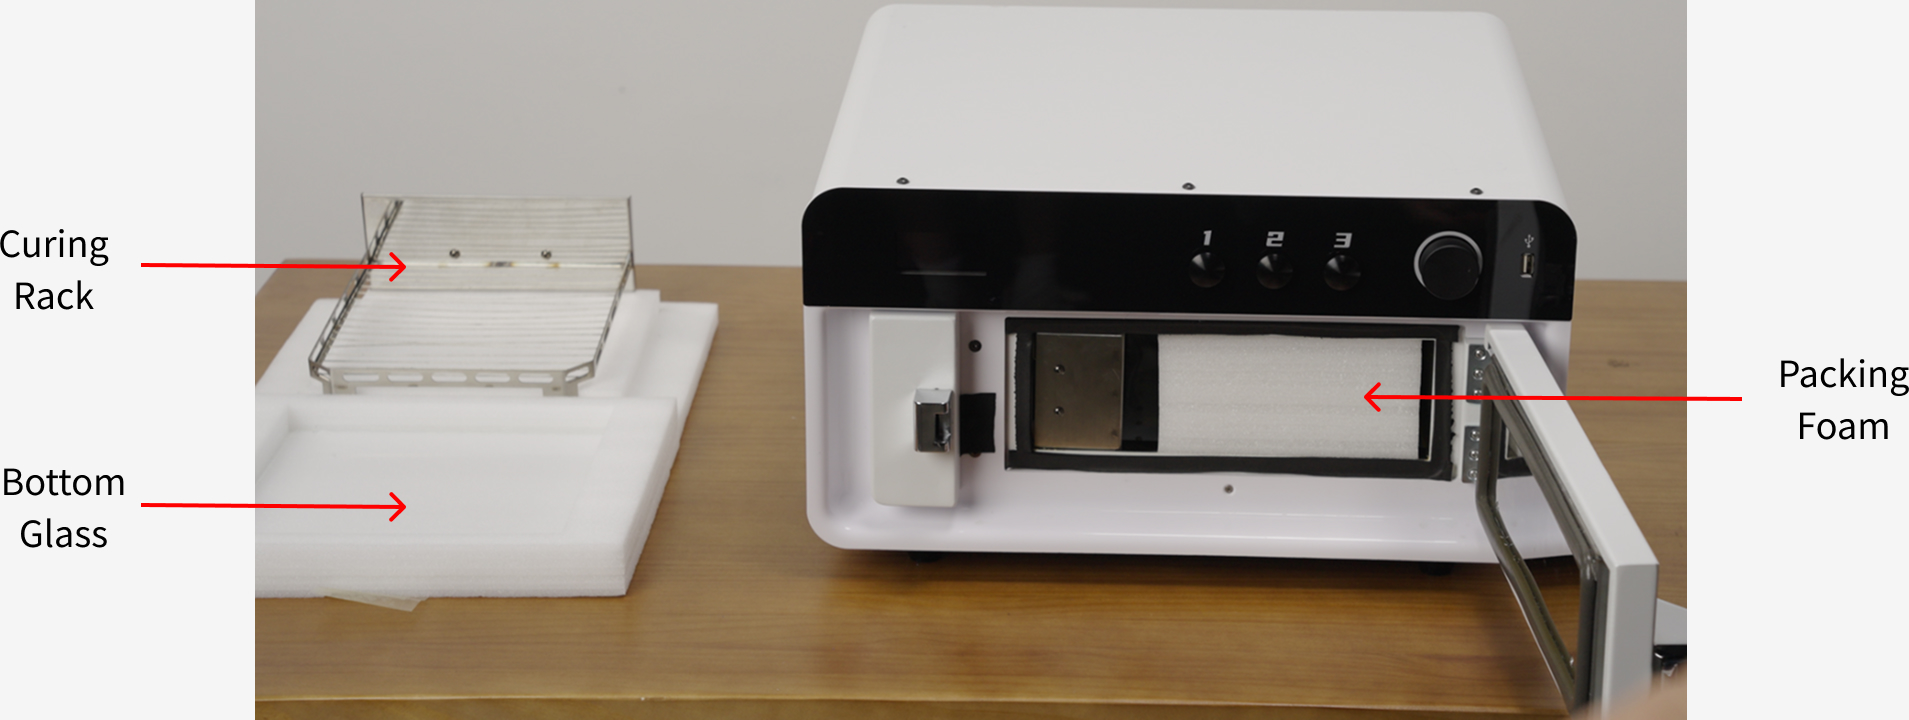
¶ Remove the foam
¶ Accessories Installation
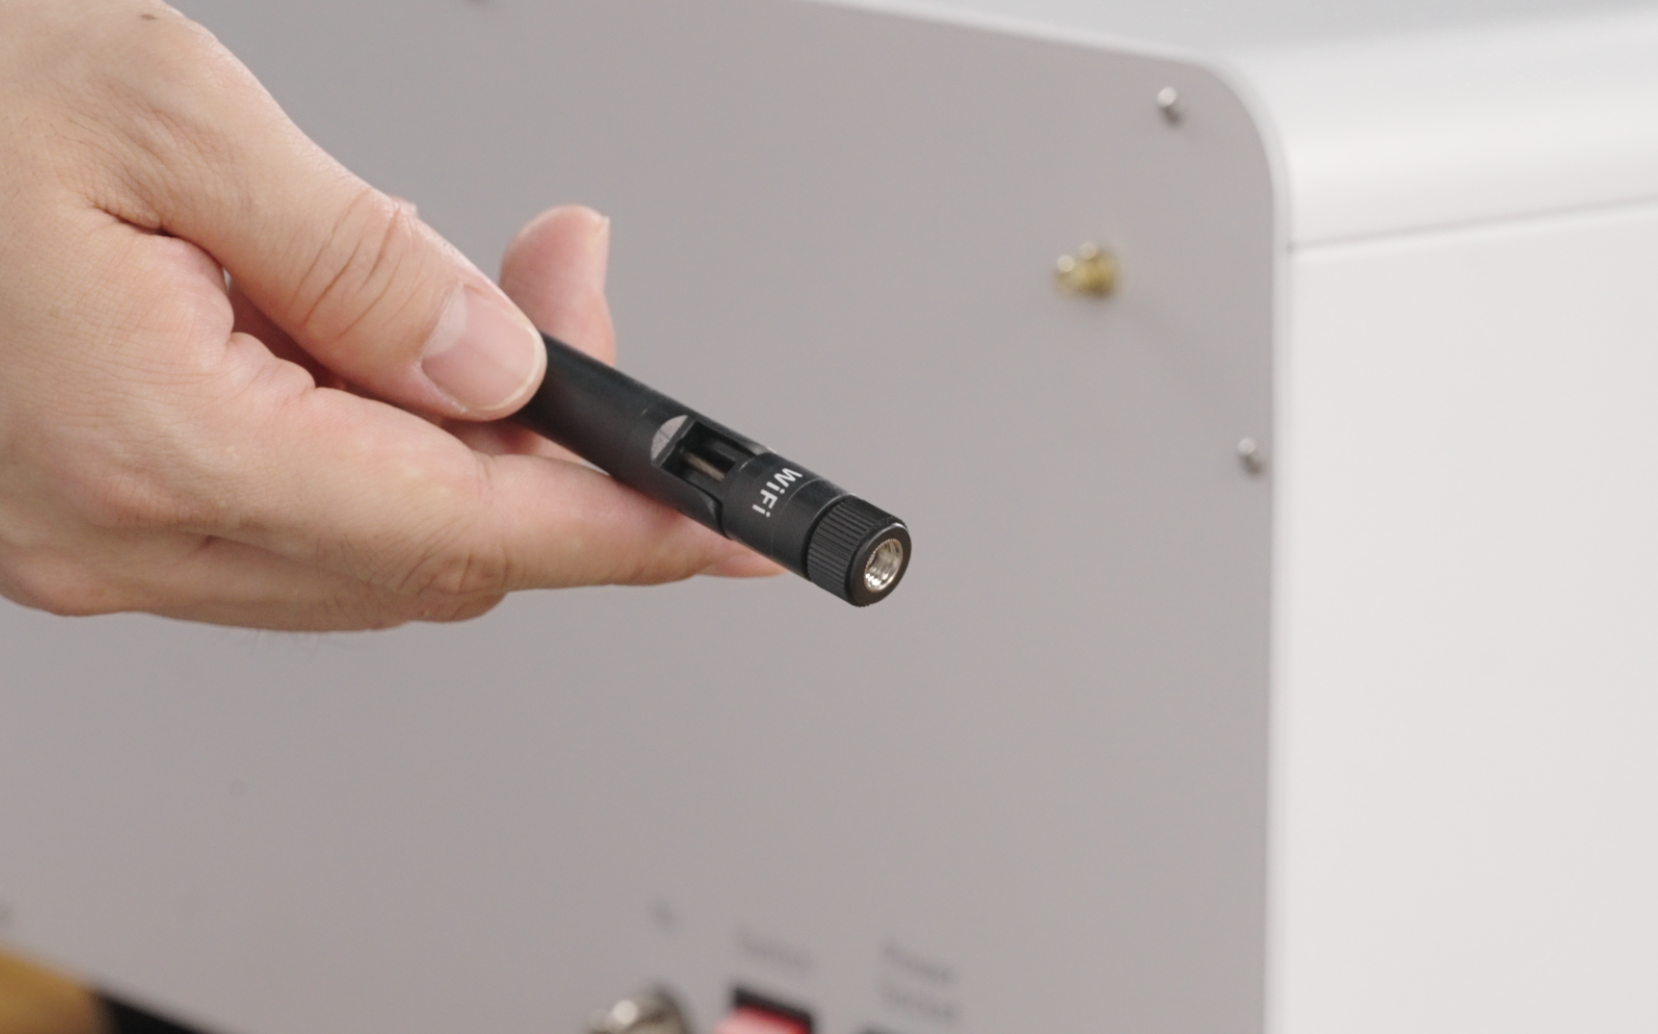
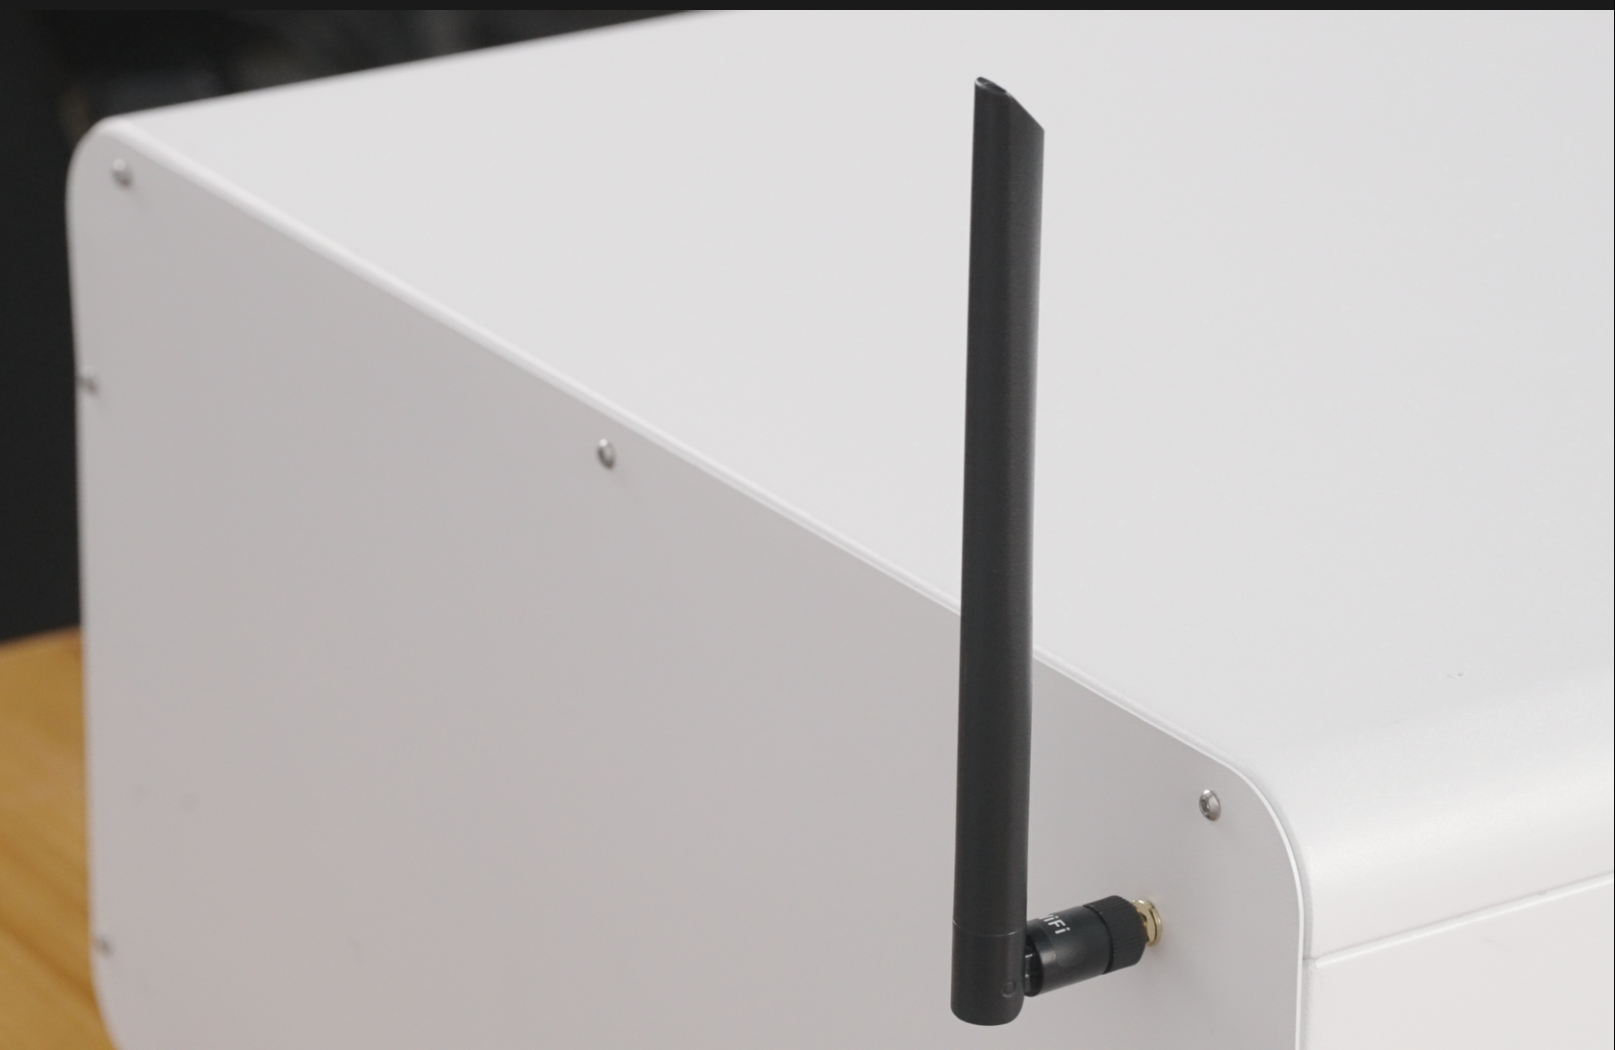
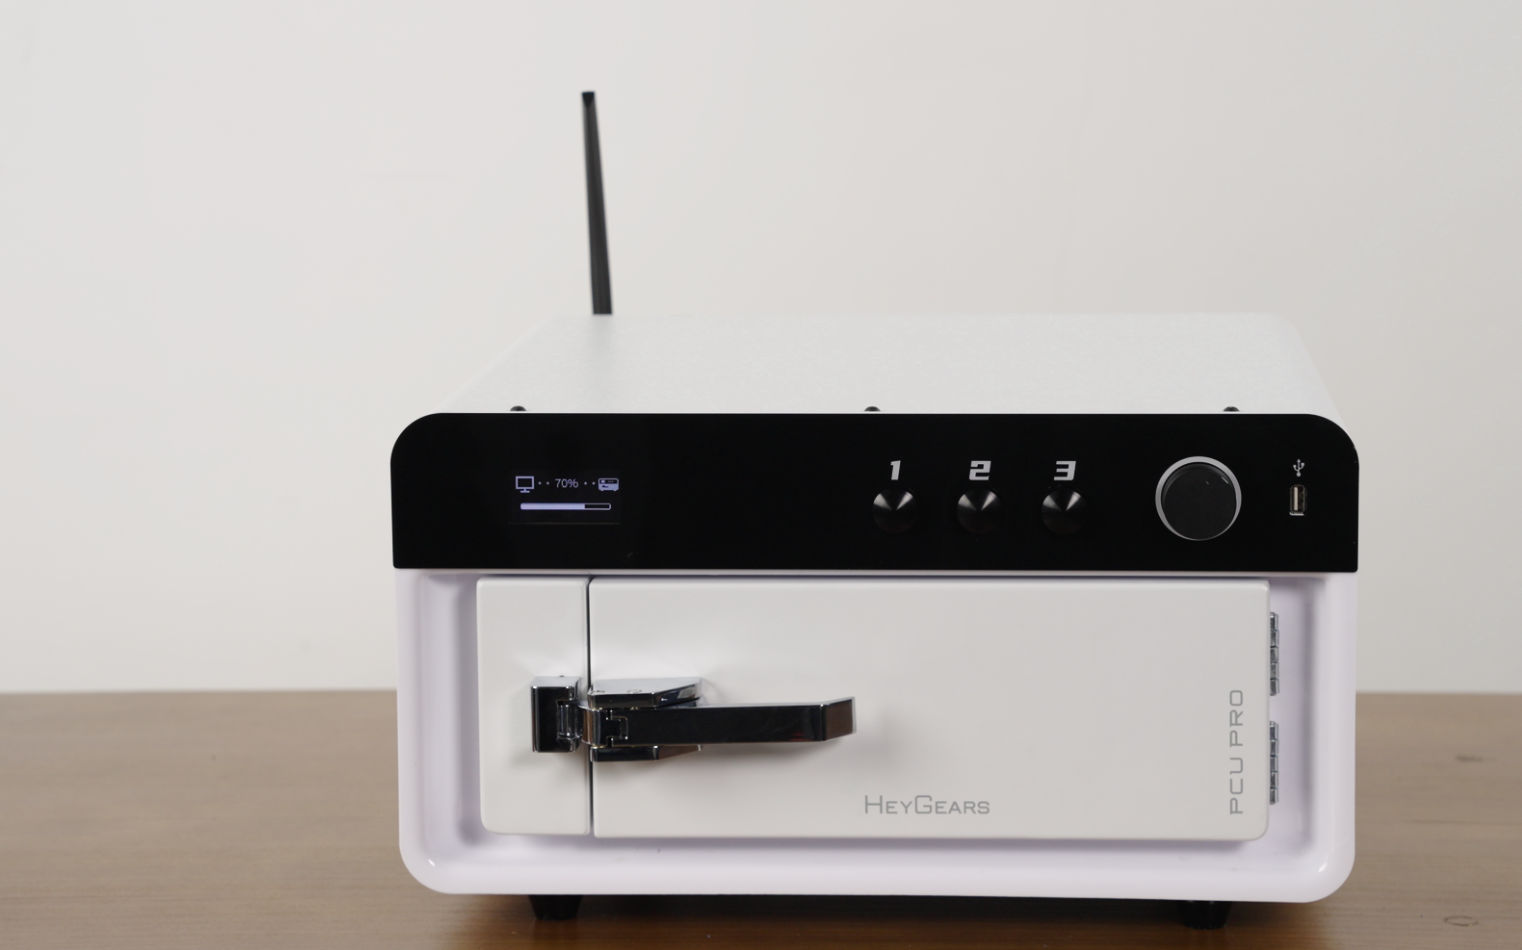
Remove the WiFi antenna from the packaging and securely attach it to the back of the device.
 |
 |
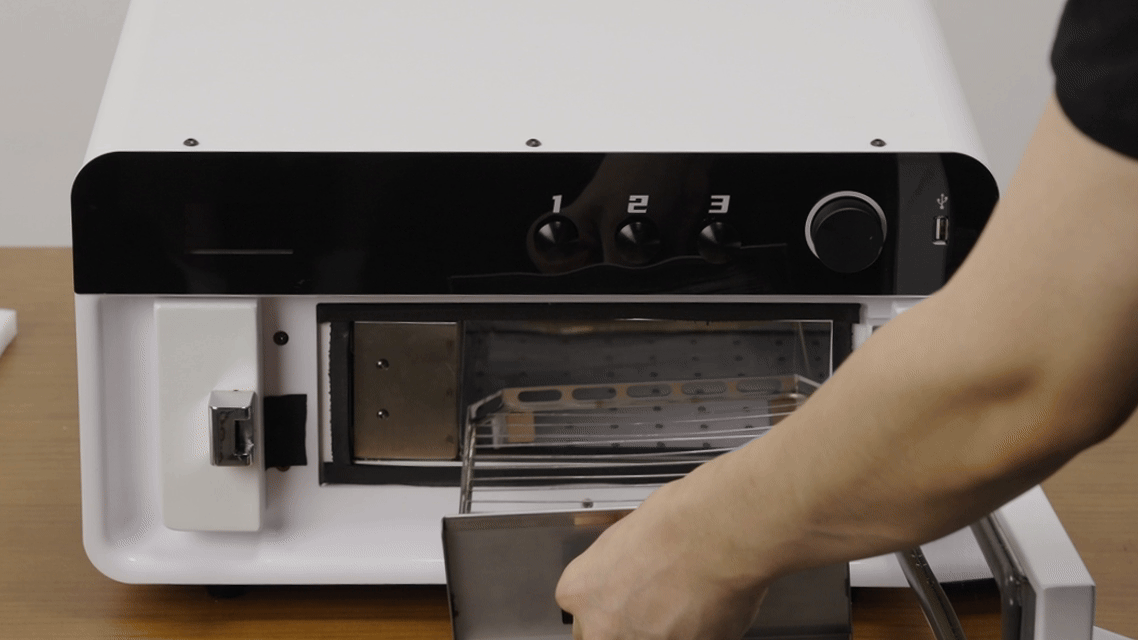
Take the bottom glass out of the packing foam, check for any damage, and then install it into the curing machine.
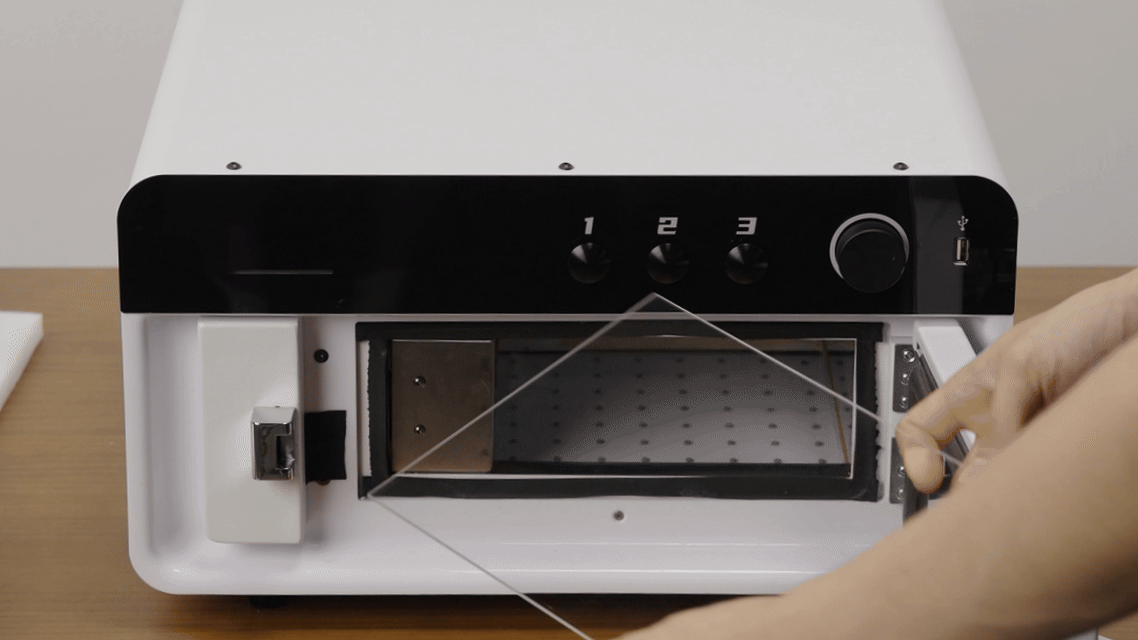
Remove the curing tray from the packaging bag and gently push it into the cabin.
Note: Ensure that the curing tray is positioned above the glass to avoid scratching the transparent cabin glass when closing the door.

¶ Initial Use
¶ Powering On and Operating the Device
Plug in the power and turn on the device.
Note: Leave at least 15 cm of space at the back of the device and at least 20 cm on both sides.
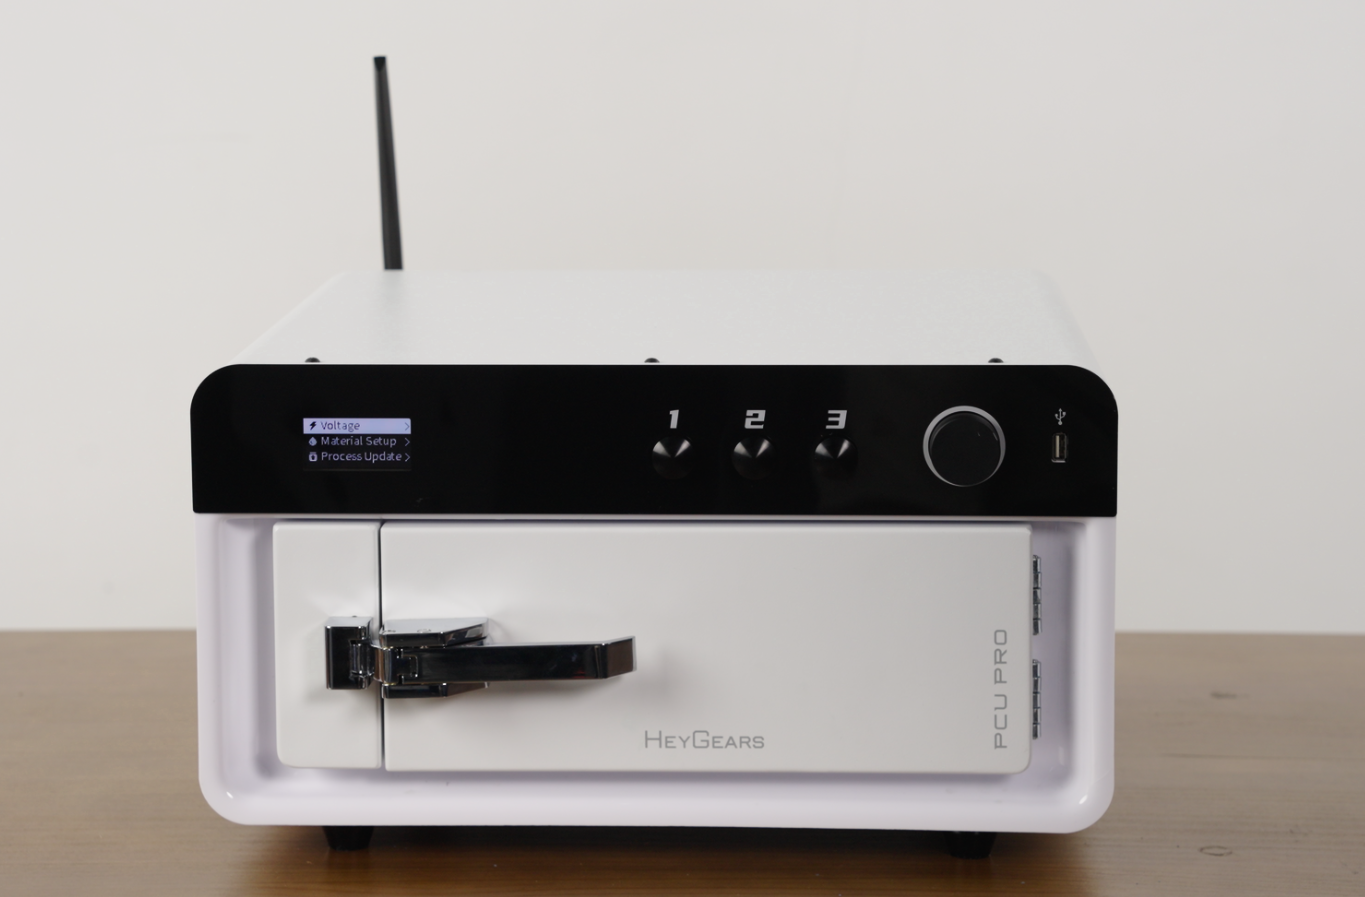
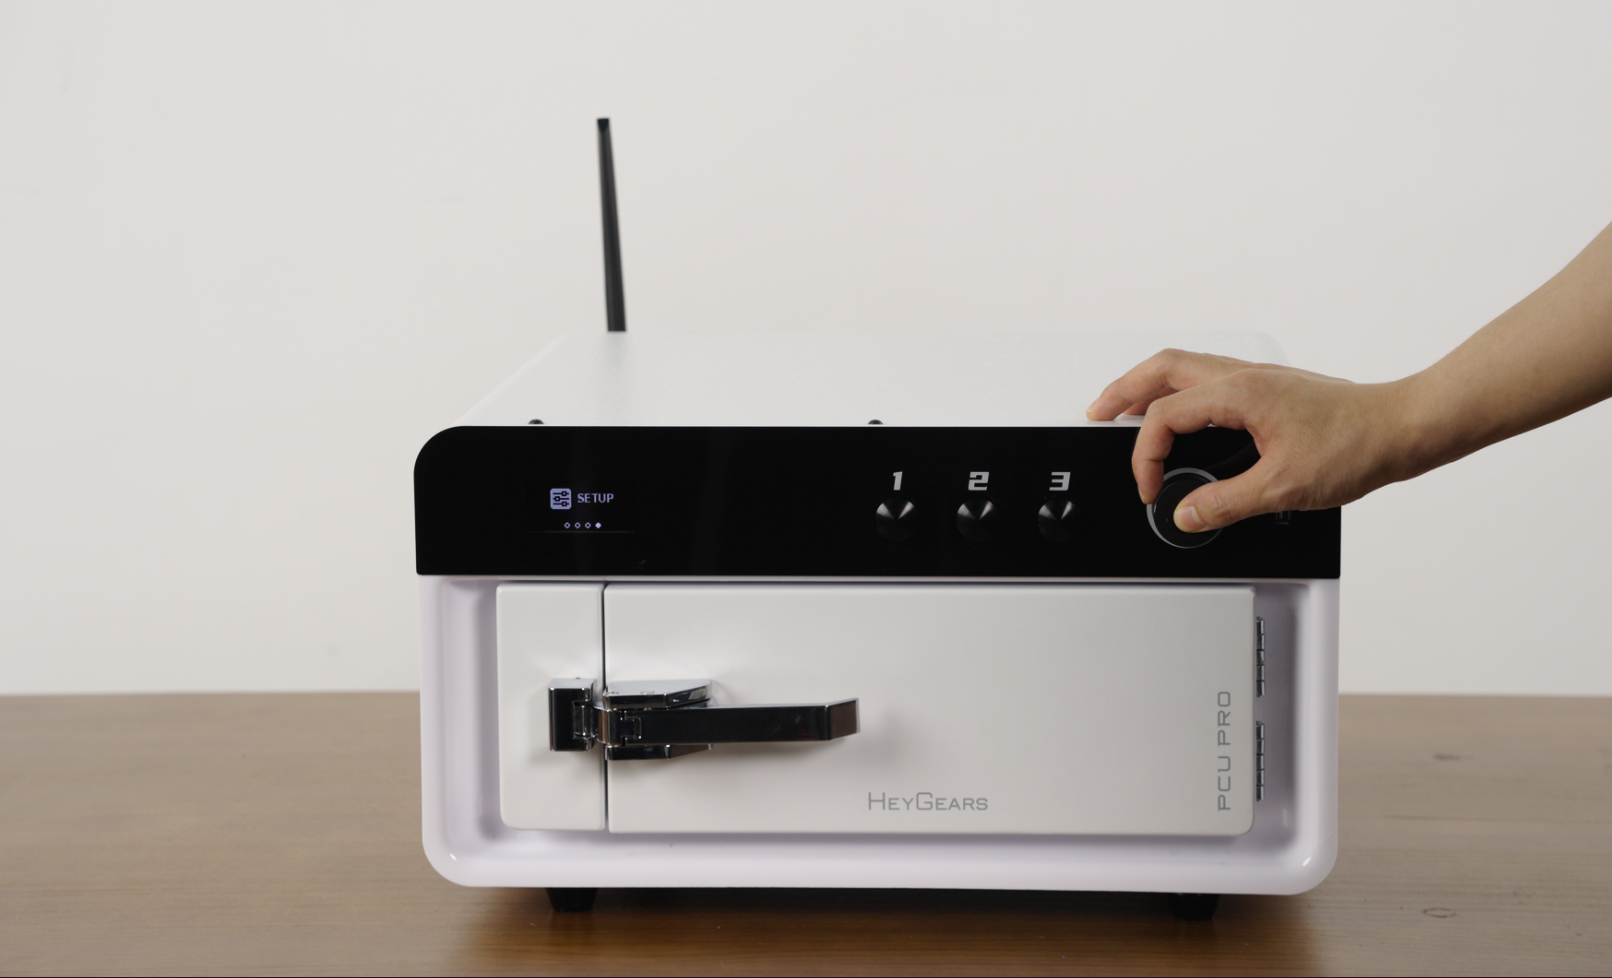
Device Operation Buttons: Press - Confirm, Rotate - Select, Long Press - Return.
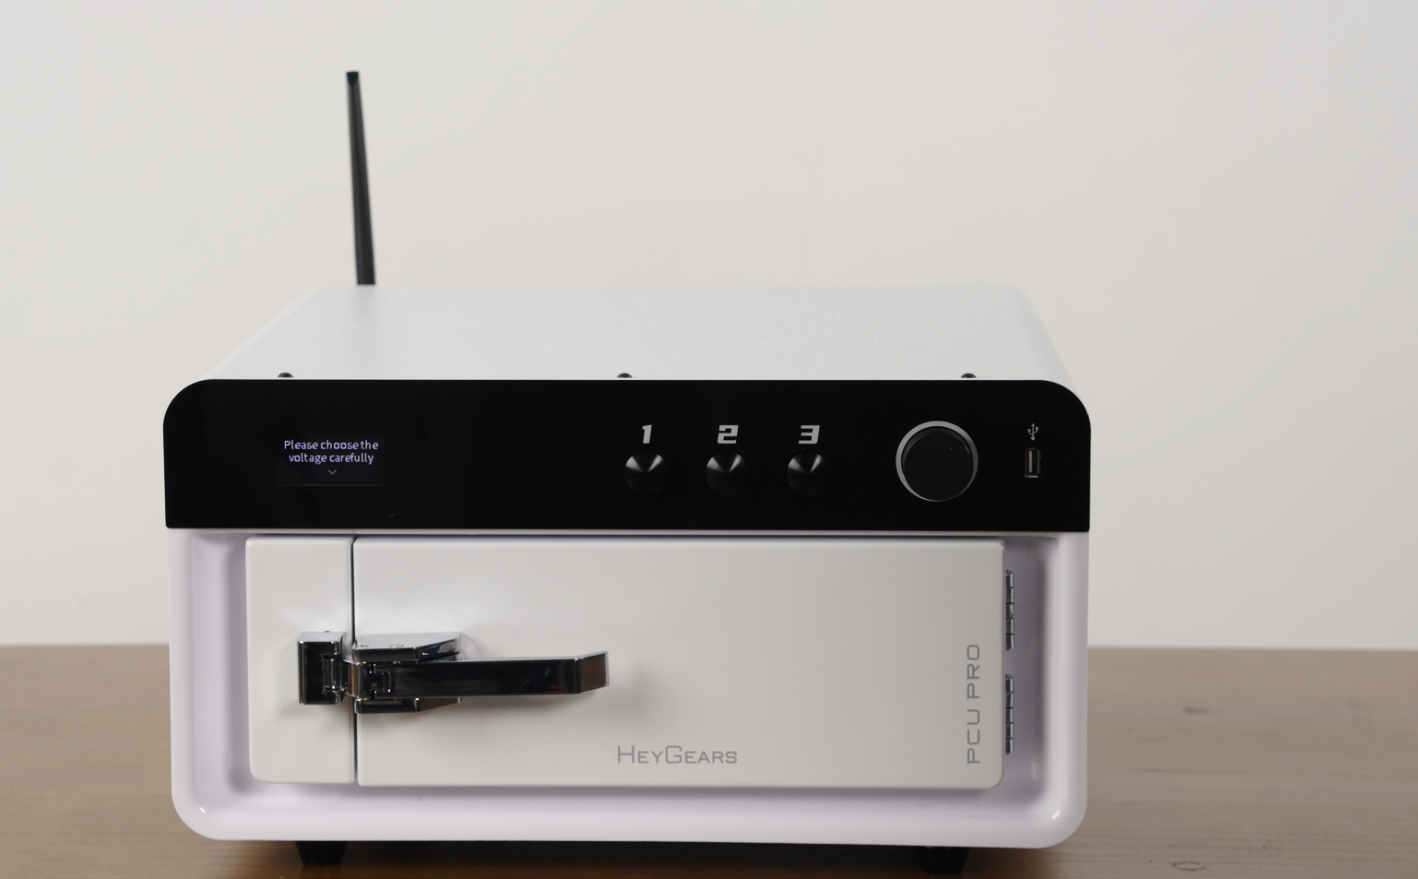
¶ Select Voltage (Choose Carefully)
When the device is powered on, a voltage selection prompt will automatically appear. After selecting the correct voltage, the device will automatically return to the settings.
Note: Please ensure to confirm the local voltage before making the correct selection.
Note: If the wrong voltage is selected, the device will automatically recognize it and prompt for a second confirmation on the screen. (A risk of damaging the device, please choose carefully.)
¶ Connecting the Device to the Network
Long press to return to the menu, go to Settings, and select Network Settings. (Please connect to a 2.4G network.)
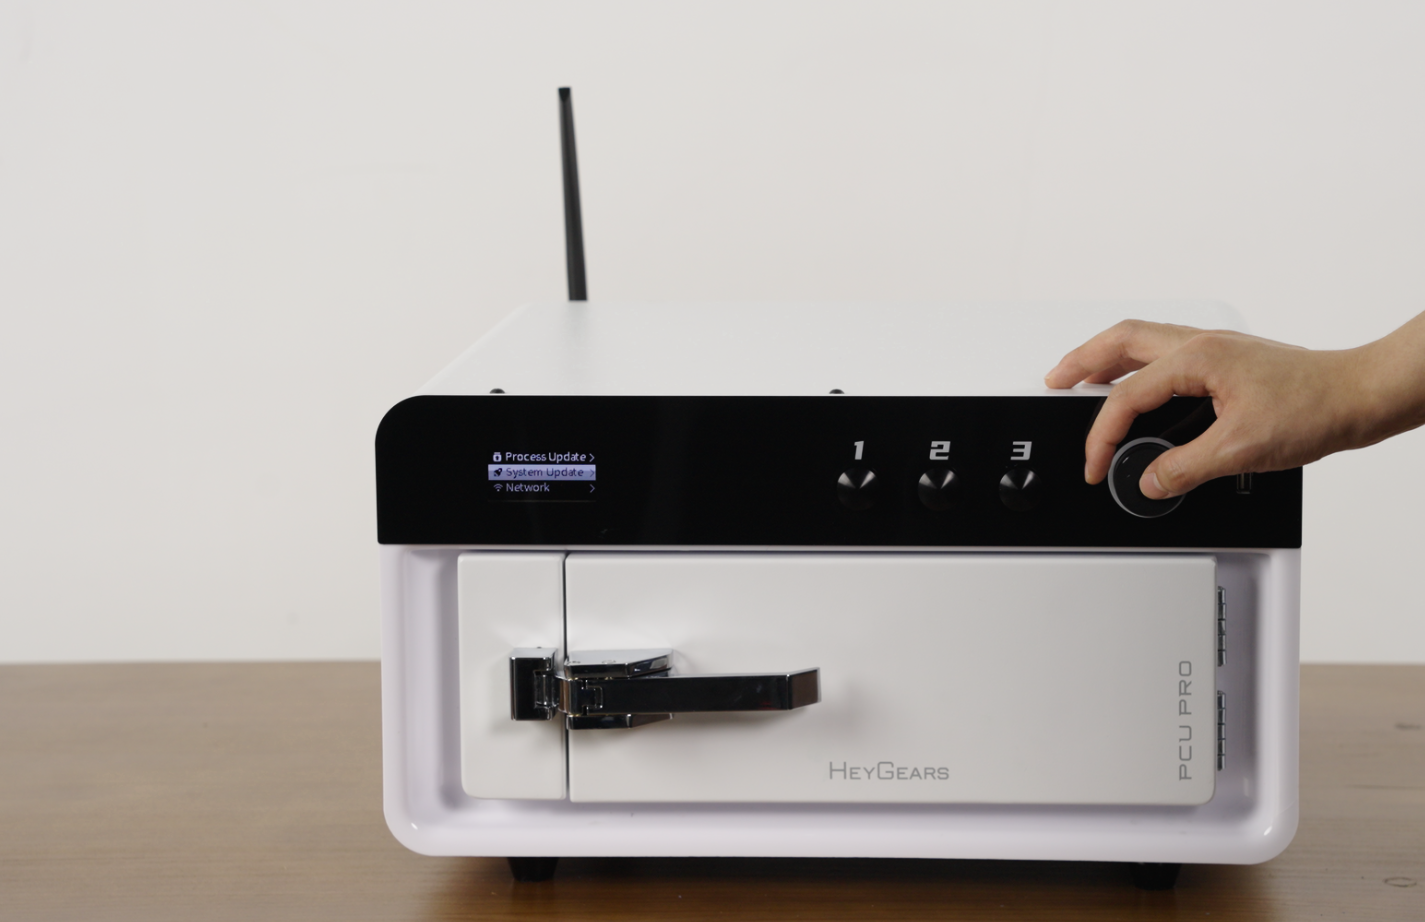
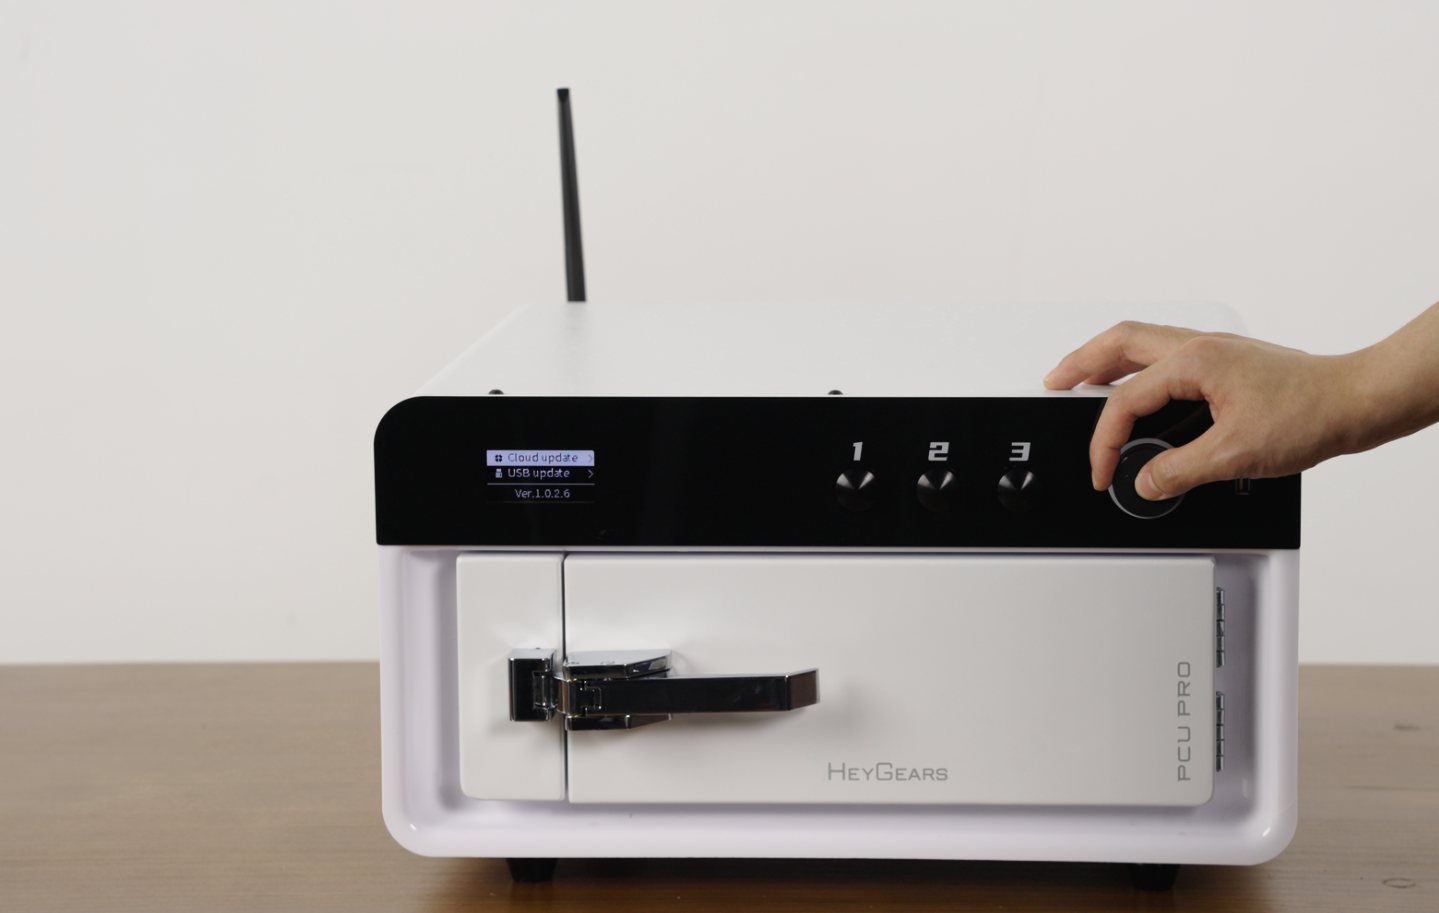
¶ System Upgrade
USB Upgrade:
OTA Upgrade: After confirming that the device is connected to the network, go to Settings and click on Upgrade.
| Set up | System Update |
 |
 |
| Cloud update | |
 |
 |
¶ Cloud Binding & Shortcut Key Settings
- Device Operation Buttons: Press - Confirm, Rotate - Select, Long Press - Return.
Cloud Binding
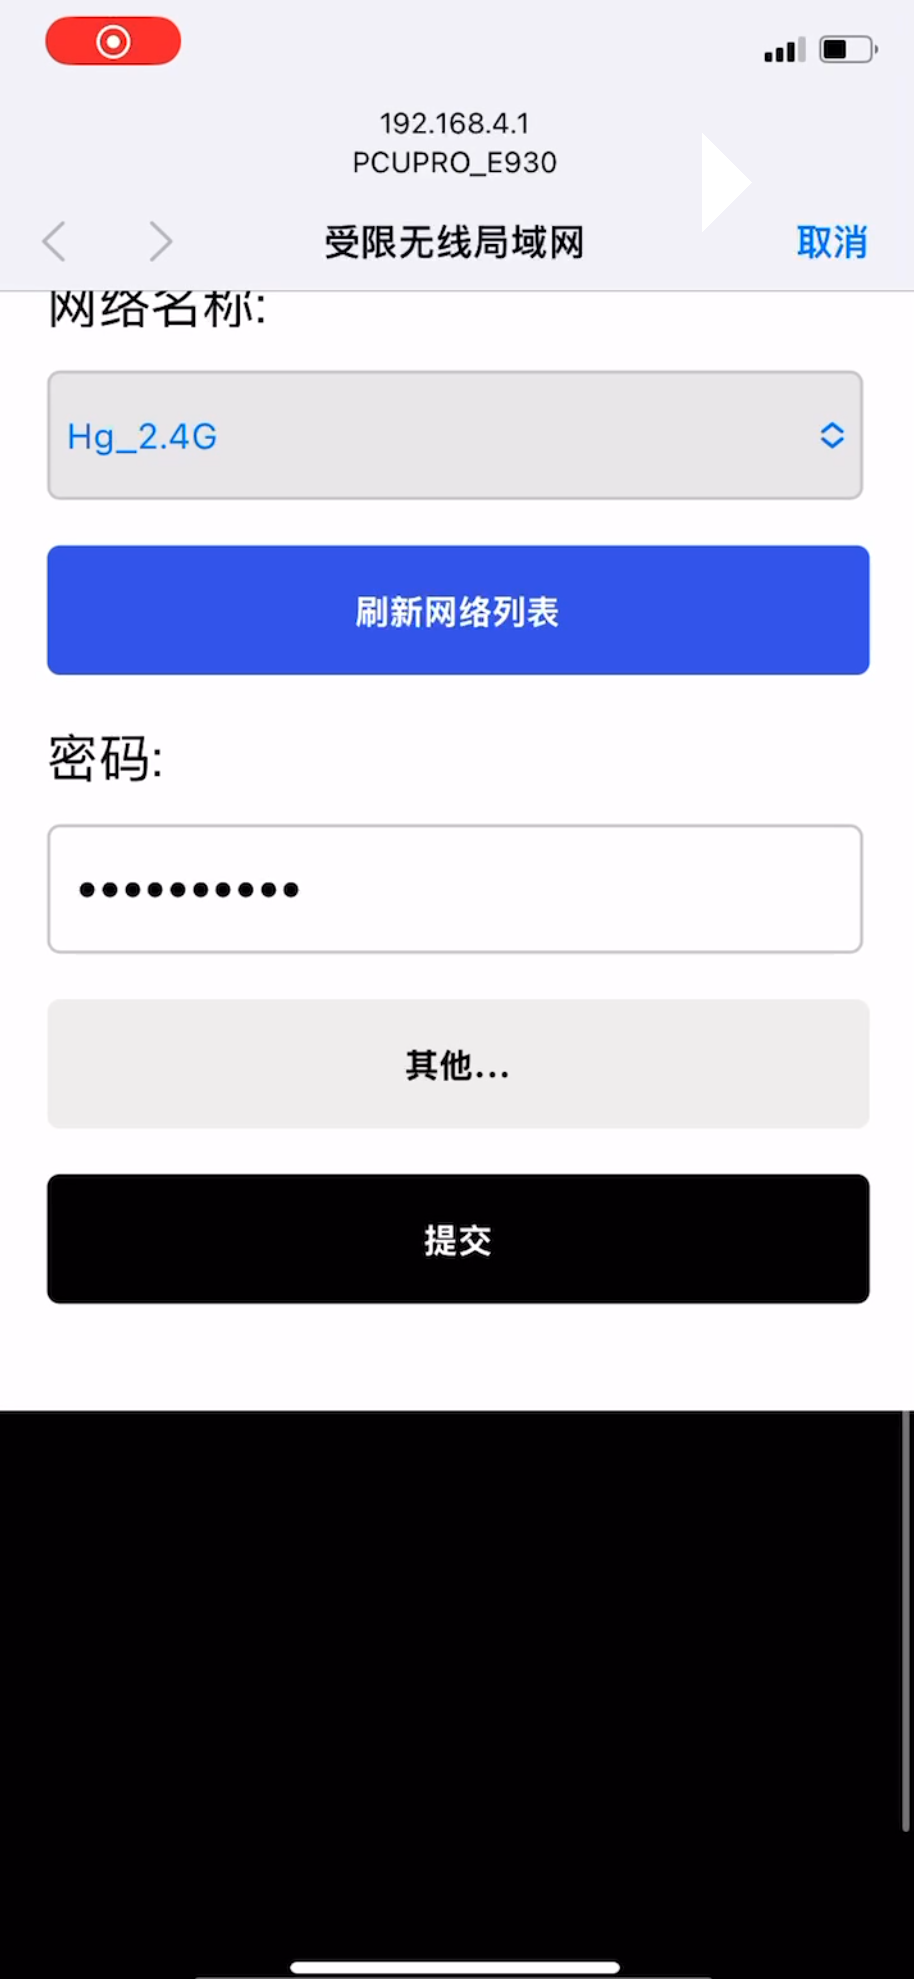
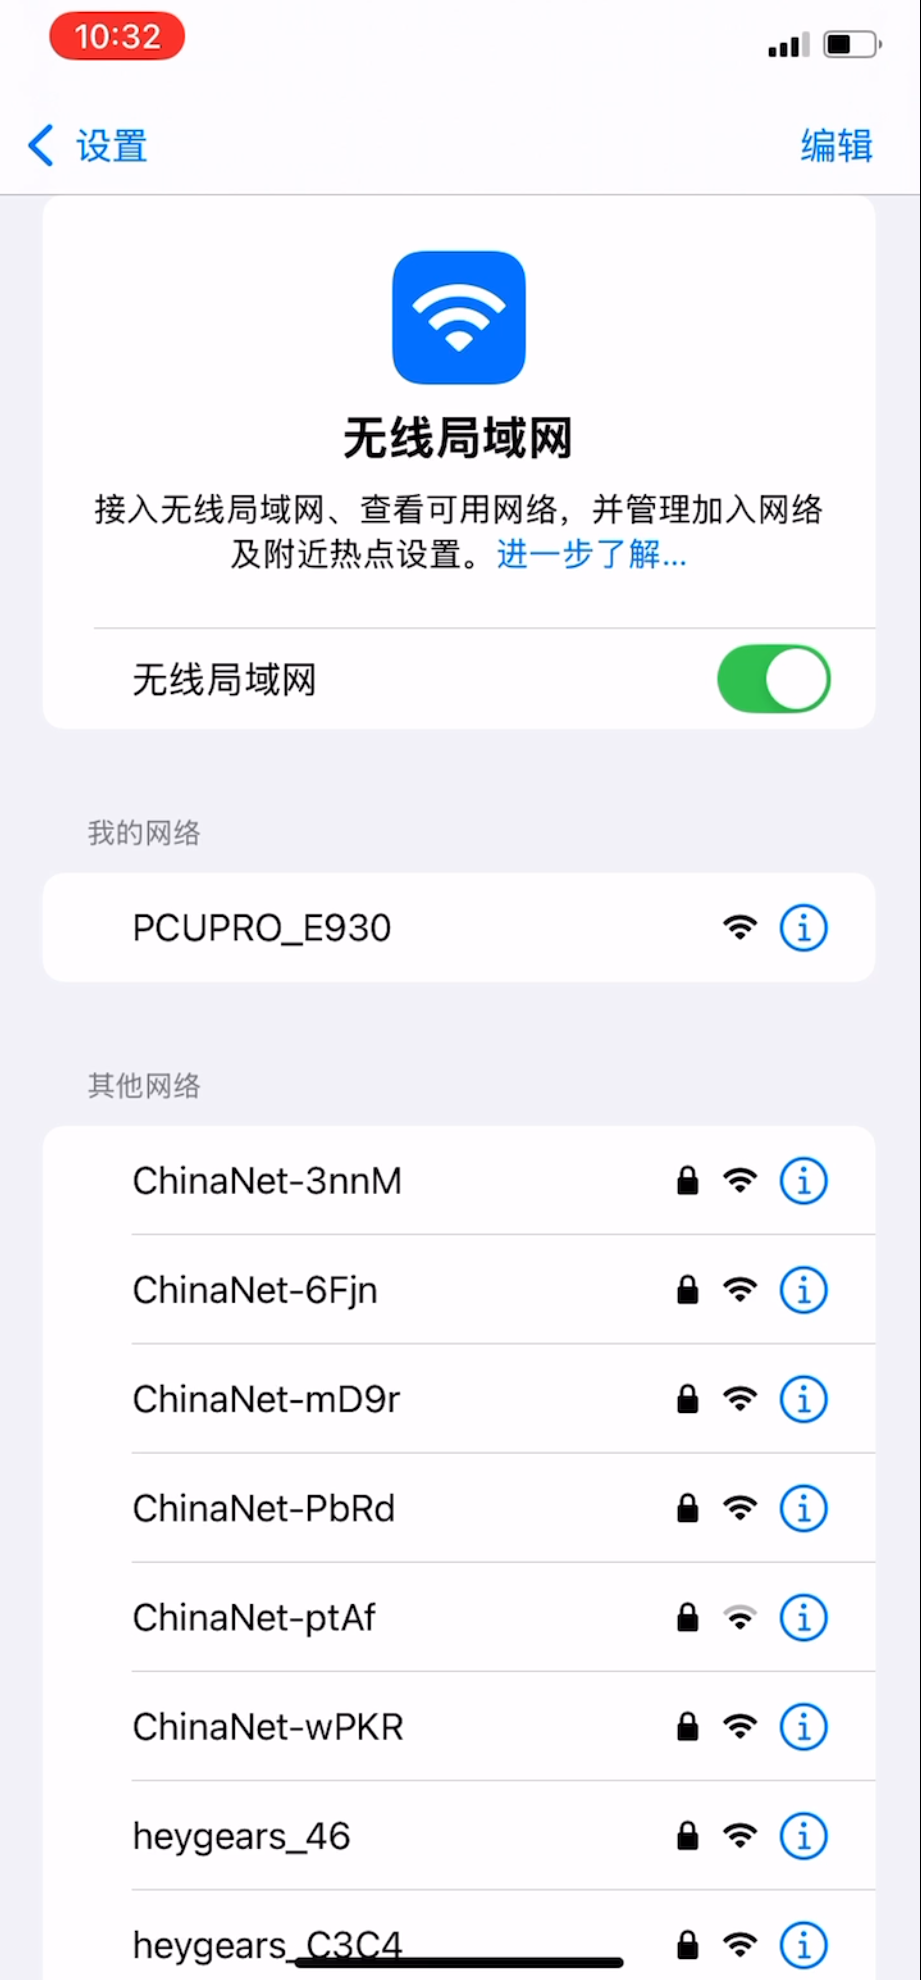
- To bind the device, first enter the device settings interface and click on WiFi.
- Find and select the PCU Pro WiFi in your phone's WiFi settings. (2.4G network configuration is required.)
 |
 |
- Please refer to the Heygears Cloud agent operation guide in the agent knowledge base.
Login website:
Asia-Pacific region: https://kyu-lab.heygears.cloud/
Europe&Middle East: https://pau-lab.heygears.cloud/
America: https://u-lab.heygears.cloud/
Mainland China: https://user-lab.heygears.cloud/
- After logging into the Cloud and confirming that the device is connected with WiFi, on the Cloud page select My Devices > Cure > Add on the page.
.png) |
.png) |
-
Enter the device SN code and click submit, then select the curing device.
-
After successful binding, perform common process configurations in the Cloud.
.png) |
.png) |
- The device supports three shortcut key settings, which can be arranged in order of preference, e.g., the most commonly used setting as "1."
.png)
¶ Nitrogen Connection and Detection
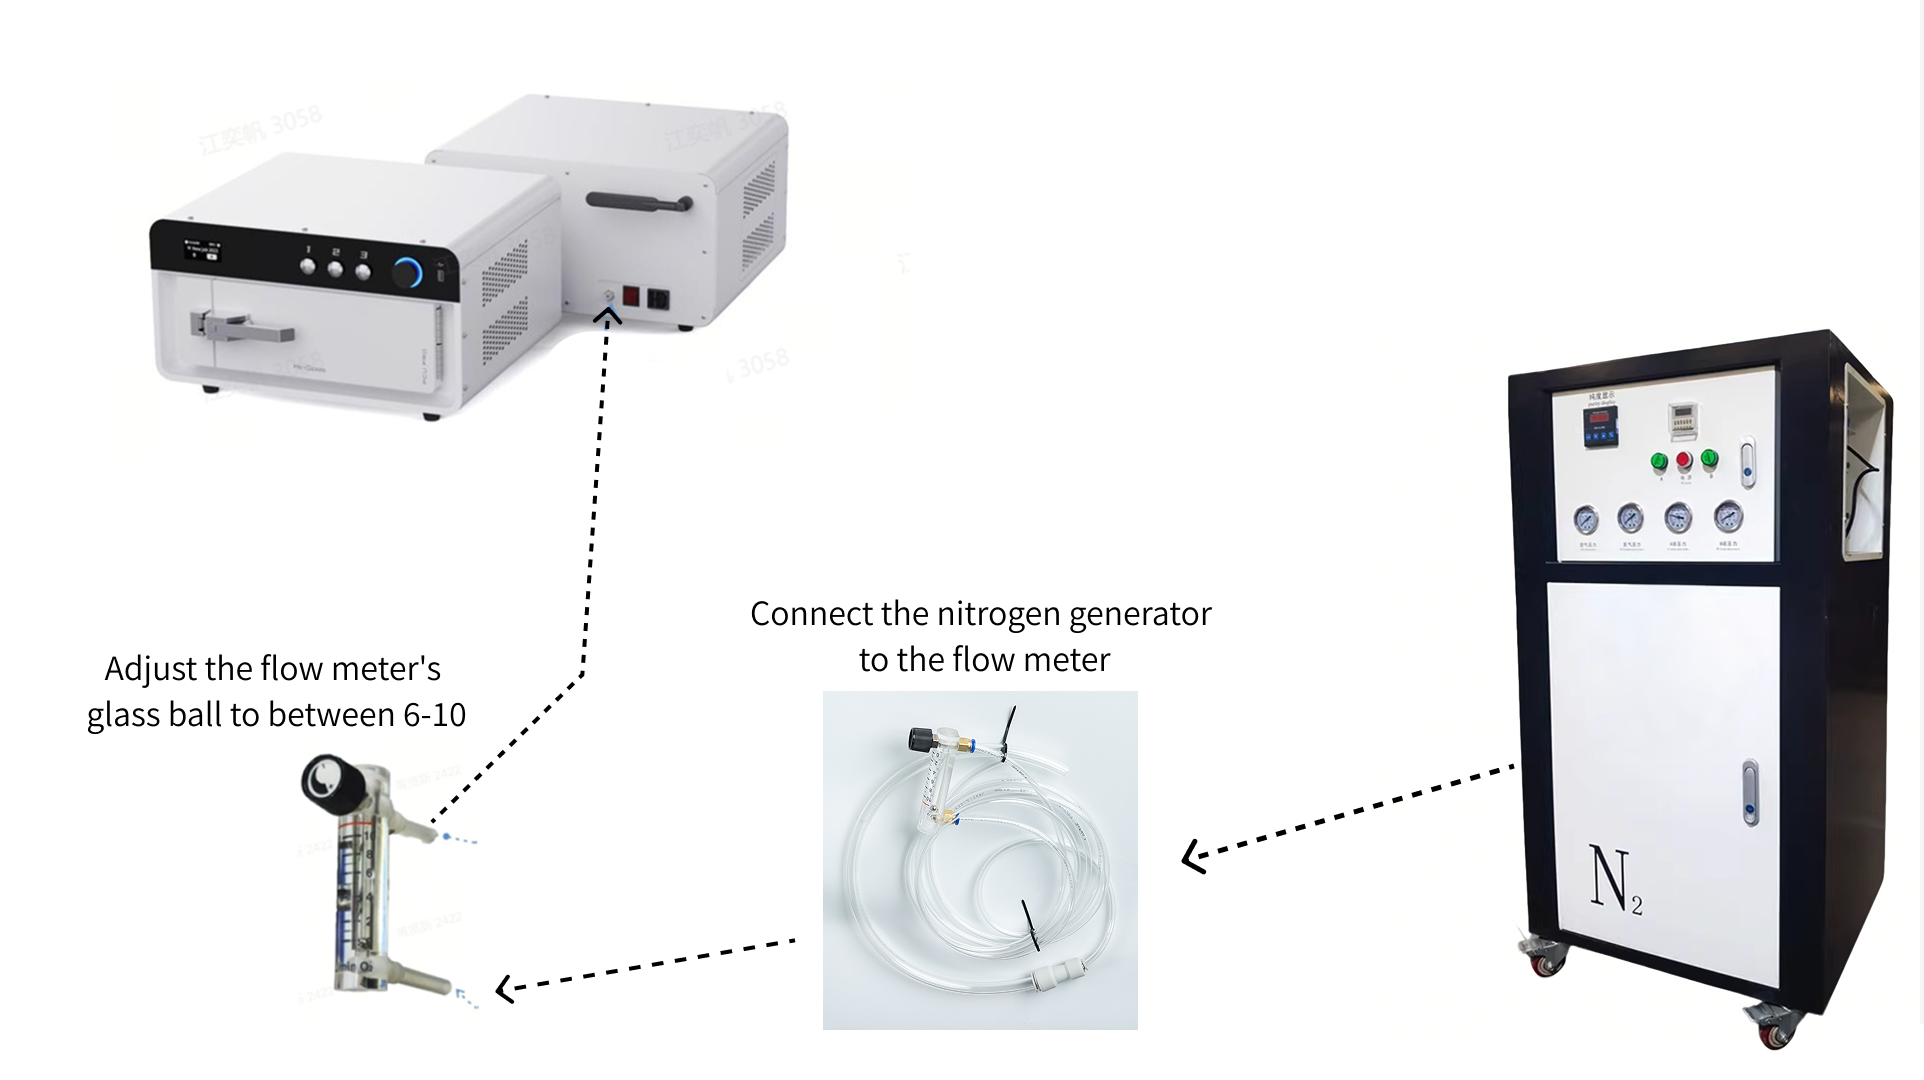
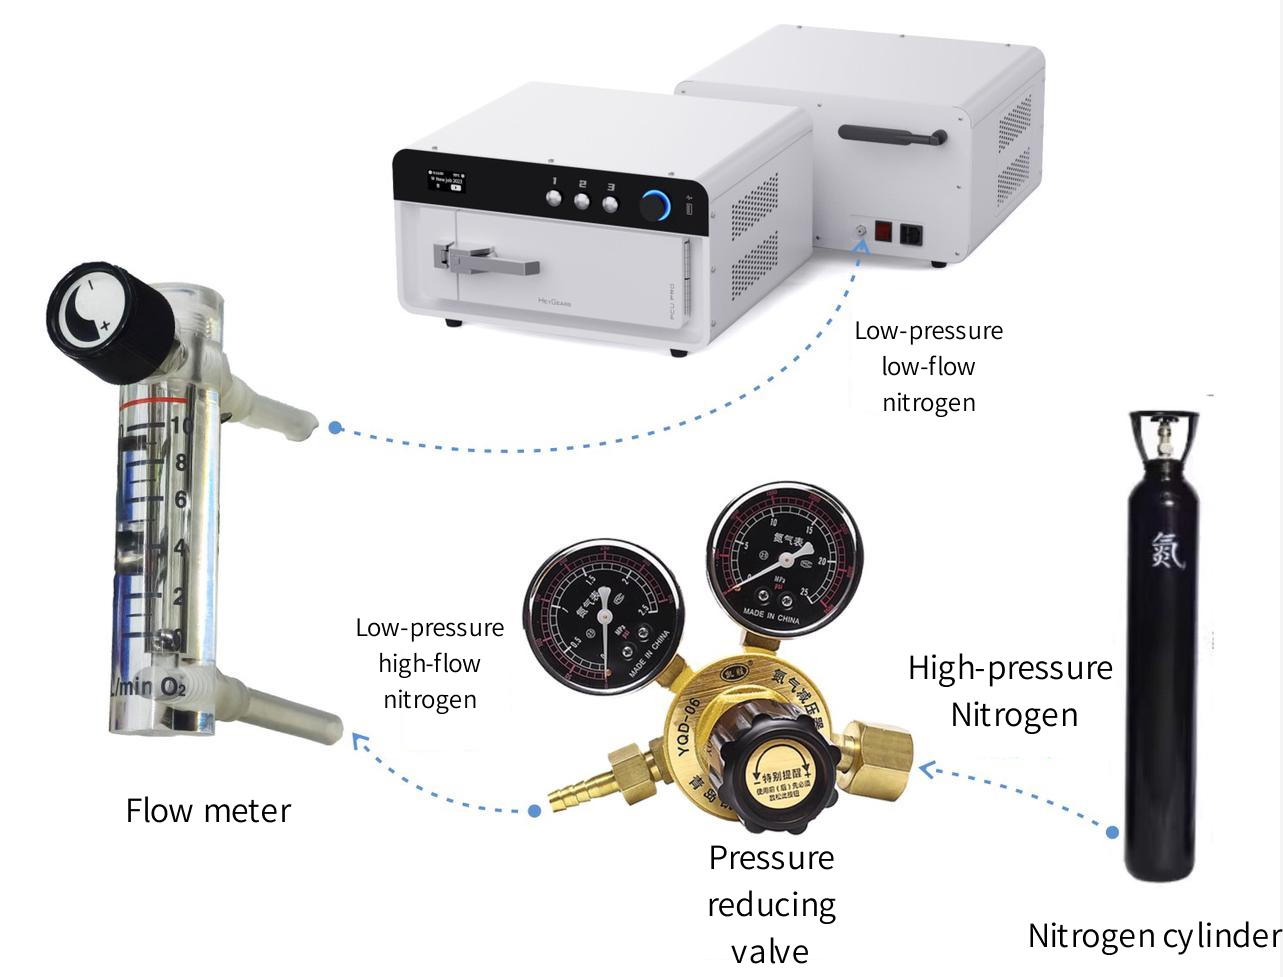
Nitrogen Generator Connection
Before using the nitrogen generator, please consult the user manual for the device.
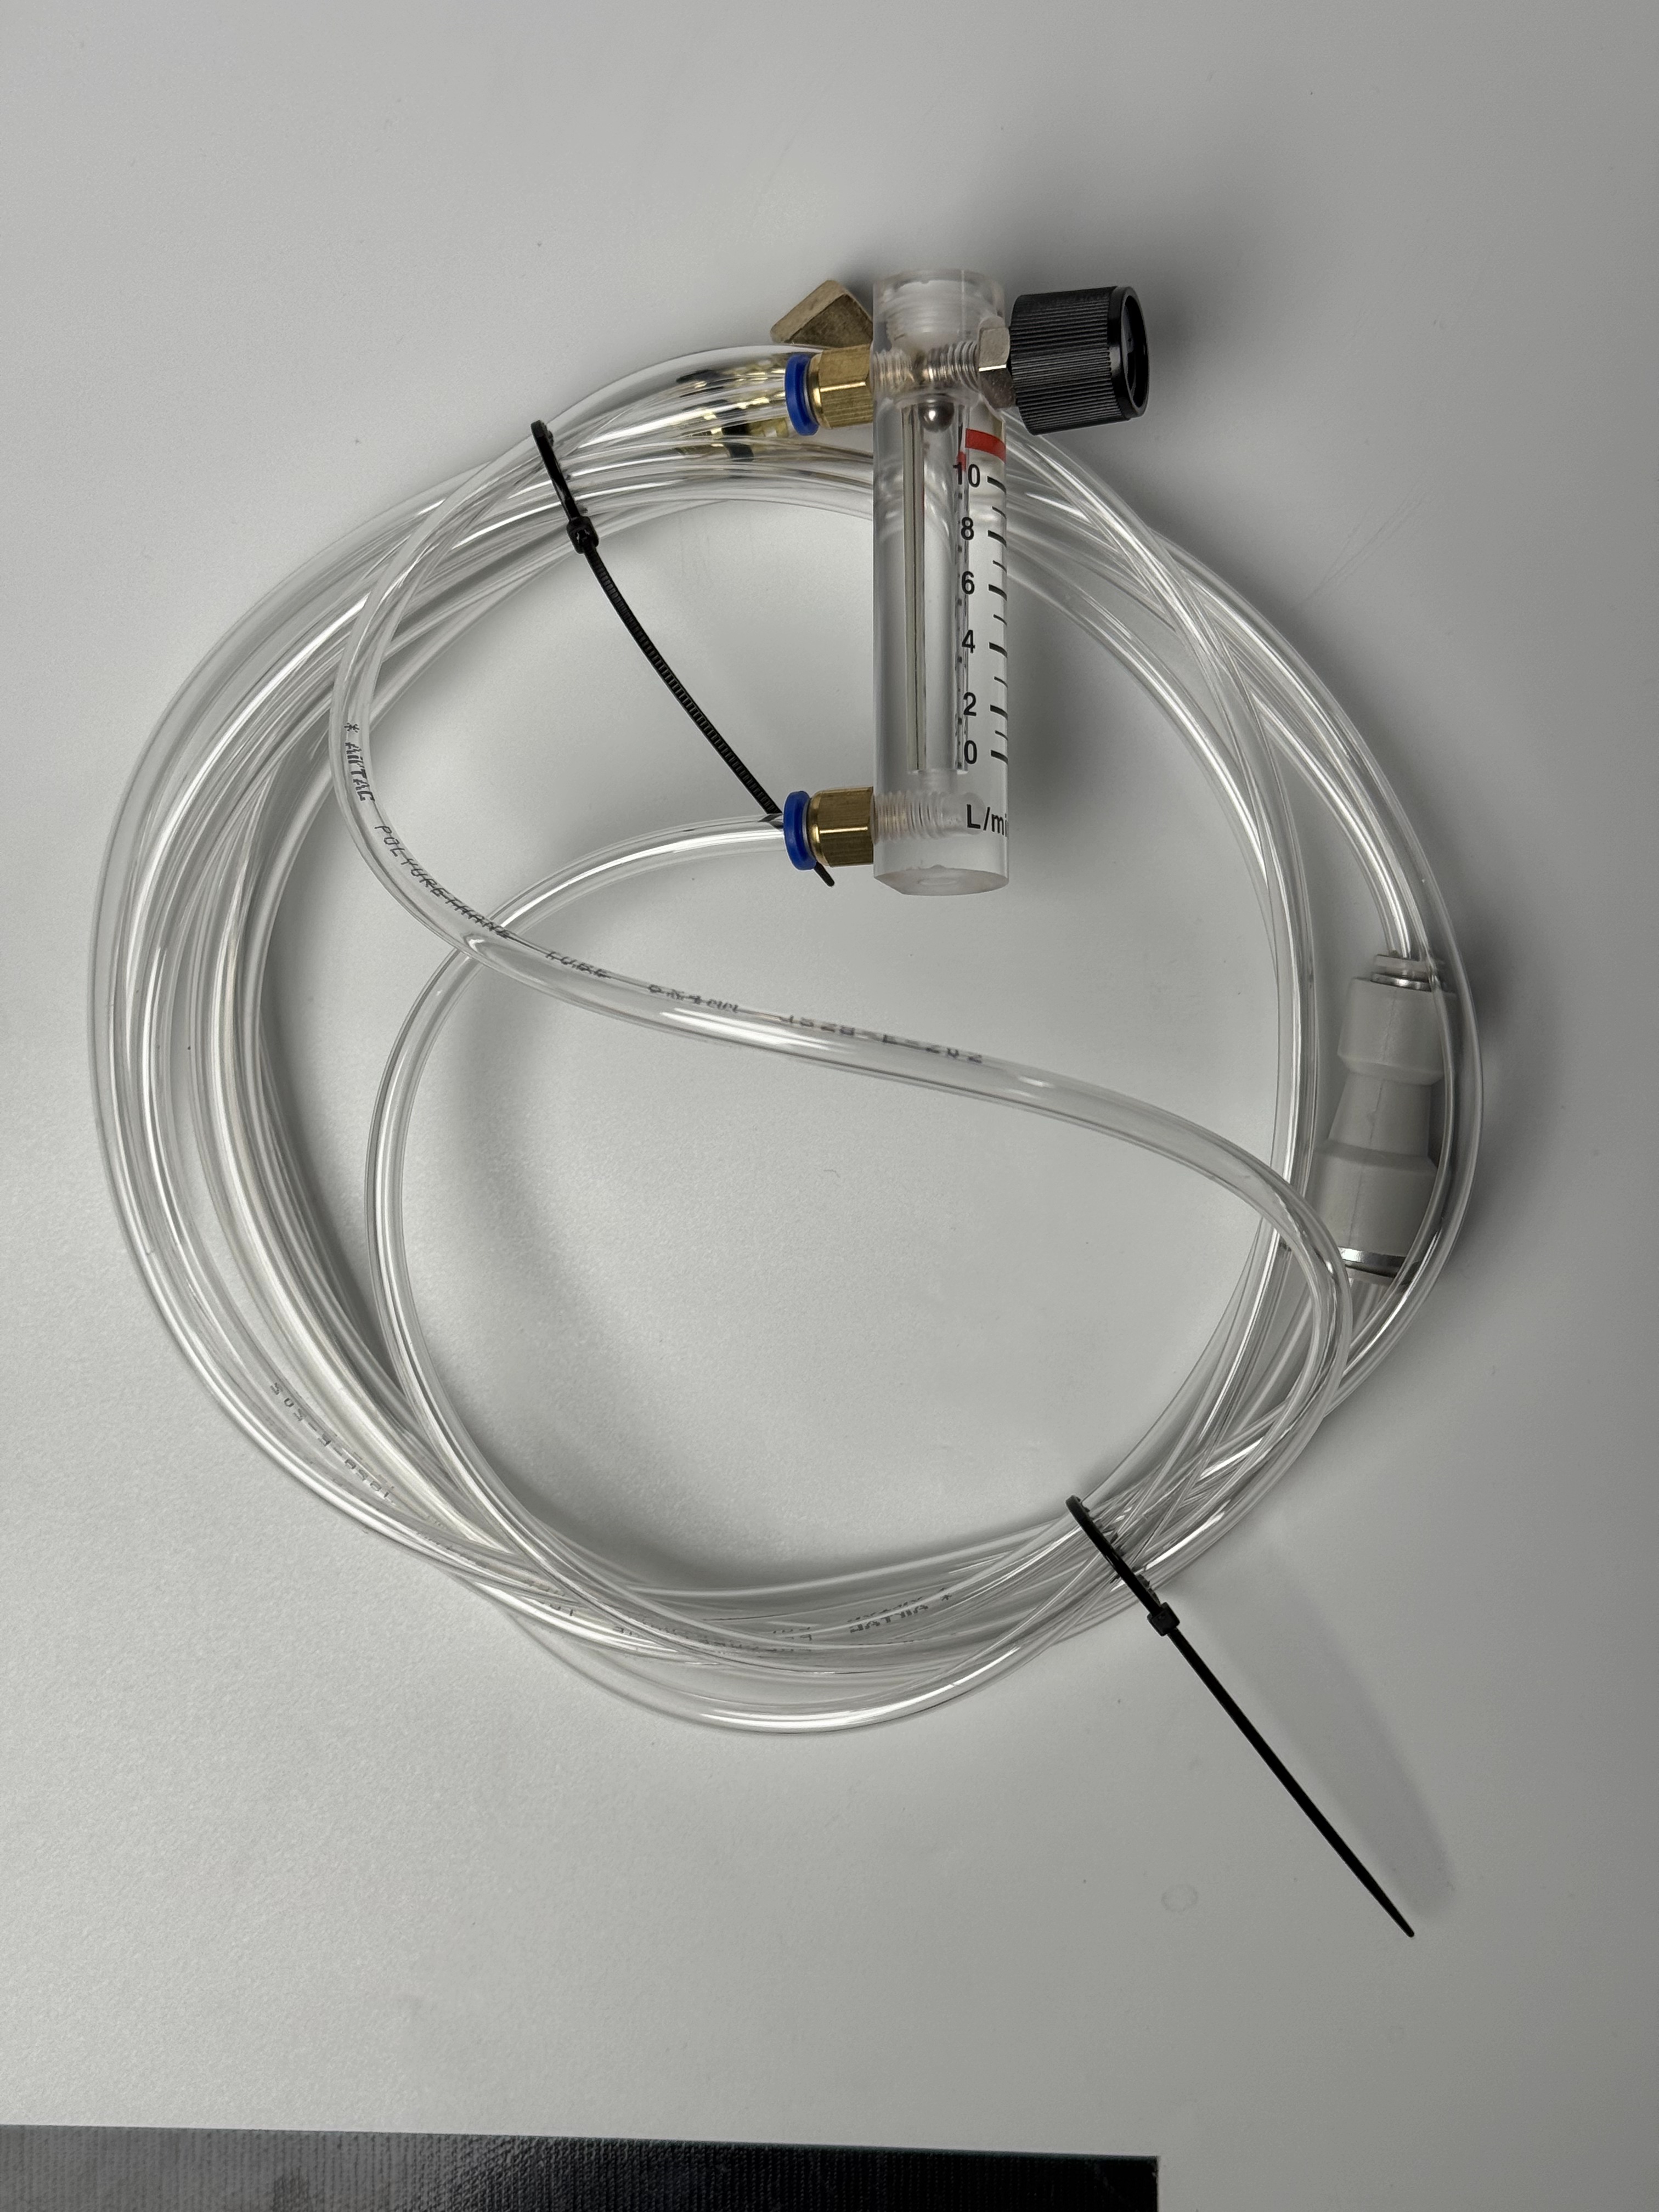
- Connect the flow meter from the device accessories to the outlet pipe of the nitrogen generator.
.png) |
.png) |
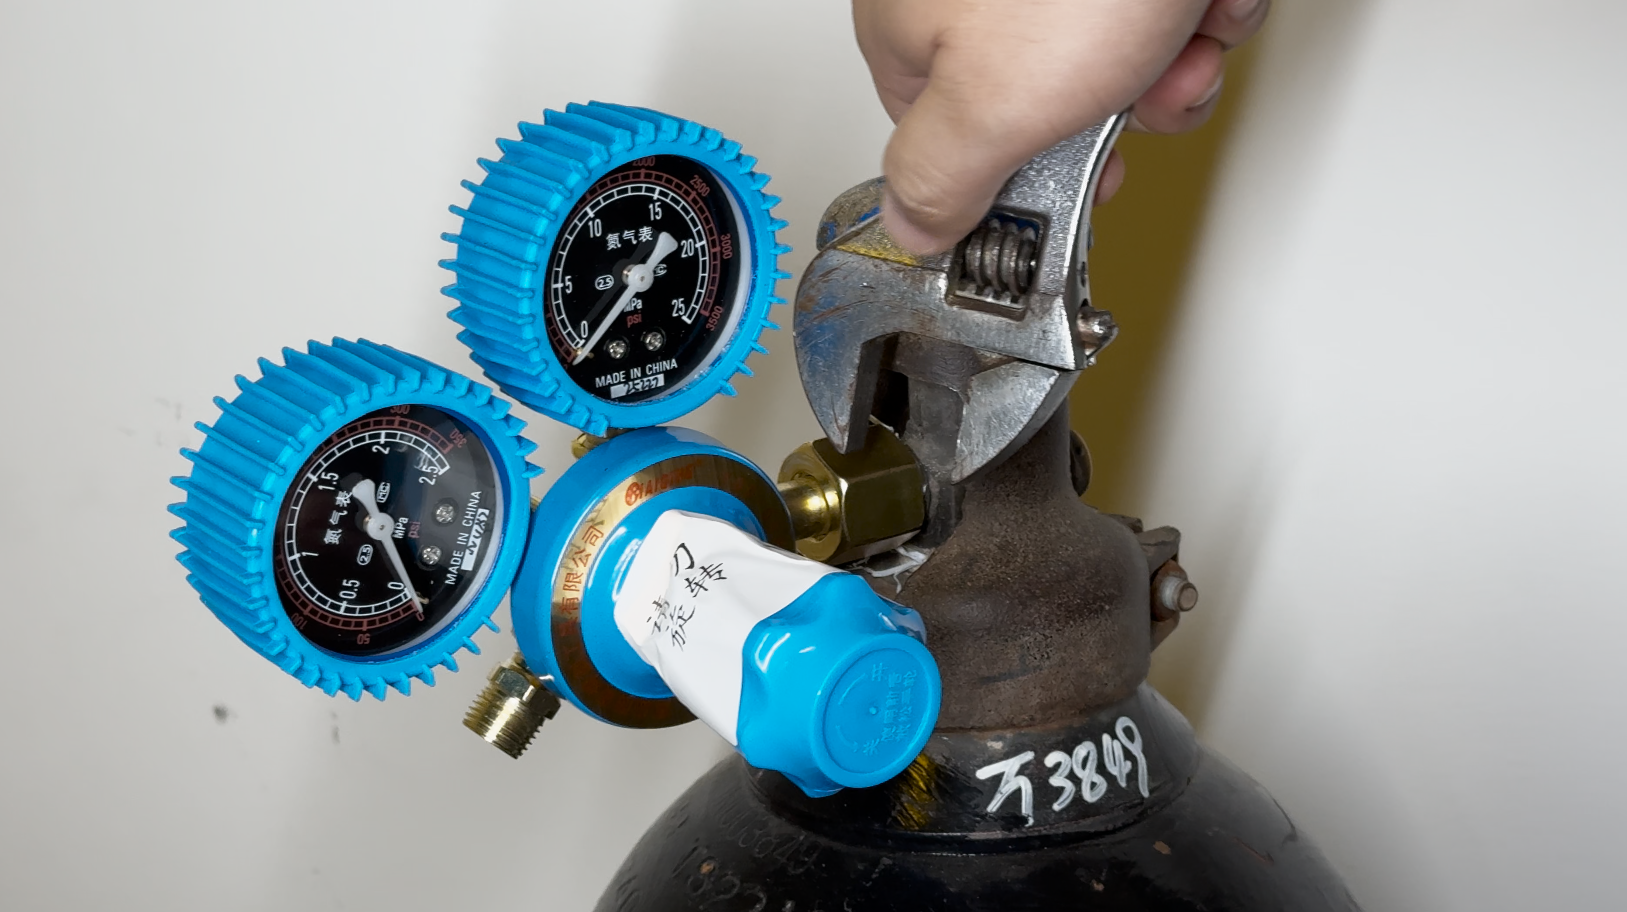
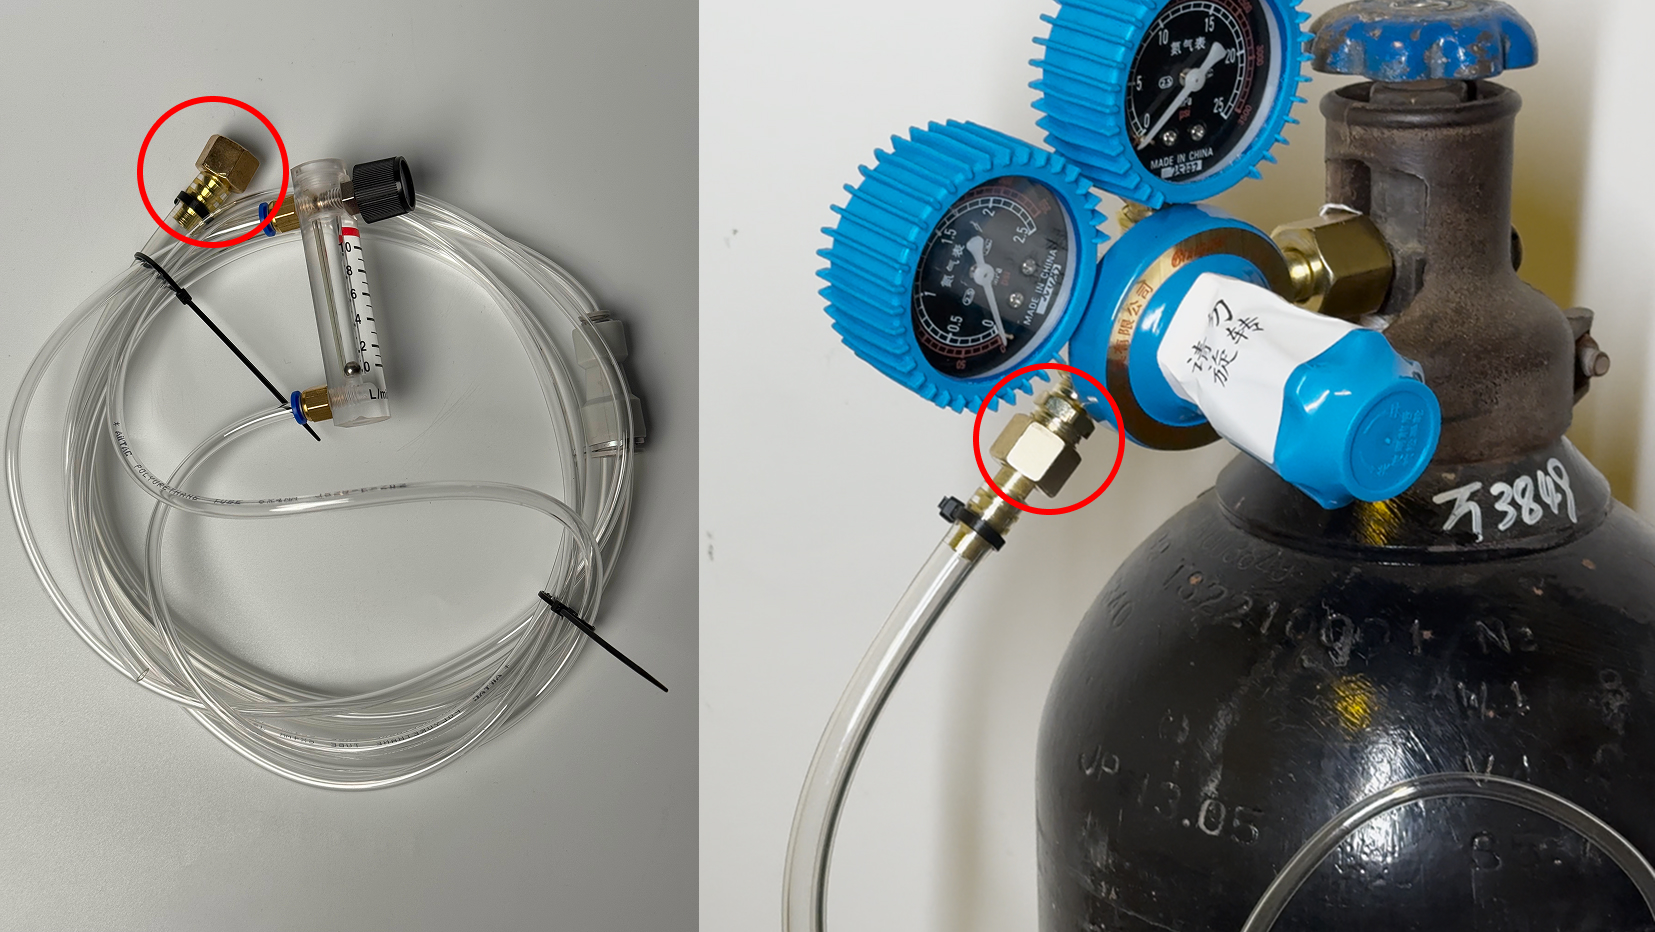
Nitrogen Cylinder Connection
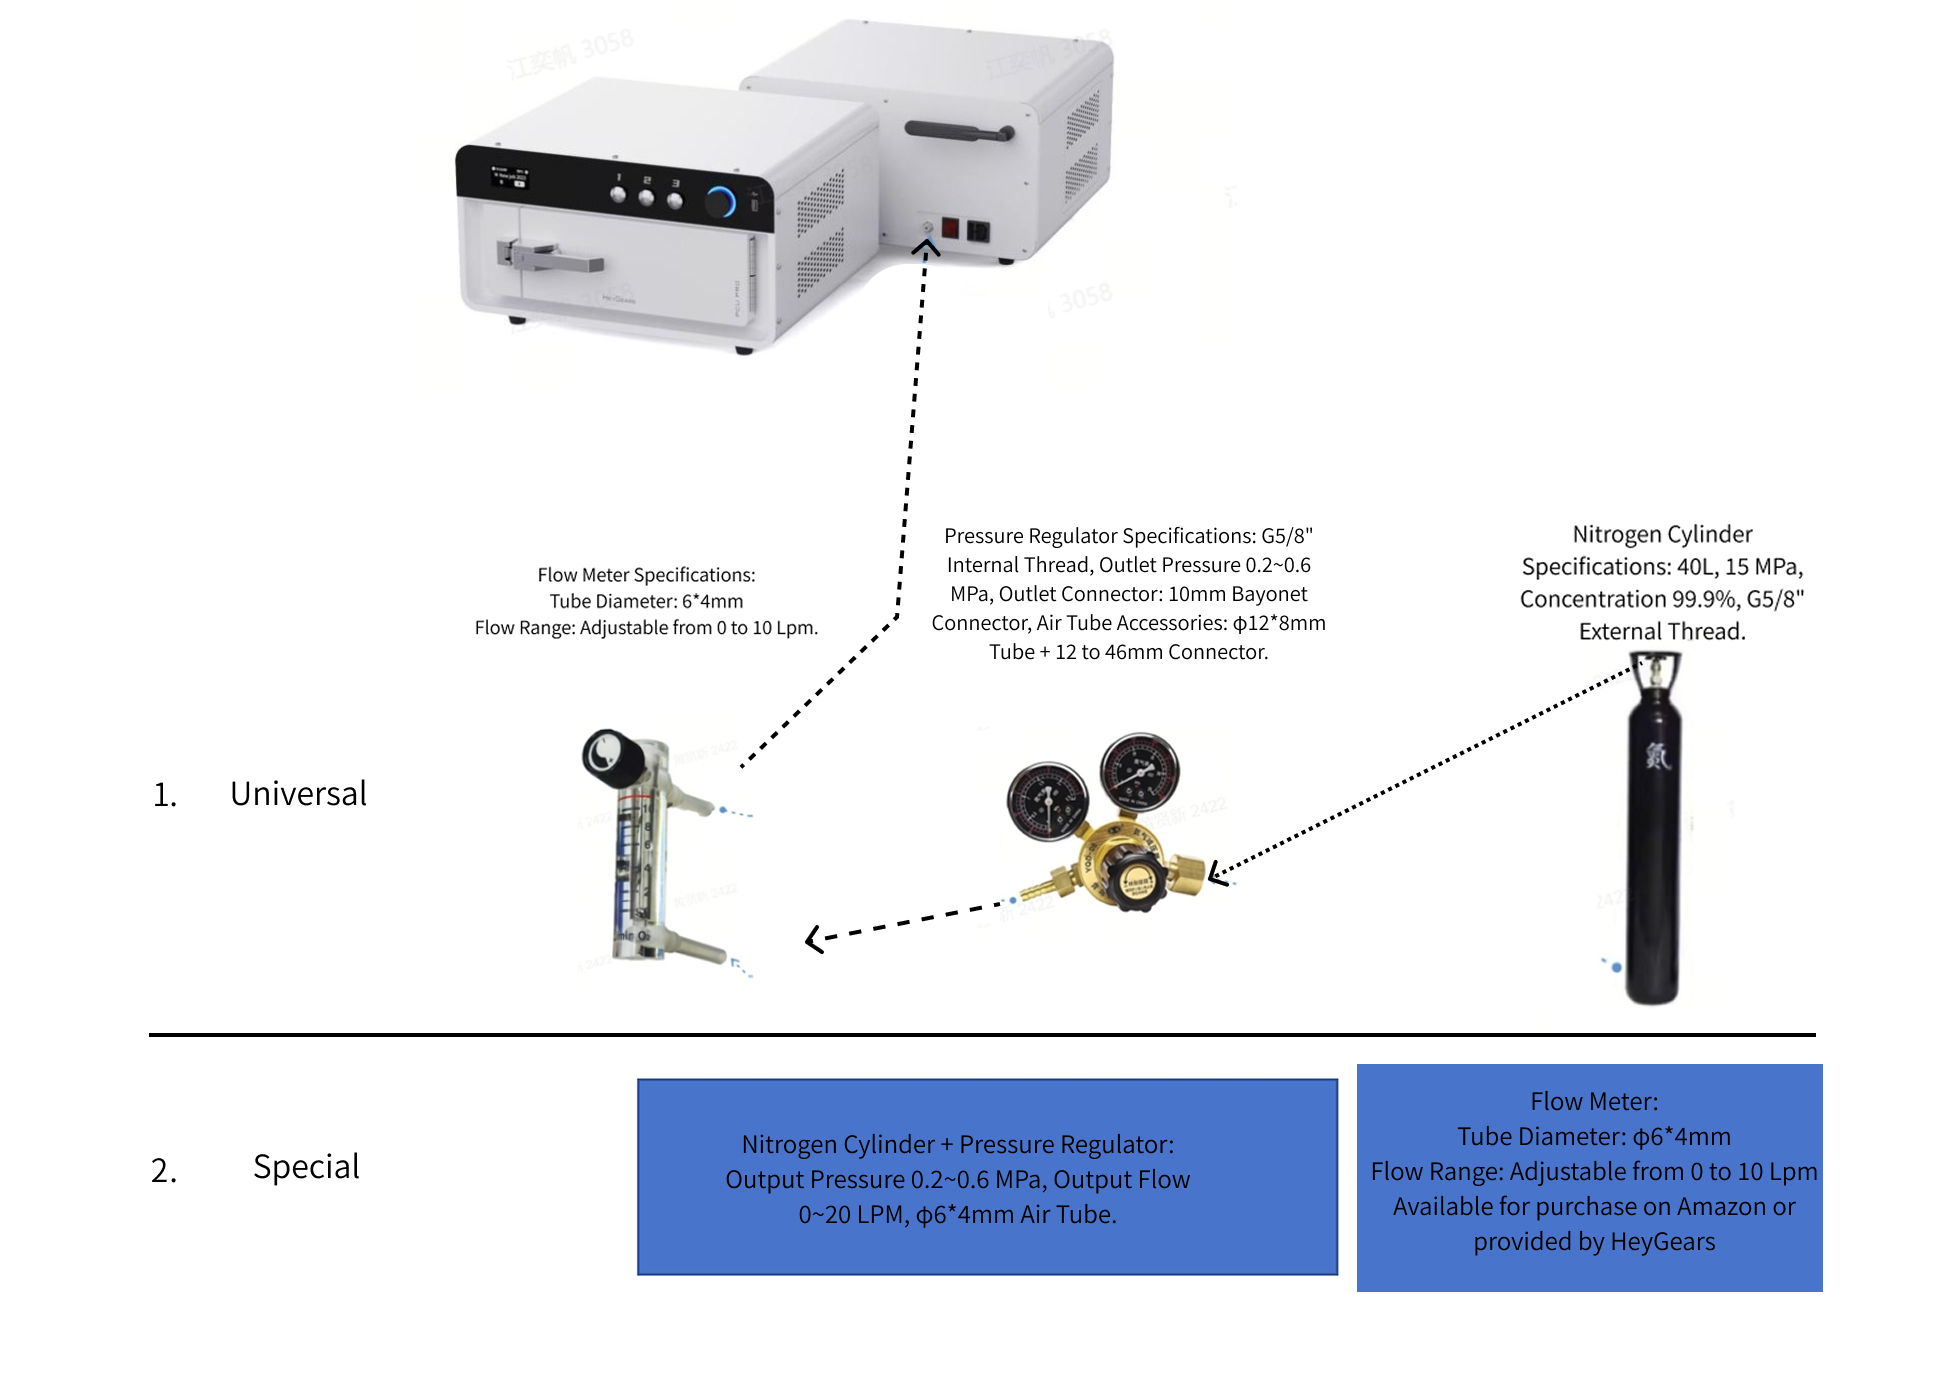
Open the packaging box of the pressure regulator assembly and check if all accessories are complete (do not rotate or tear the pressure valve label).
| Flow Meter Assembly | Pressure Reducing Valve |
 |
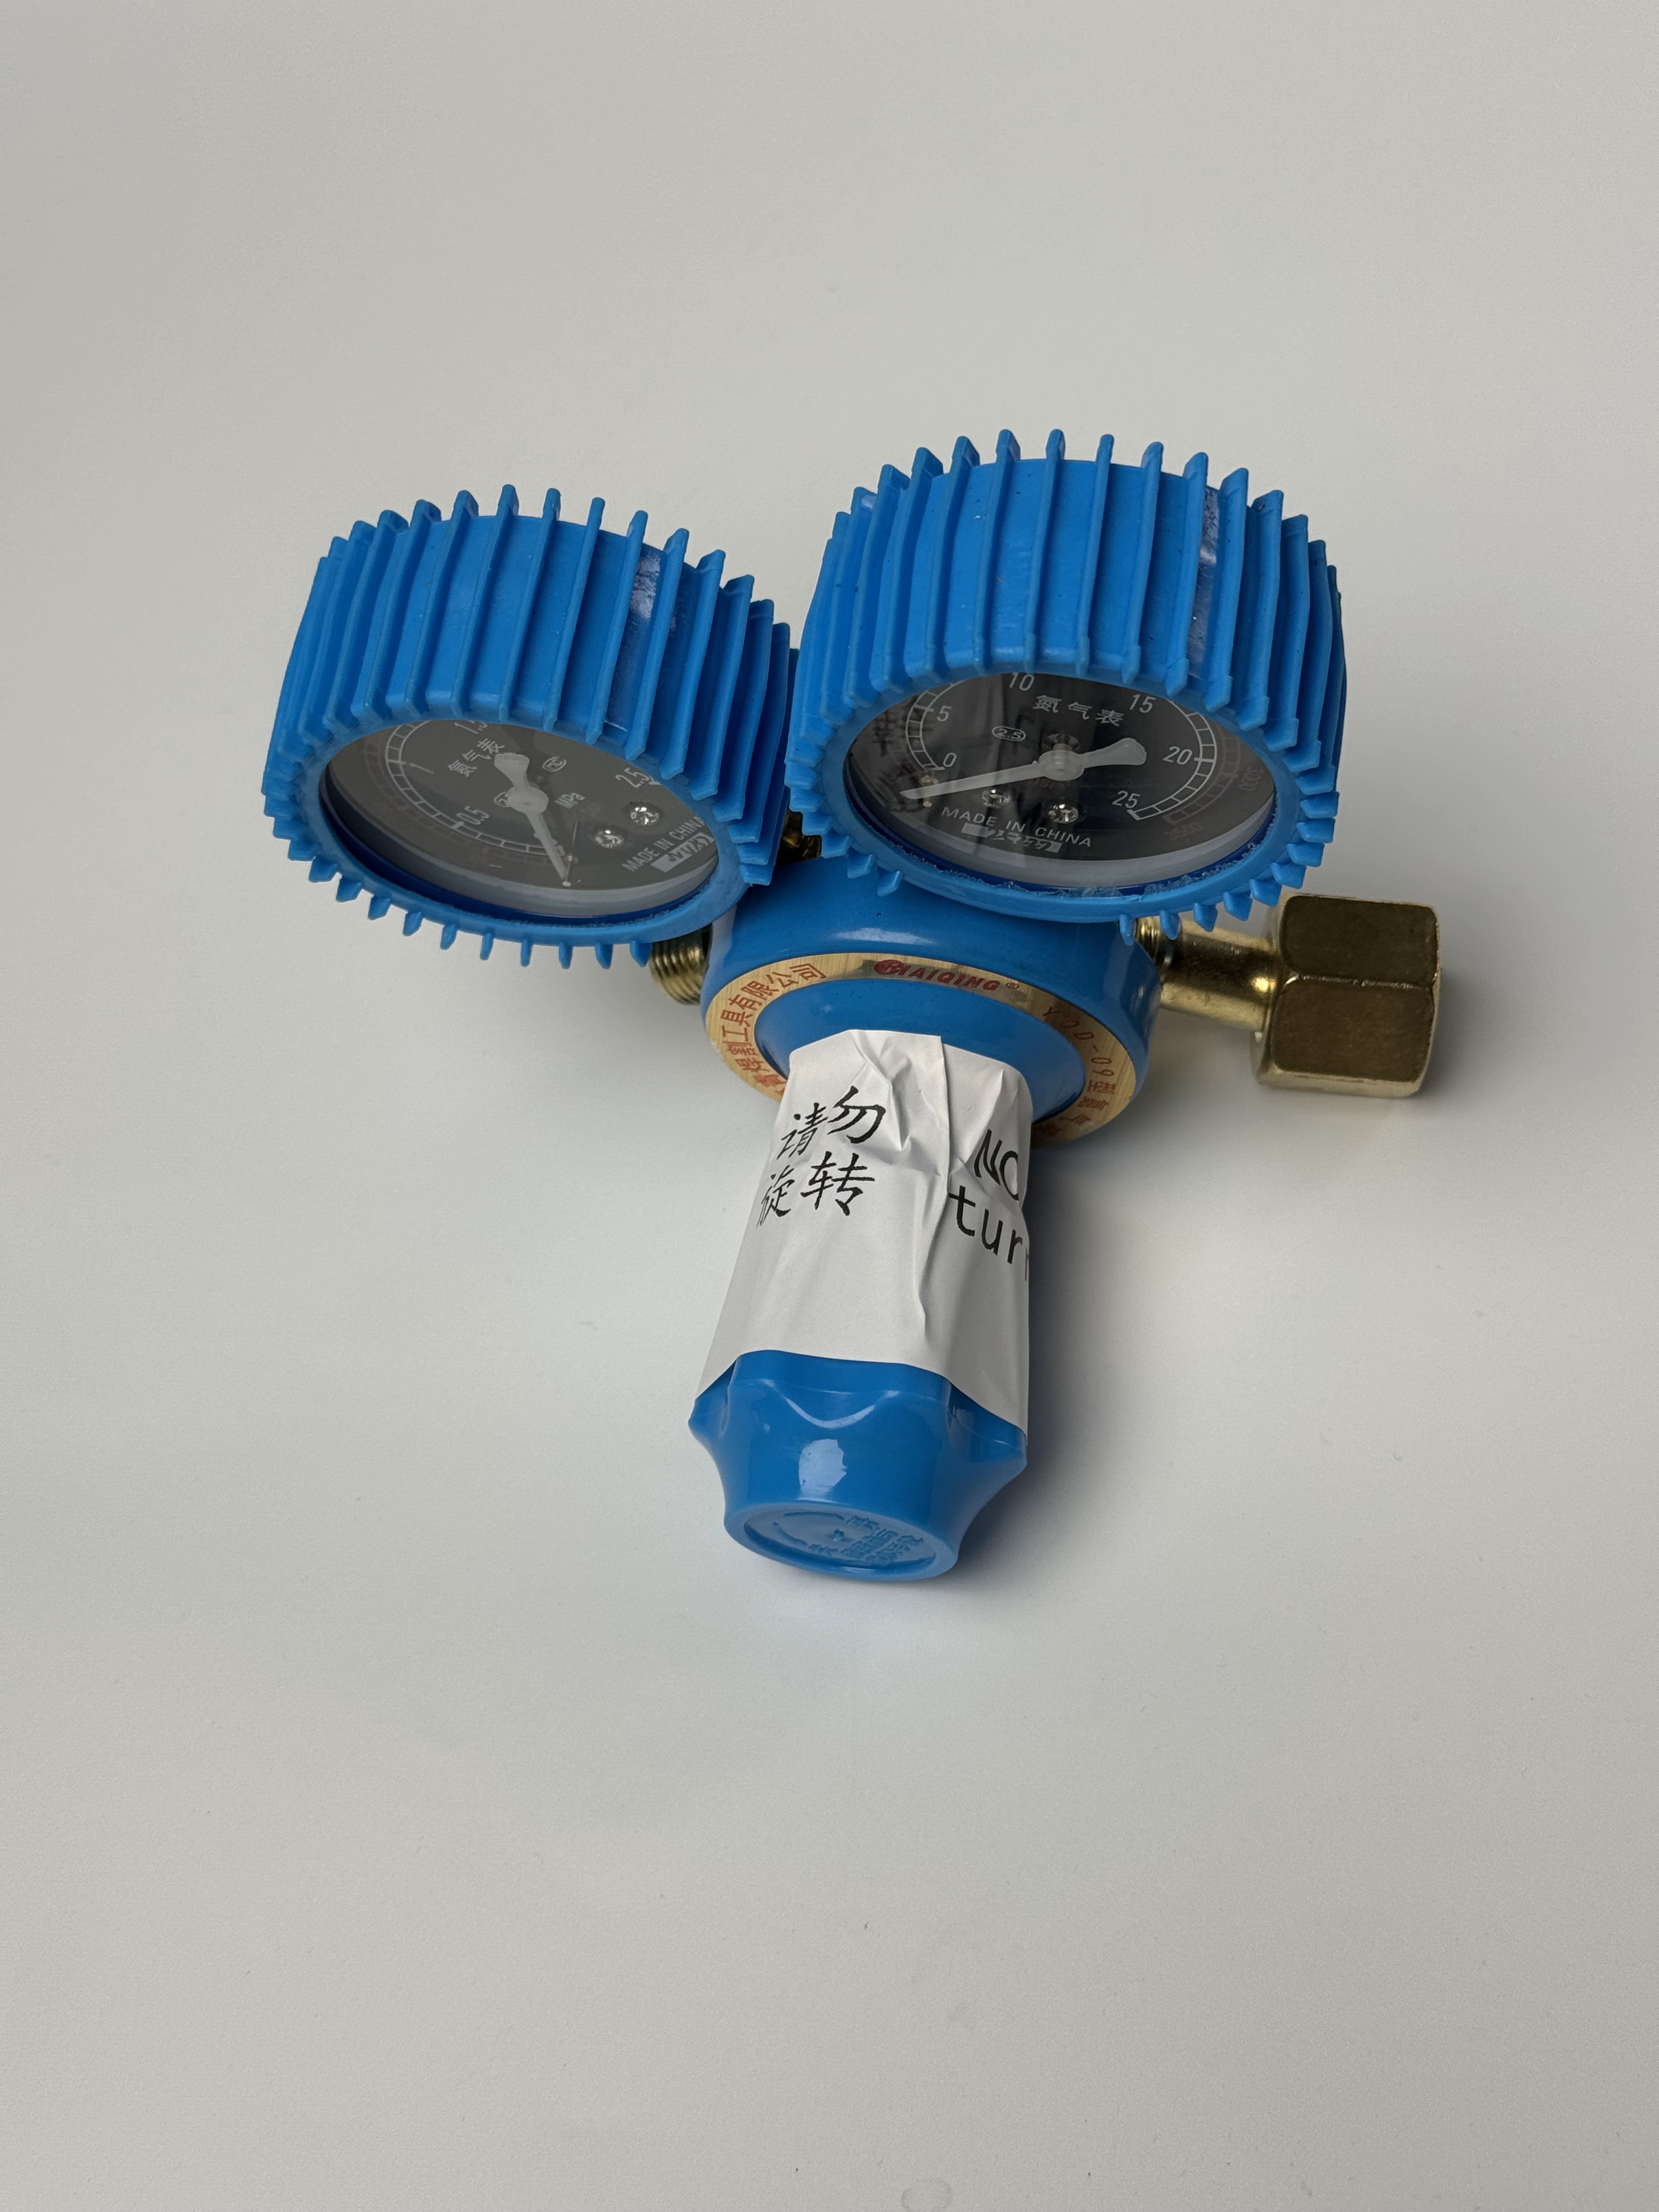 |
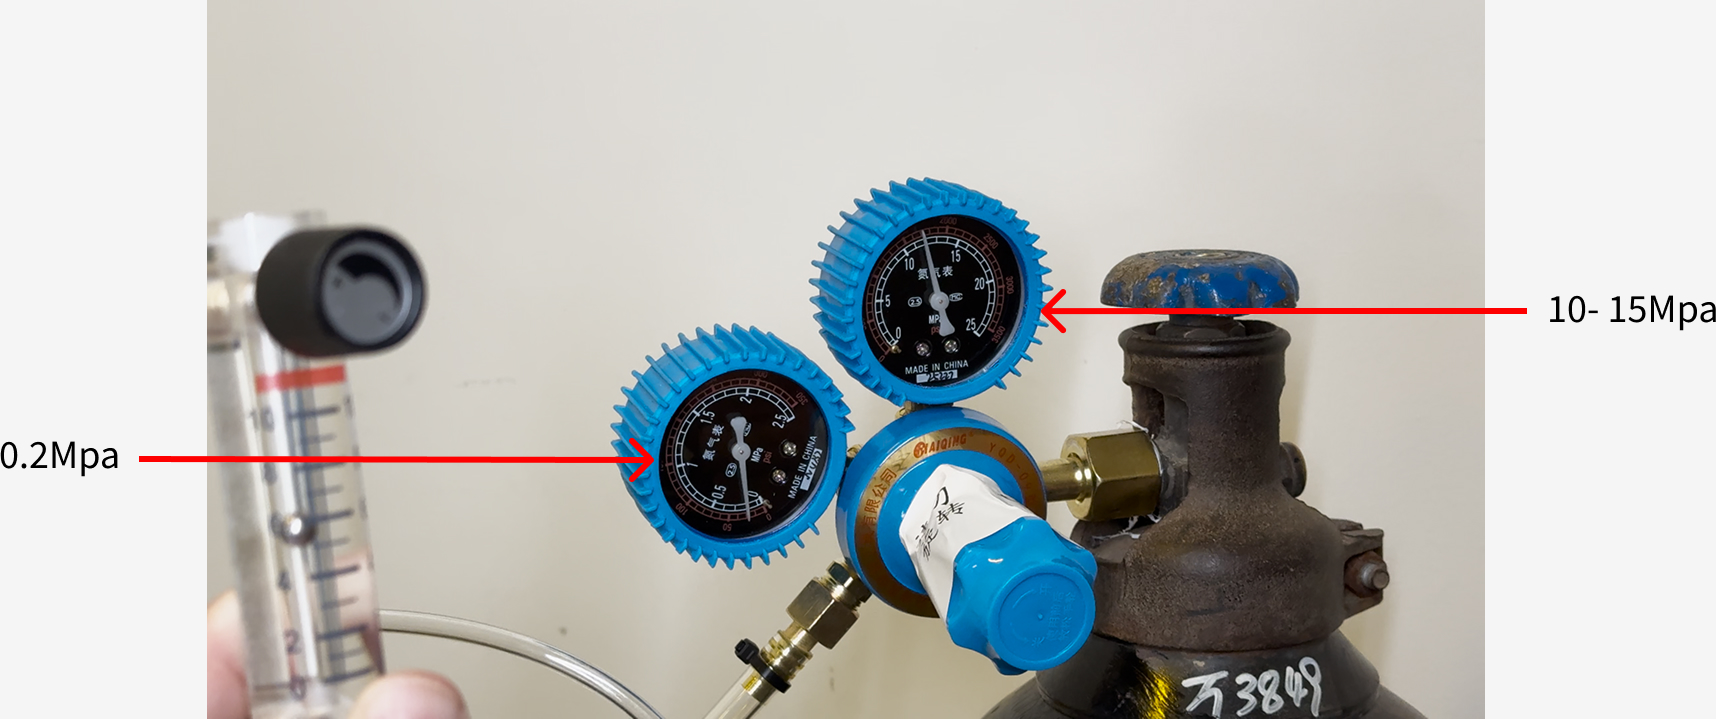
Connect the pressure reducing valve to the nitrogen cylinder and use a wrench to confirm that it is tightened.
Connect the end of the flow meter with the nut to the pressure reducing valve and use a wrench to confirm that it is tightened.
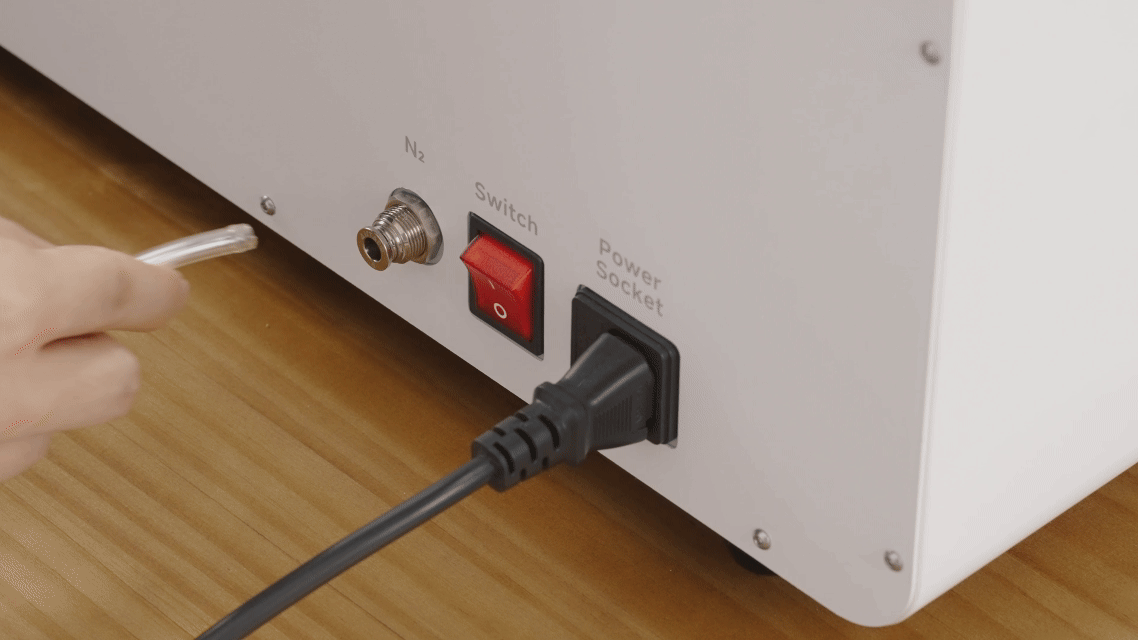
Then connect the end of the flow meter's gas tube to the back of the PCU Pro and ensure it is securely fastened to the device.
Connection sequence: Nitrogen cylinder > Pressure reducing assembly > Flow meter > Curing machine
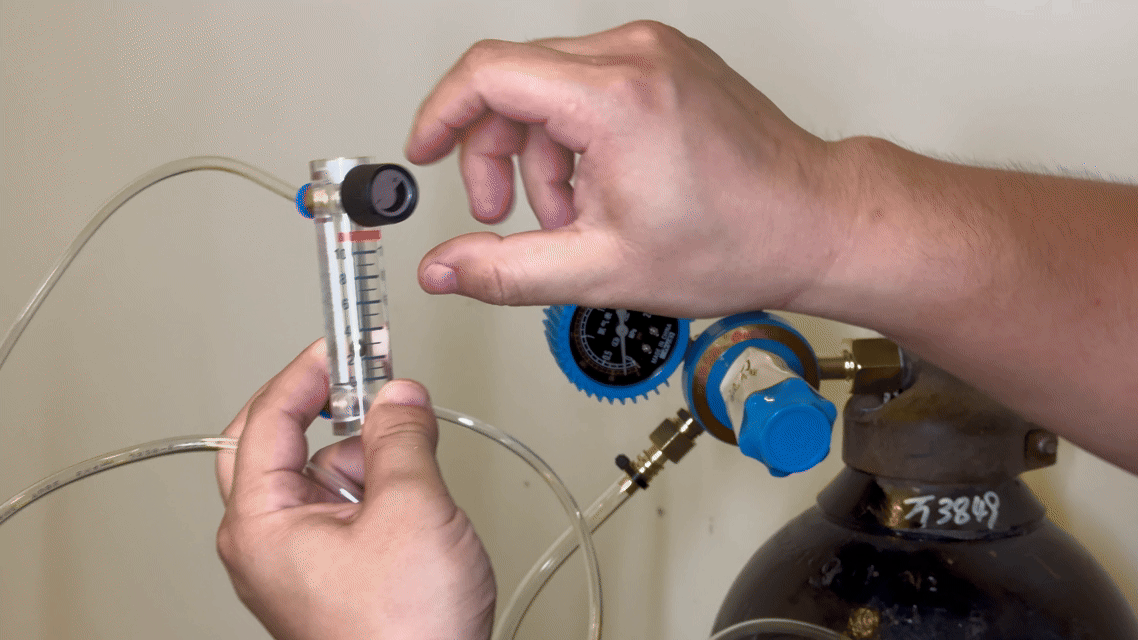
Open the nitrogen cylinder and adjust the flow meter's glass ball to between 6-10 (under standard conditions, the pressure reducing valve should be set between 0.2 and 10-15).
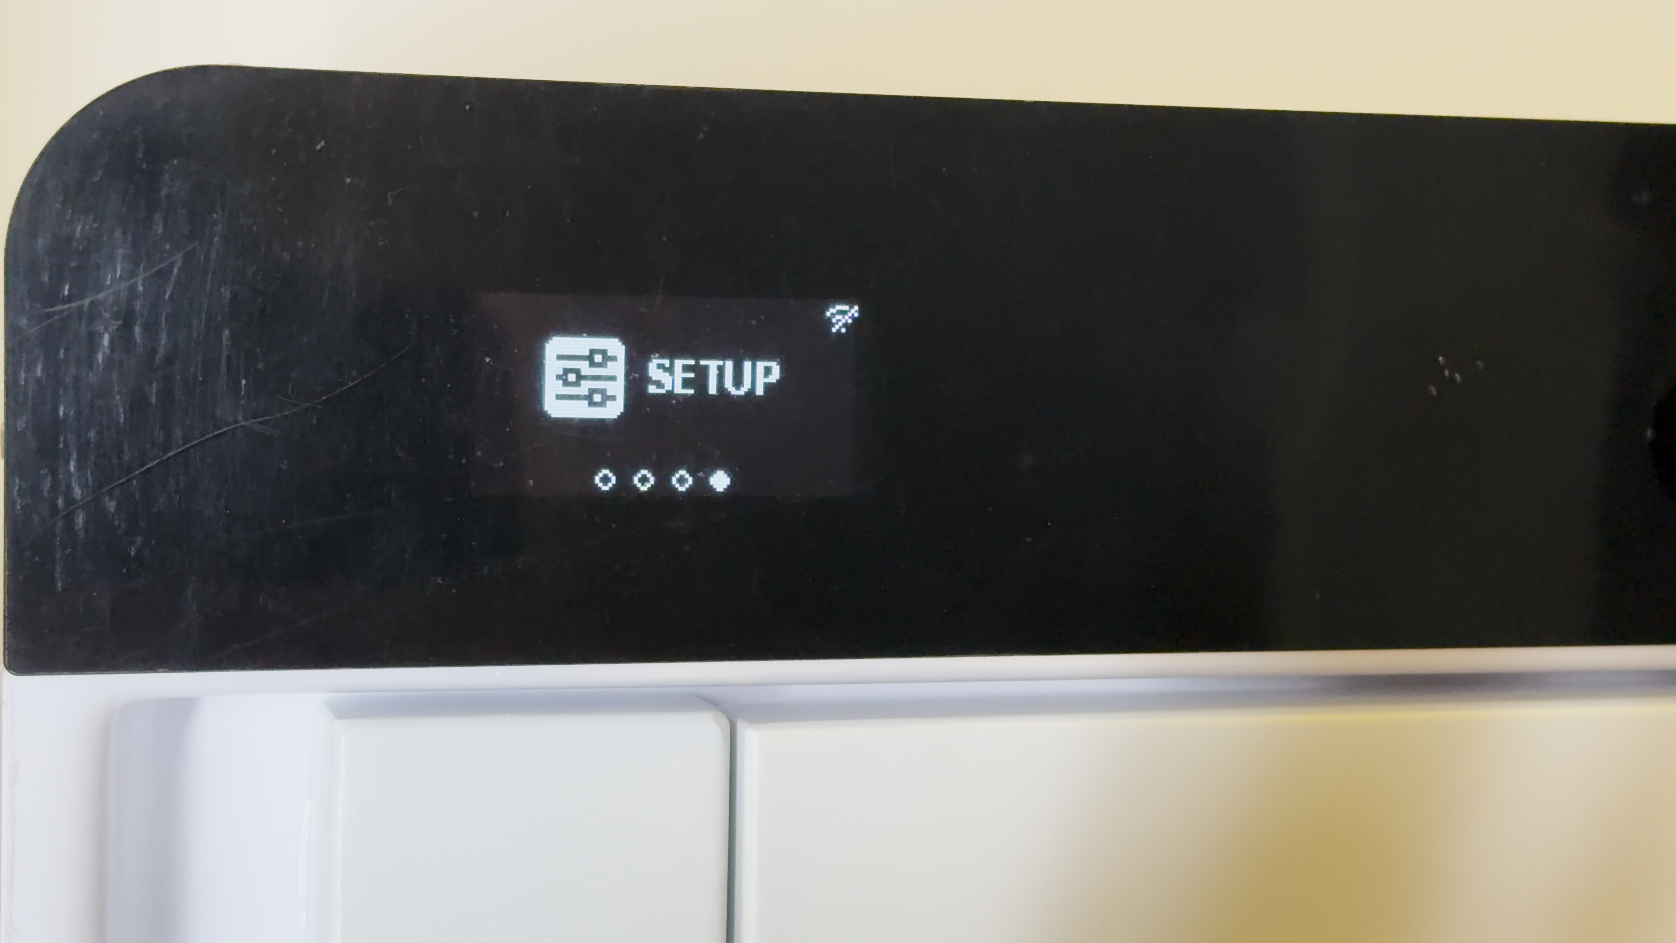
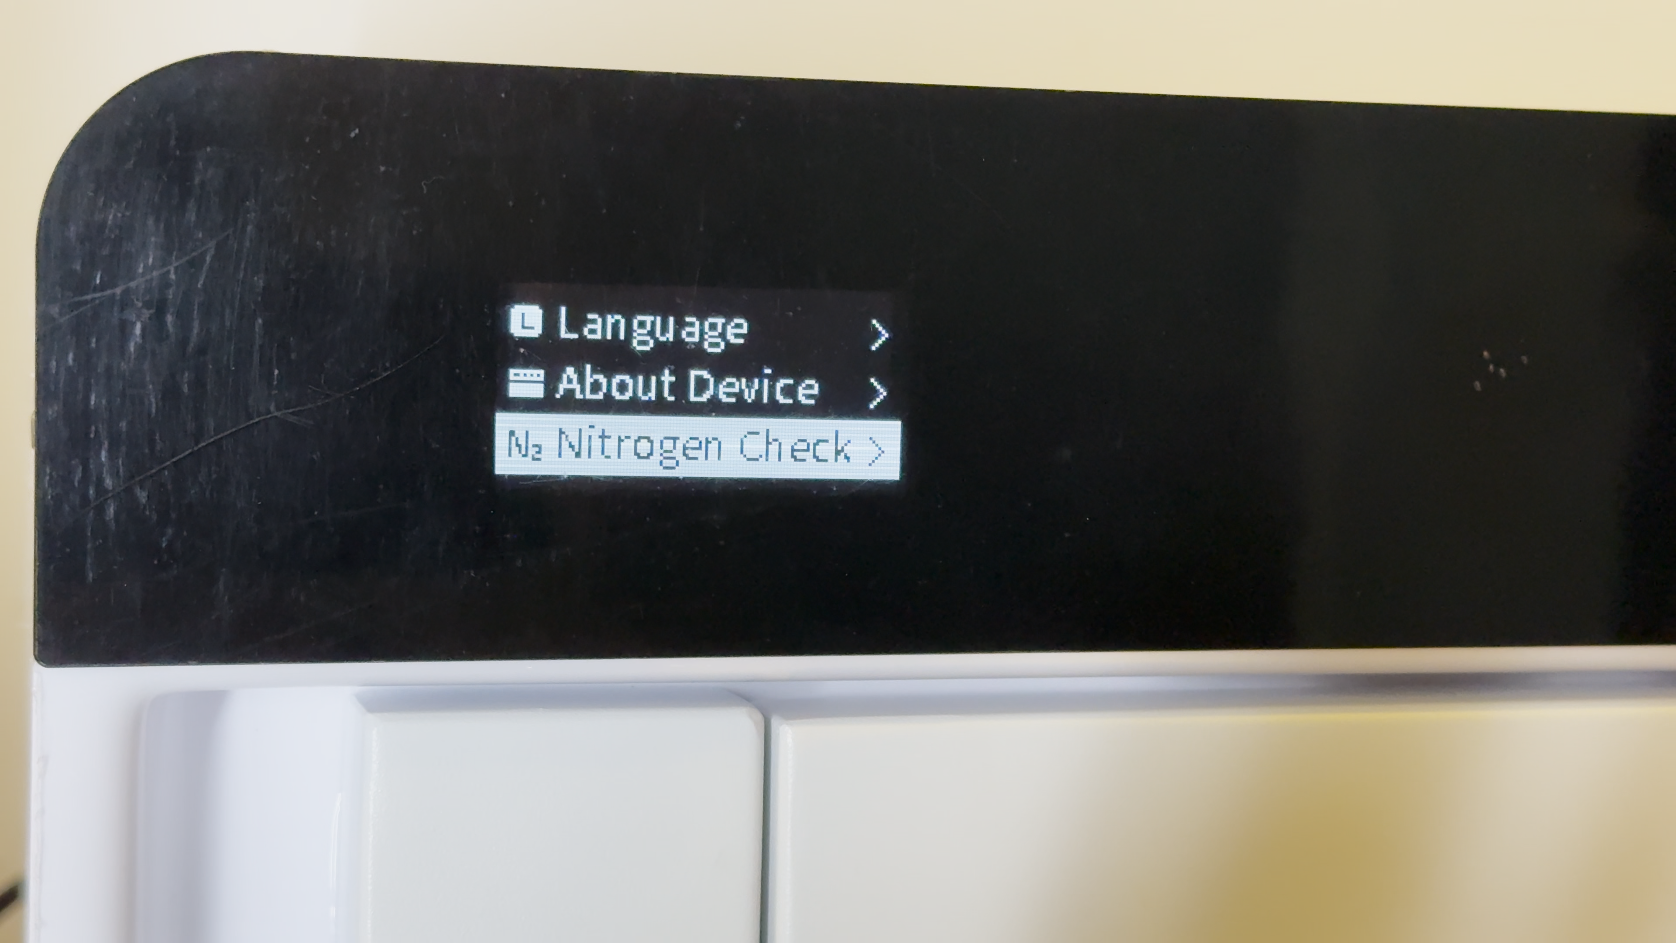
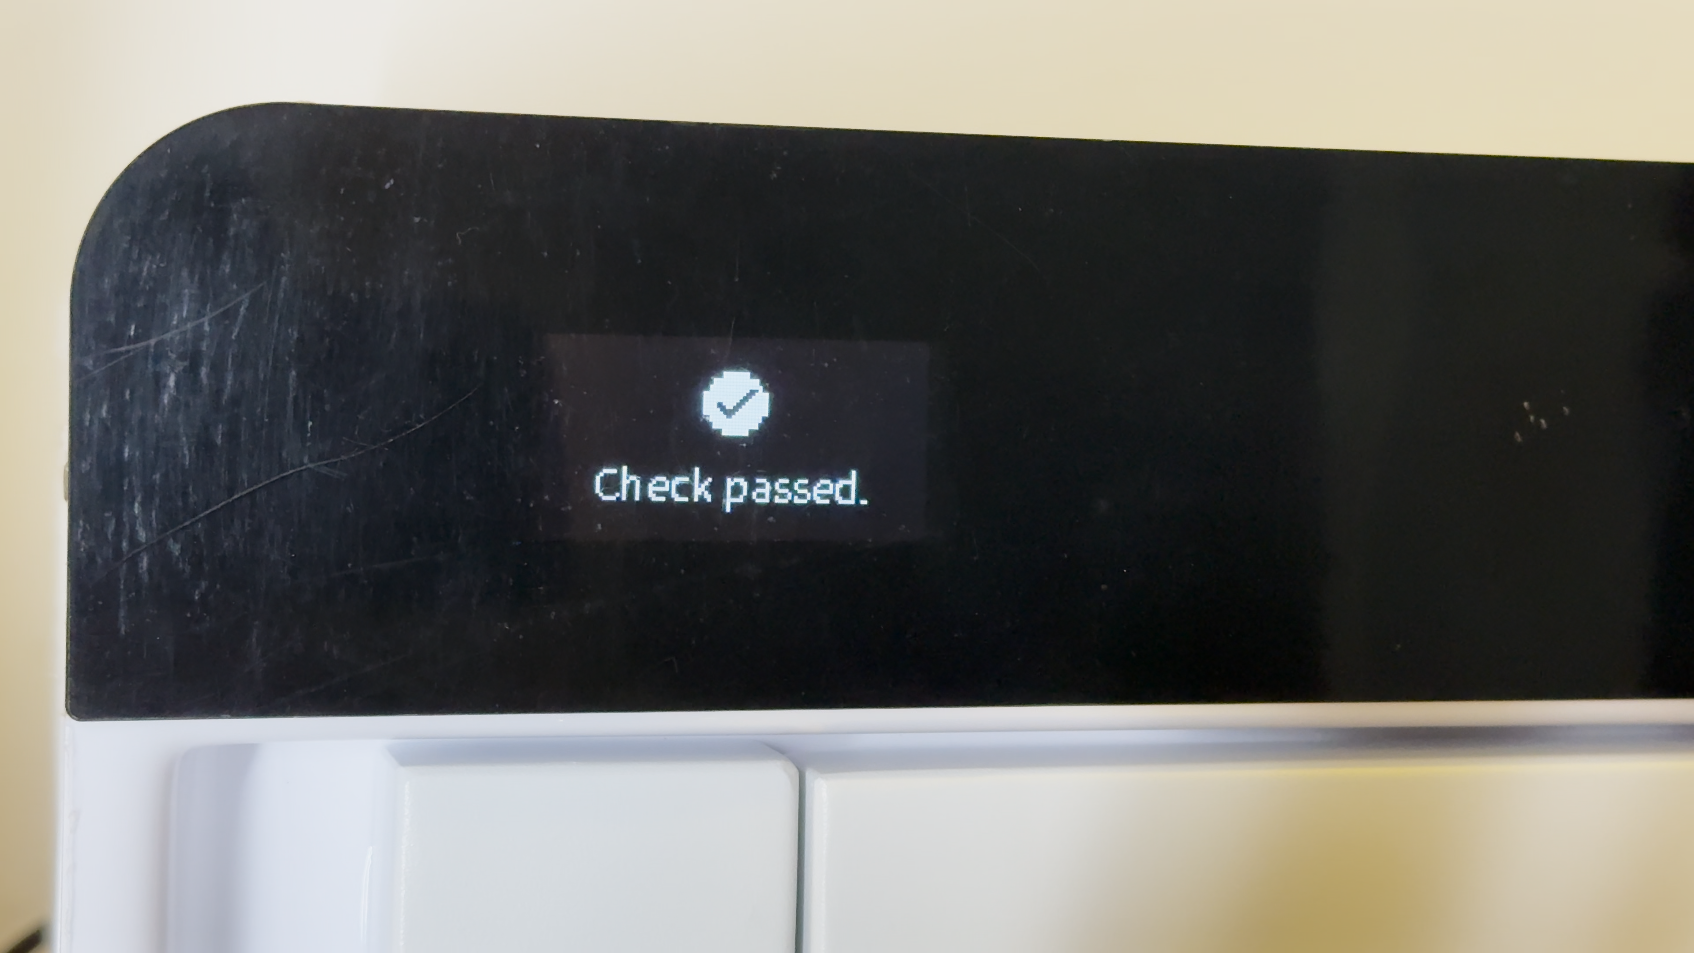
Enter the settings interface on the machine and locate the nitrogen detection.
| Set up | Nitrogen Check |
 |
 |
The parameters for the nitrogen source must meet the following requirements:
Flow Rate: 5L-10L/min
Concentration: >99%
Pressure: <0.5Mpa
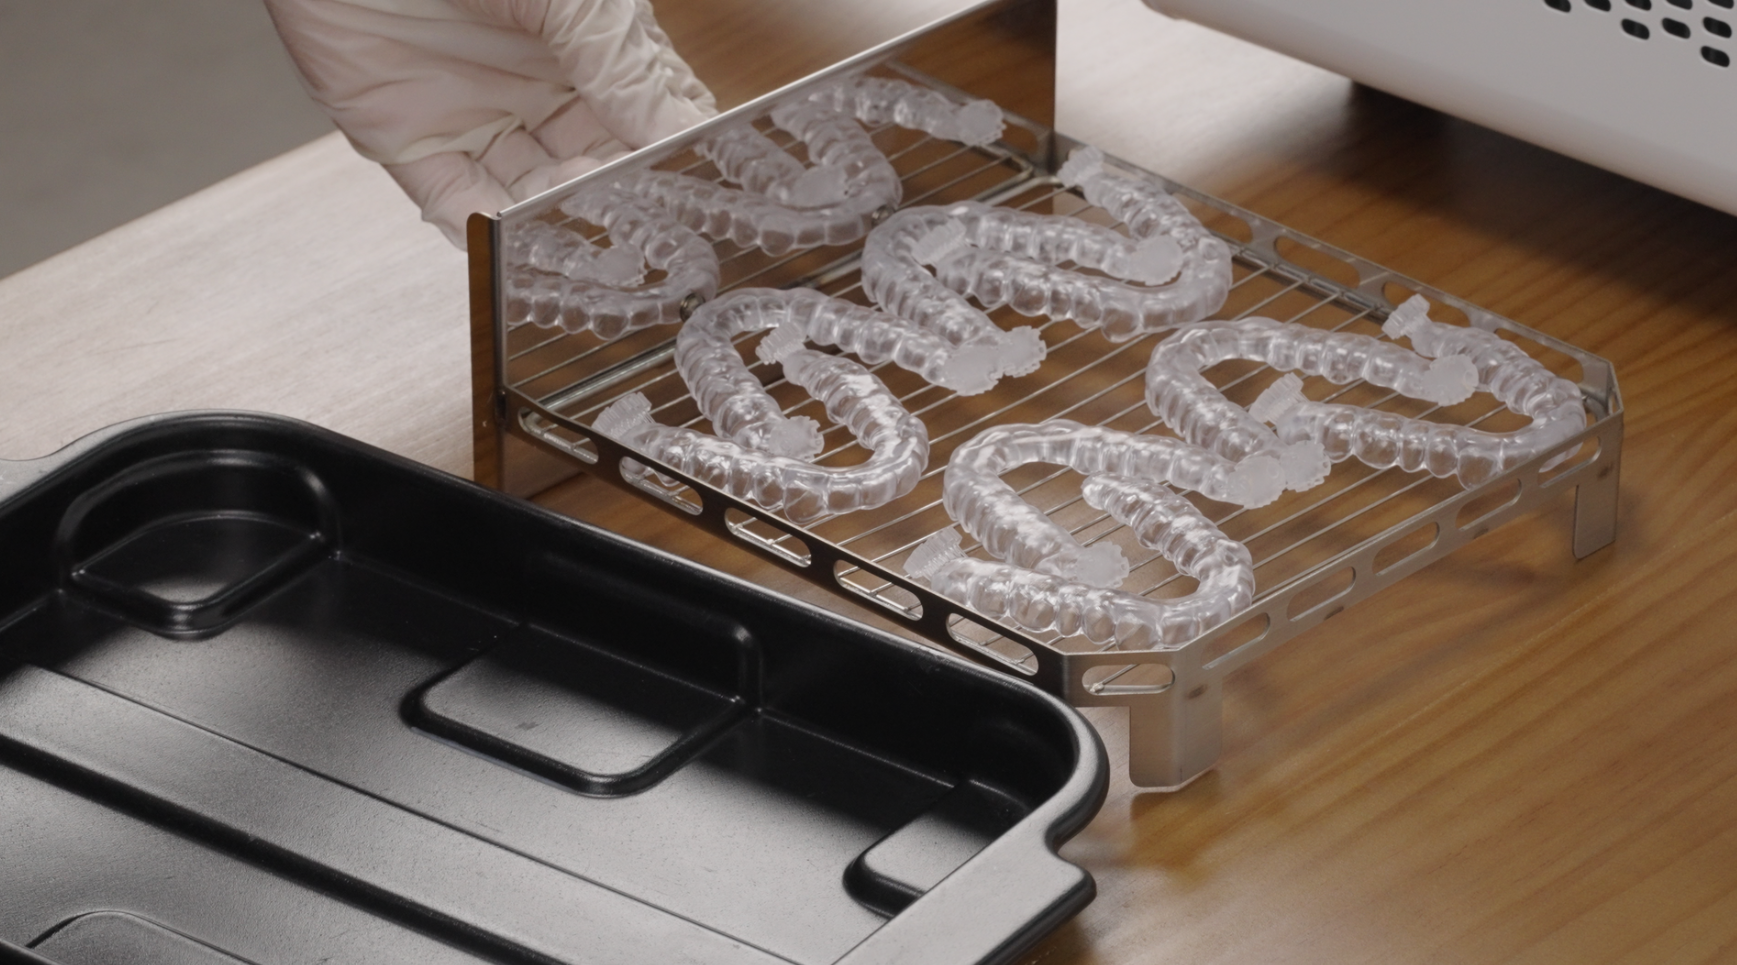
¶ Curing
Remove the curing tray.
Check and confirm that the model is free of solvent residue.
Evenly lay the cleaned model on the curing tray. Note: When placing the model in the tray, please hold the bottom support of the model (to avoid affecting the curing effect).
¶ Device Maintenance and Care
¶ Inner Cabin Cleaning
Please use glass cleaner and evenly spray it on a non-woven cloth for wiping. (Avoid using alcohol/IPA for spraying and wiping.)
¶ Cleaning the Bottom Glass of the Inner Cabin
After removing the bottom glass, clean it with alcohol/IPA.
¶ Cleaning the Filter Foam
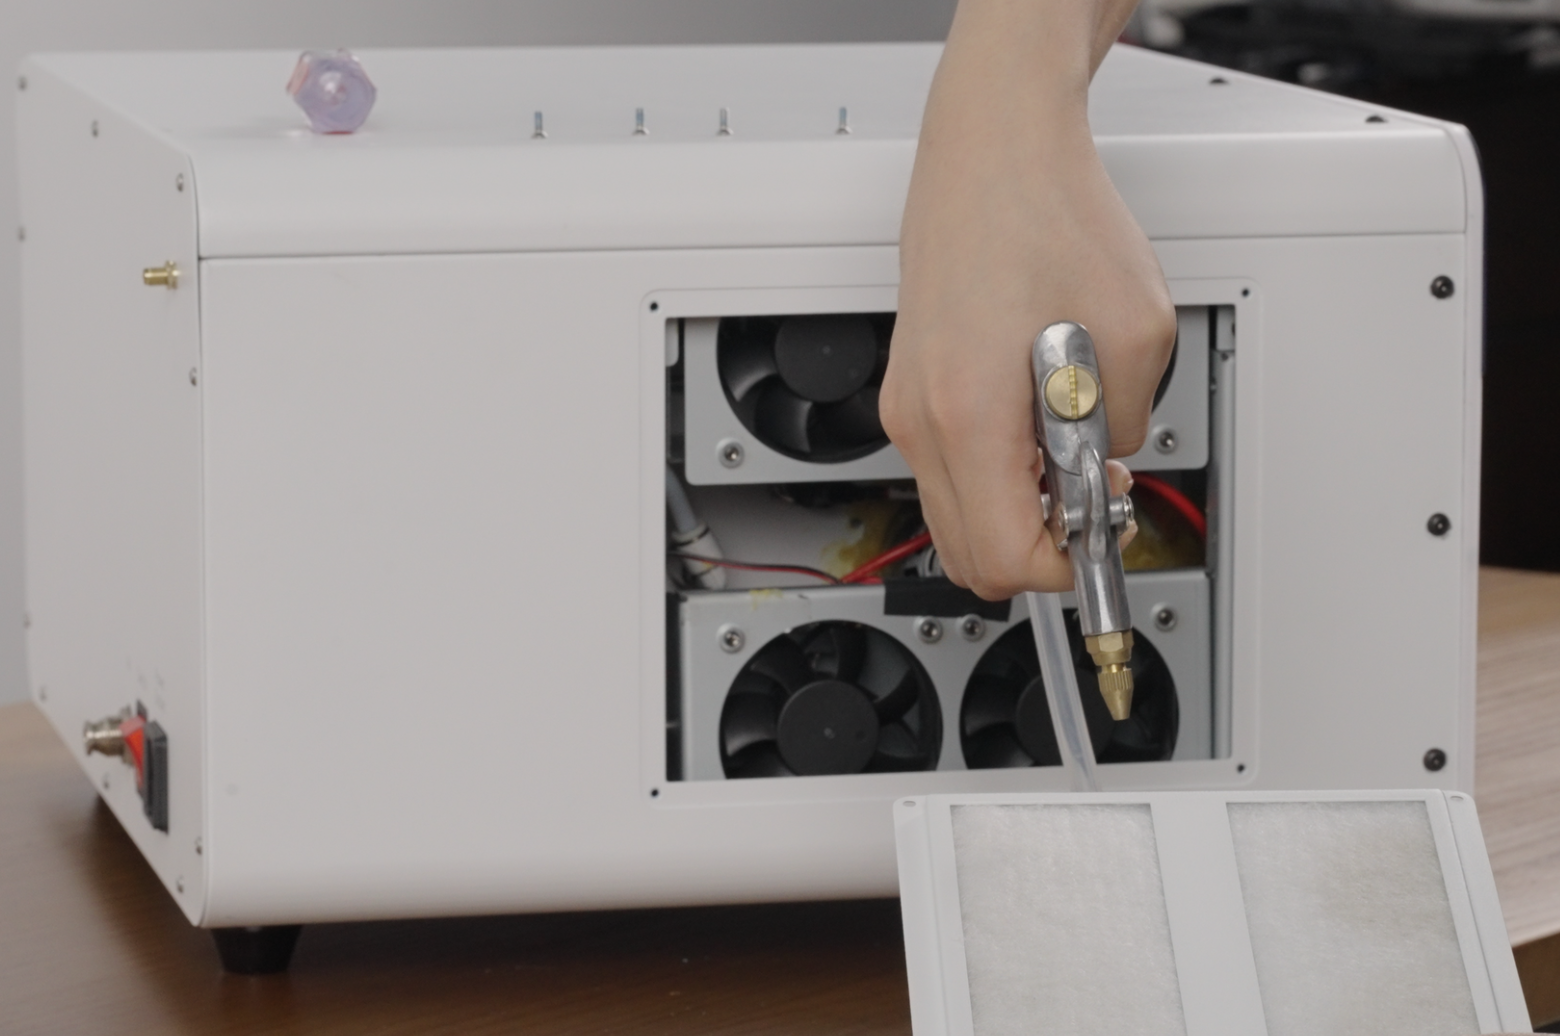
Accessories Needed: Phillips screwdriver and air gun
¶ Use a Phillips screwdriver to remove the ventilation panel on the left side of the device.
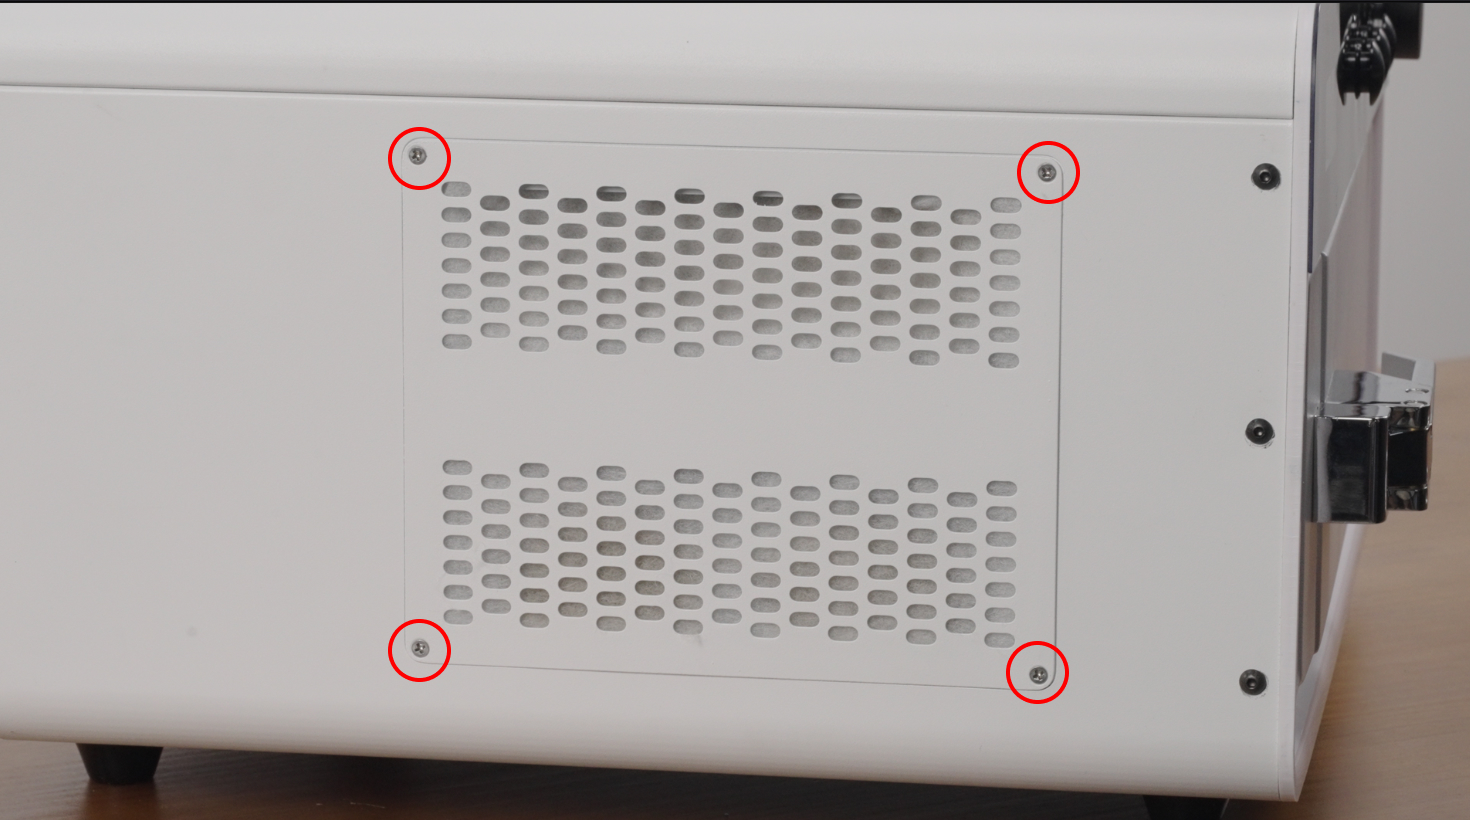
¶ Open the ventilation panel and use the air gun to blow out dust from the inside to the outside.