¶ 1. Introduction to PAP11
¶ 1.1 Overview
UltraPrint-Production PAP11 is a gray high-precision application resin that features excellent finish and faster forming; it boasts exceptional detail reproducibility, high sharpness and outstanding dimensional stability. This resin is suitable for end-use products in the miniaturization field, effectively meeting the demands of intricate detail and textured structures.
¶ 1.2 Recomendations on Application
This resin is applicable to the fields of highly detailed scale models, industrial accessories, animation and DIY figure industries.
¶ 1.3 Instructions for Use
1.3.1 Before printing, check whether the resin tank's release film is in good condition. In case of facing with issues such as print failures or partial missing areas, check the tank first. If the film is deformed, blushed, or severely worn, replace it before next printing.
1.3.2 The PAP11 is prone to sedimentation, thus the following requirements shall be met:
-
a. Shake well before each use for printing;
-
b. Scenario 1 (Printing after the resin has settled): If the resin is left in the tray for over 24 hours, it shall be mixed evenly until free of sedimentation before being used for printing.
-
c. Scenario 2 (Storing after the resin has settled): If the resin is left in the tray for over 24 hours, it shall be mixed evenly until free of sedimentation and then recycle it to the resin bottle for sealed storage.
¶ 1.4 Performance
| UltraPrint-Production PAP11 Basic Performance |
|||
|---|---|---|---|
| Categories | Properties | Standard | Value |
| Rigidity | Tensile Strength (MPa) | ASTM D638 | 50 |
| Flexural Strength (MPa) | ASTM D790 | 90 | |
| Flexural Modulus (MPa) | ASTM D790 | 2250 | |
| Resilience | Impact Strength (Notched) (J/m) | ASTM D256 | 40 |
| Work of Fracture (J/m²) | ISO 20795 | 4090 | |
| Heat resistance | Heat Deflection Temperature (0.45MPa)(℃) | ASTM D648 | 50 |
| Basic Properties | Hardness (Shore D) | ASTM D2240 | 86 |
| Viscosity (mPa·s) | ASTM D4212 | 600 | |
| Water Sorption (%) | ASTM D570 | 1.23 | |
Note: The performance is obtained under the air curing mode of the UltraCraft Cure for 30 minutes.
¶ 2. Design Suggestions
| Forming performance | |
|---|---|
| Test Items | Value |
| Min. gap width (mm) | 0.2 |
| Min. overhang length (mm) | 1.2 |
| Min. no-support angle (°) | 25 |
| Min. wall thickness (mm) | With baffle: 0.18 Without baffle: 0.18 |
| Min. drain hole (mm) | 0.4 |
| Min. pillar (mm) | 0.2 |
Note: This table specifies the design requirements for the minimum forming performance; failure to meet these requirements will result in detail loss or print failure.
¶ 2.1 Recommended Design Parameters
To ensure printing success rate, it is recommended that structures meet the following values:
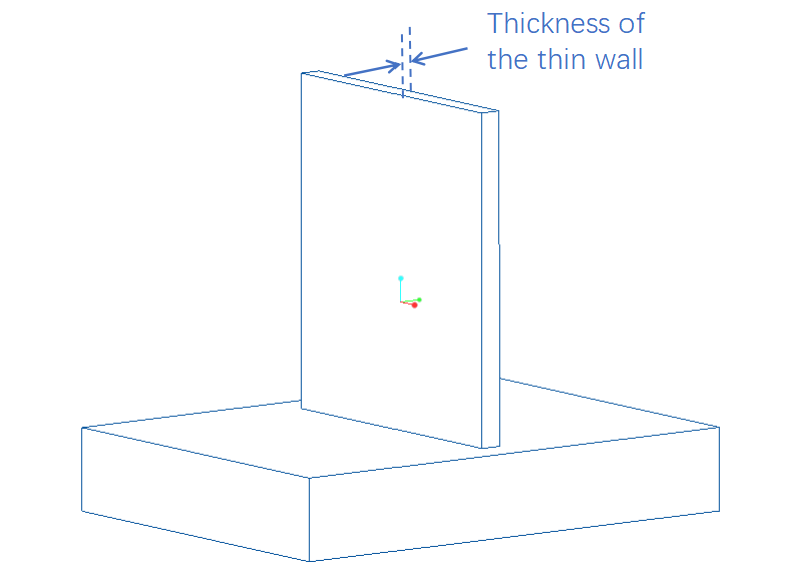
¶ 2.1.1 Wall Thickness
 |
Recommended Value | ||||
|---|---|---|---|---|---|
| Thin-walled area (mm²) | 5*5 | 10*10 | 50*50 | ||
| Min. wall thickness that provides support (mm) | 0.3 | 0.35 | 0.8 | ||
| Minimum wall thickness that not provides support (mm) | 0.3 | 0.35 | 0.8 | ||
| Typical scenarios: | 1.Electronic and electrical enclosures and structural components; 2.Models with thin-walled structures. |
||||
| Testing method by HeyGears: | 1.Complete the test within 2 hours after part removal and washing; 2.Visually inspect (from the thinnest part to thickest part) whether the model is intact, free of obvious deformation and transverse cracks; |
||||
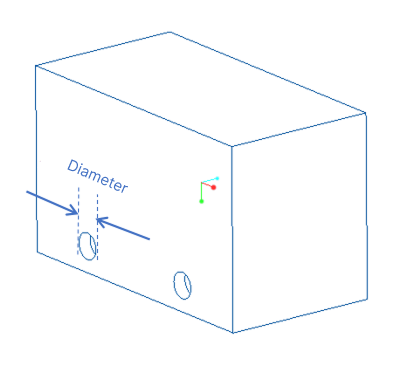
¶ 2.1.2 Hole
 |
Type: | Straight, bent, blind | ||||
|---|---|---|---|---|---|---|
| Hole Depth (mm) | 2 | 10 | 30 | 40 | 50 | |
| Min. inner diameter of straight hole (mm) | 0.3 | 0.3 | 0.4 | 0.4 | 0.4 | |
| Min. inner diameter of curved hole (mm) | / | 0.3 | 0.4 | 0.5 | / | |
| Min. inner diameter of blind hole (mm) | 0.3 | 0.4 | 0.4 | 0.4 | 0.4 | |
| Typical scenarios: | 1. Models with special structures; 2. Small tubes and details; 3. Industrial assembly parts. |
|||||
| Testing method by HeyGears: | 1. All holes were completely cleaned (washed and dried for about 3~5 times); 2. Straight holes: HeyGears team directed the light source at the holes from one end, inspected at the other end if the light could be seen, and recorded the minimum data that passed the test; 3. Blind holes: HeyGears team pointed a wire through the holes to see if it can reach the bottom (the other end), and recorded the minimum data that passed the test; 4. Bent holes: HeyGears team blew in the holes from one end with an air blow gun or an injector, inspected if the holes were ventilated, and recorded the minimum data that passed the test. |
|||||
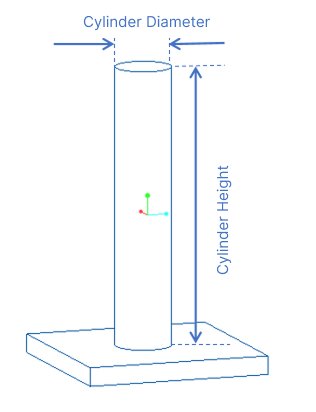
¶ 2.1.3 Pillar
 |
Types: | Pillars providing supports and not providing supports | ||||
|---|---|---|---|---|---|---|
| Depth/Height (mm) | 7 | 10 | 20 | 40 | 50 | |
| Min. diameter of pillar (mm) providing supports |
0.4 | 0.4 | 0.6 | 0.8 | 0.8 | |
| Min. diameter of pillar (mm) not providing supports |
0.3 | 0.5 | 0.6 | 0.8 | 0.8 | |
| Typical scenarios: | 1.Positioning pins, connection of assembly parts; 2.Details and tubes; 3.Thin long structures. |
|||||
| Testing method by HeyGears: | 1.The test shall be completed within 2 hours after part removal, washing and curing; 2.Visually inspect whether the model is intact, free of obvious deformation and obvious transverse fracture lines; 3.Record the minimum value that meets the requirement. |
|||||
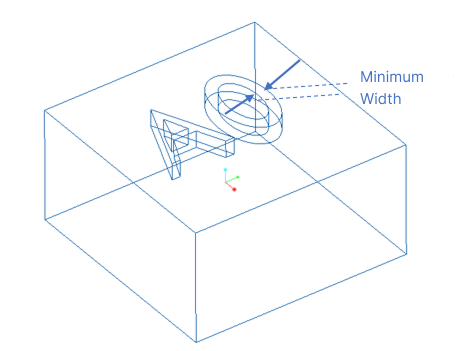
¶ 2.1.4 Width of Raised & Depressed Details
 |
Types: | Raised and depressed |
|---|---|---|
| Depth (mm) | 0.4 | |
| Min. width of depressed details (mm) | 0.22 | |
| Min. width of raised details (mm) | 0.1 | |
| Typical scenarios: | 1.Tagged text; 2.Special texture. |
|
| Testing method by HeyGears: | 1.The test was finished after part removal, washing and curing; 2.Visually inspect whether the details are well-formed, complete, clear and free of obvious defects; 3.Record the minimum value that meets the requirement. |
Note: The minimum detail size cannot be observed due to the material properties.
¶ 2.1.5 Minimum Drain Hole
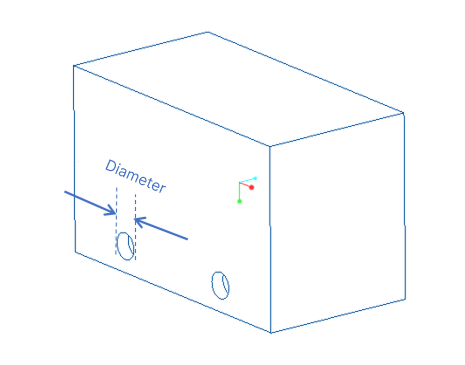 |
Types: | Liquid drain holes of any hollow structures | ||
|---|---|---|---|---|
| Size of the area to add drain holes (mm²) | 10*10 | 20*20 | 30*30 | |
| Min. diameter of drain hole (mm) | 0.6 | 1.0 | 1.0 | |
| Typical Scenarios: | 1.Drain holes in hollowed structures. | |||
| Testing method by HeyGears: | 1.Test after 5 cycles of washing and blowing during the part removal and washing; 2.Visually inspect whether the drain hole can be cleaned thoroughly, without resin leakage and obvious transverse fracture marks on the surface; 3.Record the minimum value that meets the requirement. |
|||
¶ 2.1.6 Minimum Acute Angle
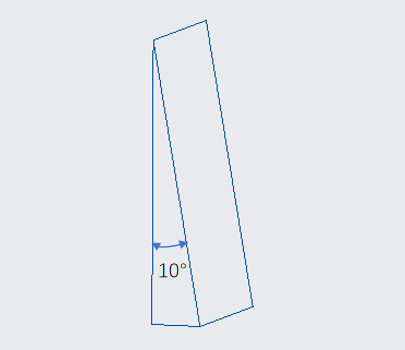 |
Types: | Sharp structures with different wall thicknesses | ||||
|---|---|---|---|---|---|---|
| Wall Thickness (mm) | 1 | 2 | 3 | 4 | 5 | |
| Minimum acute angle (°) | 10 | 10 | 10 | 10 | 10 | |
| Typical Scenarios: | 1. sharp corner structure | |||||
| Testing method by HeyGears: | 1.The test shall be completed within 2 hours after scraping and cleaning ; 2.Visually inspect whether the tip of the model is fully formed, free of obvious deformation and obvious transverse cracks; 3.Record the minimum value that meets the requirement. |
|||||
¶ 2.1.7 Gap
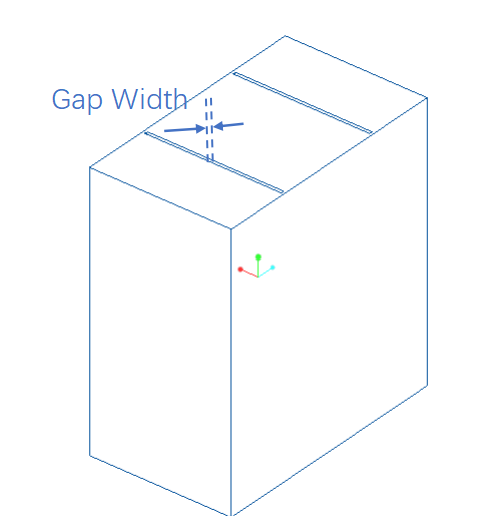 |
Types: | Gaps of curved surface and flat one | ||
|---|---|---|---|---|
| Curved (at different depths) (mm) |
5 | 10 | 15 | |
| Min. gap (mm) | 0.15 | 0.15 | 0.2 | |
| Depth/Height of flat (at different widths) (mm) |
5 | 10 | 15 | |
| Min. gap (mm) | 0.2 | 0.2 | 0.15 | |
| Typical Scenarios: | 1. Integral Structure Model (Gear); 2. Surface details and texture structure; |
|||
| Testing method by HeyGears: | 1.The test shall be completed within 2 hours after scraping and cleaning (without curing); 2.Visually check whether the model (assembly) can be completely separated; 3.Record the minimum value that meets the requirement. |
|||
¶ 2.2 Gap in Connections
| Regular Resin Tank | ||||||
|---|---|---|---|---|---|---|
| Gap in Connections | Types | Fit, tight, loose | ||||
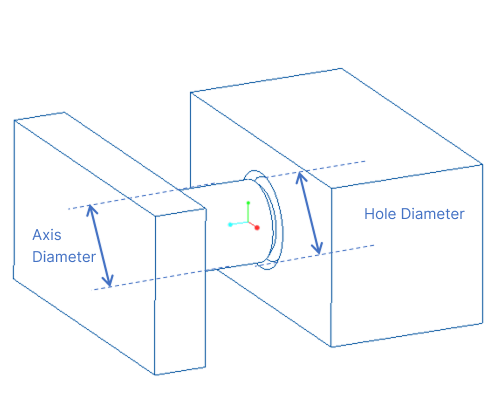 |
Images | Contact shape | Tight (mm) | Fit (mm) | Loose (mm) | |
 |
Square | <0 | 0 | >0 | ||
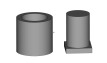 |
Circle | <0 | 0-0.02 | >0.02 | ||
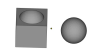 |
Ball | <0 | 0 | >0 | ||
 |
Polygonal | <0.04 | 0.04 | >0.04 | ||
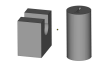 |
C-shaped | <-0.02 | -0.02-0 | >0 | ||
| Testing method by HeyGears: | 1.The test was done after part removal, washing and curing; 2.Column-shaped connection structures were taken out from the sprue; 3.The structures were assembled, from the loosest ones to the tightest ones (the order might differ due to subjective thoughts); 4.Data was recorded according to the assembly results. |
|||||
¶ 2.3 Tolerance
| Printed dimensions and tolerances | 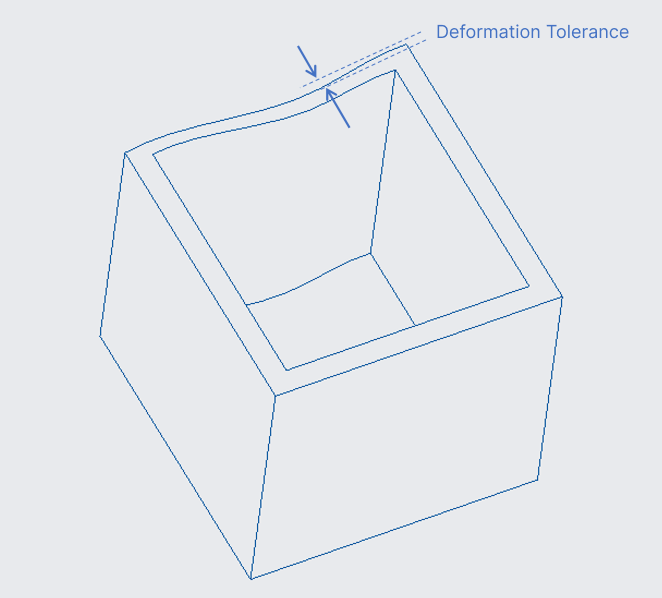 |
Types: | Arbitrary Structure | ||
|---|---|---|---|---|---|
| Max. value among dimensions of a printed object (mm) | 20 | 50 | 100 | ||
| Tolerance | ±0.05 | ±0.1 | ±0.15 | ||
| Testing method by HeyGears: | 1.Thin walls or other special structures were not considered; 2.Measurement was done within 2 hours after part removal, washing and curing; 3.Printing parameters were the same when using Pulsing Release Resin Tank and using regular resin tank. |
||||
¶ 3. Process and Configuration
¶ 3.1 Support Parameters
| Support Parameters (printing with regular resin tank) | ||
|---|---|---|
| Support areas | Parameter items | Default value |
| Support body | Lift height (mm) | 5 |
| Trunk diameter (mm) | 0.65 | |
| Overhang angle (°) | 40 | |
| Support density | Anchor distance (mm) | 2.5 |
| Border anchor distance (mm) | 2.5 | |
| Connection | Top diameter (mm) | 0.2 |
| Connection length (mm) | 1.5 | |
| Contact | Contact shape | Sphere |
| Diameter (mm) | 0.26 | |
| Embedded depth (mm) | 0.16 | |
¶ 3.2 Parameters for Slicing in Other Softwares (Not Recommended)
| Chitubox (printing with pulsing release resin tank) | ||
|---|---|---|
| Support areas | Parameter items | Default values |
| Basic config. | Z-axis lift height (mm) | 5 |
| Raft shape | Cross Grid | |
| Raft thickness (mm) | 1.0 | |
| Overhang angle (°) | 45 | |
| Support density | Anchor distance (mm) | 2 |
| Connection | Top diameter (mm) | 0.25 |
| Connection length (mm) | 1.5 | |
| Trunk Diameter (mm) | 0.75 | |
| Contact | Contact shape | Sphere |
| Diameter (mm) | 0.35 | |
| Embedded depth (mm) | 0.22 | |
| Voxeldance Tango (printing with pulsing release resin tank) | ||
|---|---|---|
| Support areas | Parameter items | Default values |
| Basic config. | Z-axis lift height (mm) | 5 |
| Raft shape | Convex Hull | |
| Raft thickness (mm) | 1.0 | |
| Overhang angle (°) | 45 | |
| Support density | Anchor distance (mm) | 2.0 |
| Connection | Top diameter (mm) | 0.25 |
| Connection length (mm) | 1.5 | |
| Trunk Diameter (mm) | 0.75 | |
| Contact | Contact shape | Sphere |
| Diameter (mm) | 0.35 | |
| Embedded depth (mm) | 0.22 | |
Note: It's advised to use a “safer” parameter configurations and have some tests first, as HeyGears printers cannot guarantee a high printing success rate for models sliced with a third-party slicer software which does not enjoy HeyGears print strategies.
¶ 3.3 Washing
| Material Name | Cleaning devices | Recommended process | ||
|---|---|---|---|---|
| UltraPrint-Production PAP11 | HeyGears UltraCraft Wash | Washing settings | Cleaning solution | Washing time |
| Rotation speed 180r/min | 99% IPA | 2min rough wash + 2min fine wash | ||
Note 1: Rough wash refers to the behavior of washing off most liquid resin on the printed object with used IPA (used for more than 3 batches of prints); Fine wash refers to the behavior of well cleaning details of the printed object with clean alcohol (used for less than 3 batches of prints).
Note 2: Washing finished, it's advised to blow dry the print with compressed air or bake it dry in a baker at 50℃ for 10min. Please AVOID submerging the print in alcohol for a long time (over 10 min in total), which might impact the resin's performance and the print's dimension.
¶ 3.4 Curing
| Material | Curing modes | Recommended process | ||
|---|---|---|---|---|
| UltraPrint-Production PAP11 Resin | Fast curing | Heat or not | Curing media | Setting |
| No | Air | 30min | ||
Note: Cure the print with HeyGears UltraCraft Cure. It’s advised to send the curing job from HeyGears Blueprint Studio to the device first and then start curing on the device, as the job sent from Blueprint Studio would enjoy a more advanced curing process and have an even better curing result.
¶ 4. Operation Steps
¶ 4.1 Slicing in Blueprint Studio
| Step 1: Enter Slicer in Blueprint Studio. | Step 2: Choose the corresponding settings. |
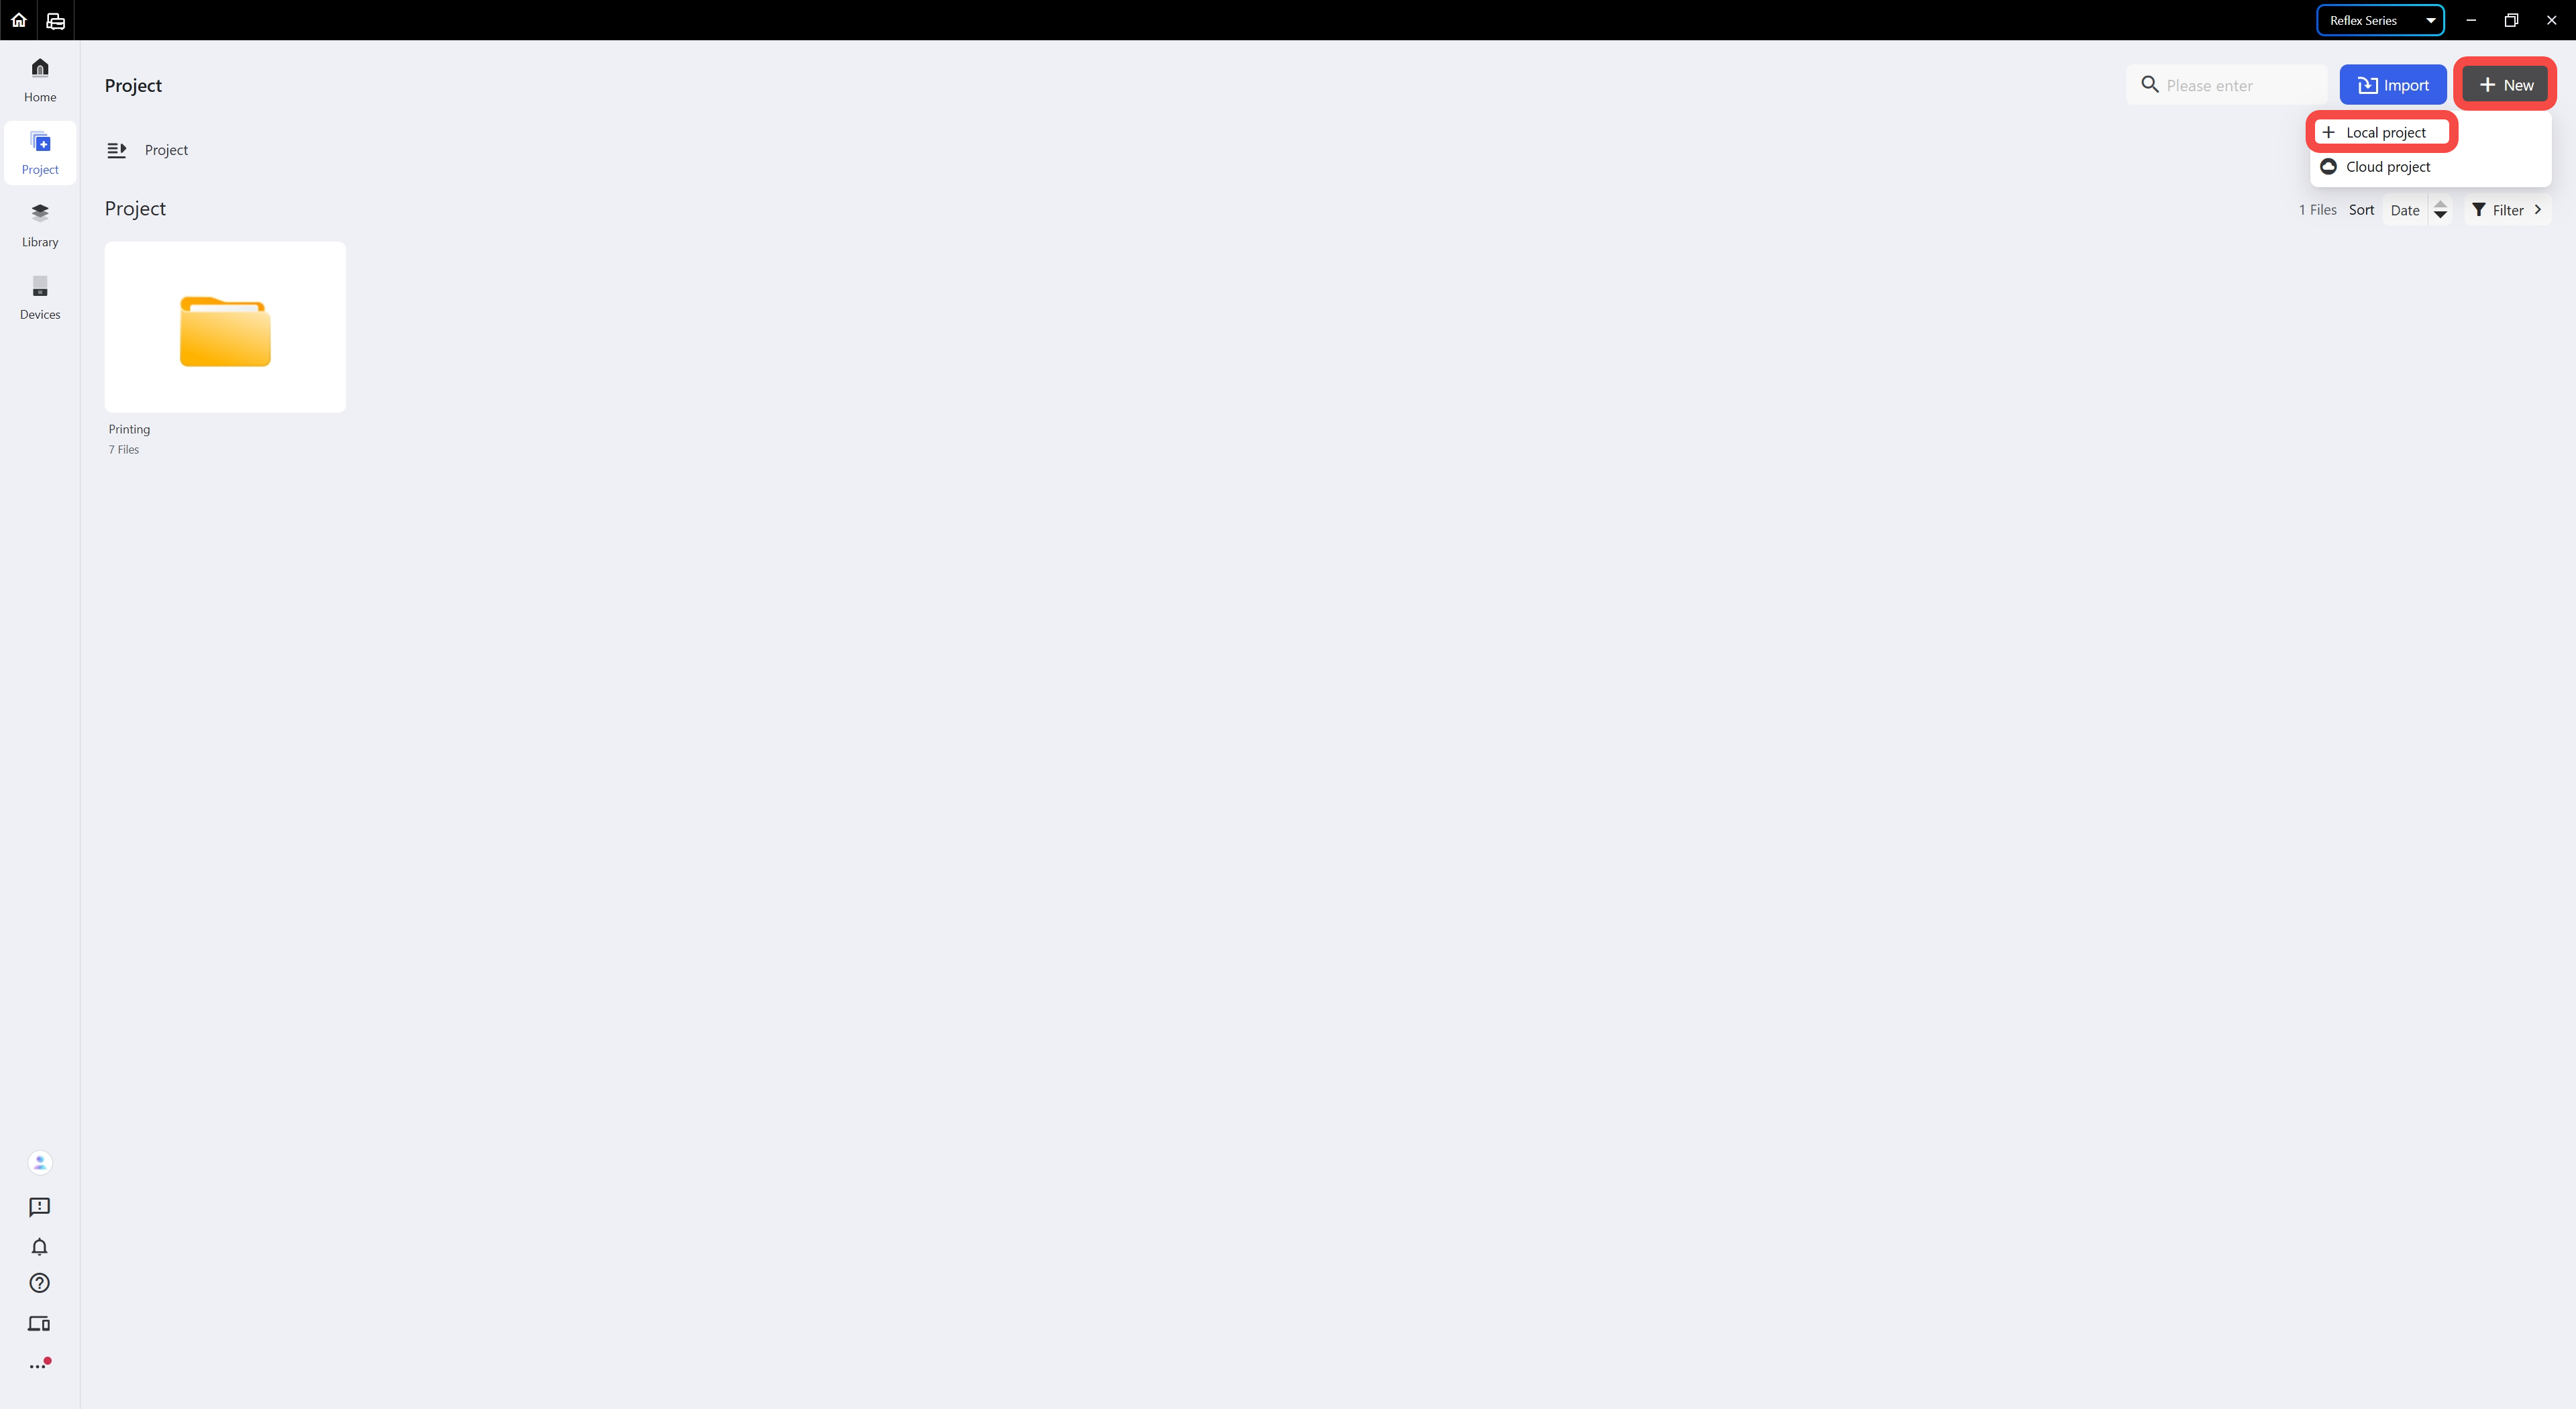 |
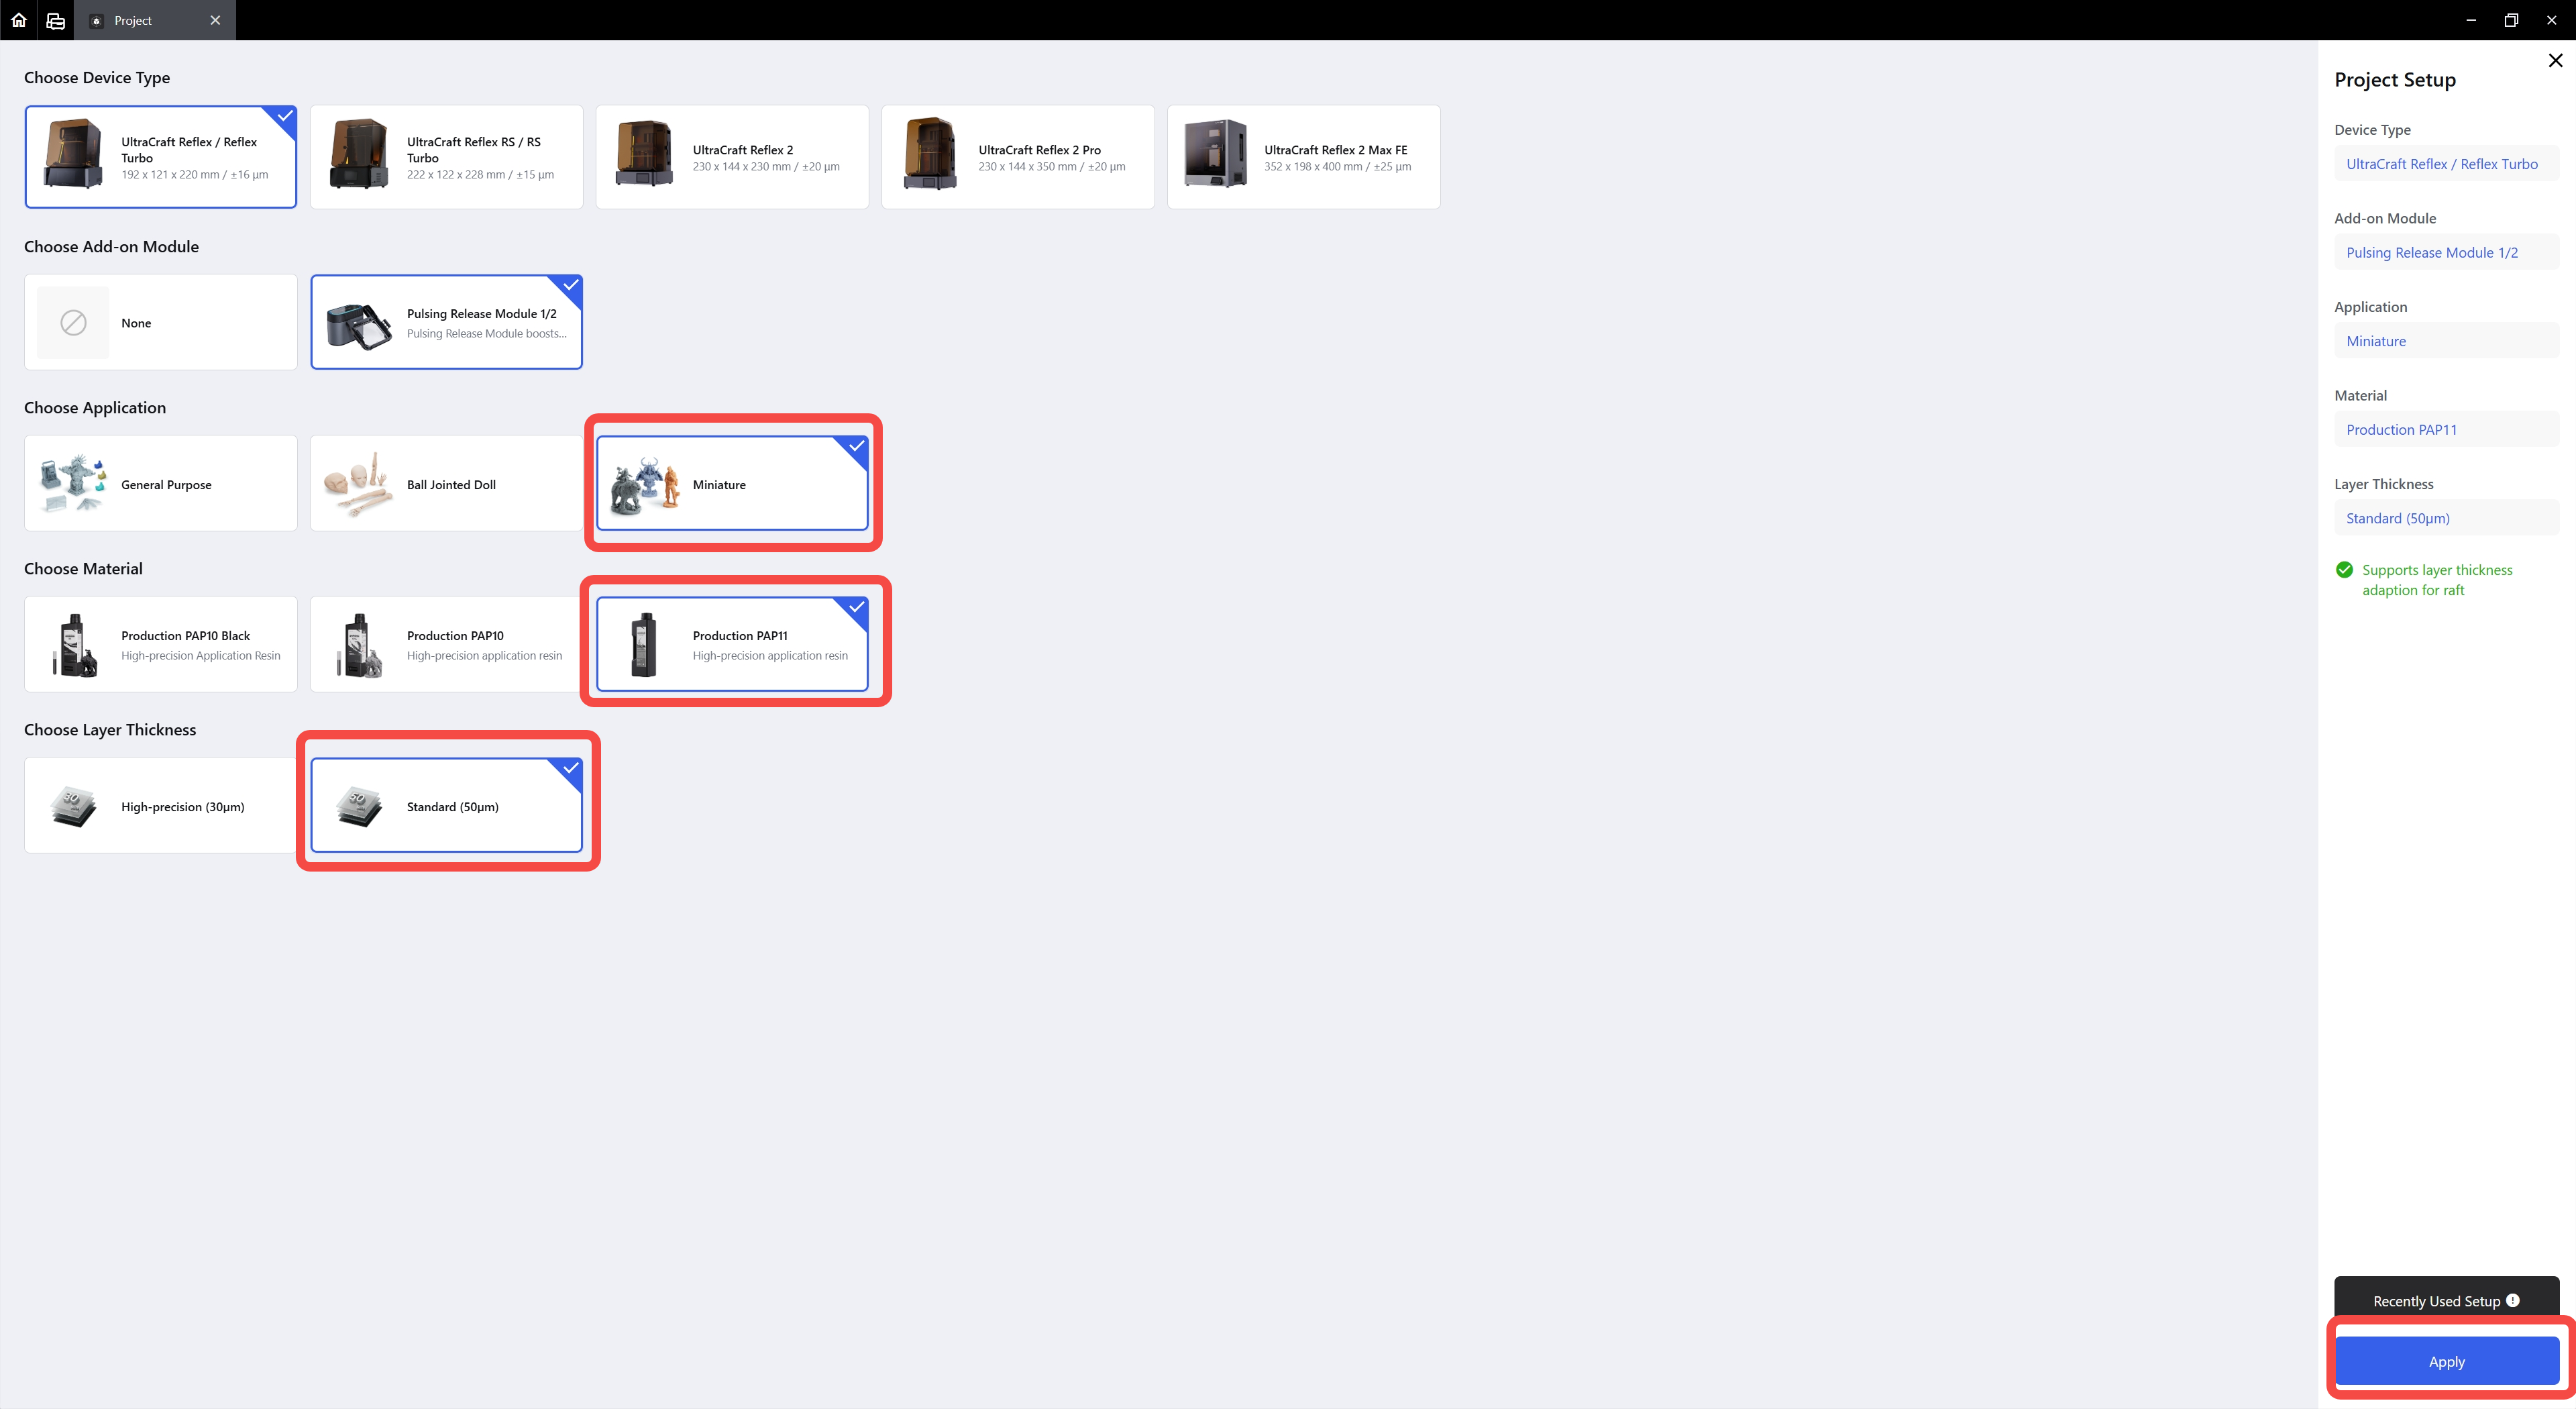 |
| Step 3: Click the Import button or drag the model into the Studio. | Step 4: In the Prepare page, use Rotate, Scale, Hollow, Hole, Label, Duplicate and other tools based on your needs. |
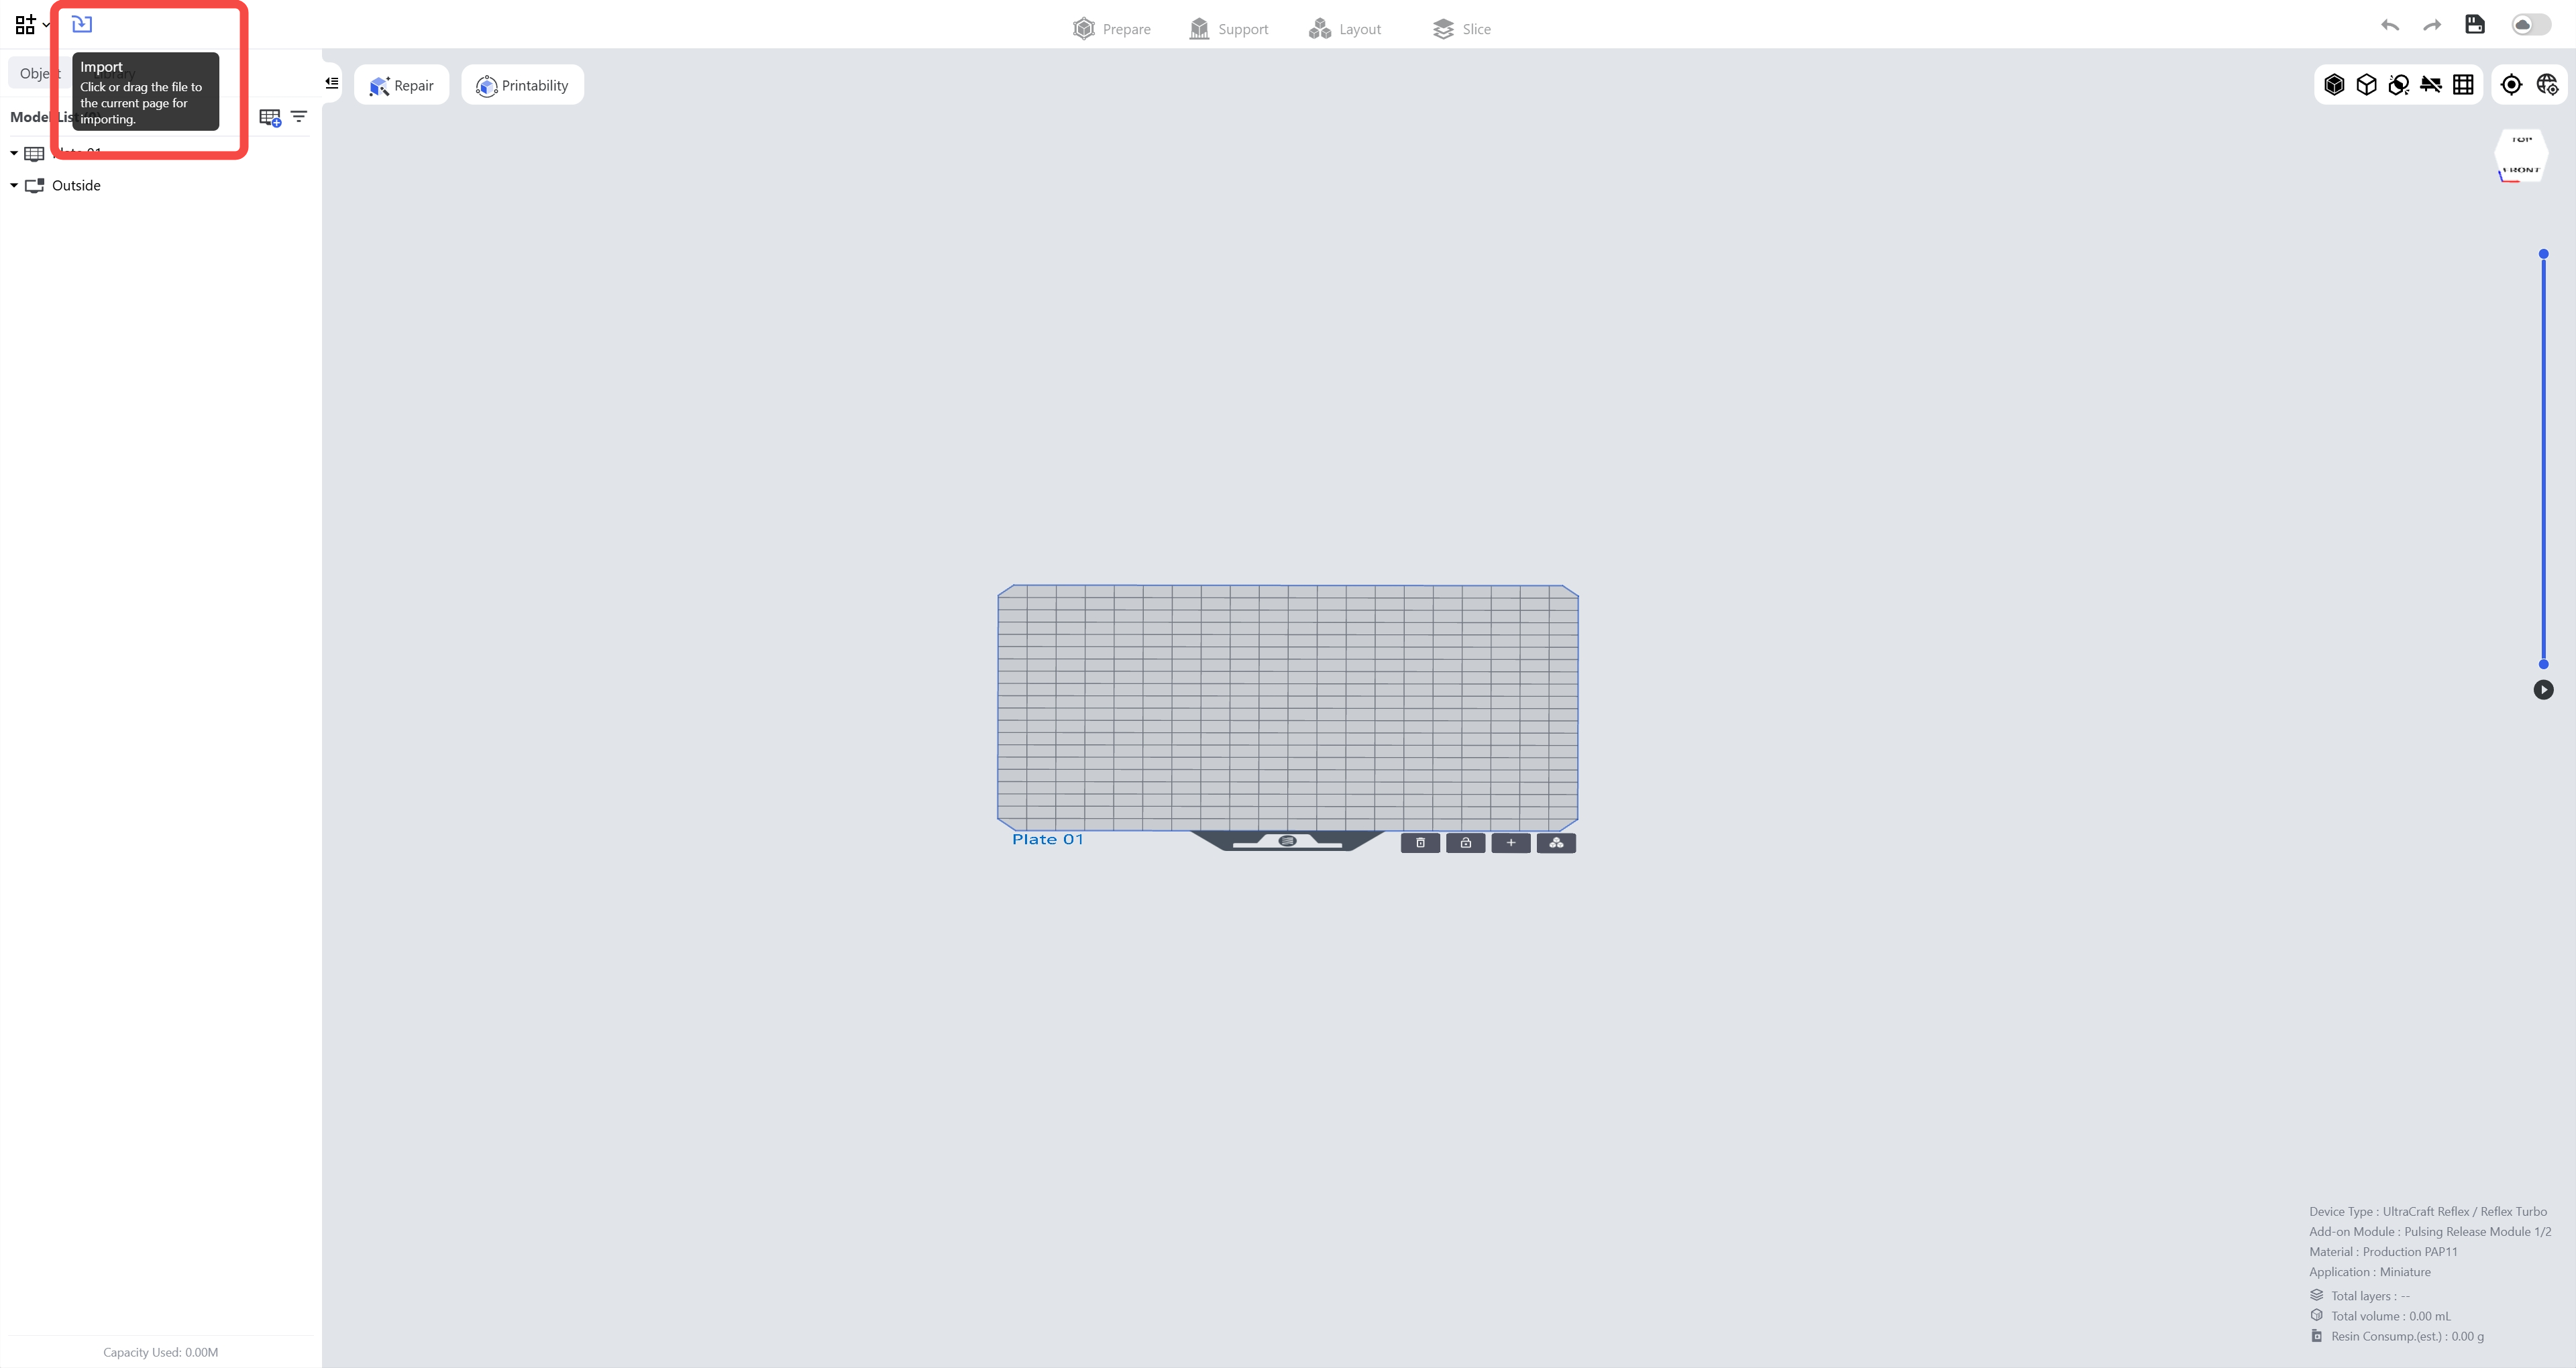 |
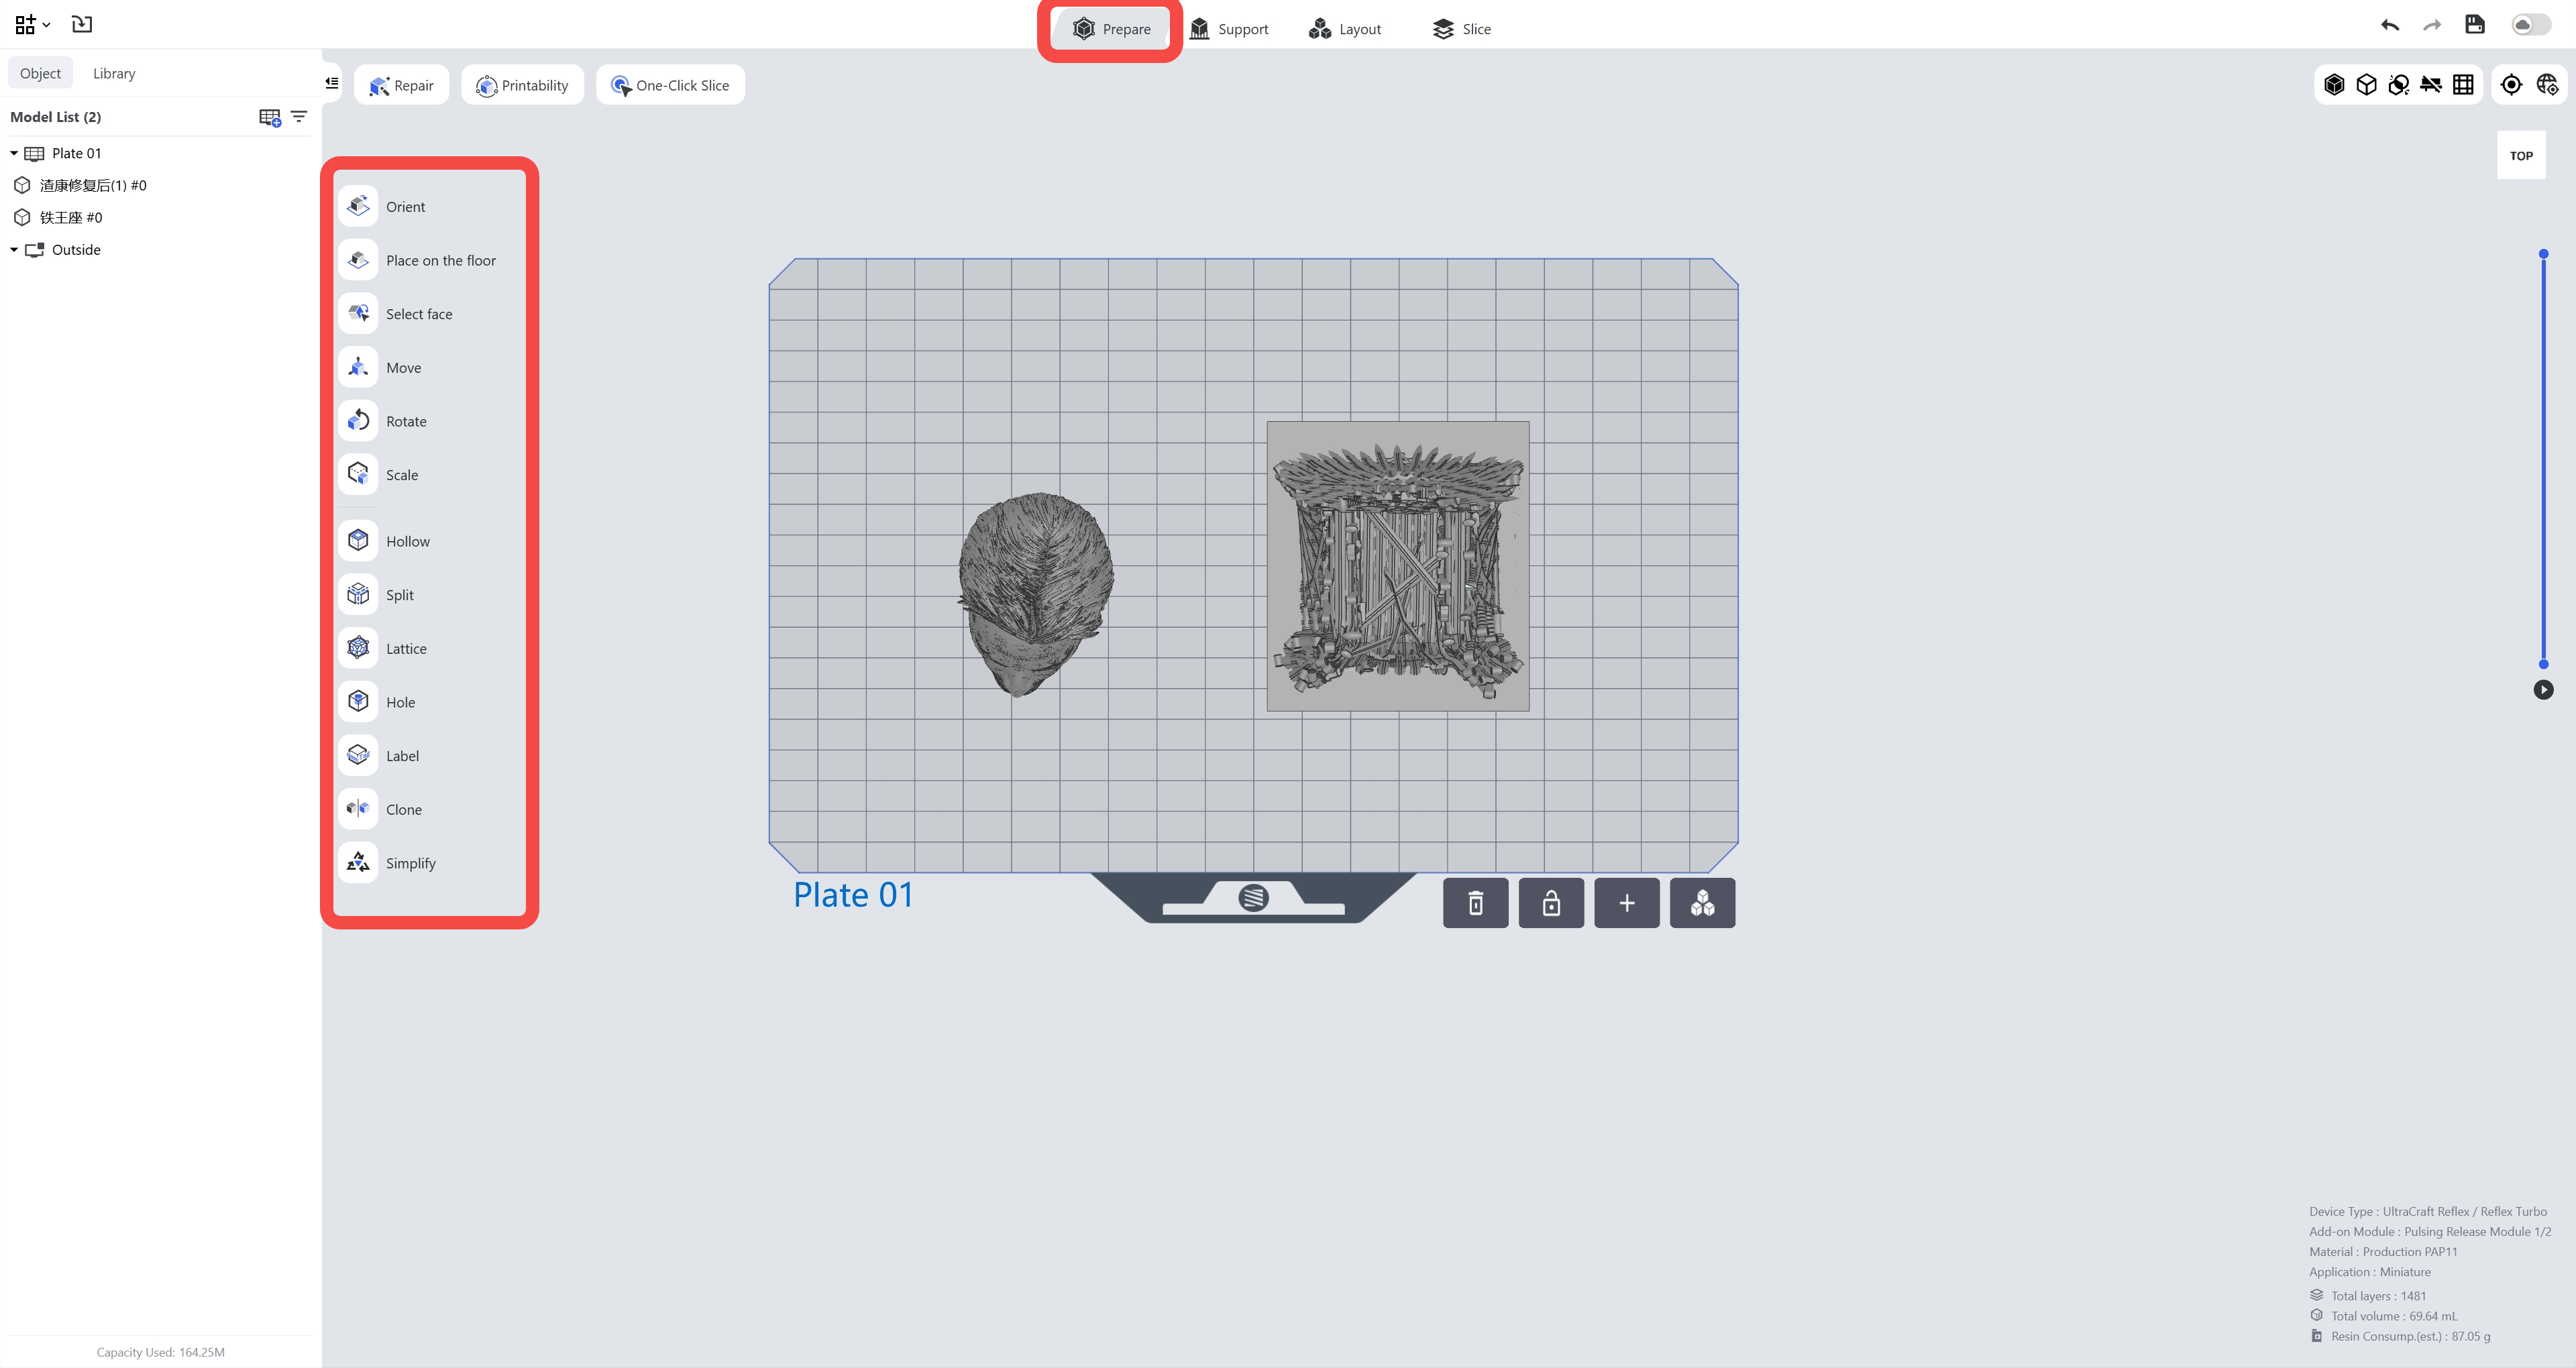 |
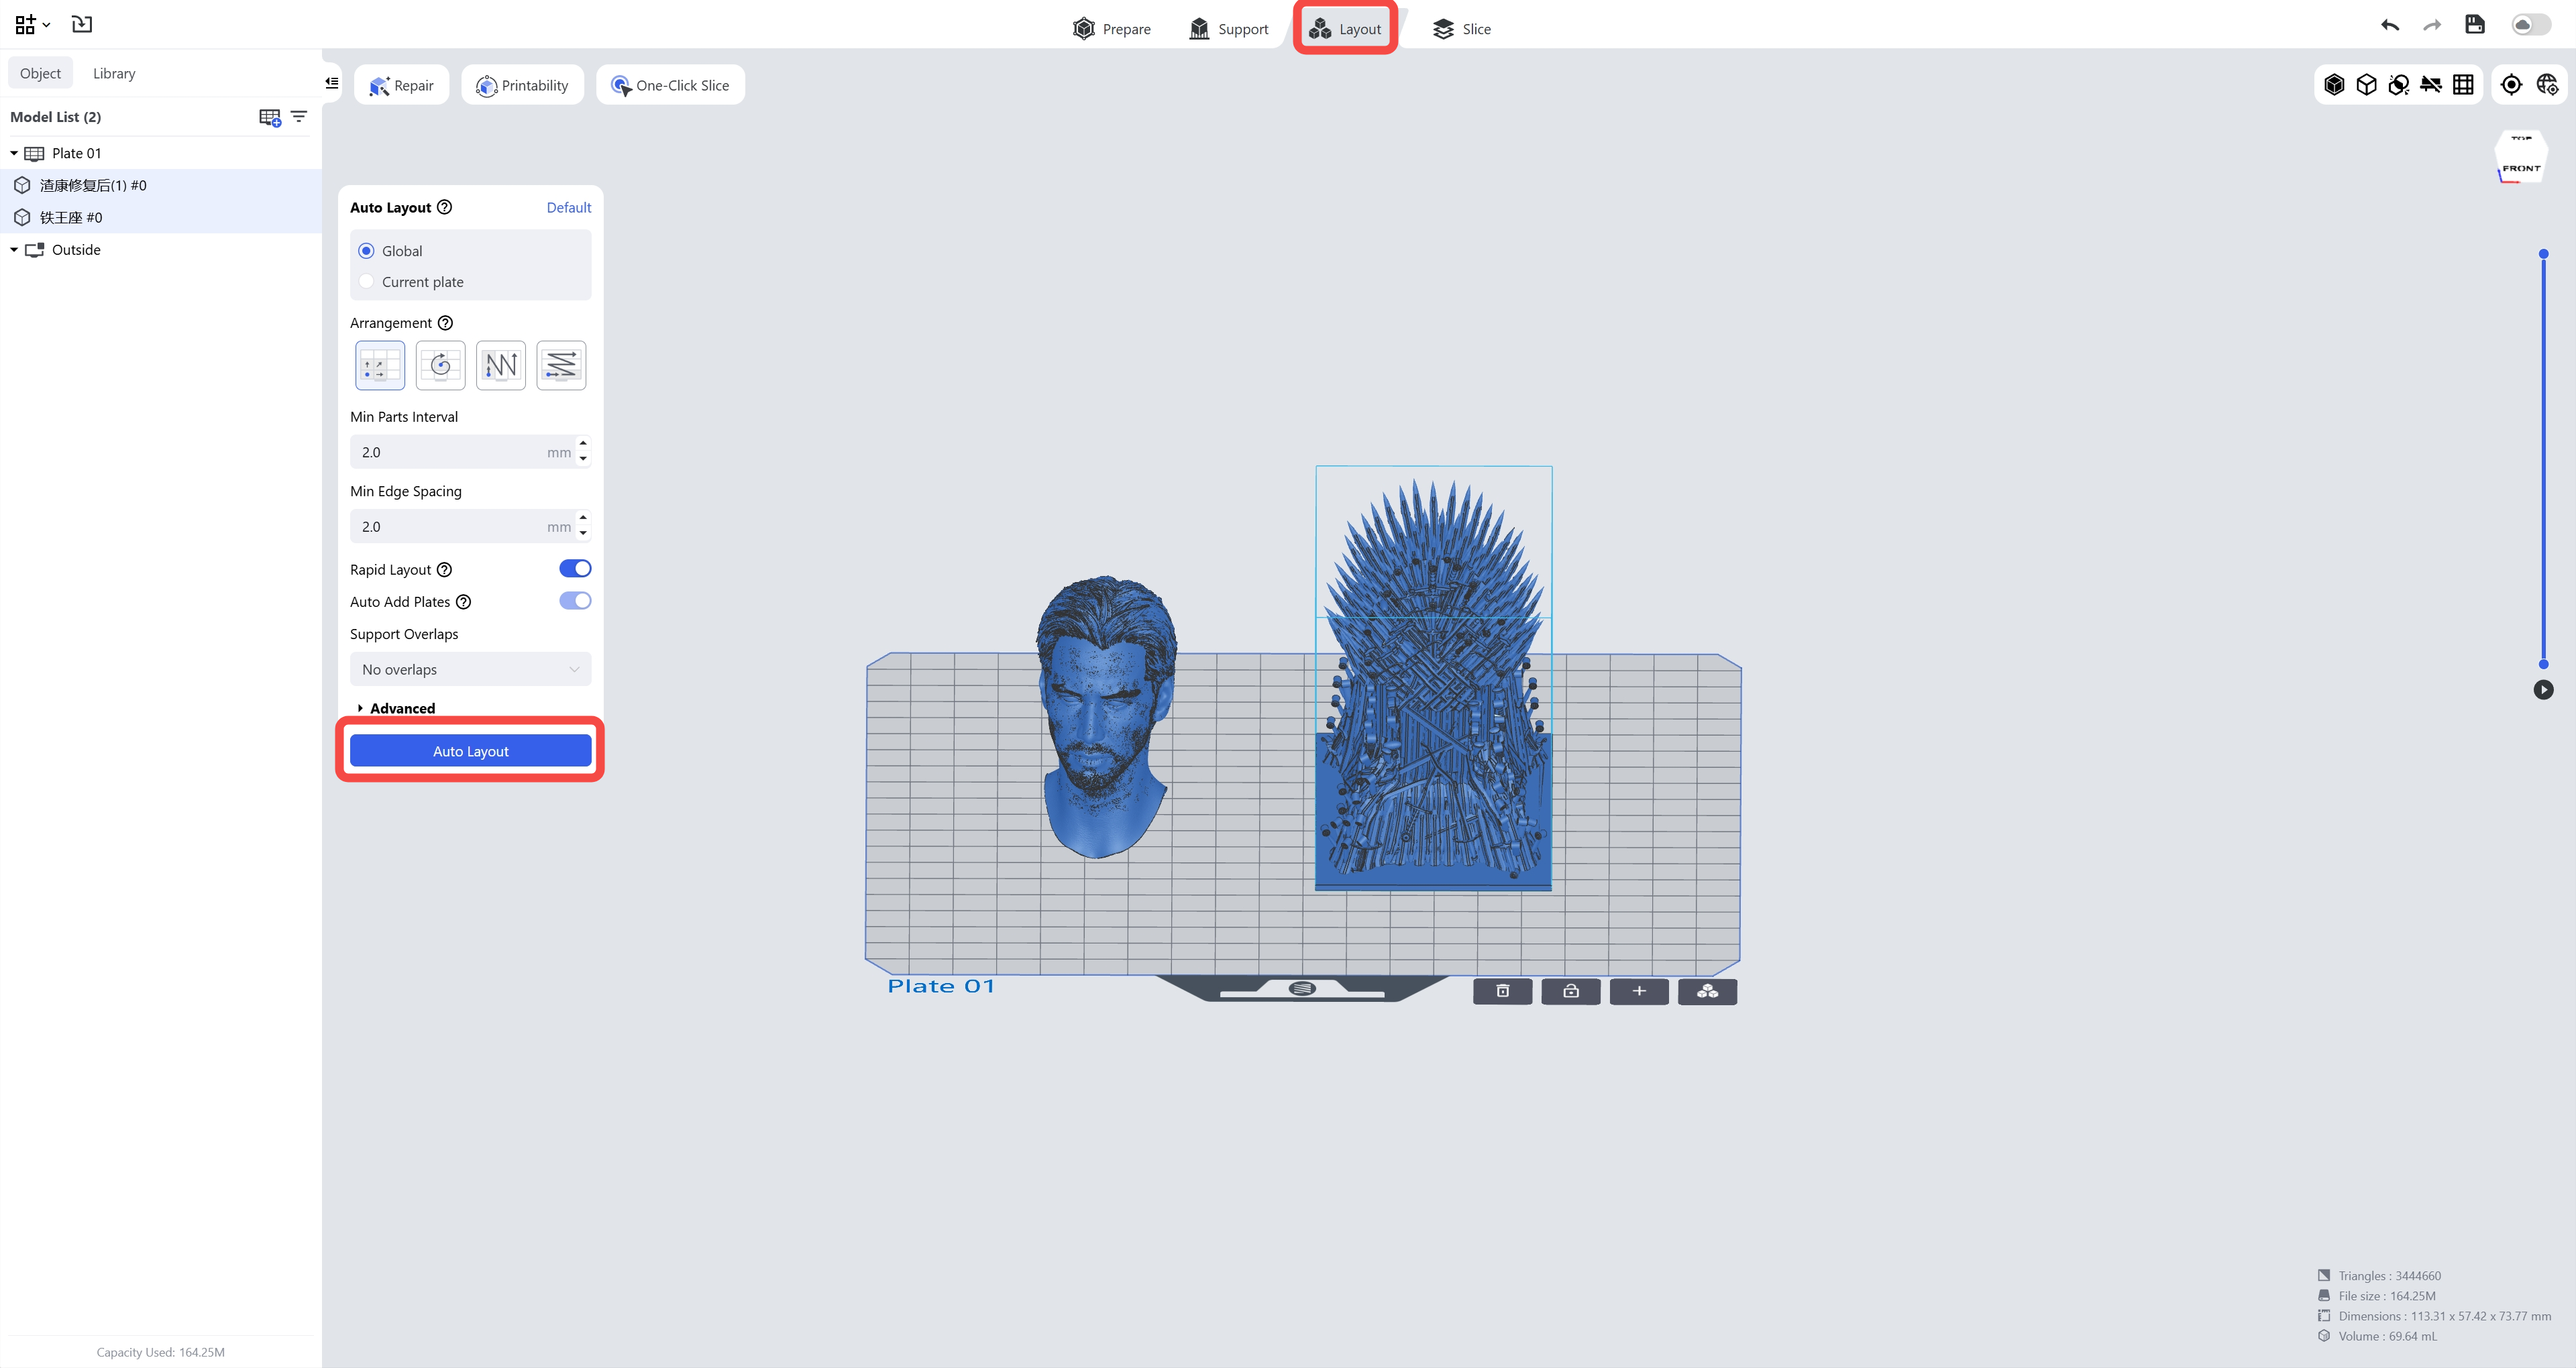
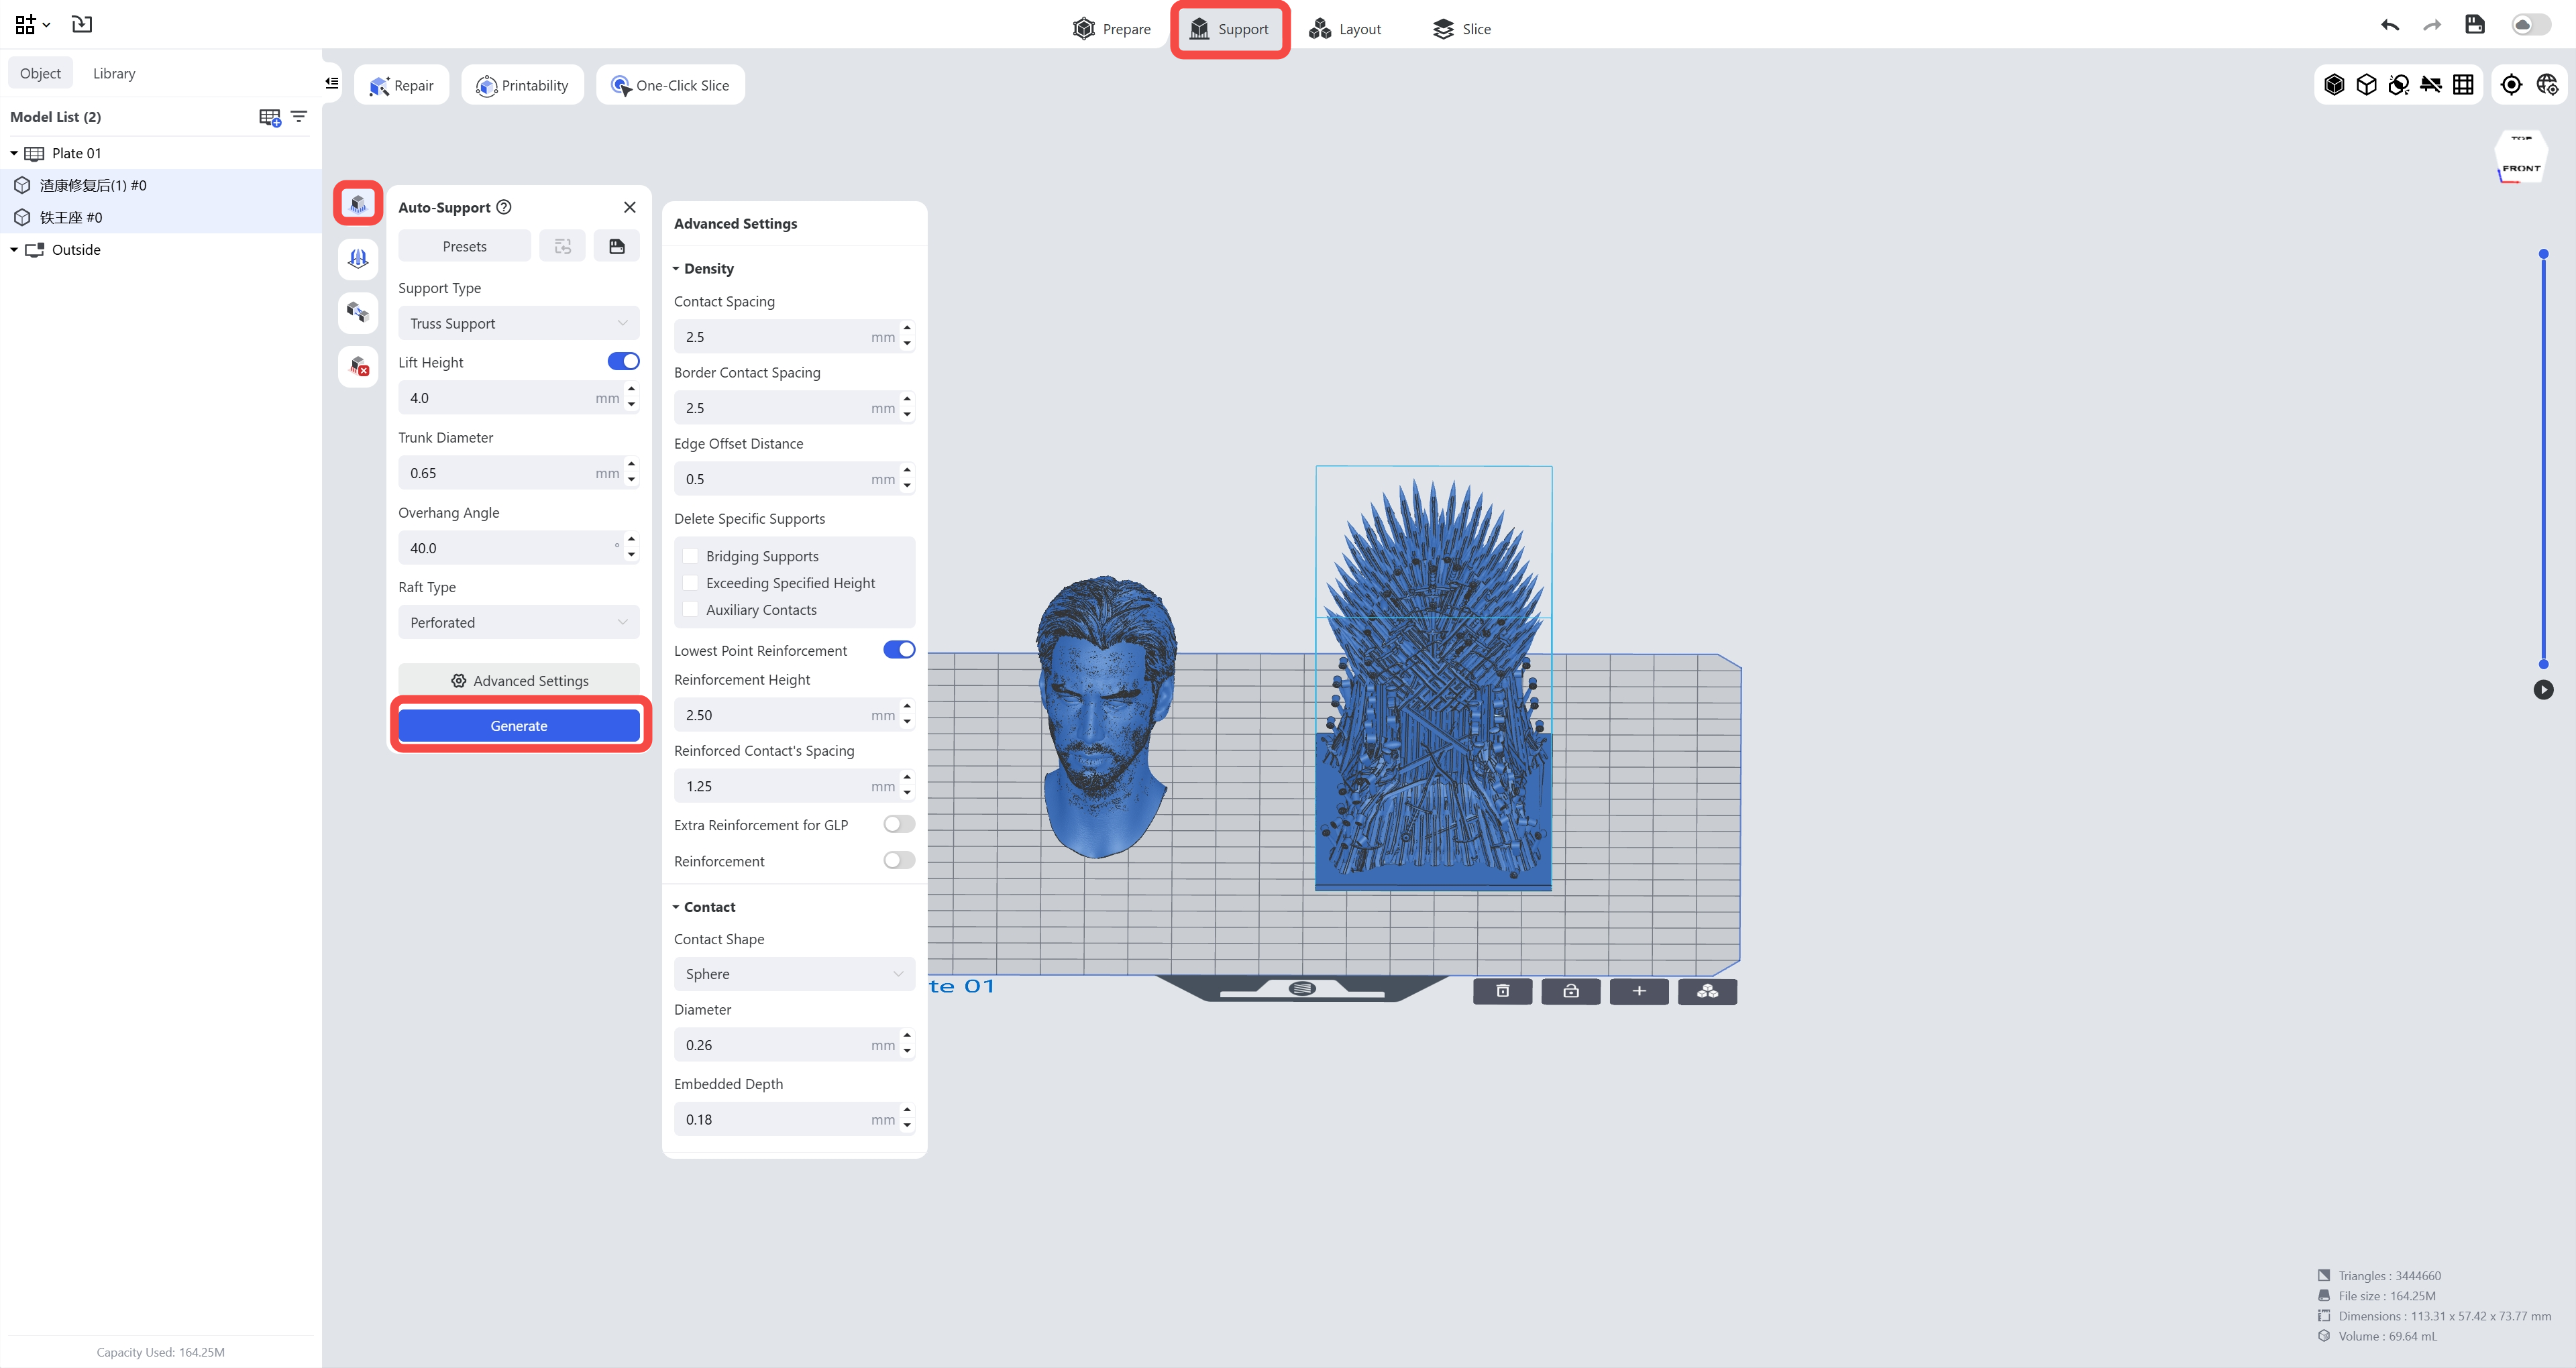
| Step 5: Run Auto-layout or do it manually by yourself. | Step 6: Run Auto-support, choose Truss support and generate support. |
 |
 |
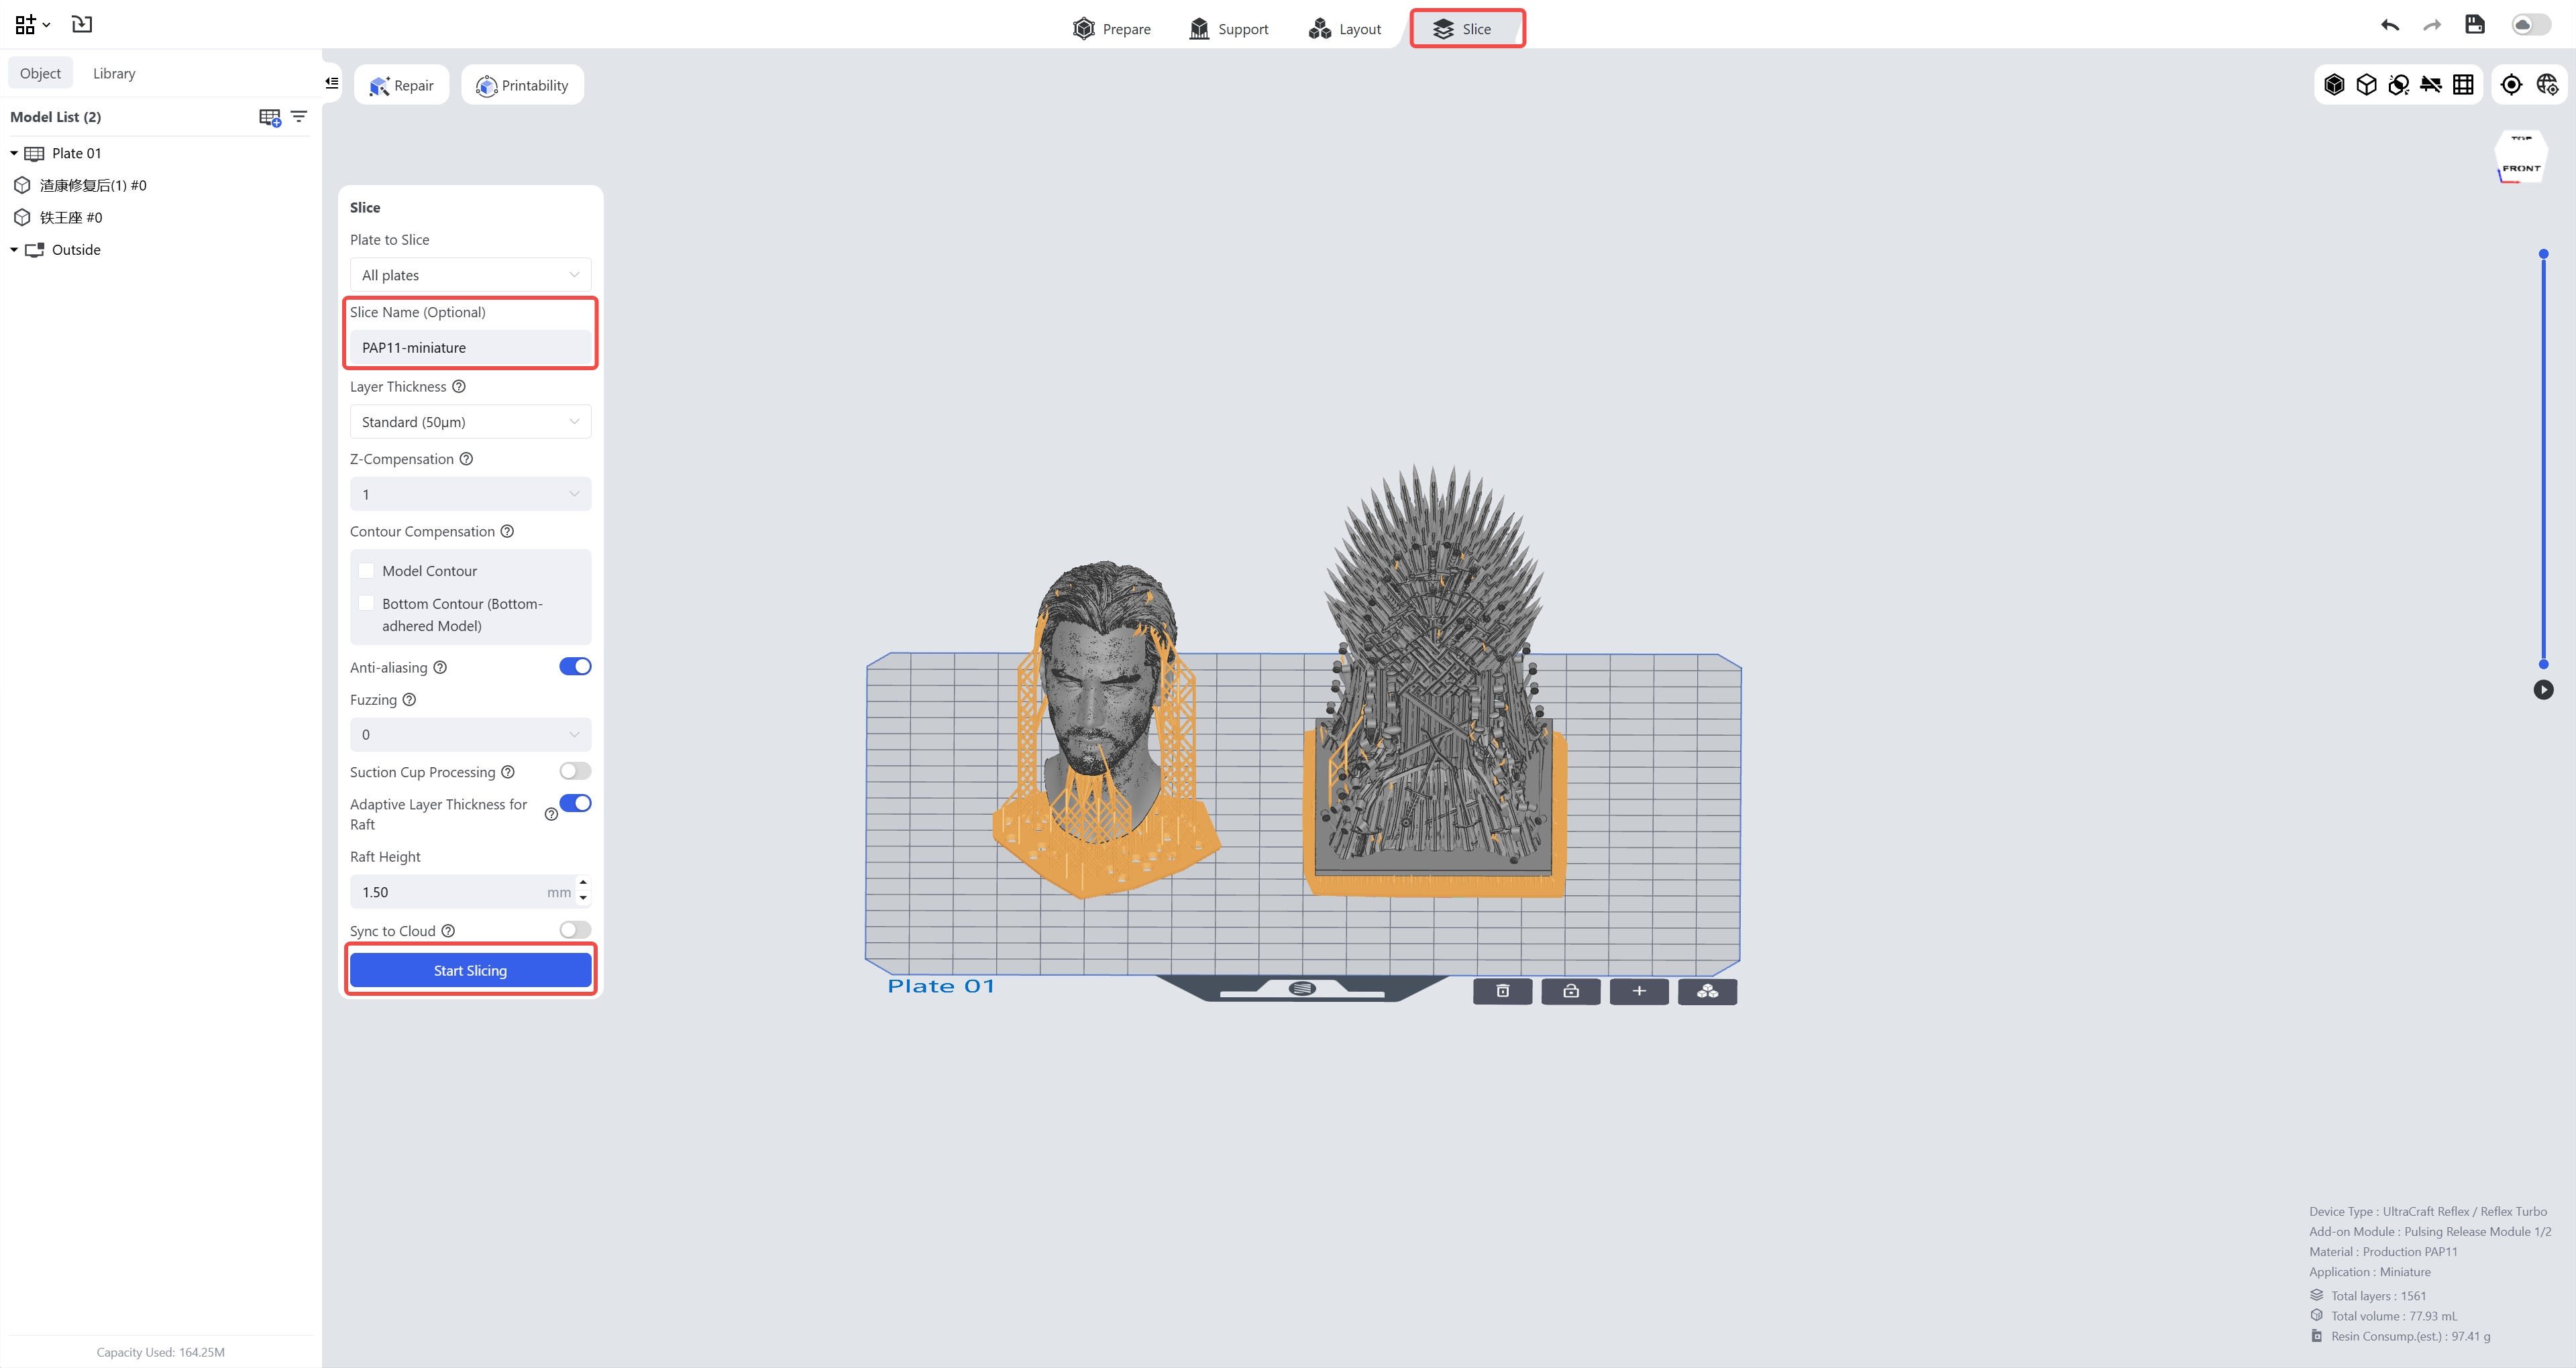
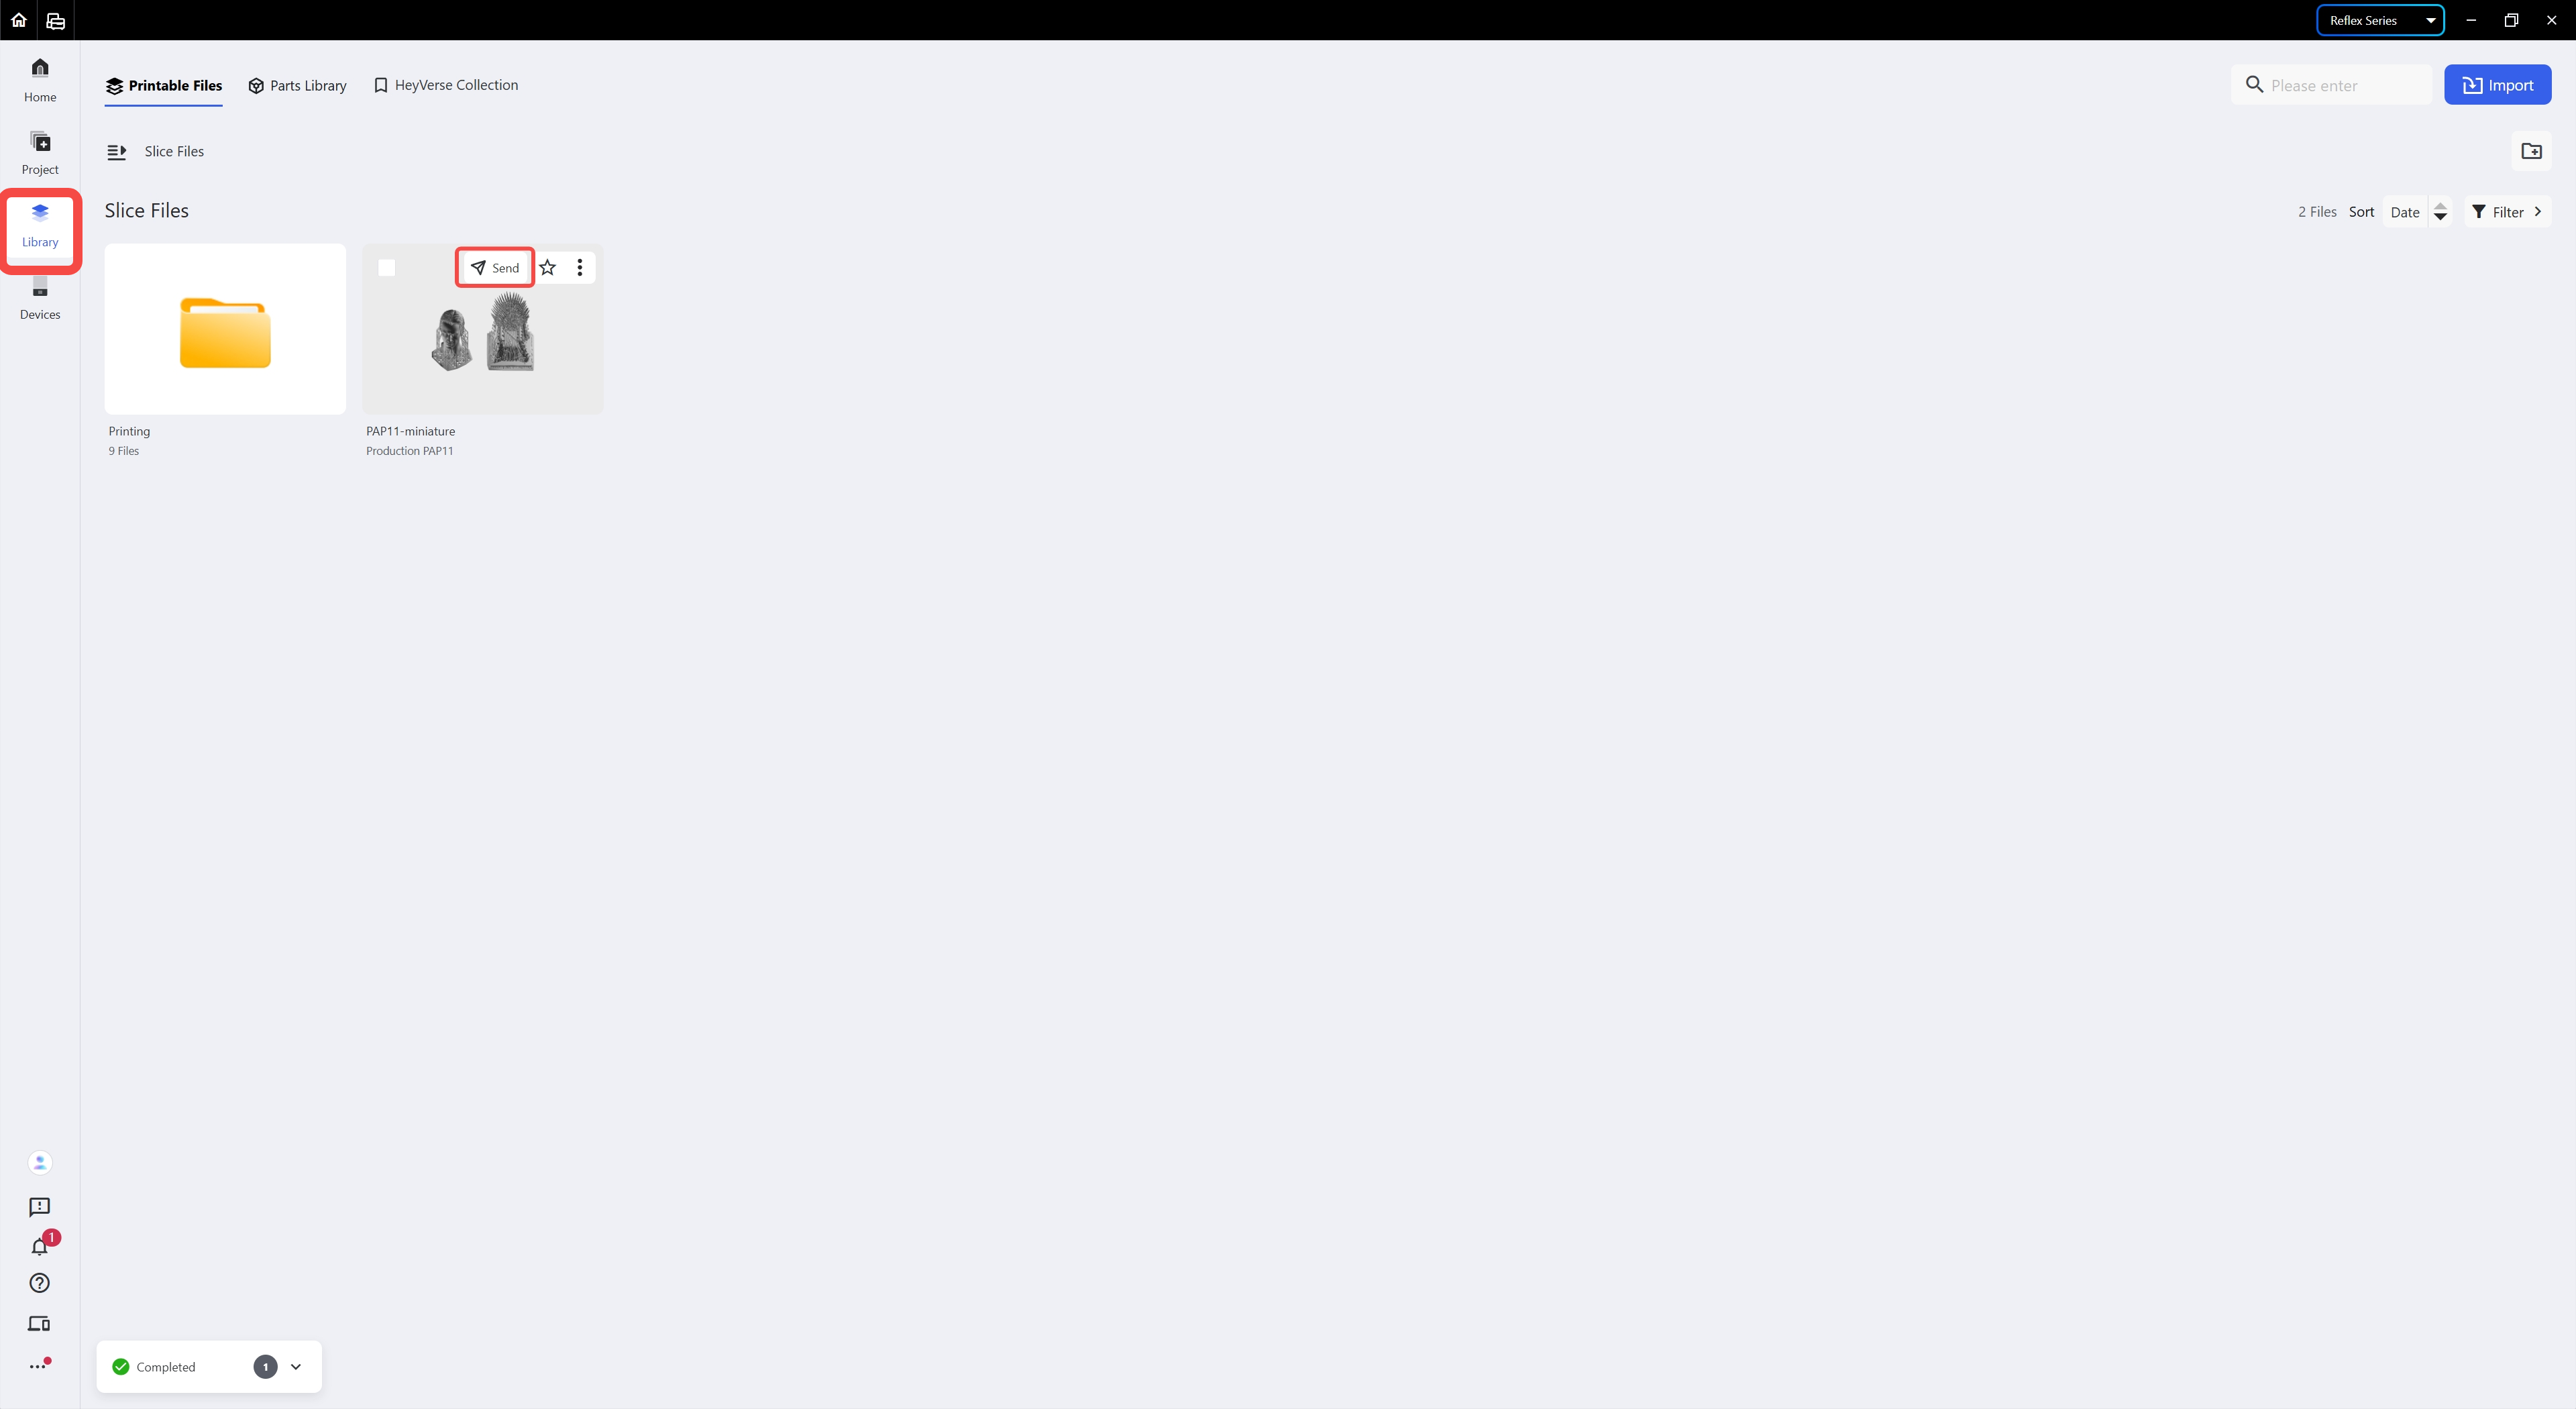
| Step 7: Run Slicing. You may edit the slice file name if needed. | Step 8: After slicing is done, you may check slice files and send print jobs at the [Library] page. |
 |
 |
¶ 4.2 Printing and Post-processing
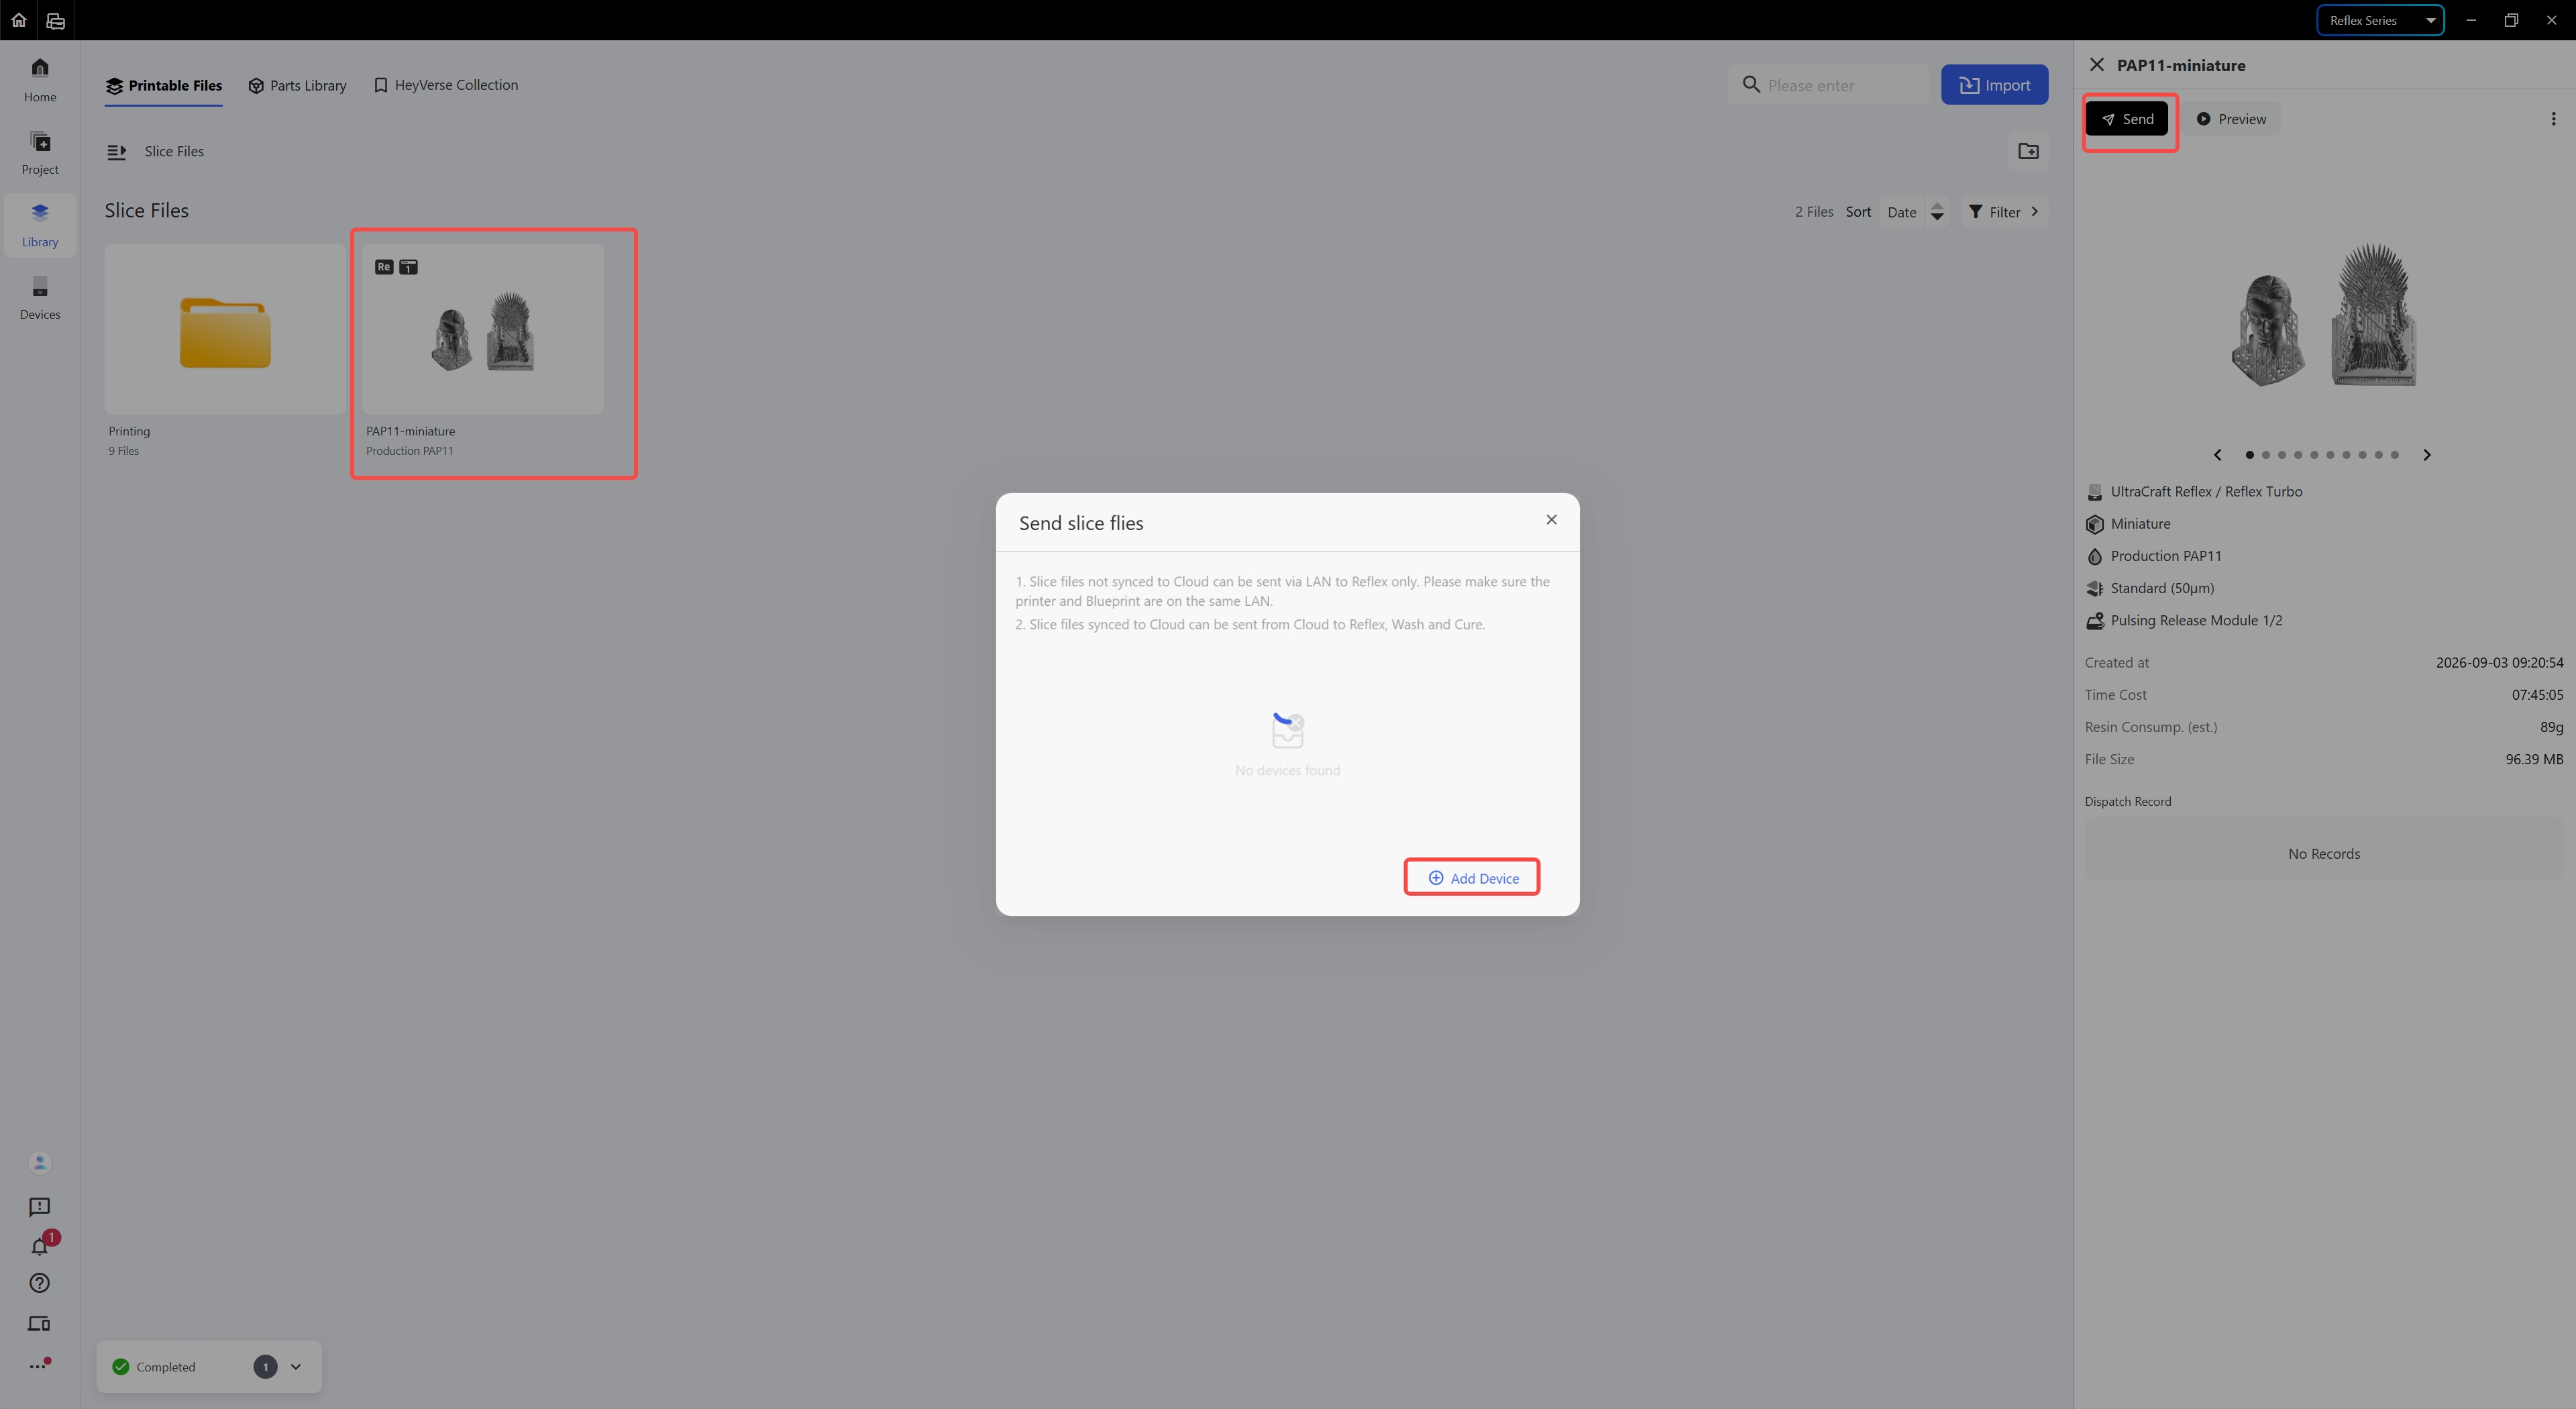
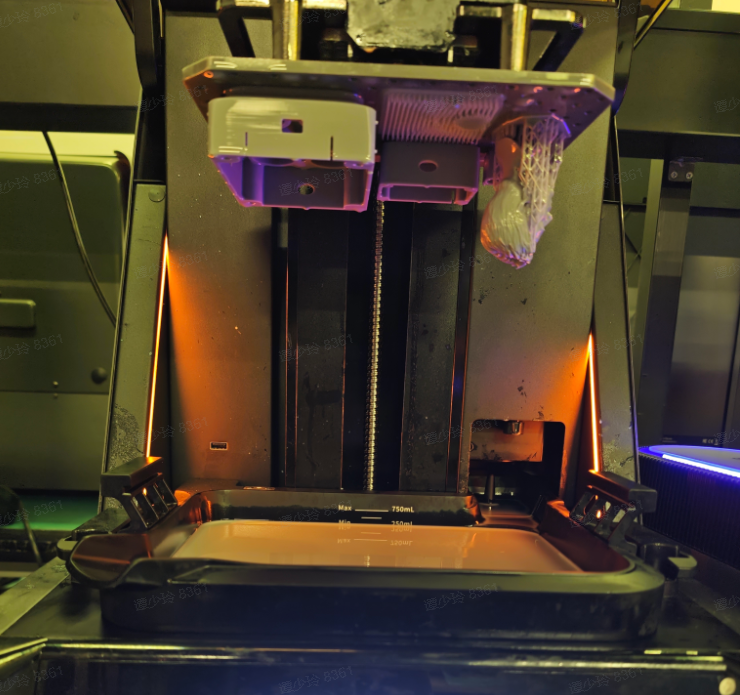
| Step 1: Send the slice files to your printer on Blueprint platform, or import them to your printer via USB flash drive. | Step 2: Printing. |
 |
 |
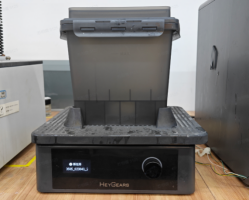
| Step 3: Washing. Set the washing settings on UltraCraft Wash or in Blueprint platform when sending the wash job. |
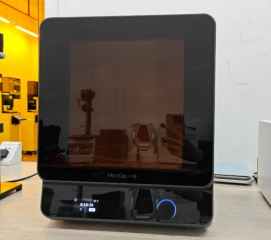
Step 4: Curing. Set the curing settings on UltraCraft Cure or on Blueprint platform when sending the curing job. |
 |
 |
¶ 5. Finishing
¶ 5.1 Removing Supports
-
Supports should be removed before curing. For most models, removing by hand will be fine (twisting off the support structures).
-
For models with thin walls or with supports at corners/gaps, it's better to remove with tools (pliers or art knife, tweezers).
¶ 5.2 Sanding and Spray-Painting
Grind off some support remains on printed models to make their surface smooth.
- 1. Grinding by hand
Use wet sandpaper (from 400 mesh to 1200 mesh) to grind off layer lines and support remains. It's advised to use sandpaper that is 200 mesh finer every time, and grind off scratches made by previous sandpaper before switching to finer sandpaper. After grinding with 1200 mesh sandpaper, the surface of the print part will look fine and matte.
- 2. Washing
Wash off the dust from grinding with water first. Wipe off the dust and fingerprints until clean with microfiber cloth and IPA/95% alcohol.
- 3. Spraying
Depending on requirements, UV varnish can be applied via spraying or brushing. UV varnish requires curing under broad-spectrum UV light, and some UV coatings may cause 3D-printed parts to become brittle, so sample testing is recommended before use.
¶ 5.3 Final Product
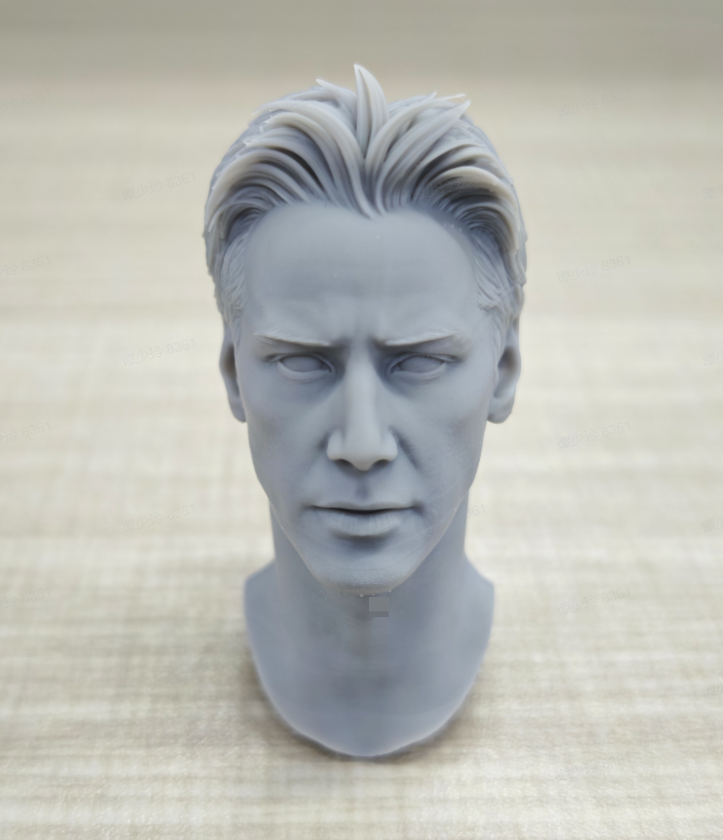 |
| After support removal |
¶ 6. Notes
¶ 6.1 Cautions and Tips
- Please wear personal protective equipment, including gloves and goggles, during processing.
- Before the resin is cured, avoid direct contact with the liquid resin or the print parts to prevent irritation to the eyes or skin (which may cause sensitization).
- If it gets into eyes, rinse immediately with plenty of clean water and seek medical advice.
- If it gets onto the skin, rinse immediately with plenty of water and wash thoroughly with soap.
- It should only be used after training by qualified personnel.
- After each use, always tightly recap the resin bottle immediately and keep the bottle sealed.
- Before use, please shake the resin well. It is recommended to stir the resin in the resin tank before printing, and ensure that there is no obvious sedimentation of the color powder.
- After pouring the resin into the resin tank, keep it away from light. If not planning to print for 3 days, filter the resin and pour it back into the resin bottle; do not leave the resin in the material tray for more than 7 days to avoid print failure caused by resin deterioration due to water absorption.
¶ 6.2 Storage and Transportation
-
The PAP11 should be stored indoors in a well-ventilated area between 20℃ and 28℃, away from corrosive gases, high temperatures, moisture, and direct sunlight.
-
It should be transported in an environment with a temperature between 0℃ and 45℃, protected from heavy pressure, direct sunlight, and exposure to rain and snow.
-
Valid for 24 months.
¶ 6.3 Disposal
It is recommended to refer to the MSDS for exact information. Do not discharge liquid resin directly into the environment; please cure it completely into a solid under sunlight and then dispose of it in accordance with local regulations.