¶ Device Installation
¶ 1.Unpacking
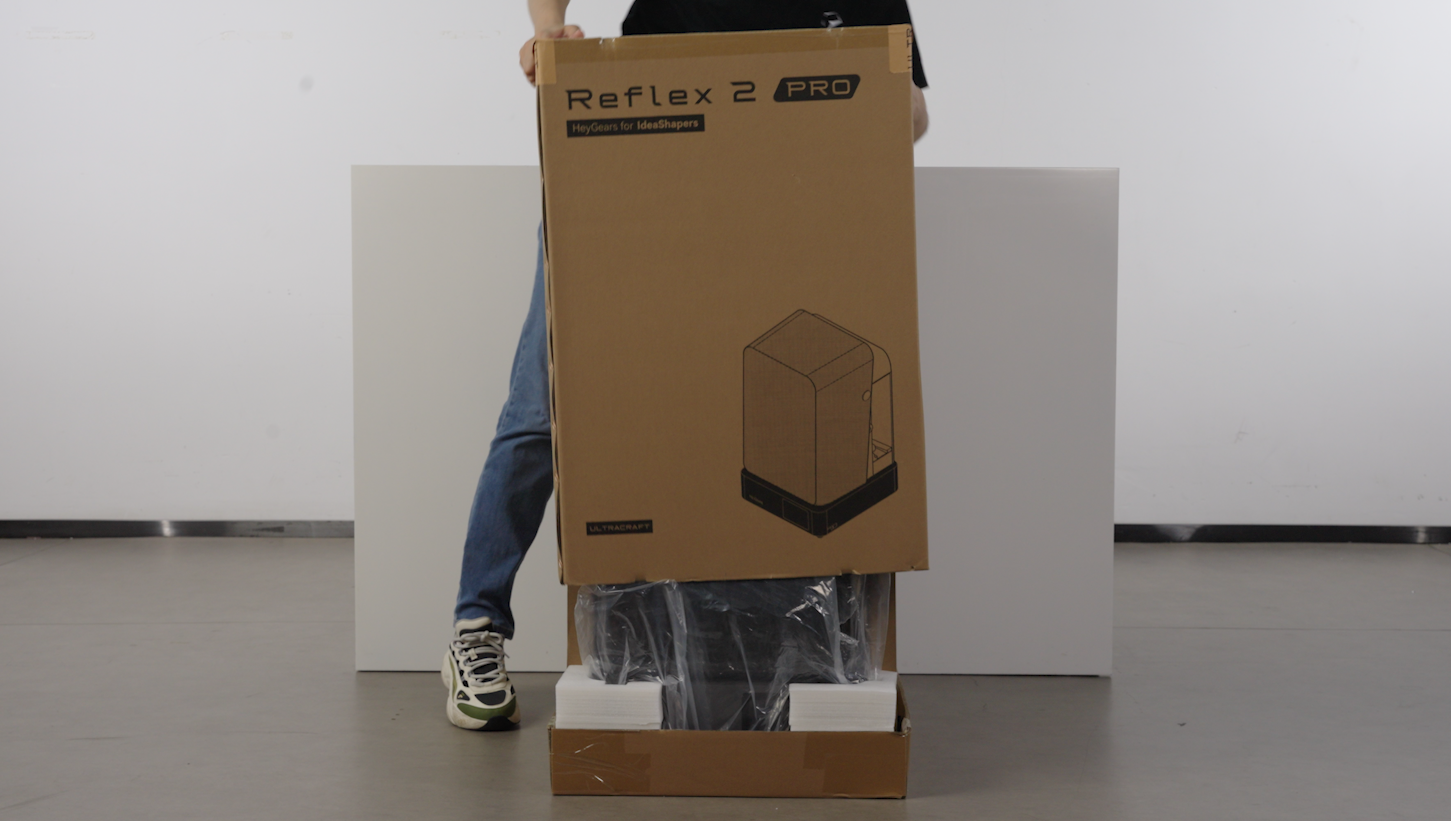
- Cut the packing straps of the outer packaging and remove the foam from inside the box.
 |
 |
-
Two or more than two people place the device on a flat table.
-
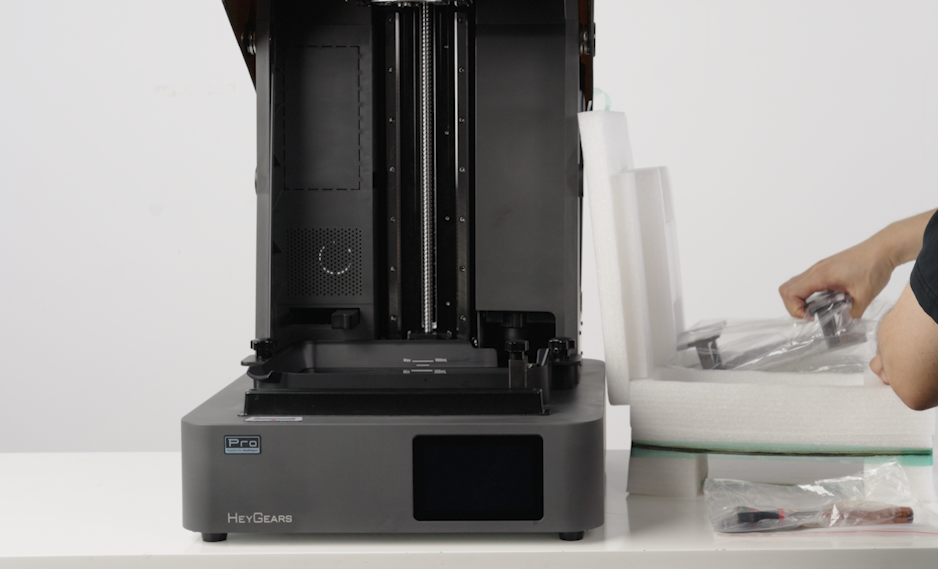
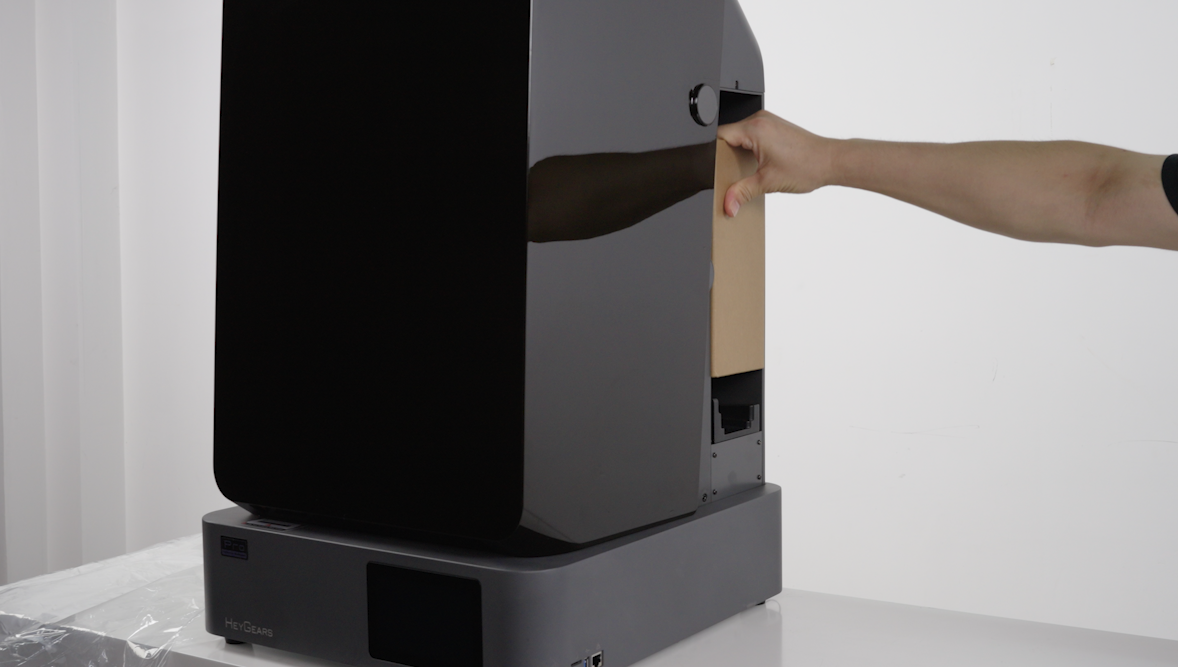
Remove the packaging box from the resin cartridge slot.
-
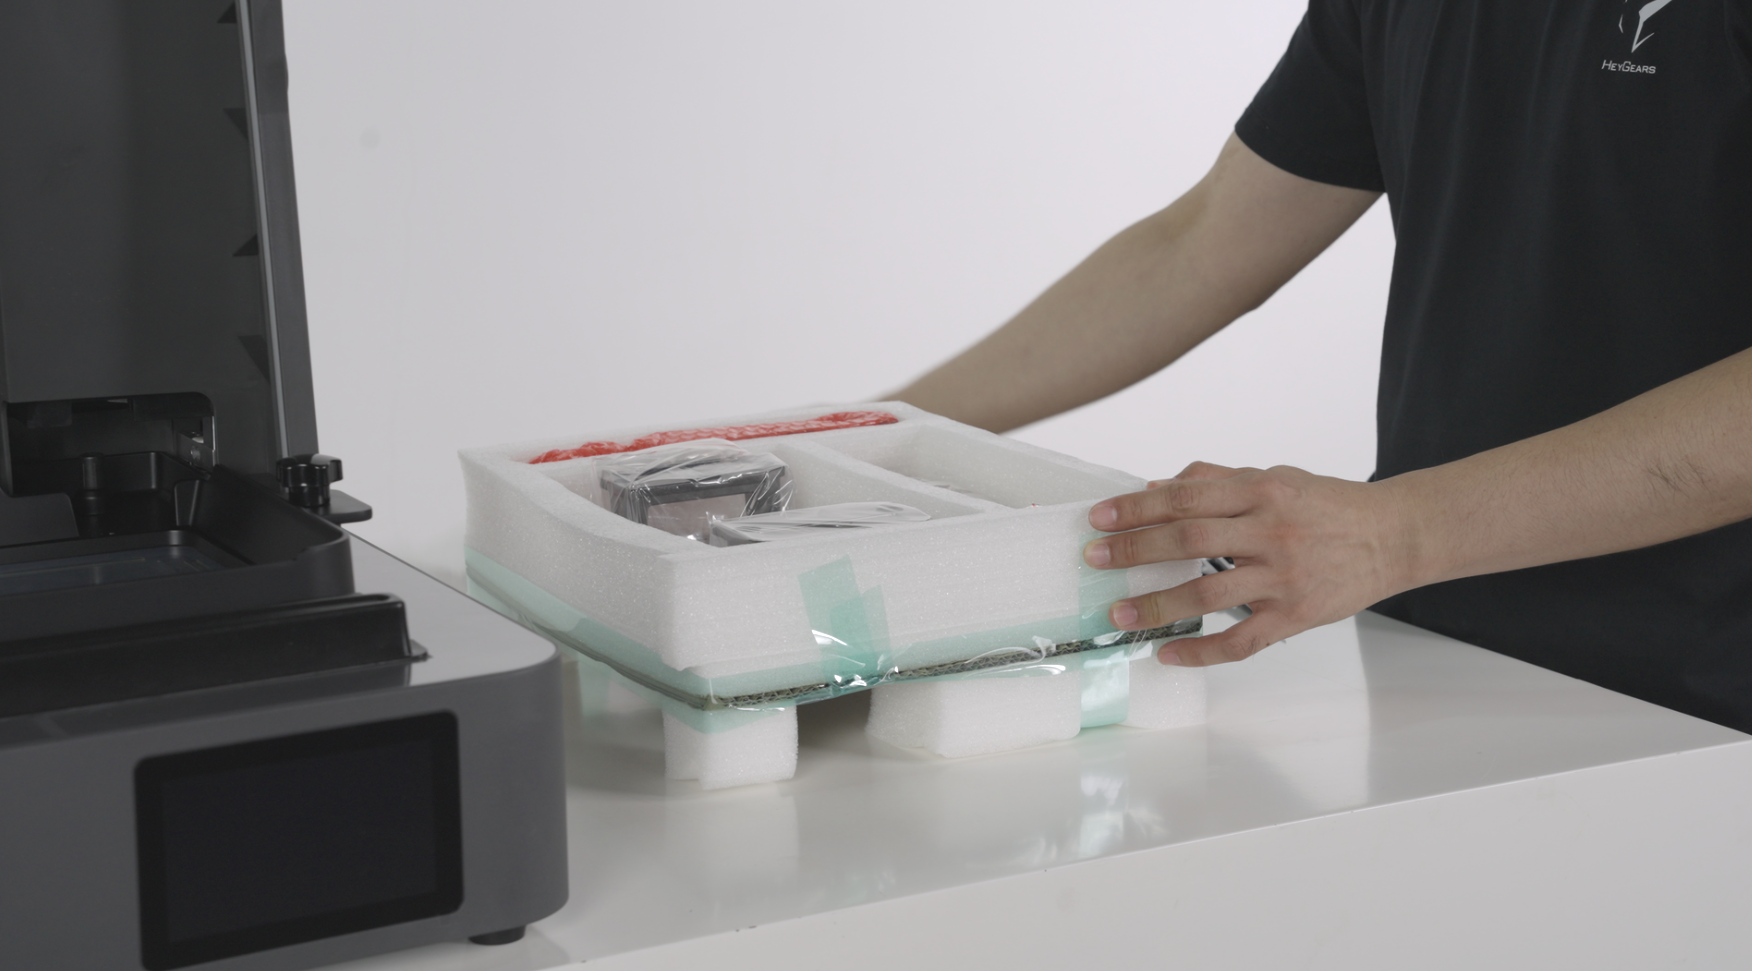
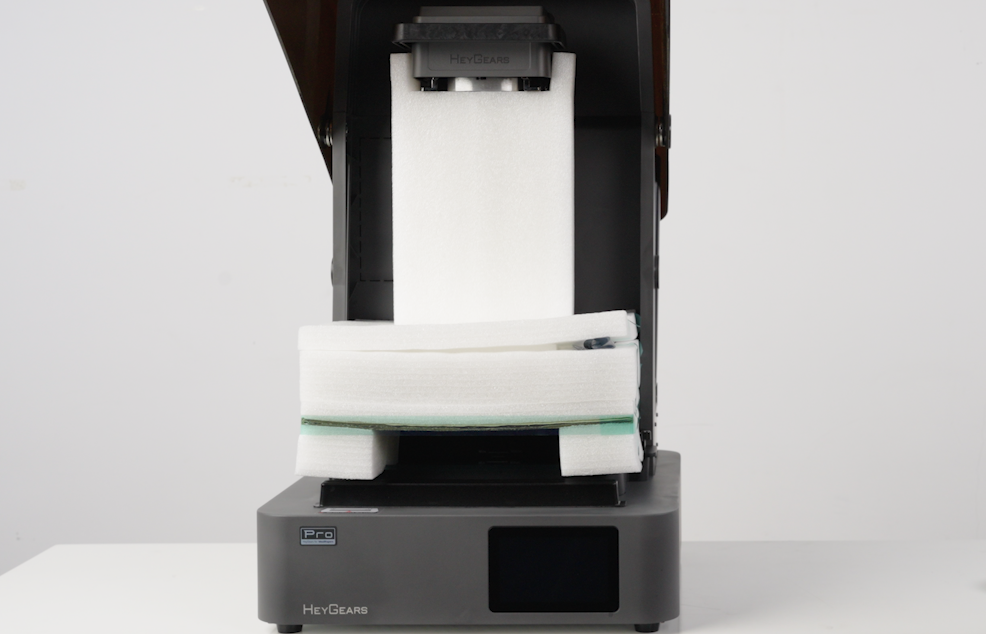
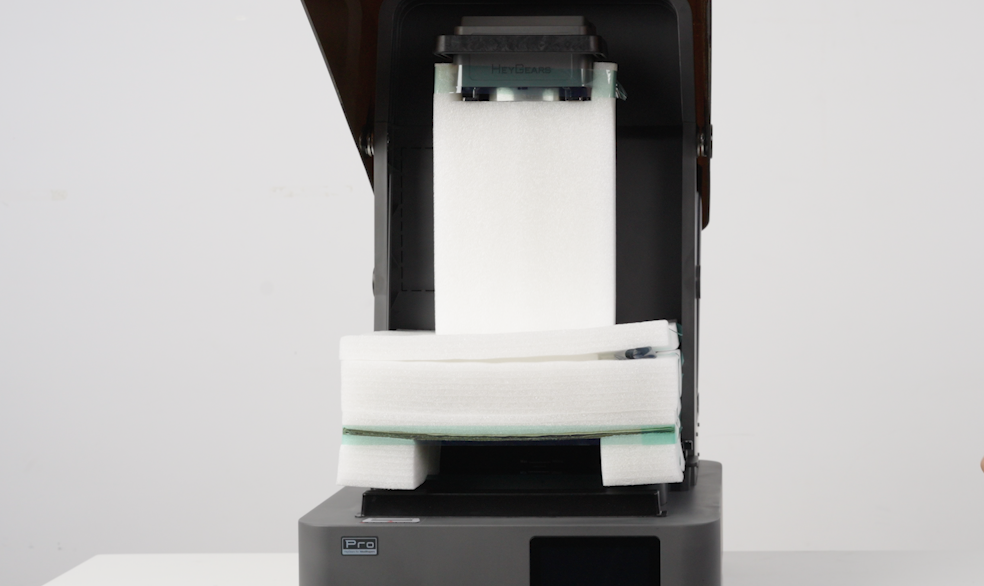
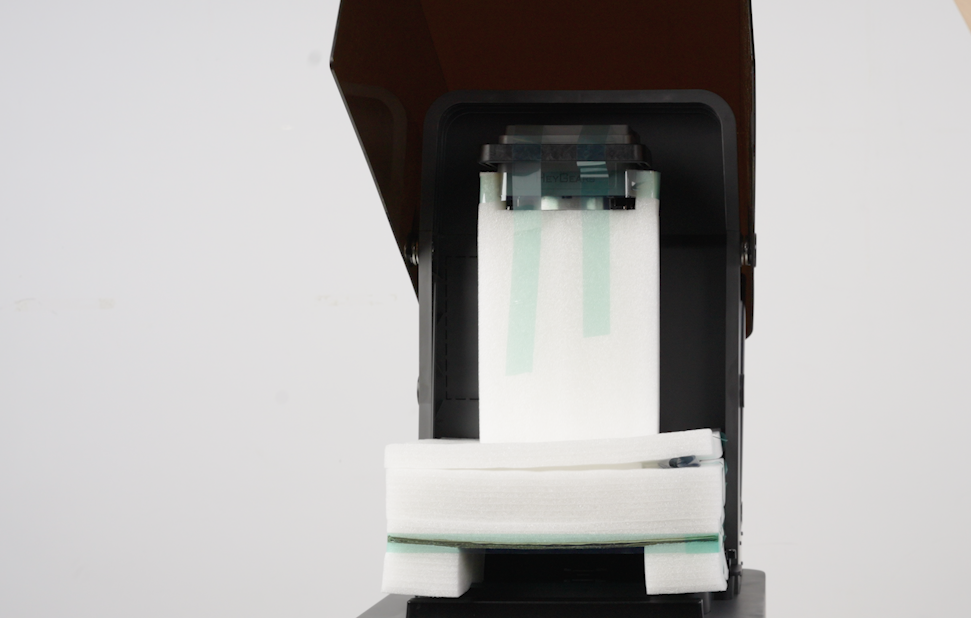
Open the hood, tear off the tape securing the foam, and remove the securing foam underneath the platform.
 |
 |
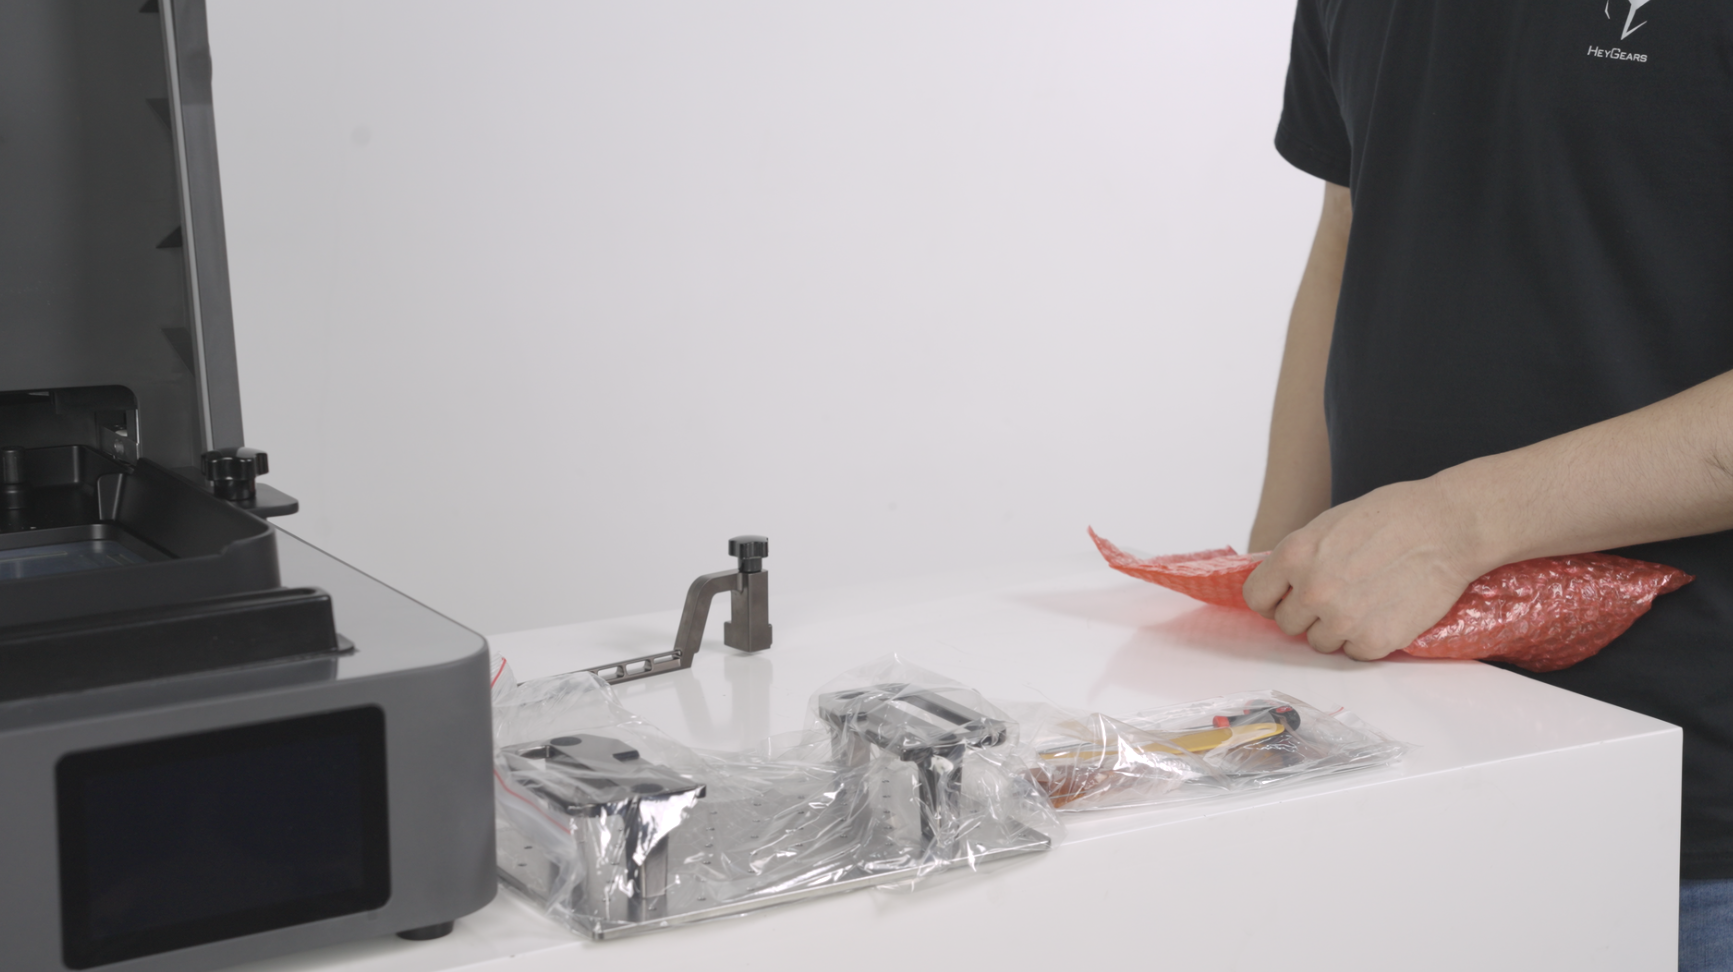
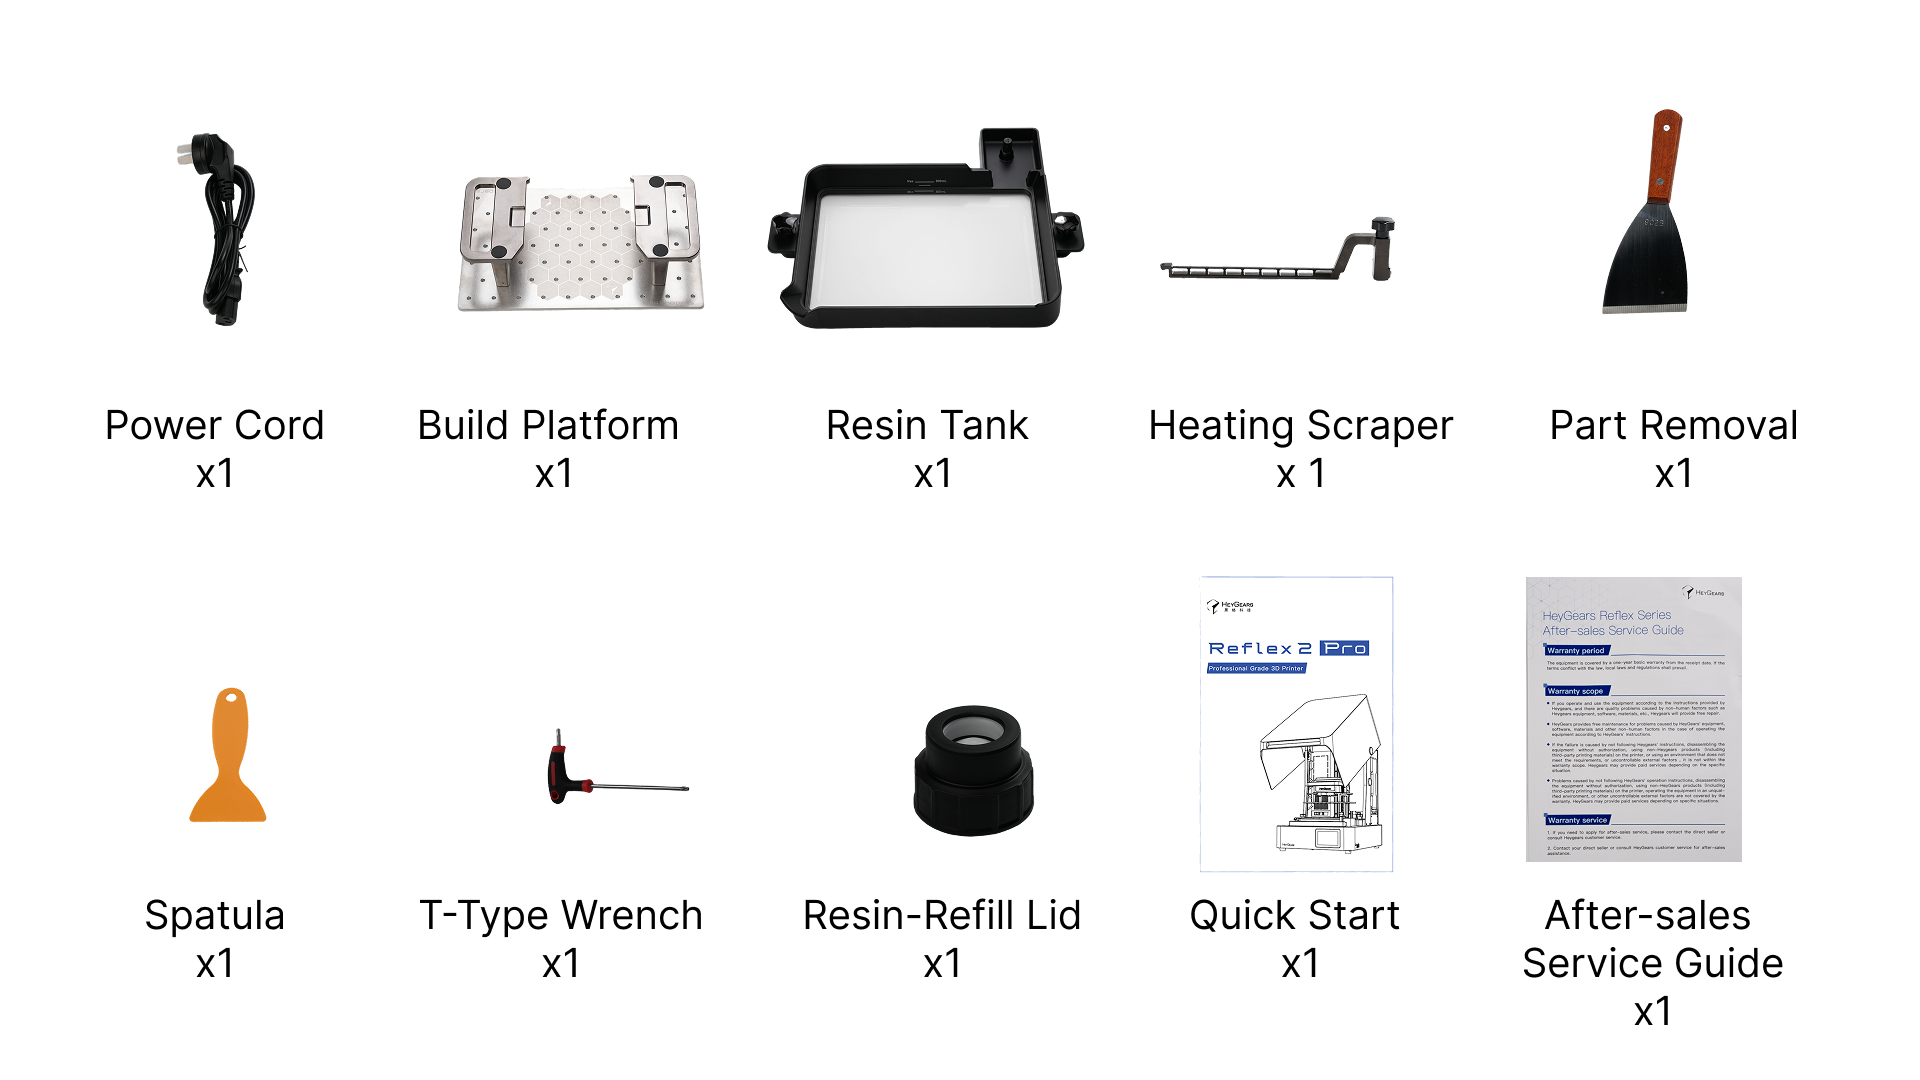
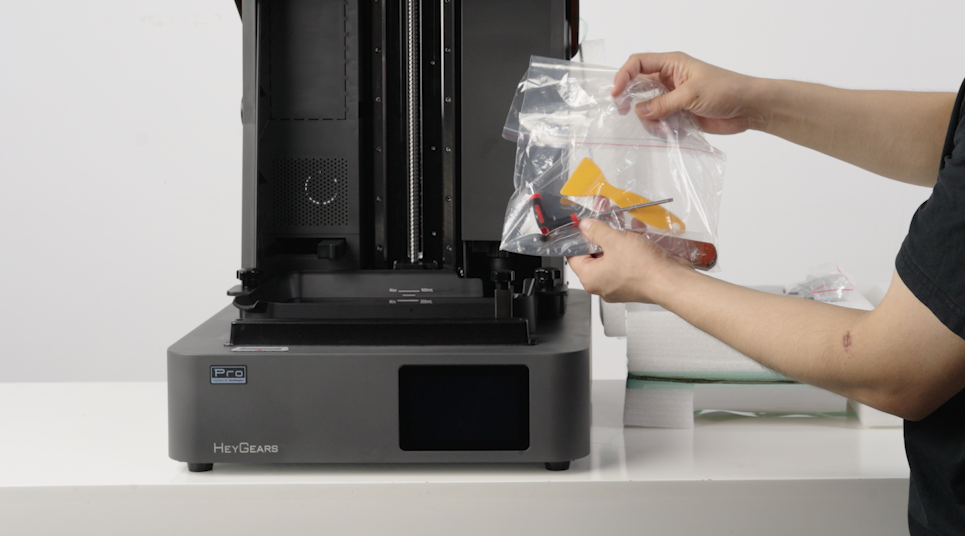
- Take out the packing foam above the resin tank, open the foam, and check if the accessories are complete: Build Platform, heating scraper, spatula, and T- type wrench.
 |
 |
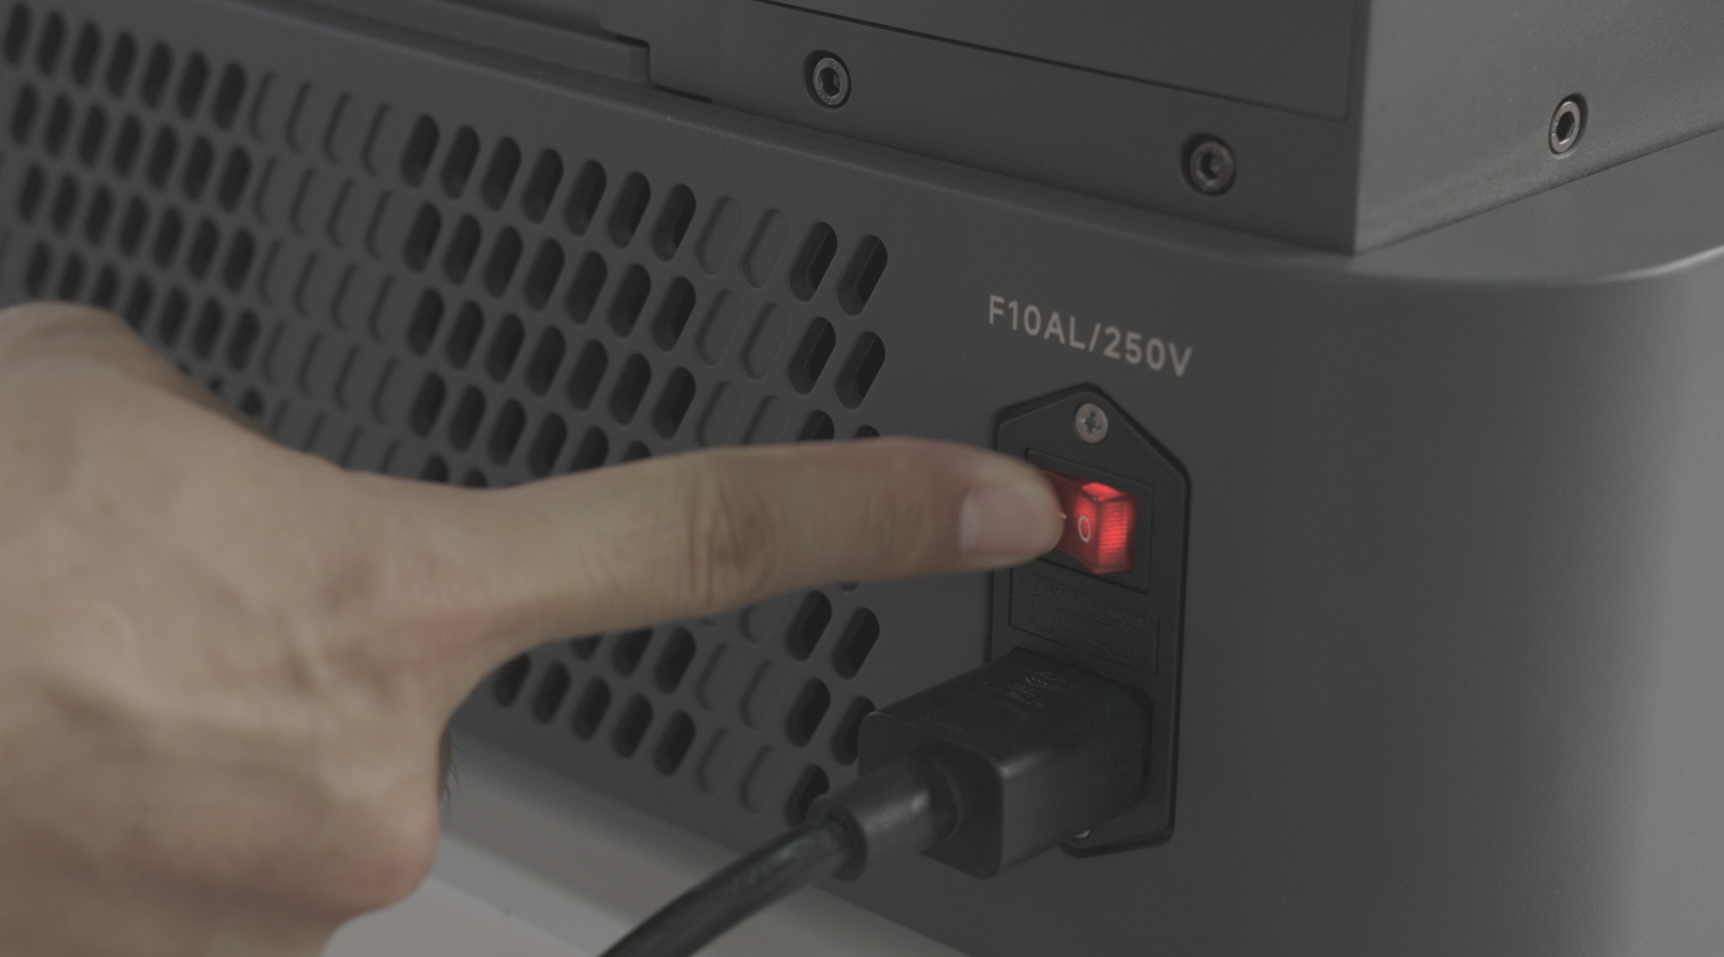
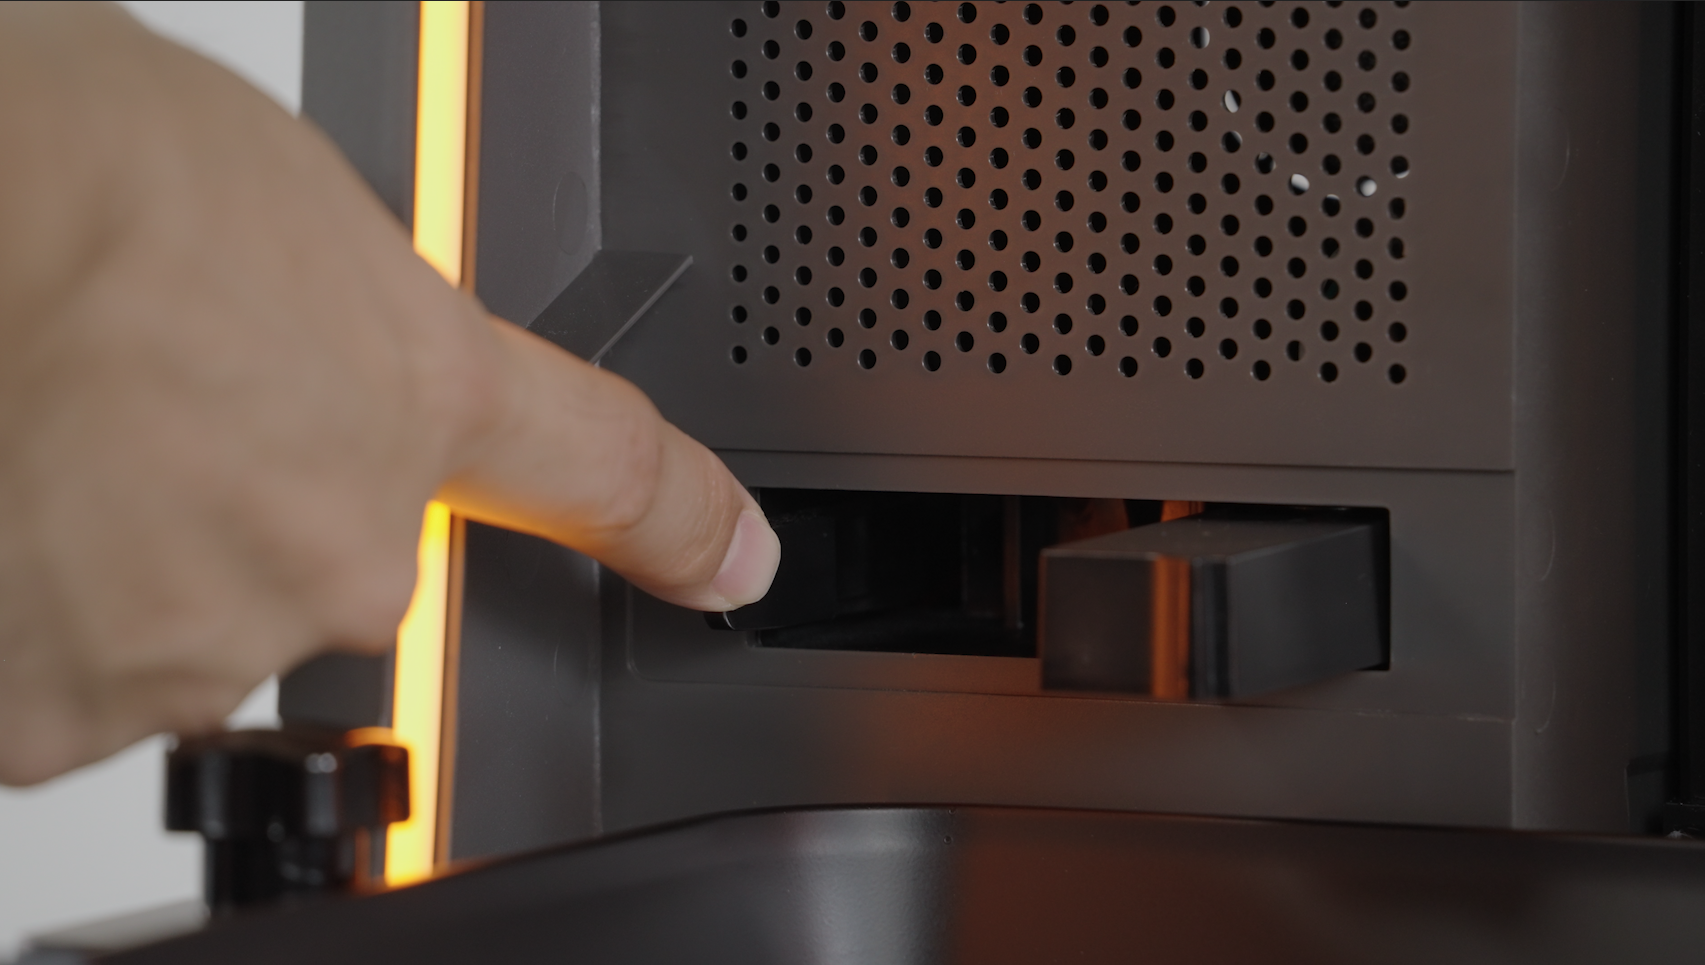
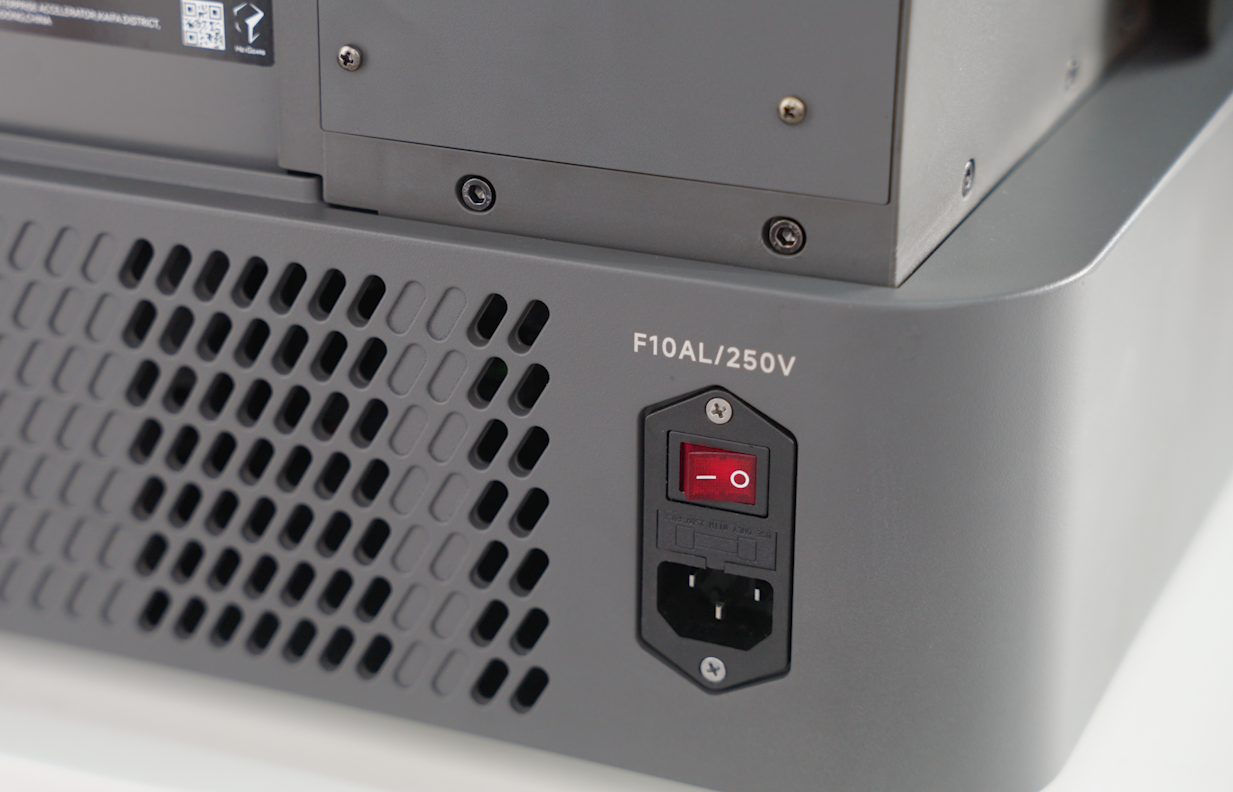
- Remove the tape on the liquid level sensor, plug the device into the power source and turn it on.
 |
 |
¶ 2.Check if all the accessories are complete
¶ 3.Enter the Initial Installation Guide for the Device
-
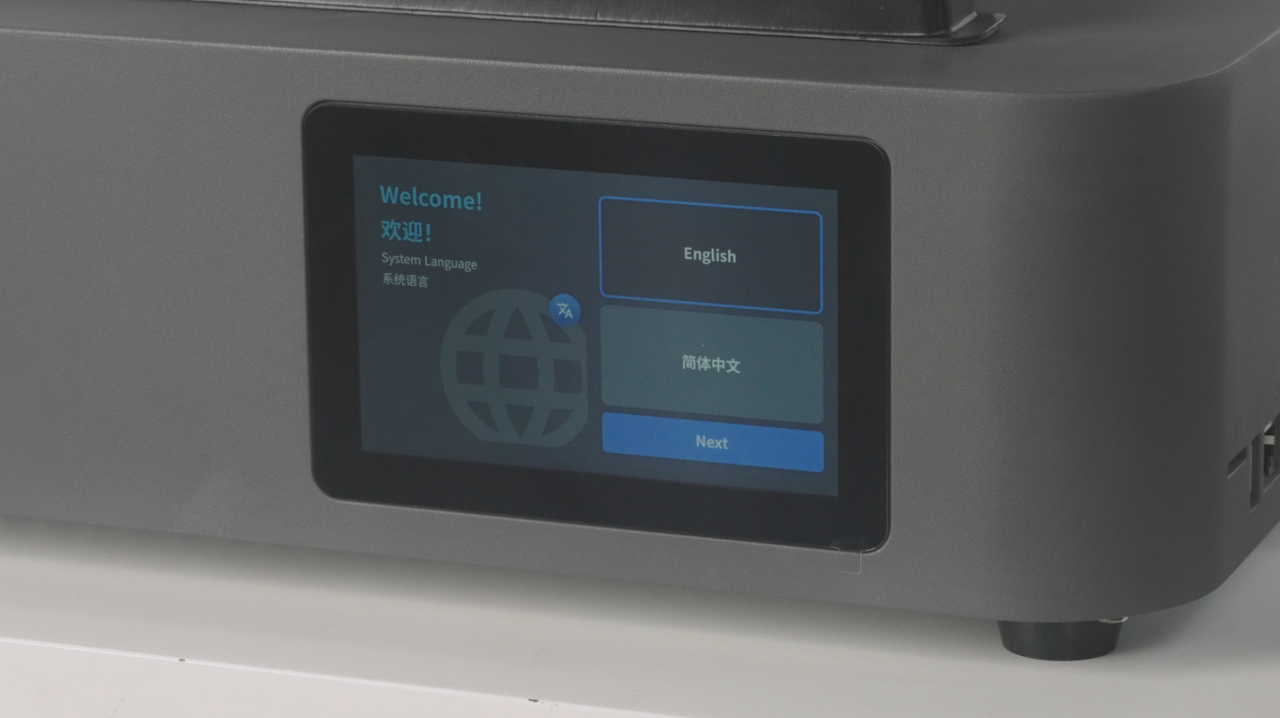
For the first time, power-on the device will automatically enter the initial installation guide.
-
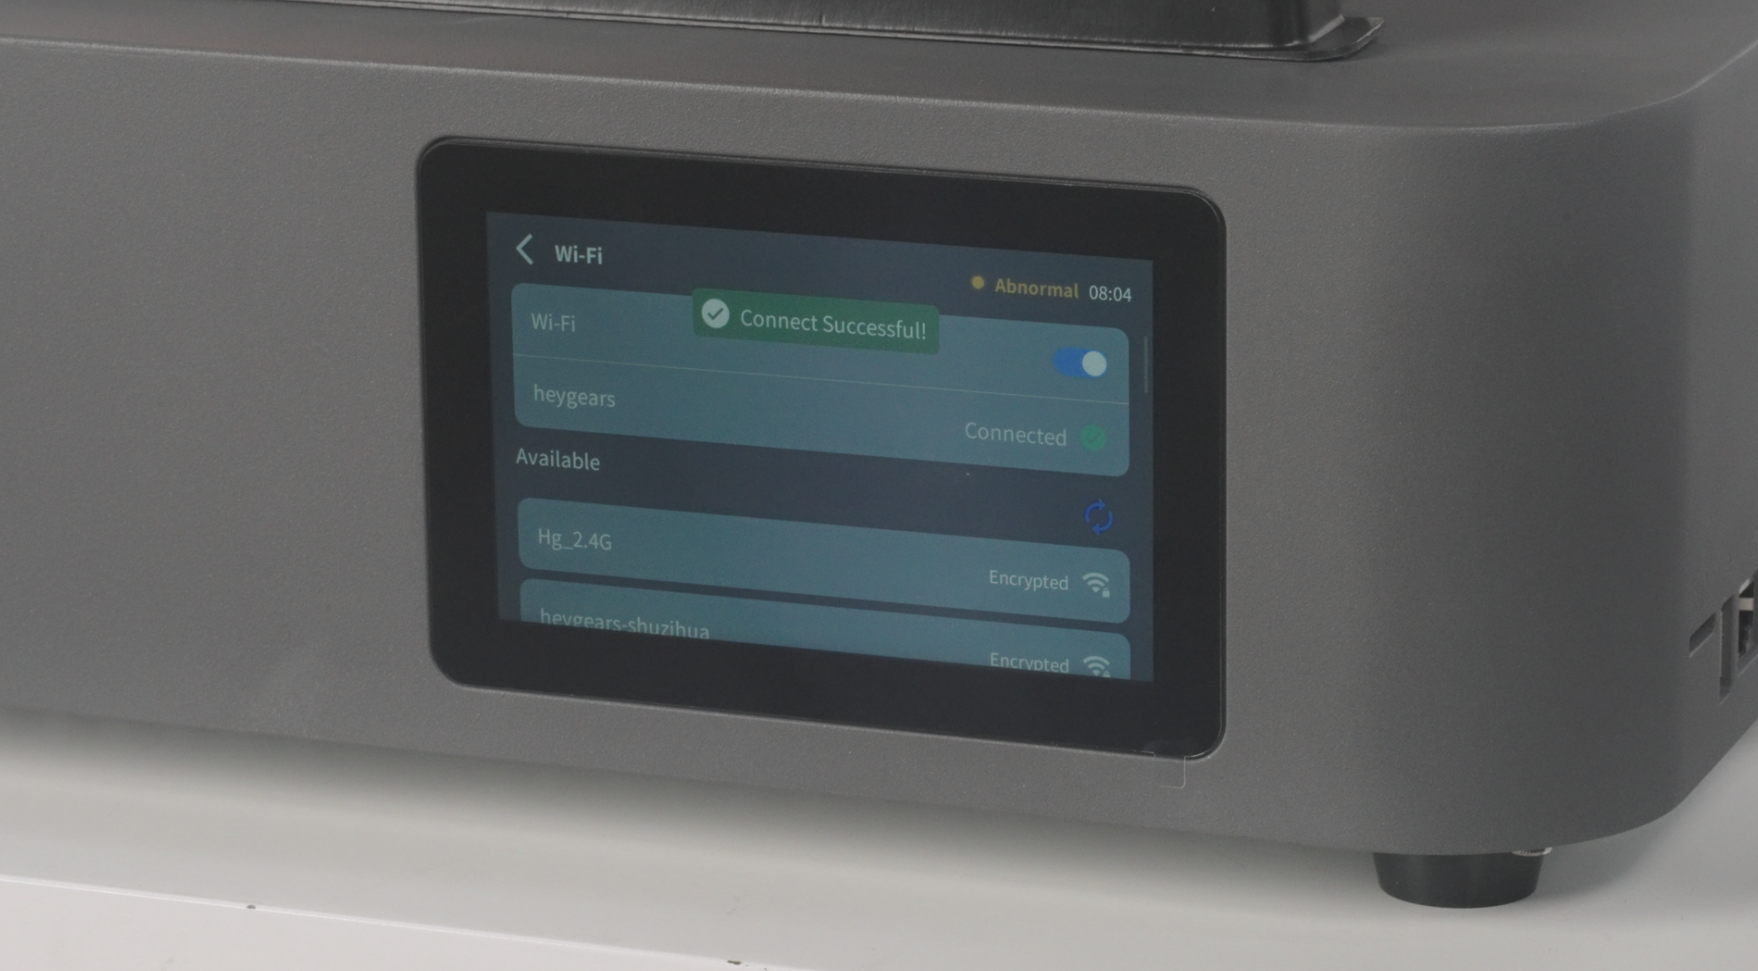
Select the language according to the instructions, then connect the device to the network.
 |
 |
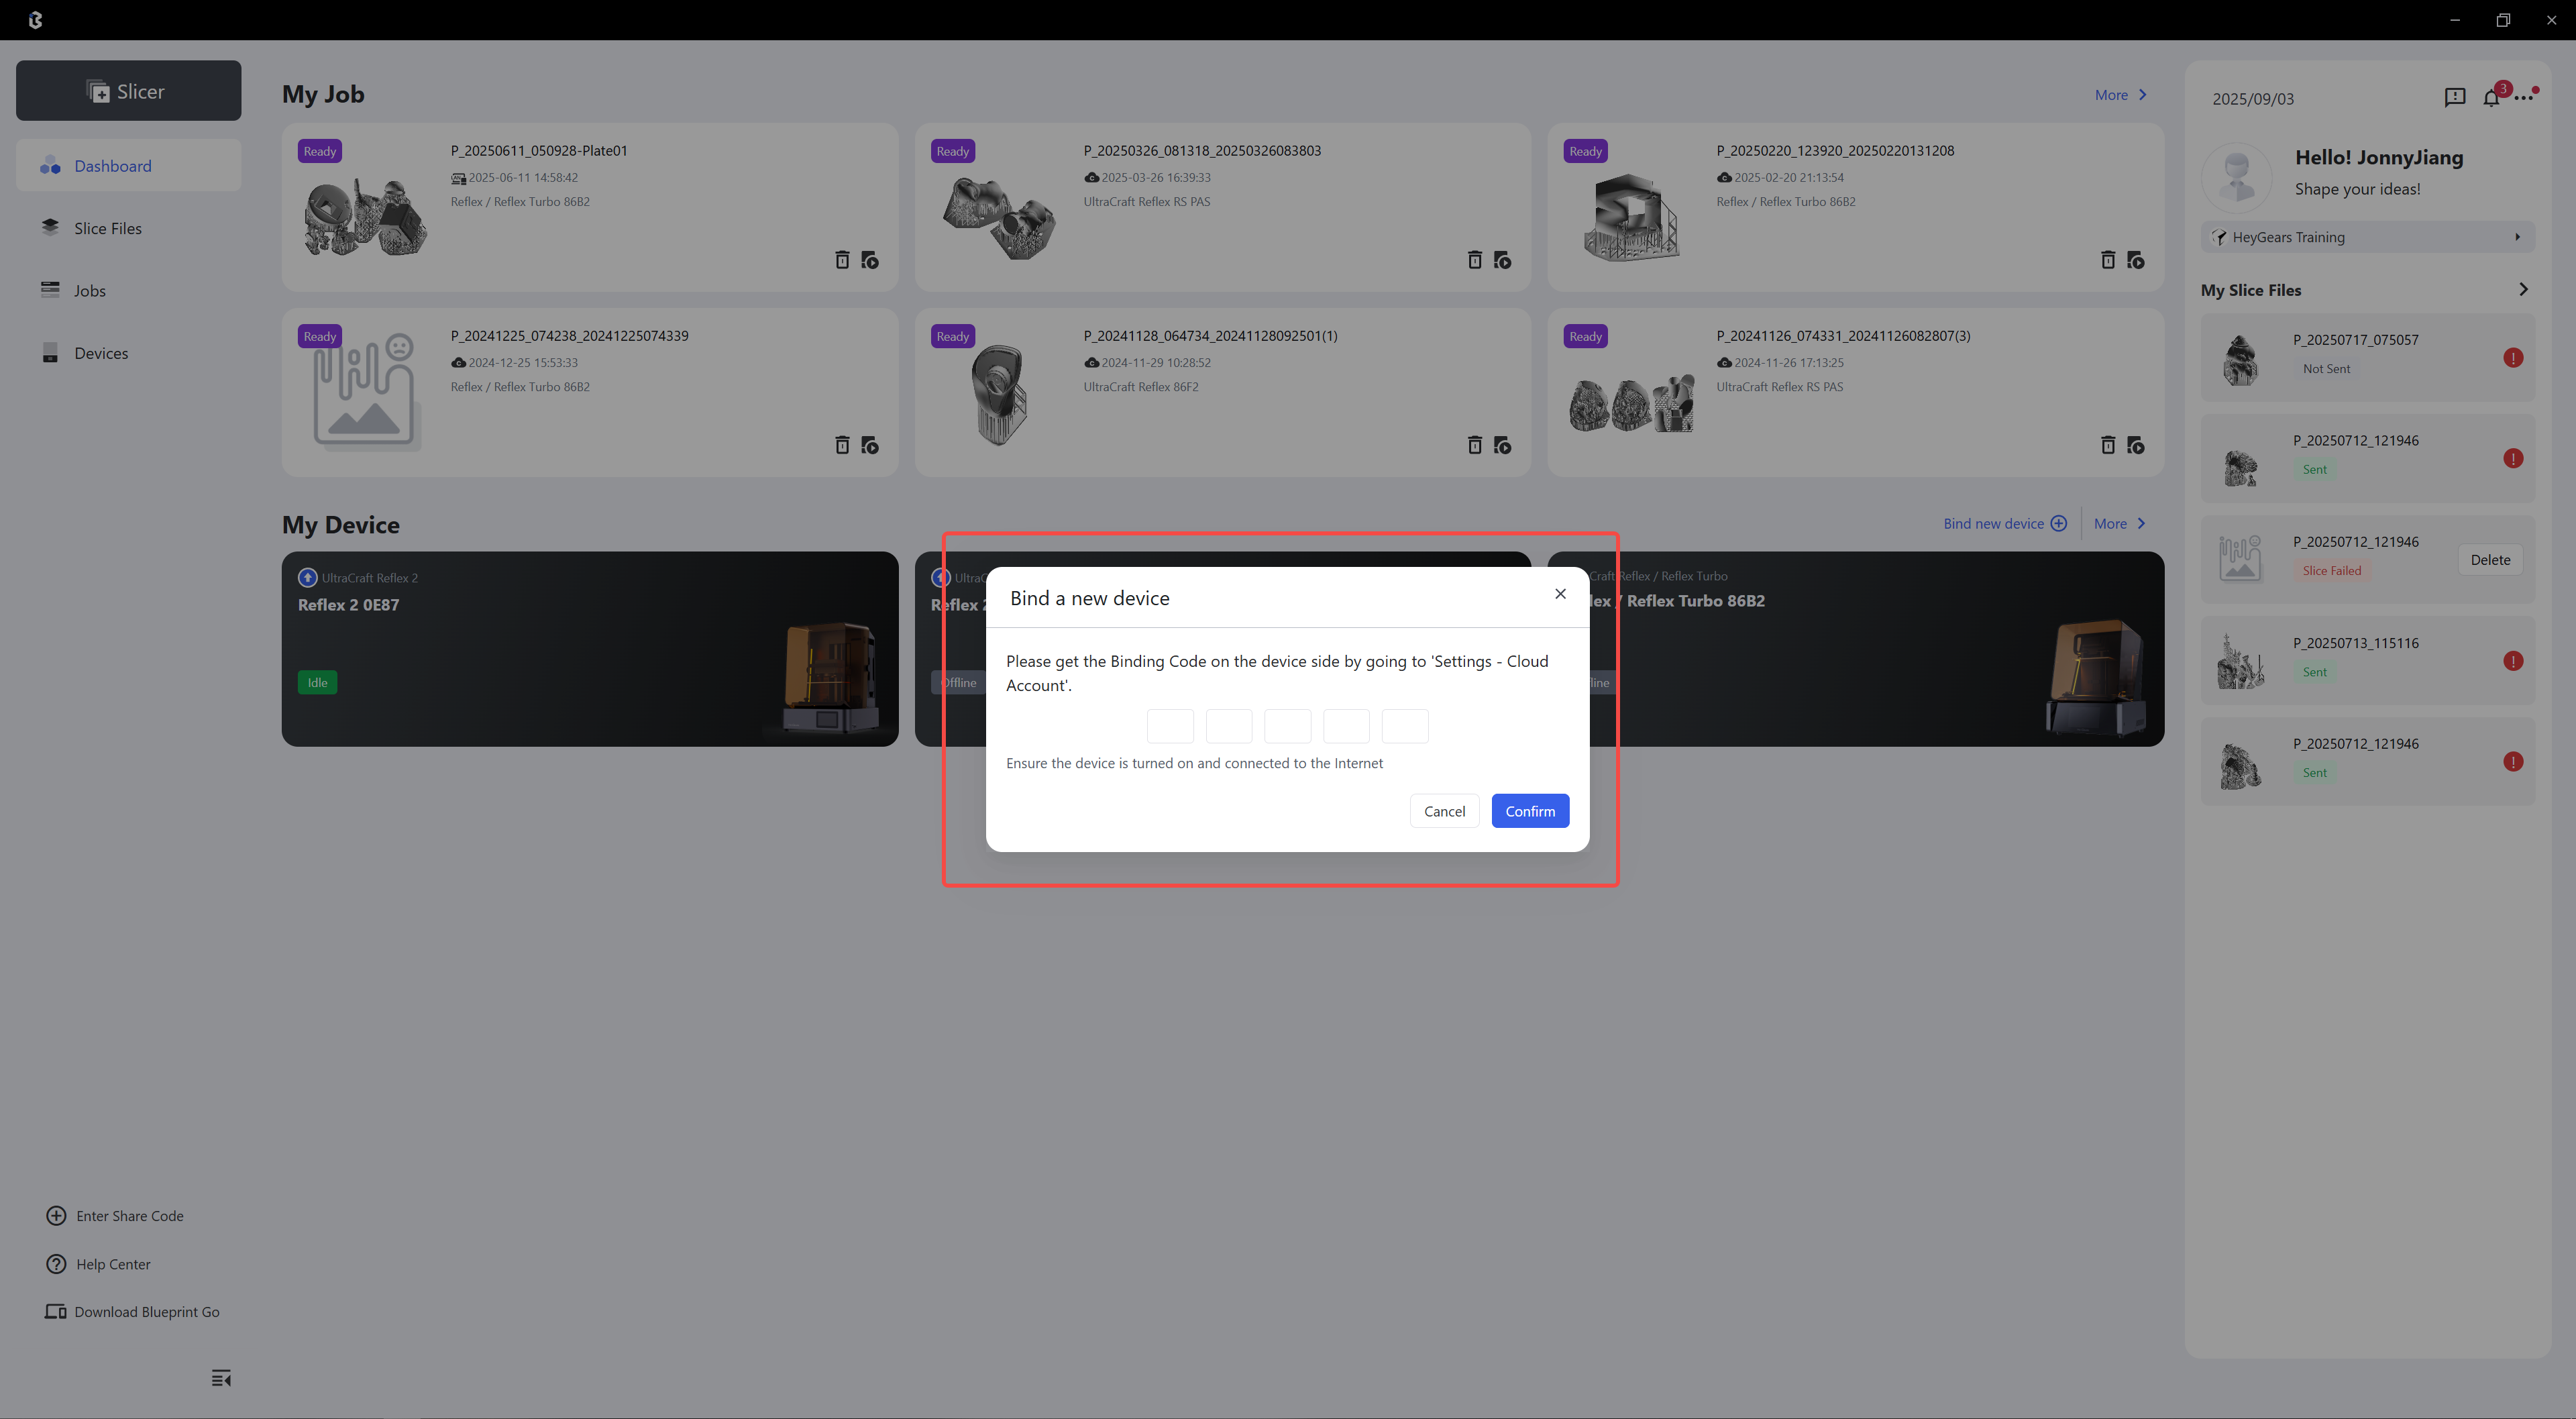
- Open BluePrint Studio software, click Bind new device in My Devices, and enter the binding code shown on the device.
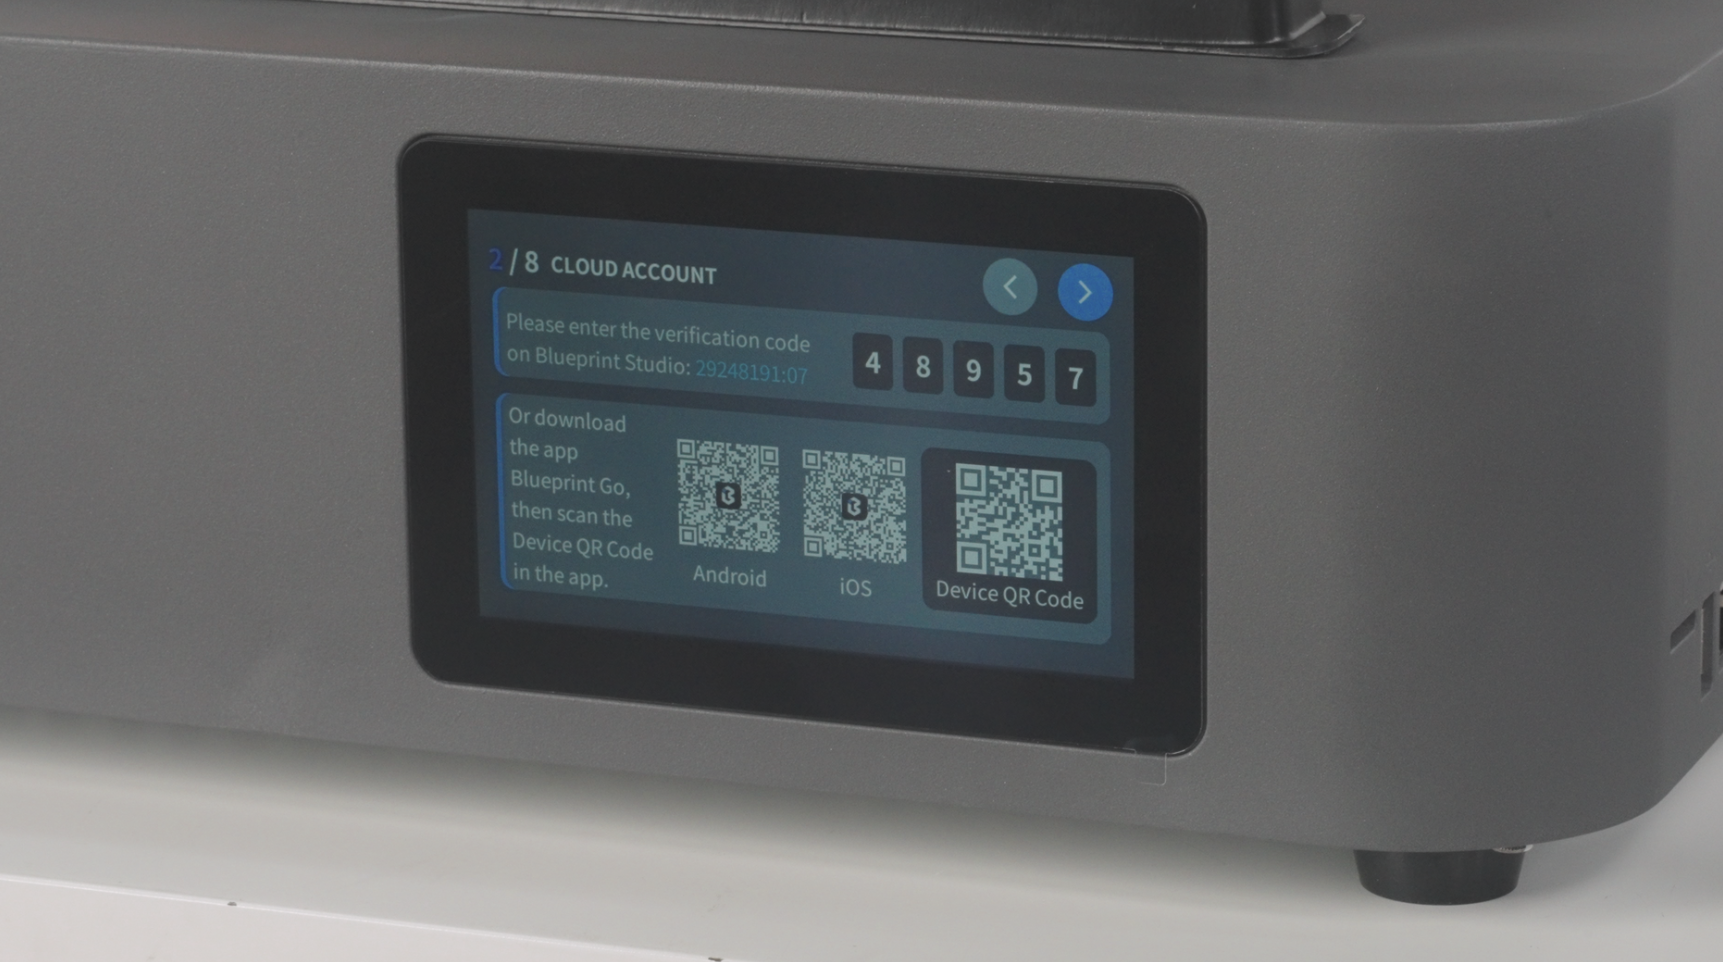 |
 |
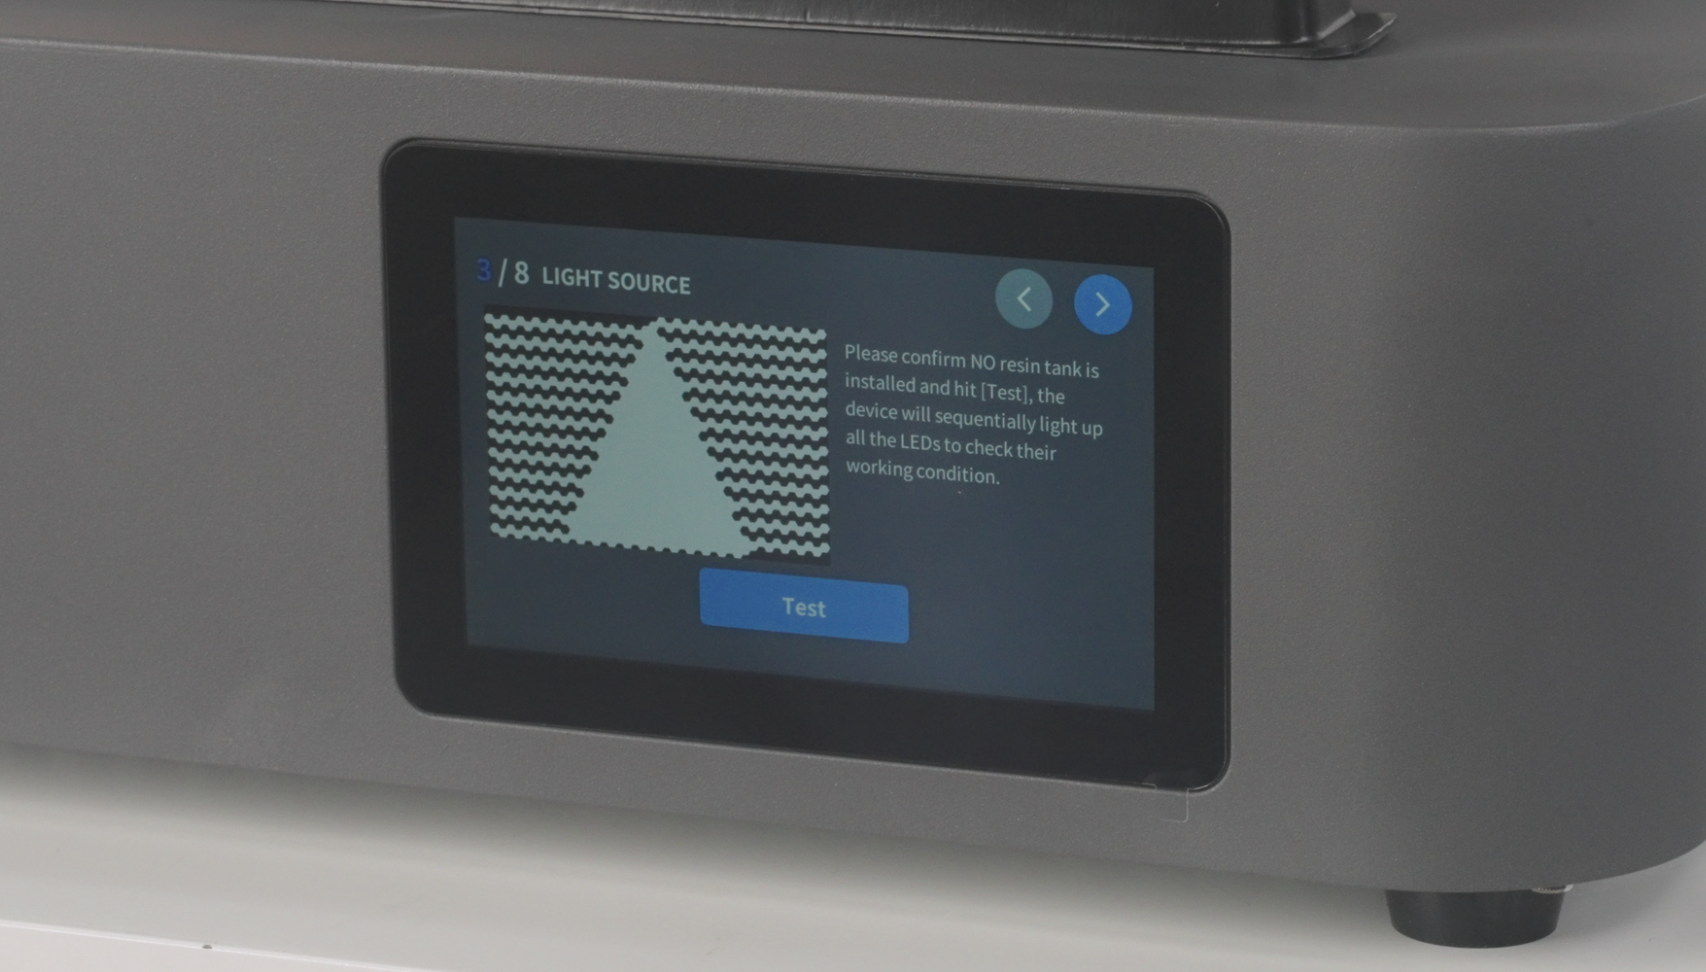
- After successful binding, remove the resin tank from the device and click "Test" to perform a self-check of the light source.
 |
 |
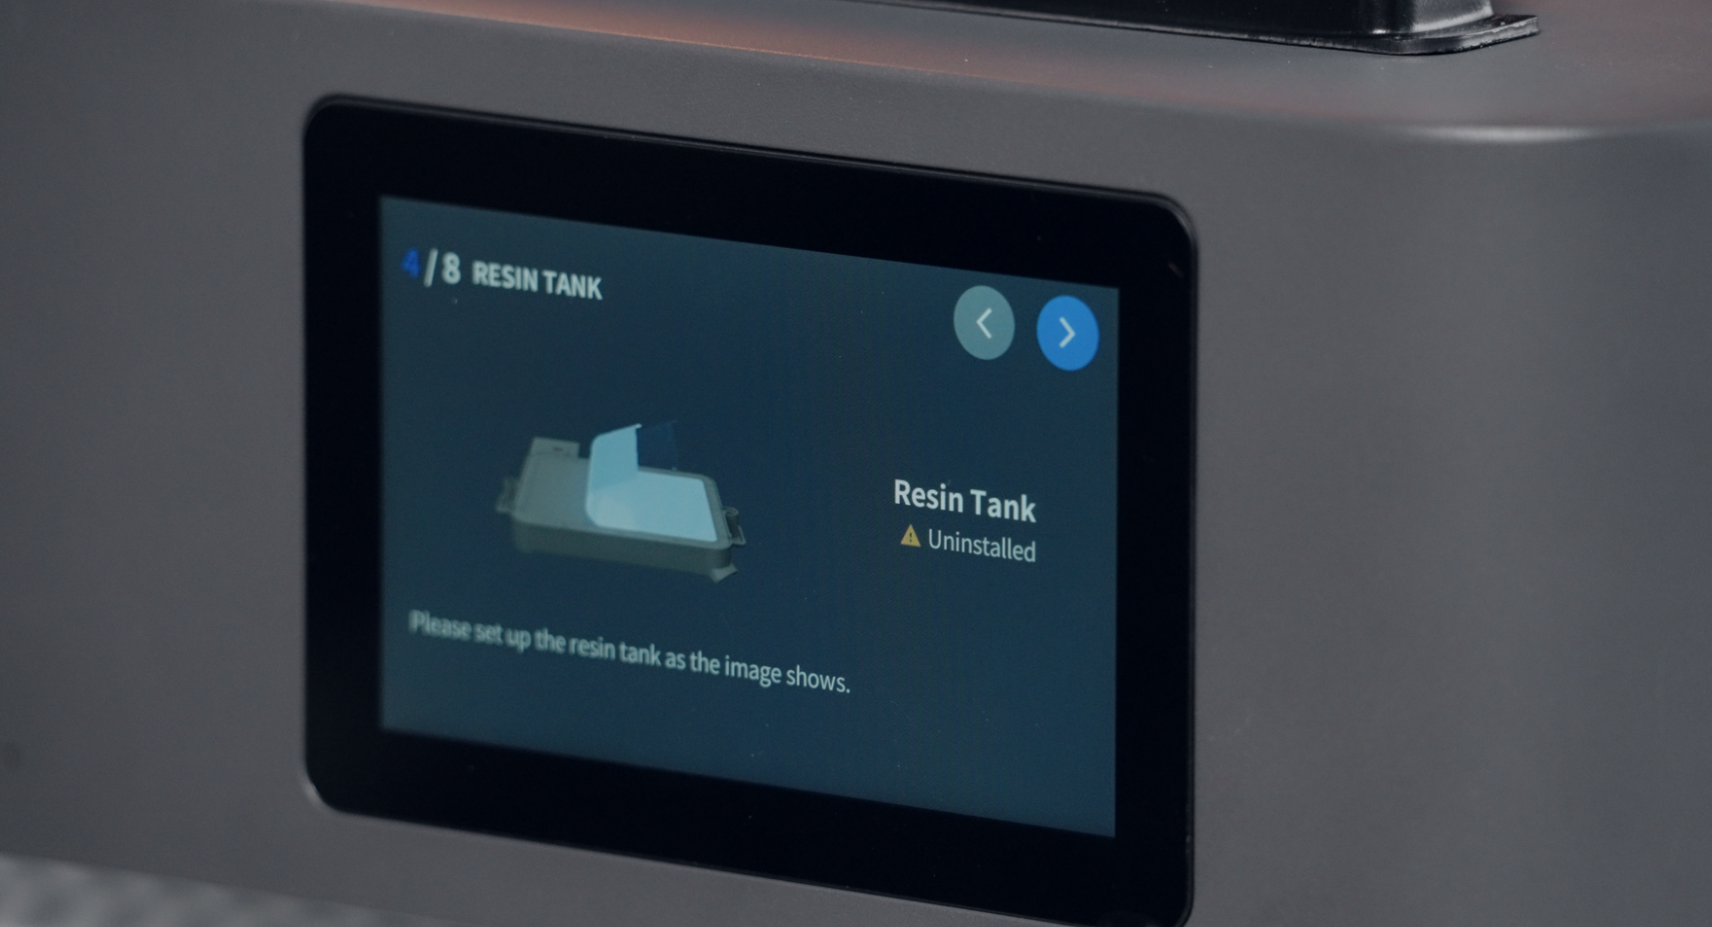
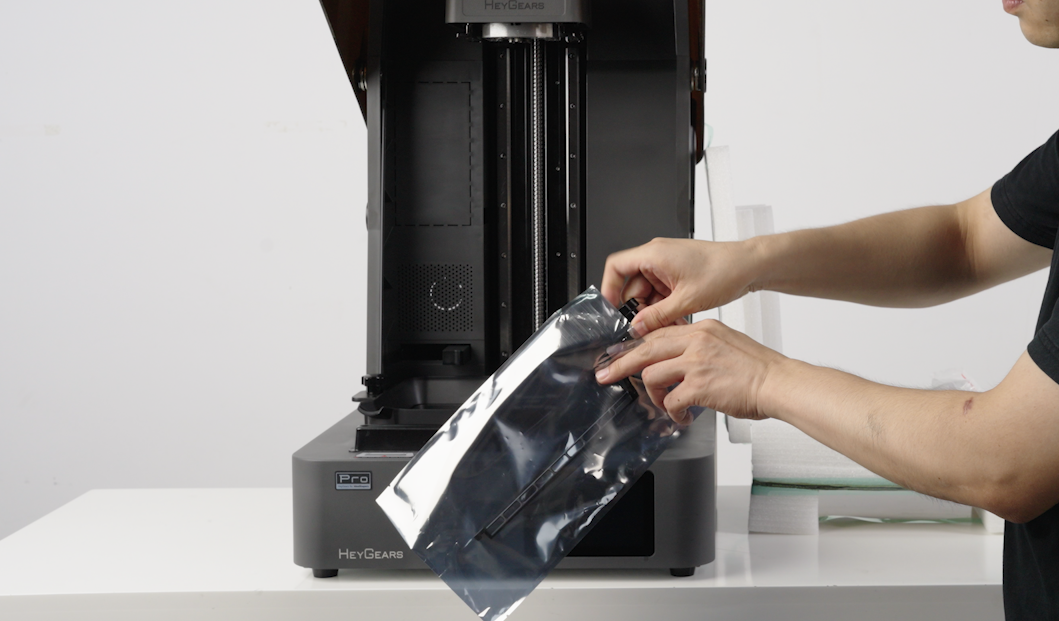
- Remove the resin tank from the packaging bag.
Important Note: There is a protective film attached under the release film of the resin tank. Please peel it off carefully and slowly (be careful not to peel off the foot pads under the release film).
 |
 |
 |
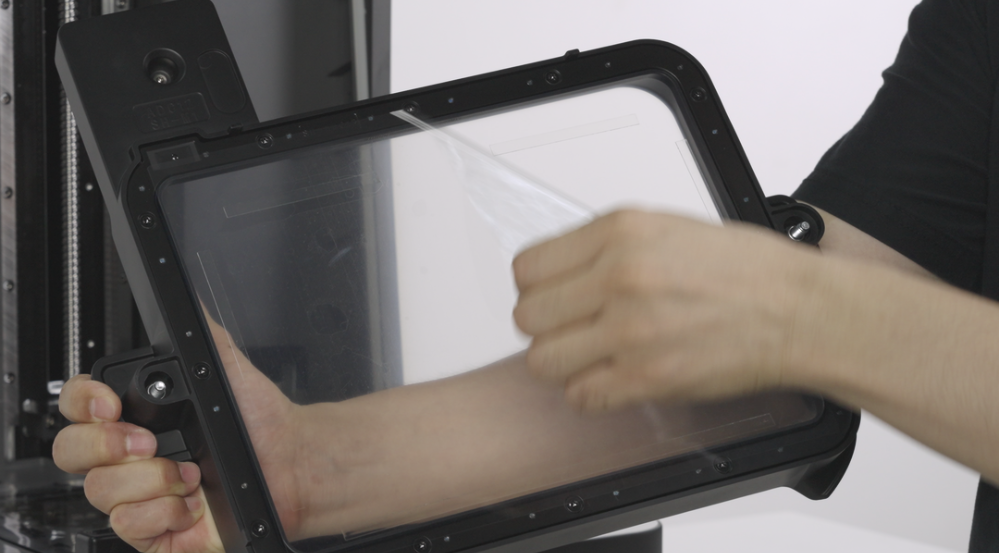
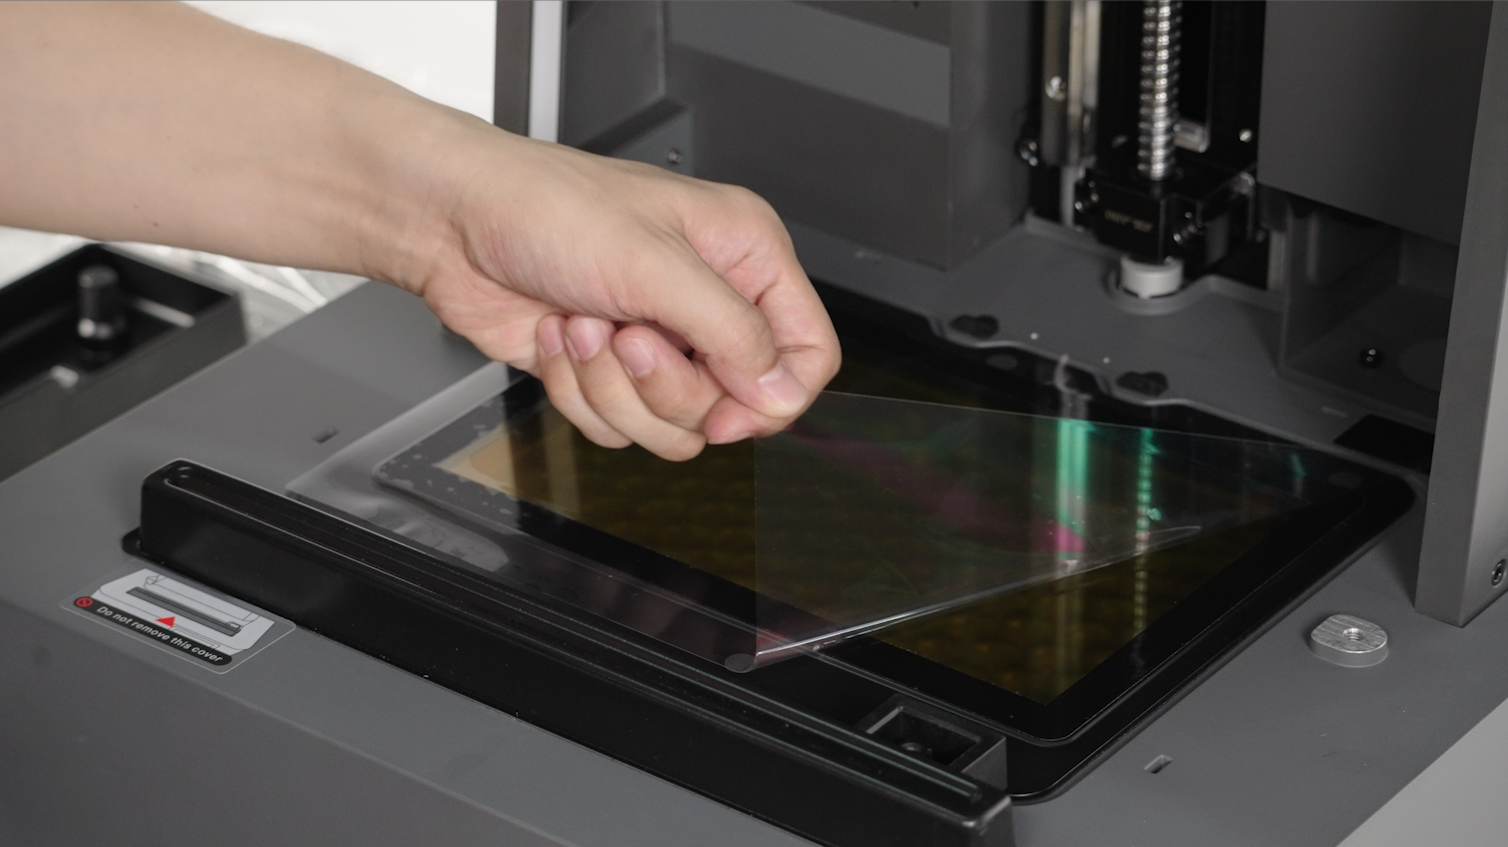
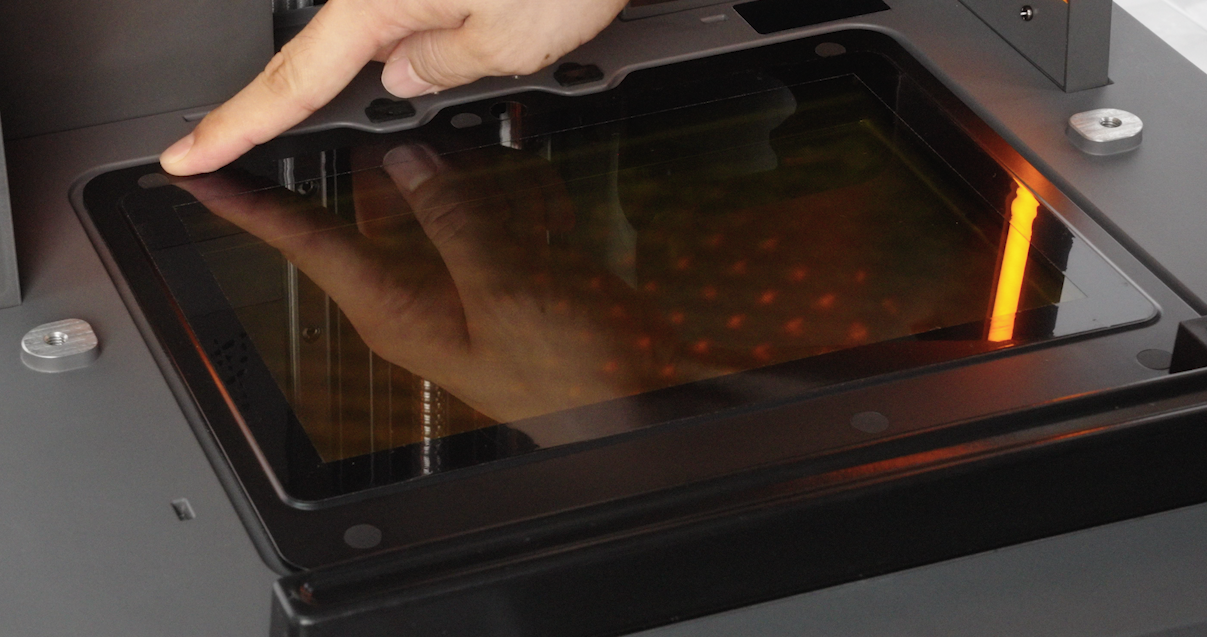
- Remove the protective film above the LCD screen (Users will receive two different types of protective films, and the actual items shall be subject to what the user receives.)
 |
 |
 |
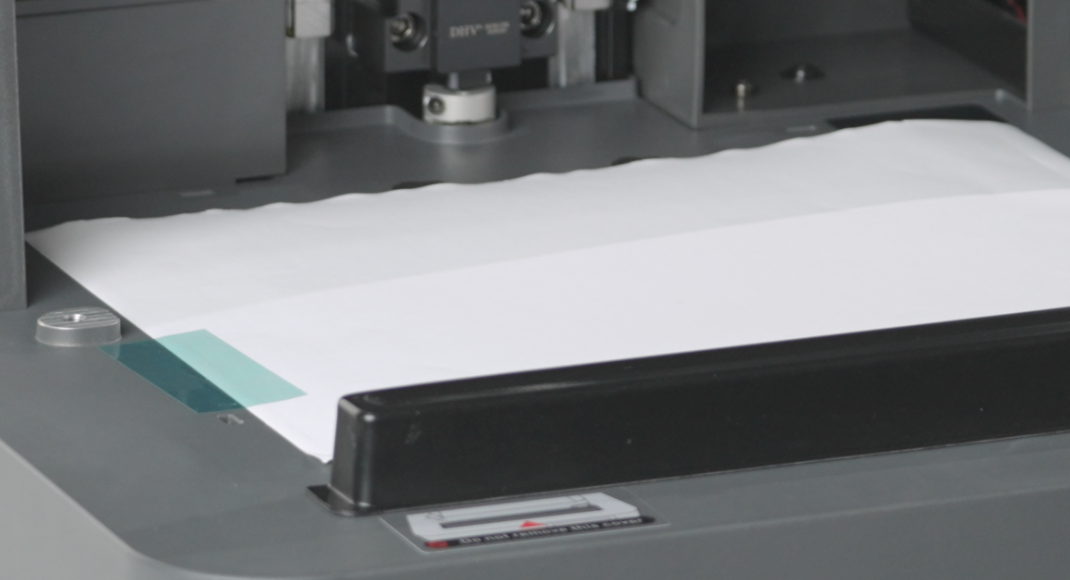
Note: It is recommended to keep the plastic film on the device's base, as it helps maintain the device's cleanliness.
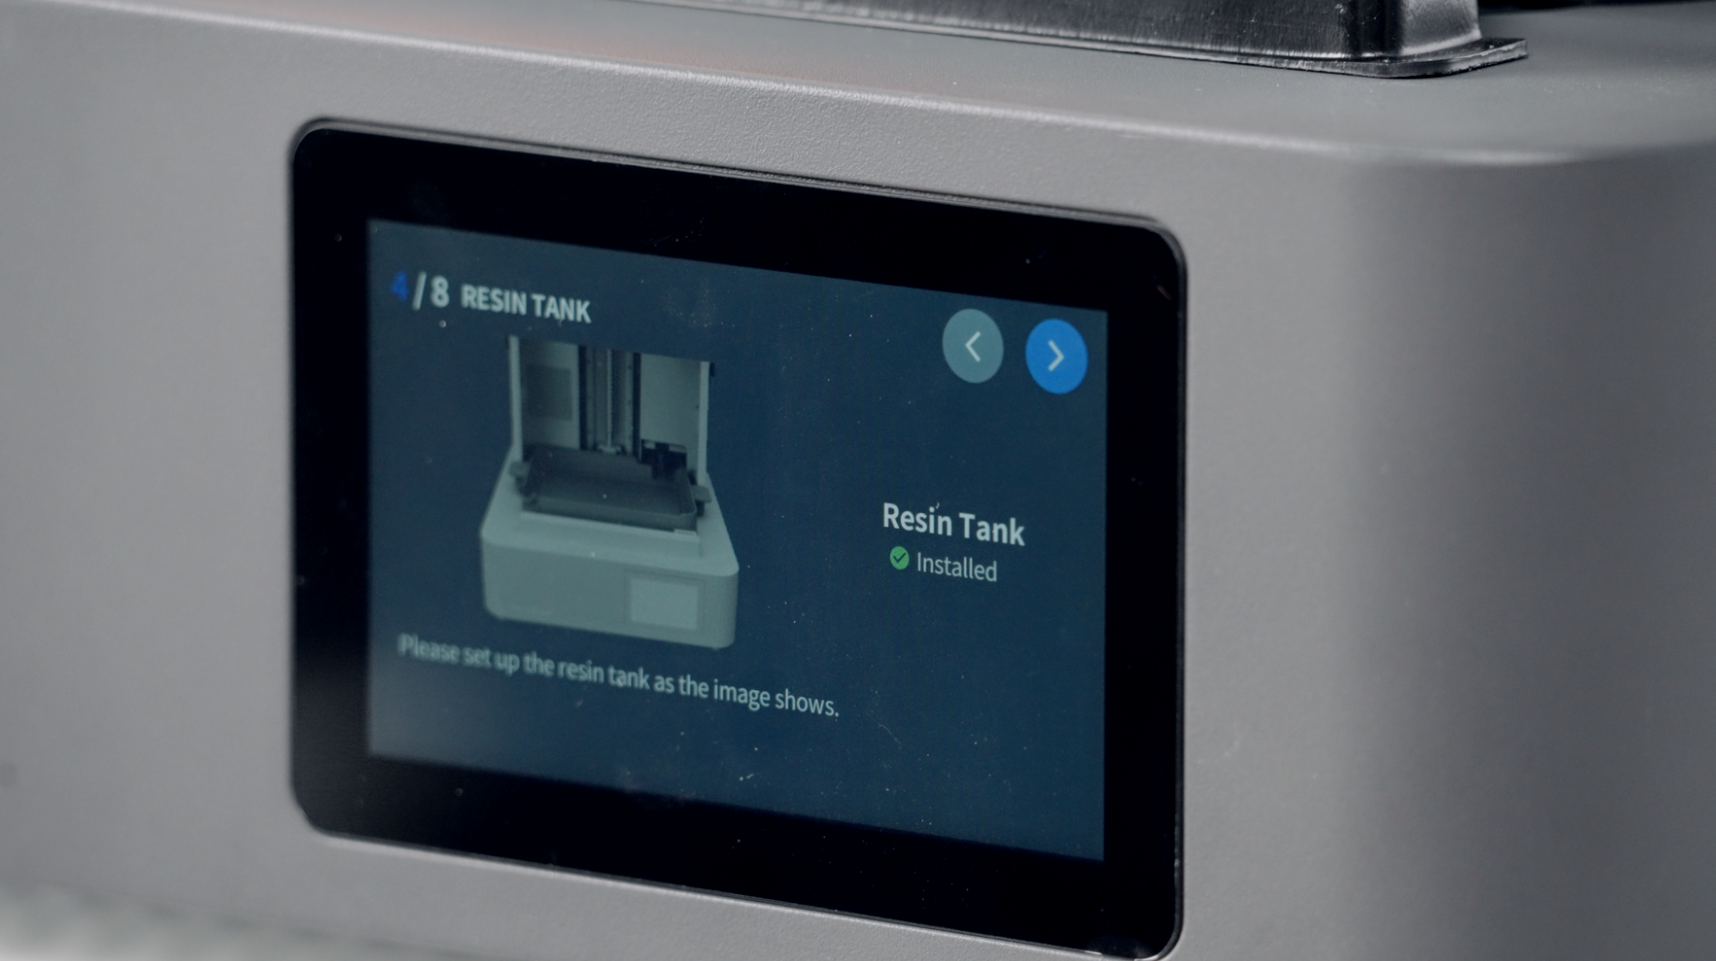
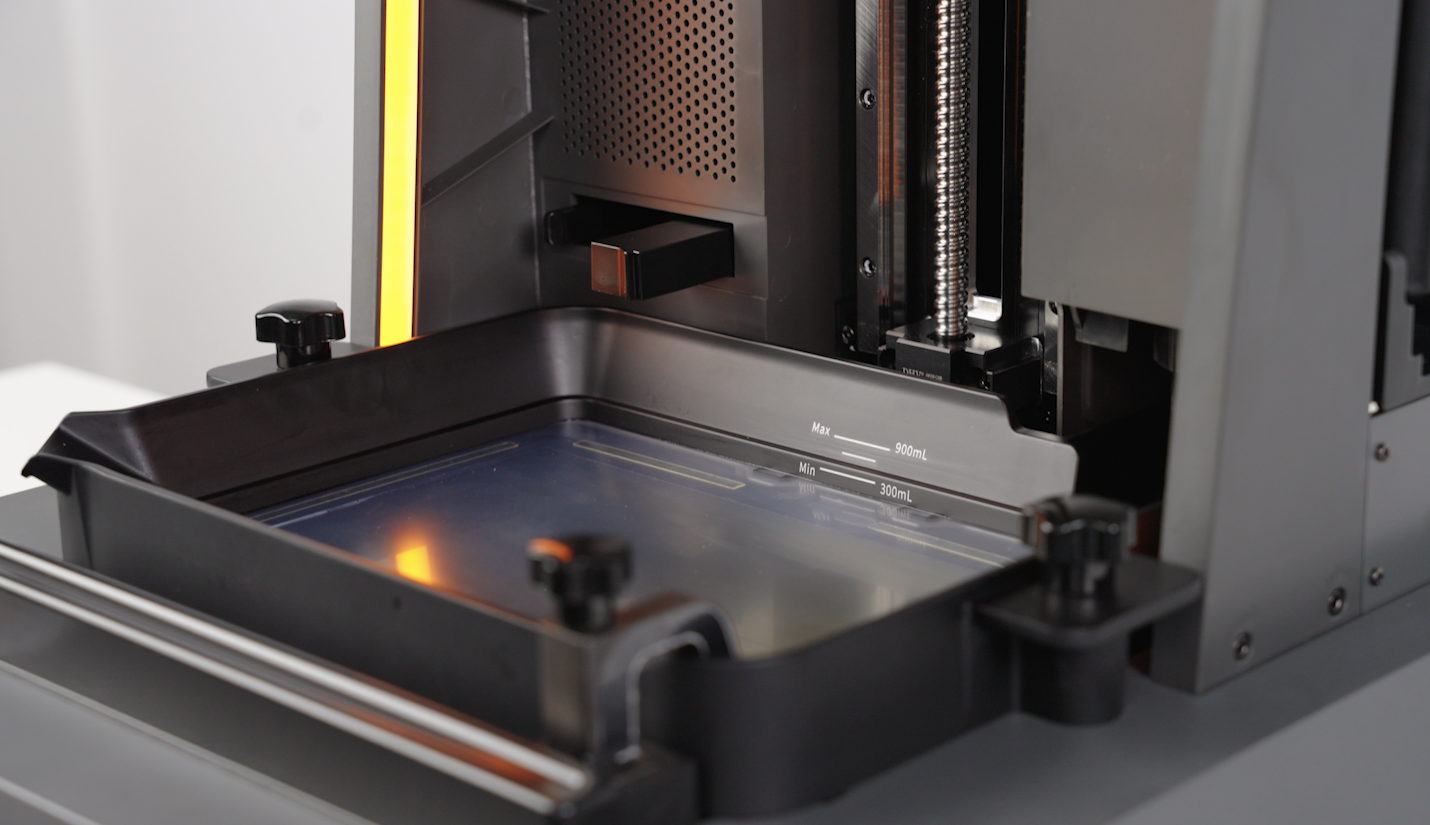
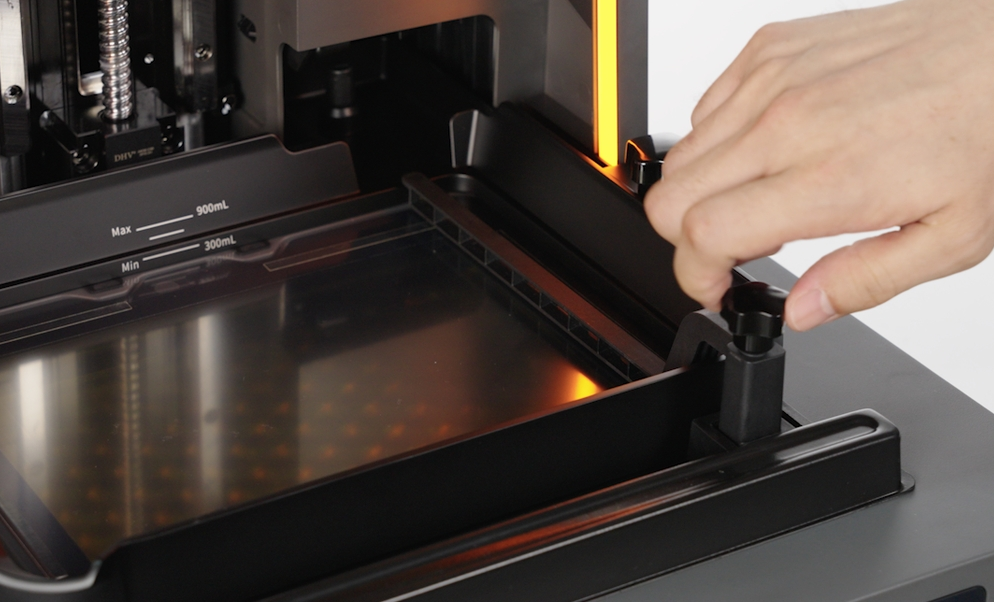
- Install the resin tank above the LCD screen and press the side to pop out the liquid level sensor.
 |
 |
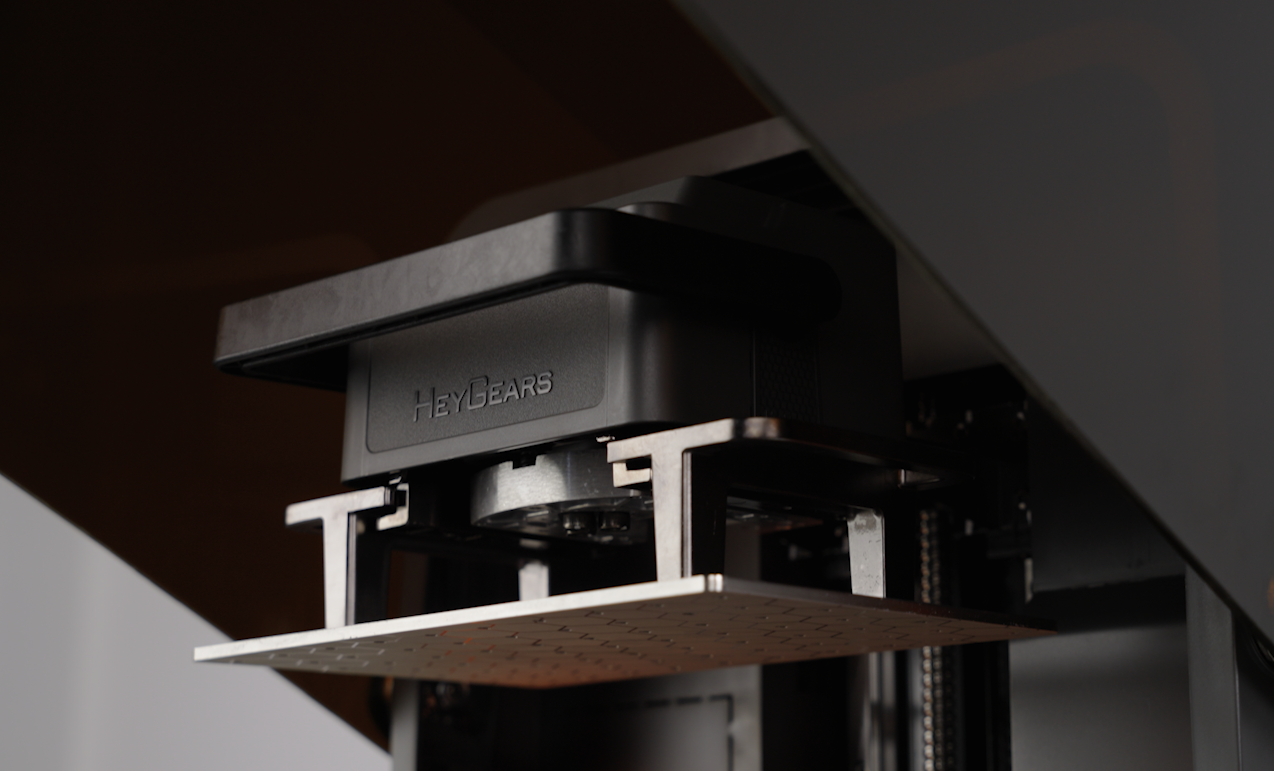
- Install the build platform and heating scraper.
 |
 |
 |
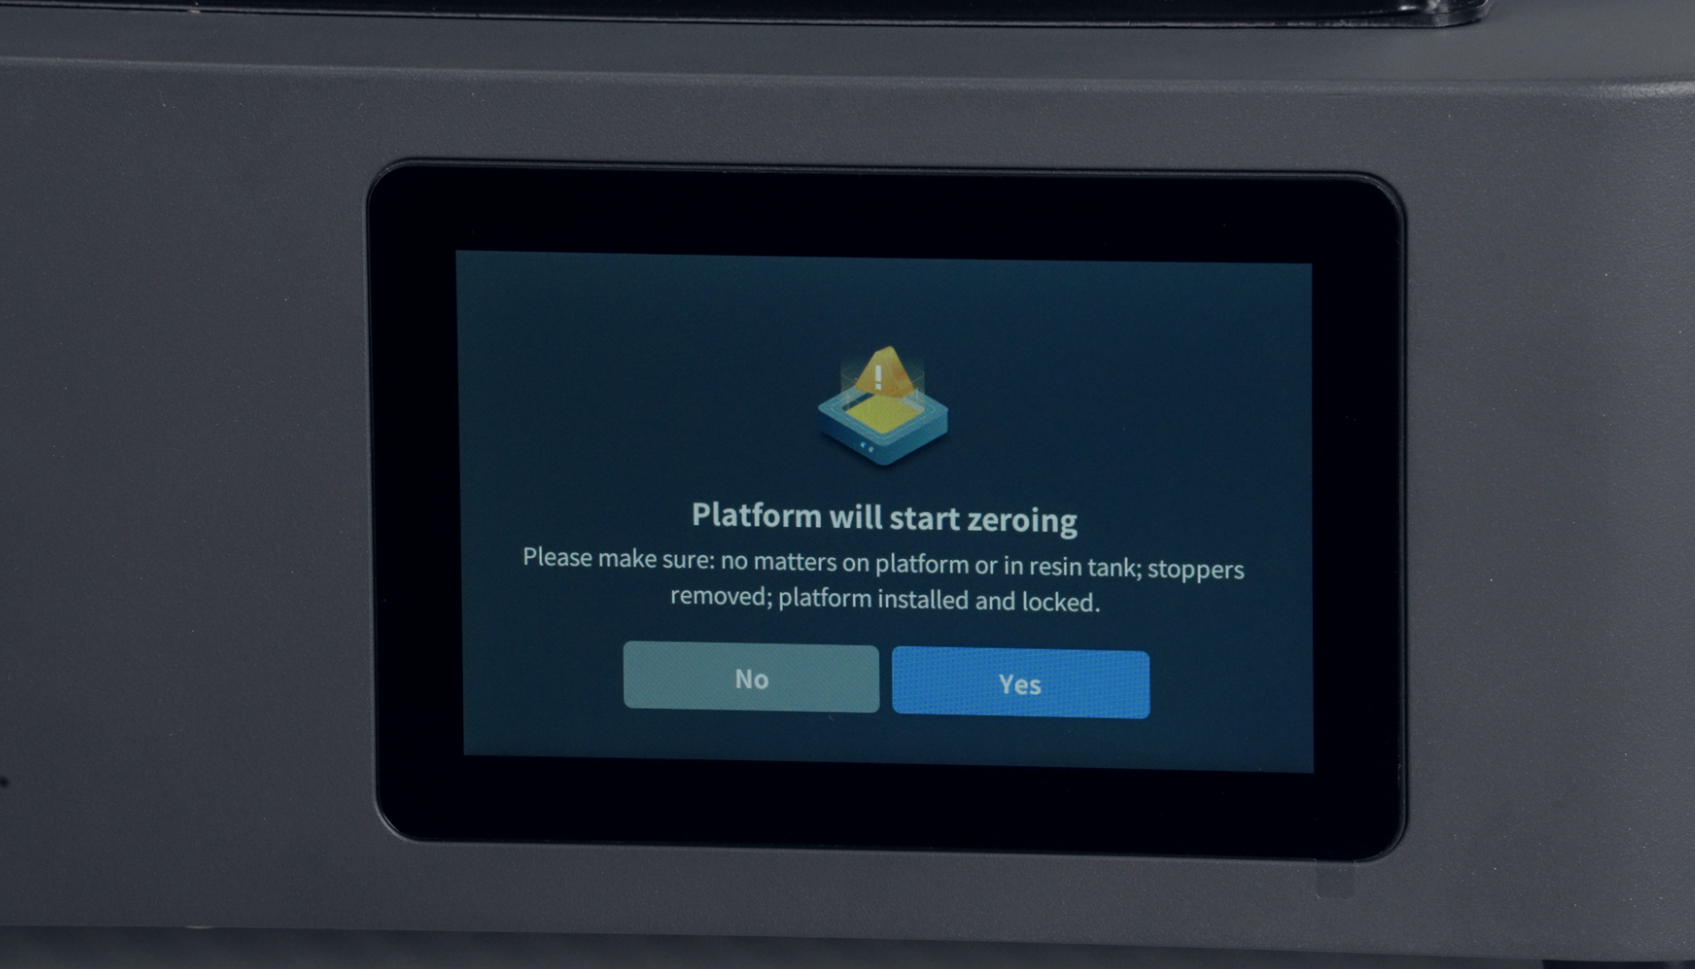
- Before leveling the platform, please confirm that the scraper is positioned at the far right, then click "Leveling". (If leveling fails to pass the leveling guide, please refer to "Maintenance - 3. Platform Leveling")
 |
 |
Note: If the scraper fails to return to the far right end of the tank, please manually reset it.
- Weight sensor calibration:
- Click "Calibrate" when the resin bottle is not inserted.
 |
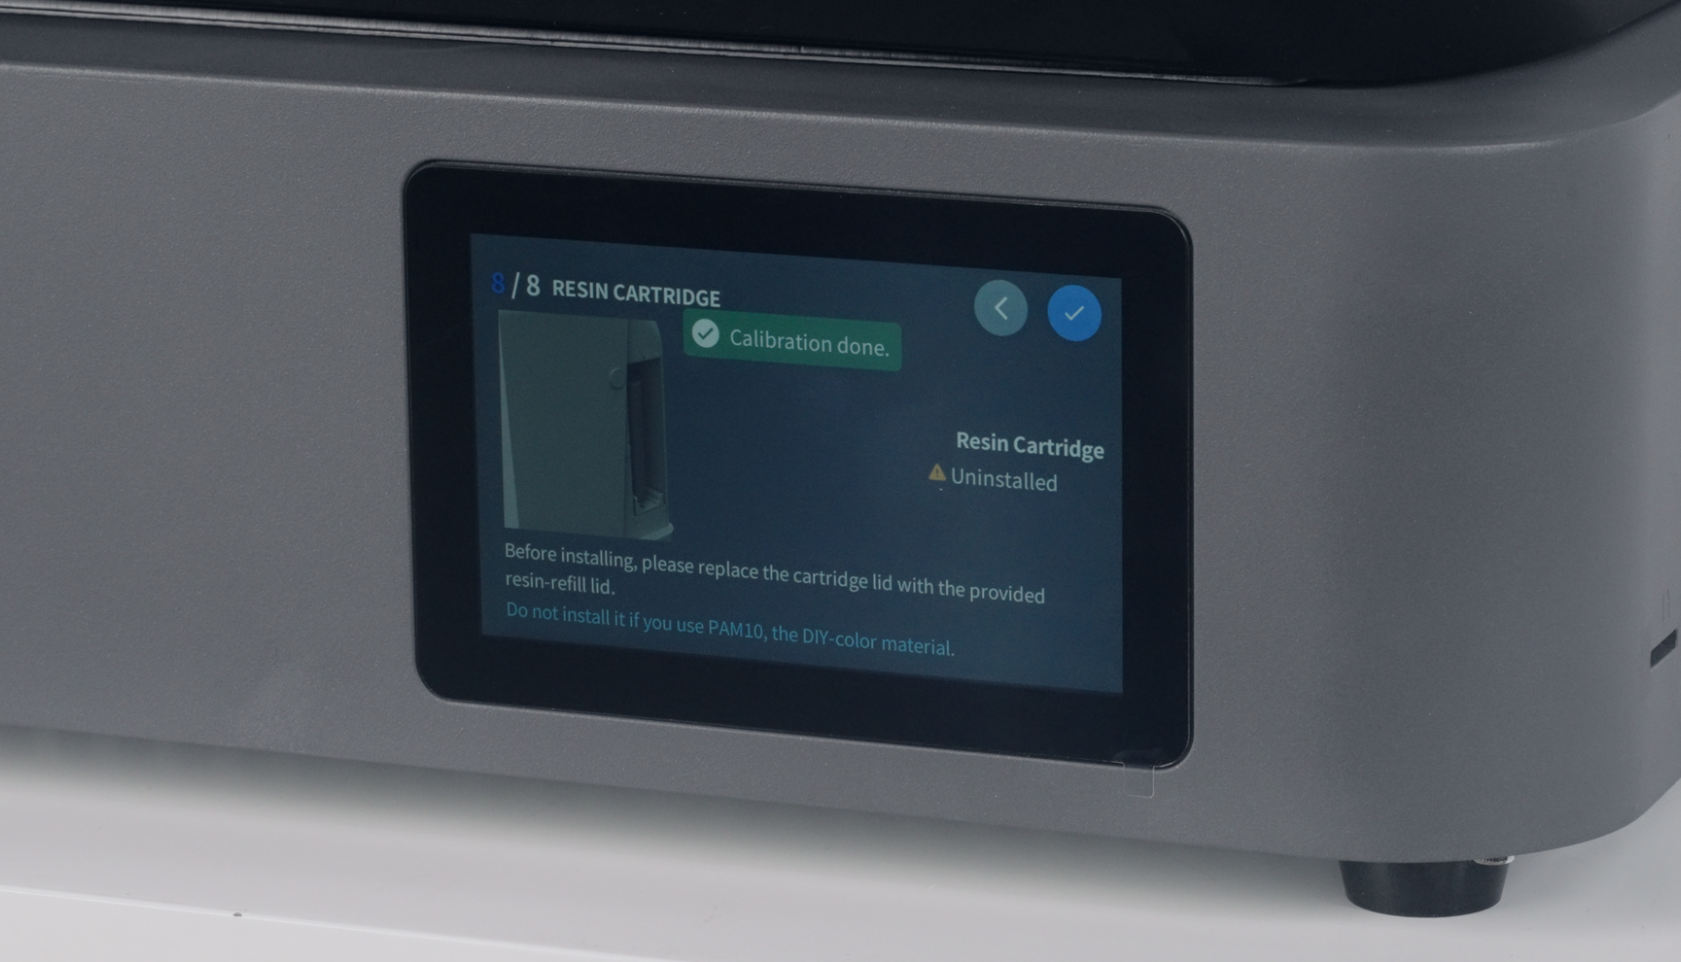 |
- Resin bottle installation.
-
Shake the resin bottle for 3 - 5 minutes.
-
First, replace the resin-refill lid assembly onto a new resin bottle (users of the old version of the resin bottle are also advised to replace it with a new resin-refill lid assembly)
Note:Please keep the sealing cap on the resin bottle
 |
 |
- Insert the resin bottle into the resin cartridge slot.
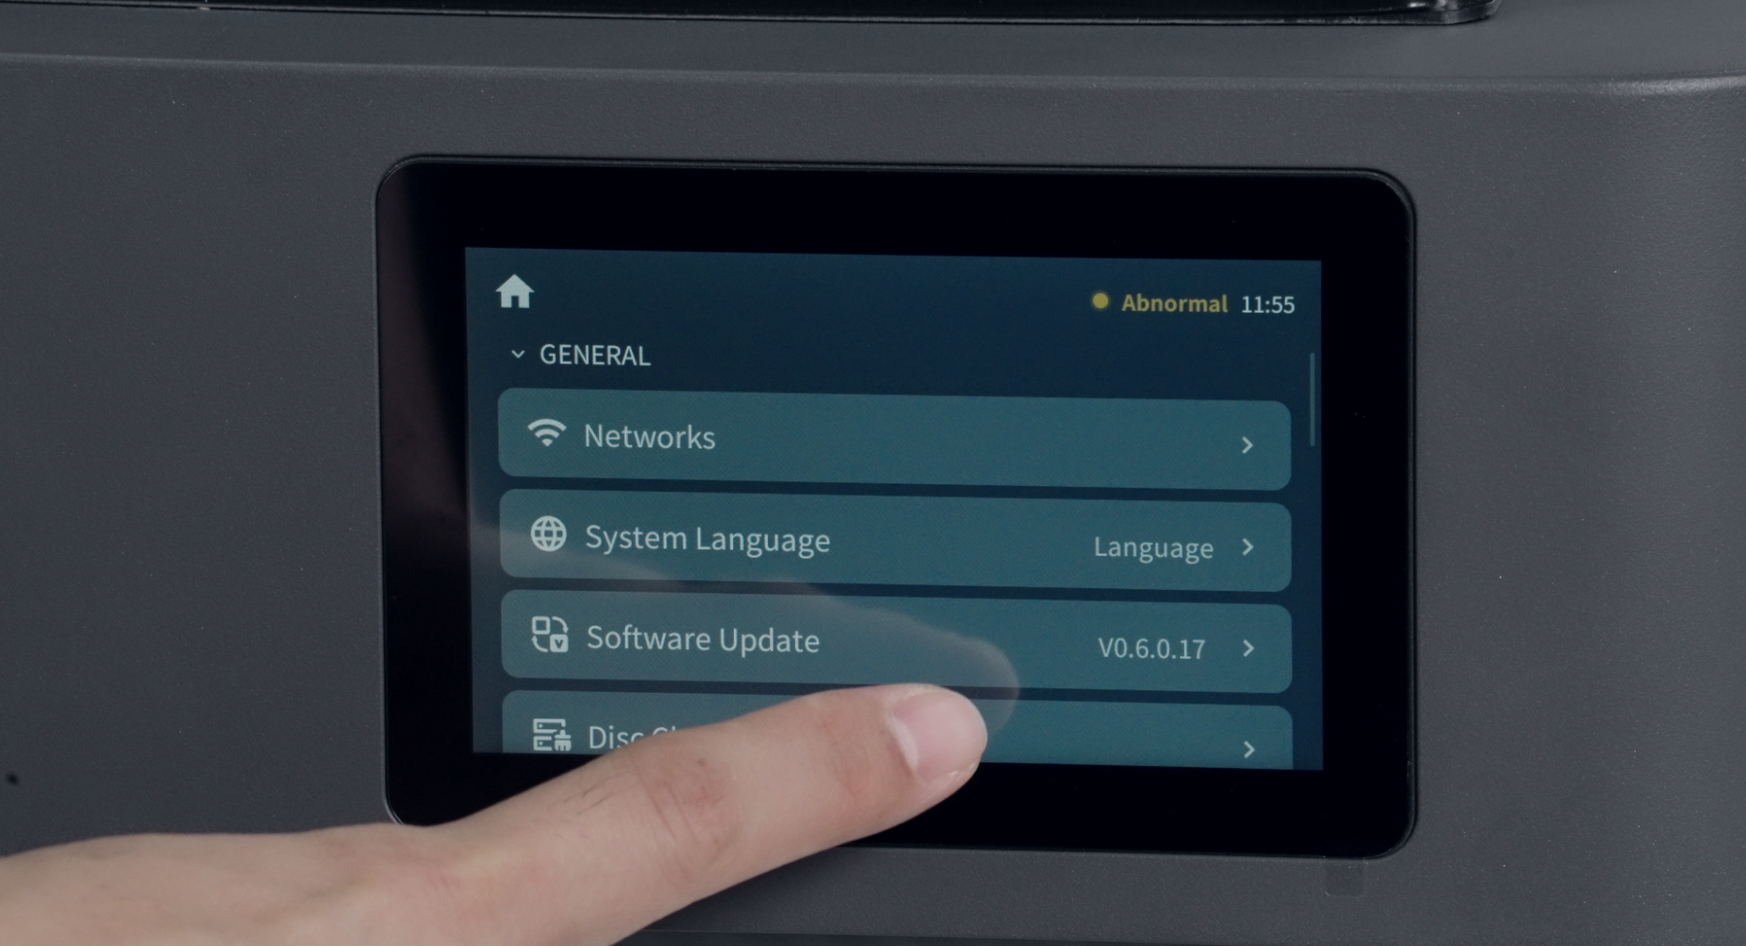
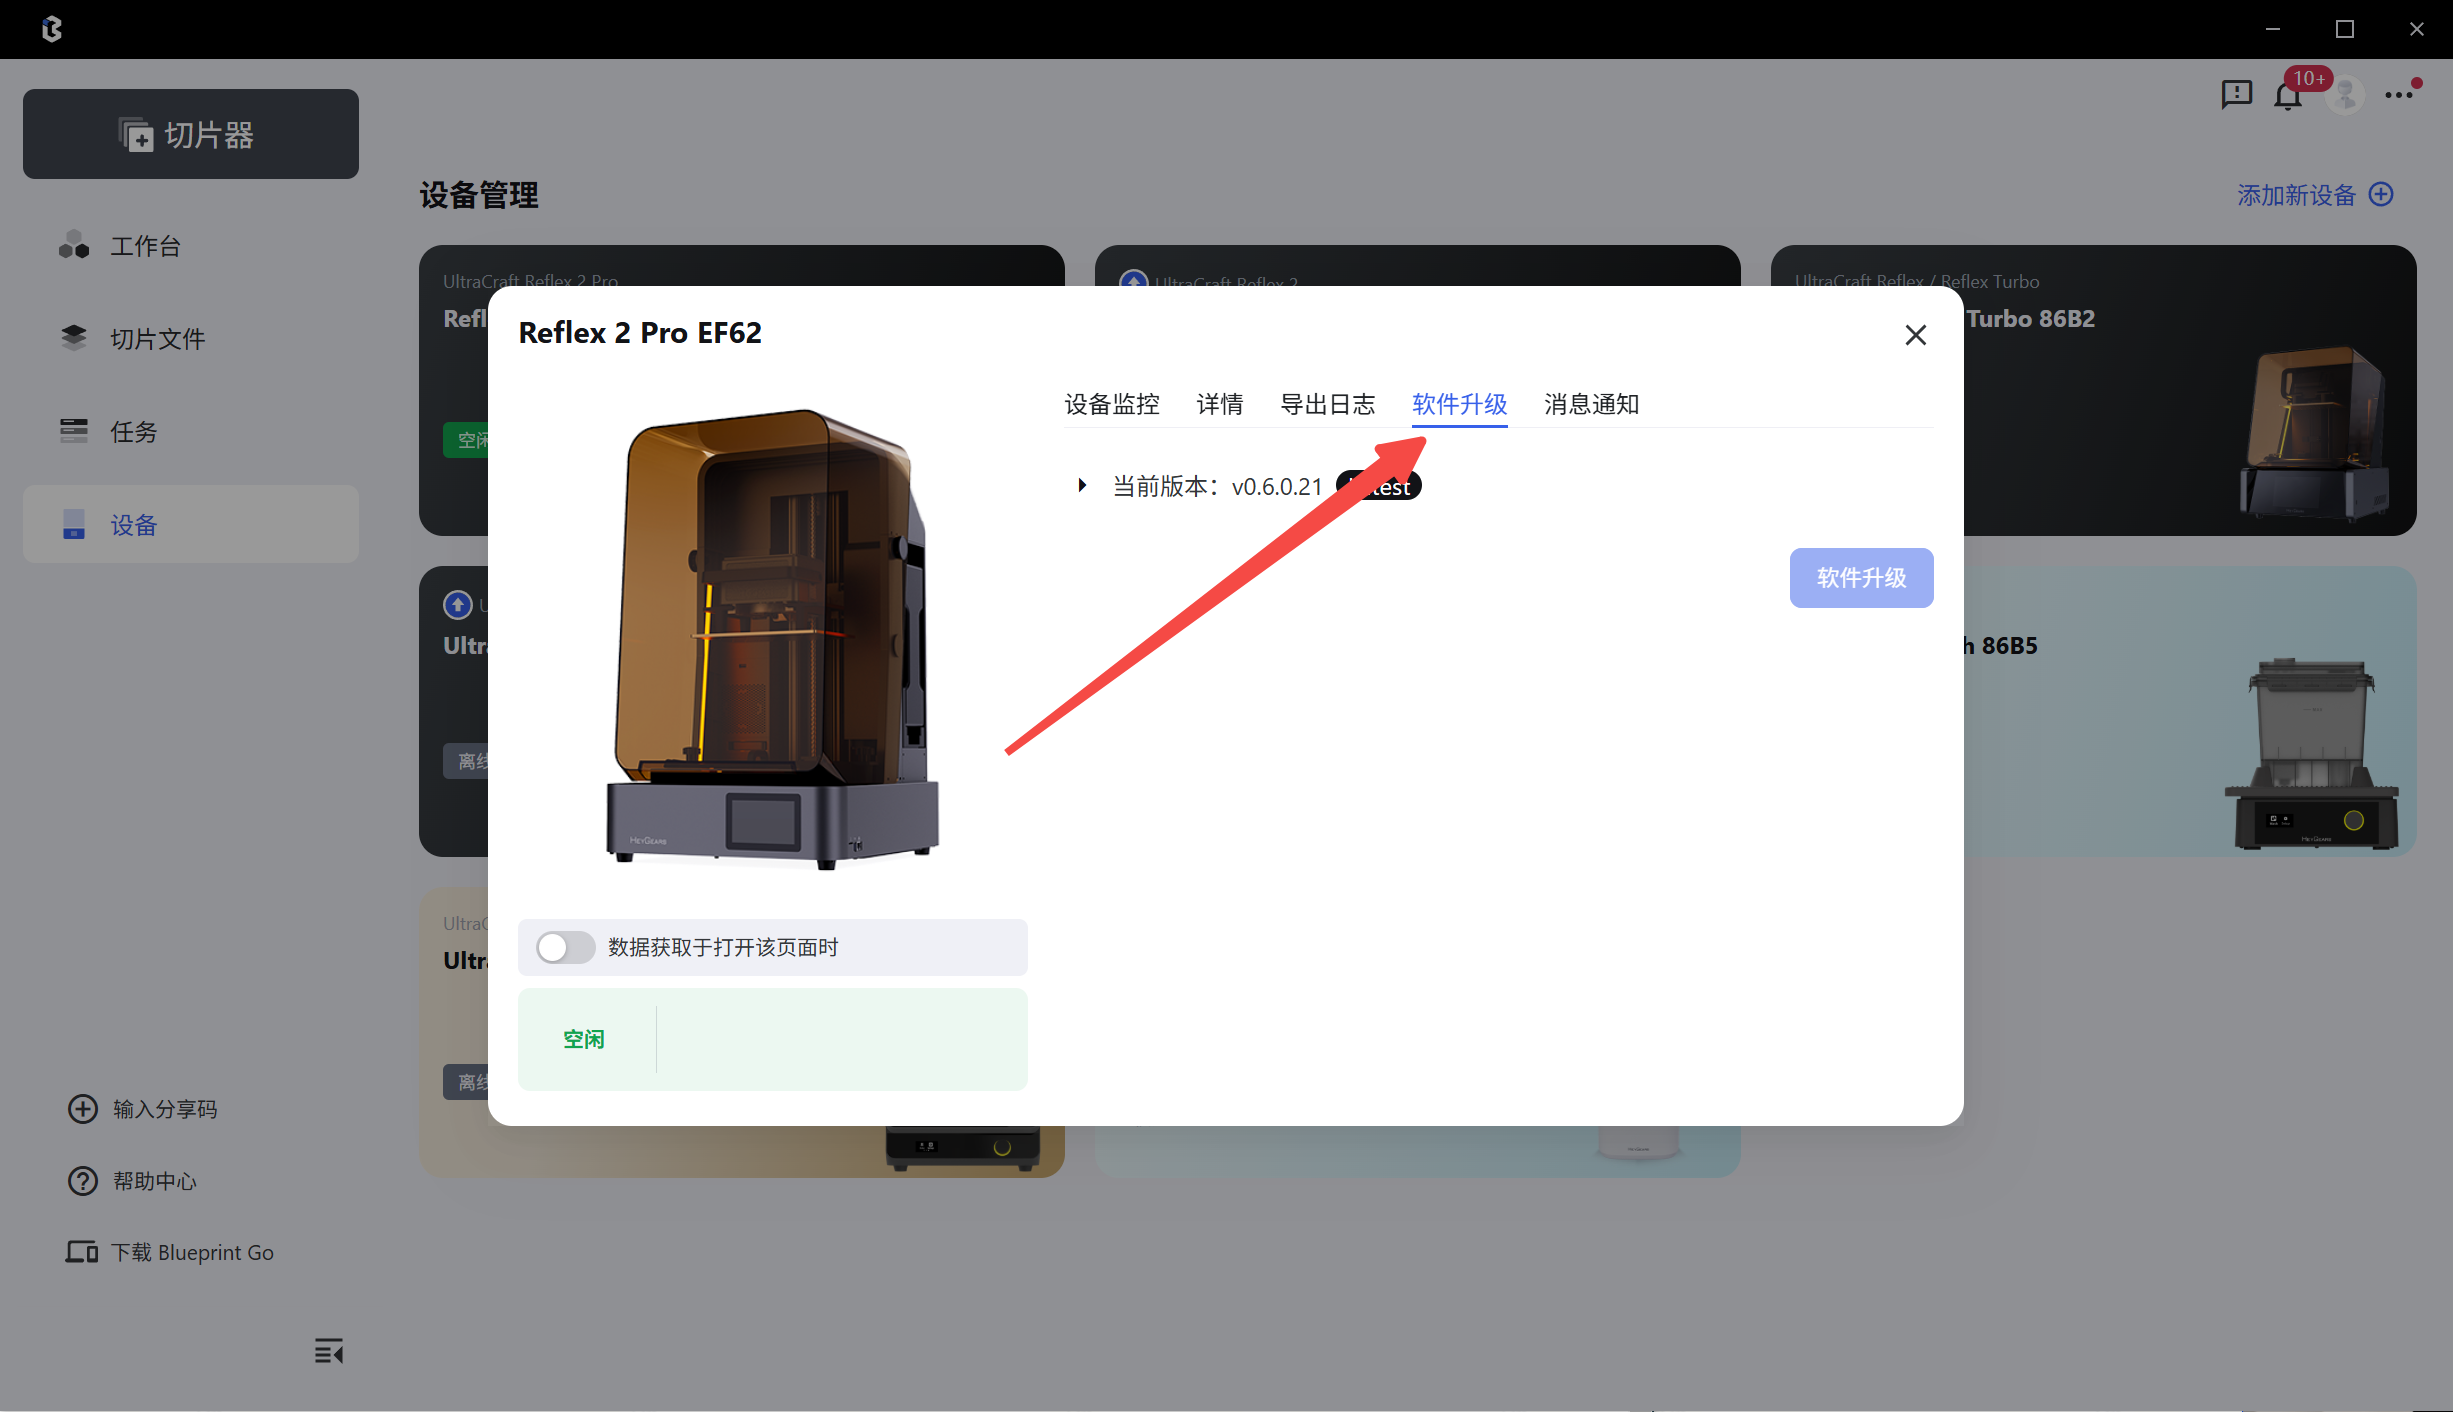
Important: After binding to BluePrint Studio, check if an system upgrade is required and perform an OTA system upgrade immediately.
A. On the device: Enter the settings interface, scroll down to find the software update.
B. With the software: Click Software Upgrade in BluePrint Studio.
 |
 |
¶ 2.First Printing
¶ 1. Pre-processing
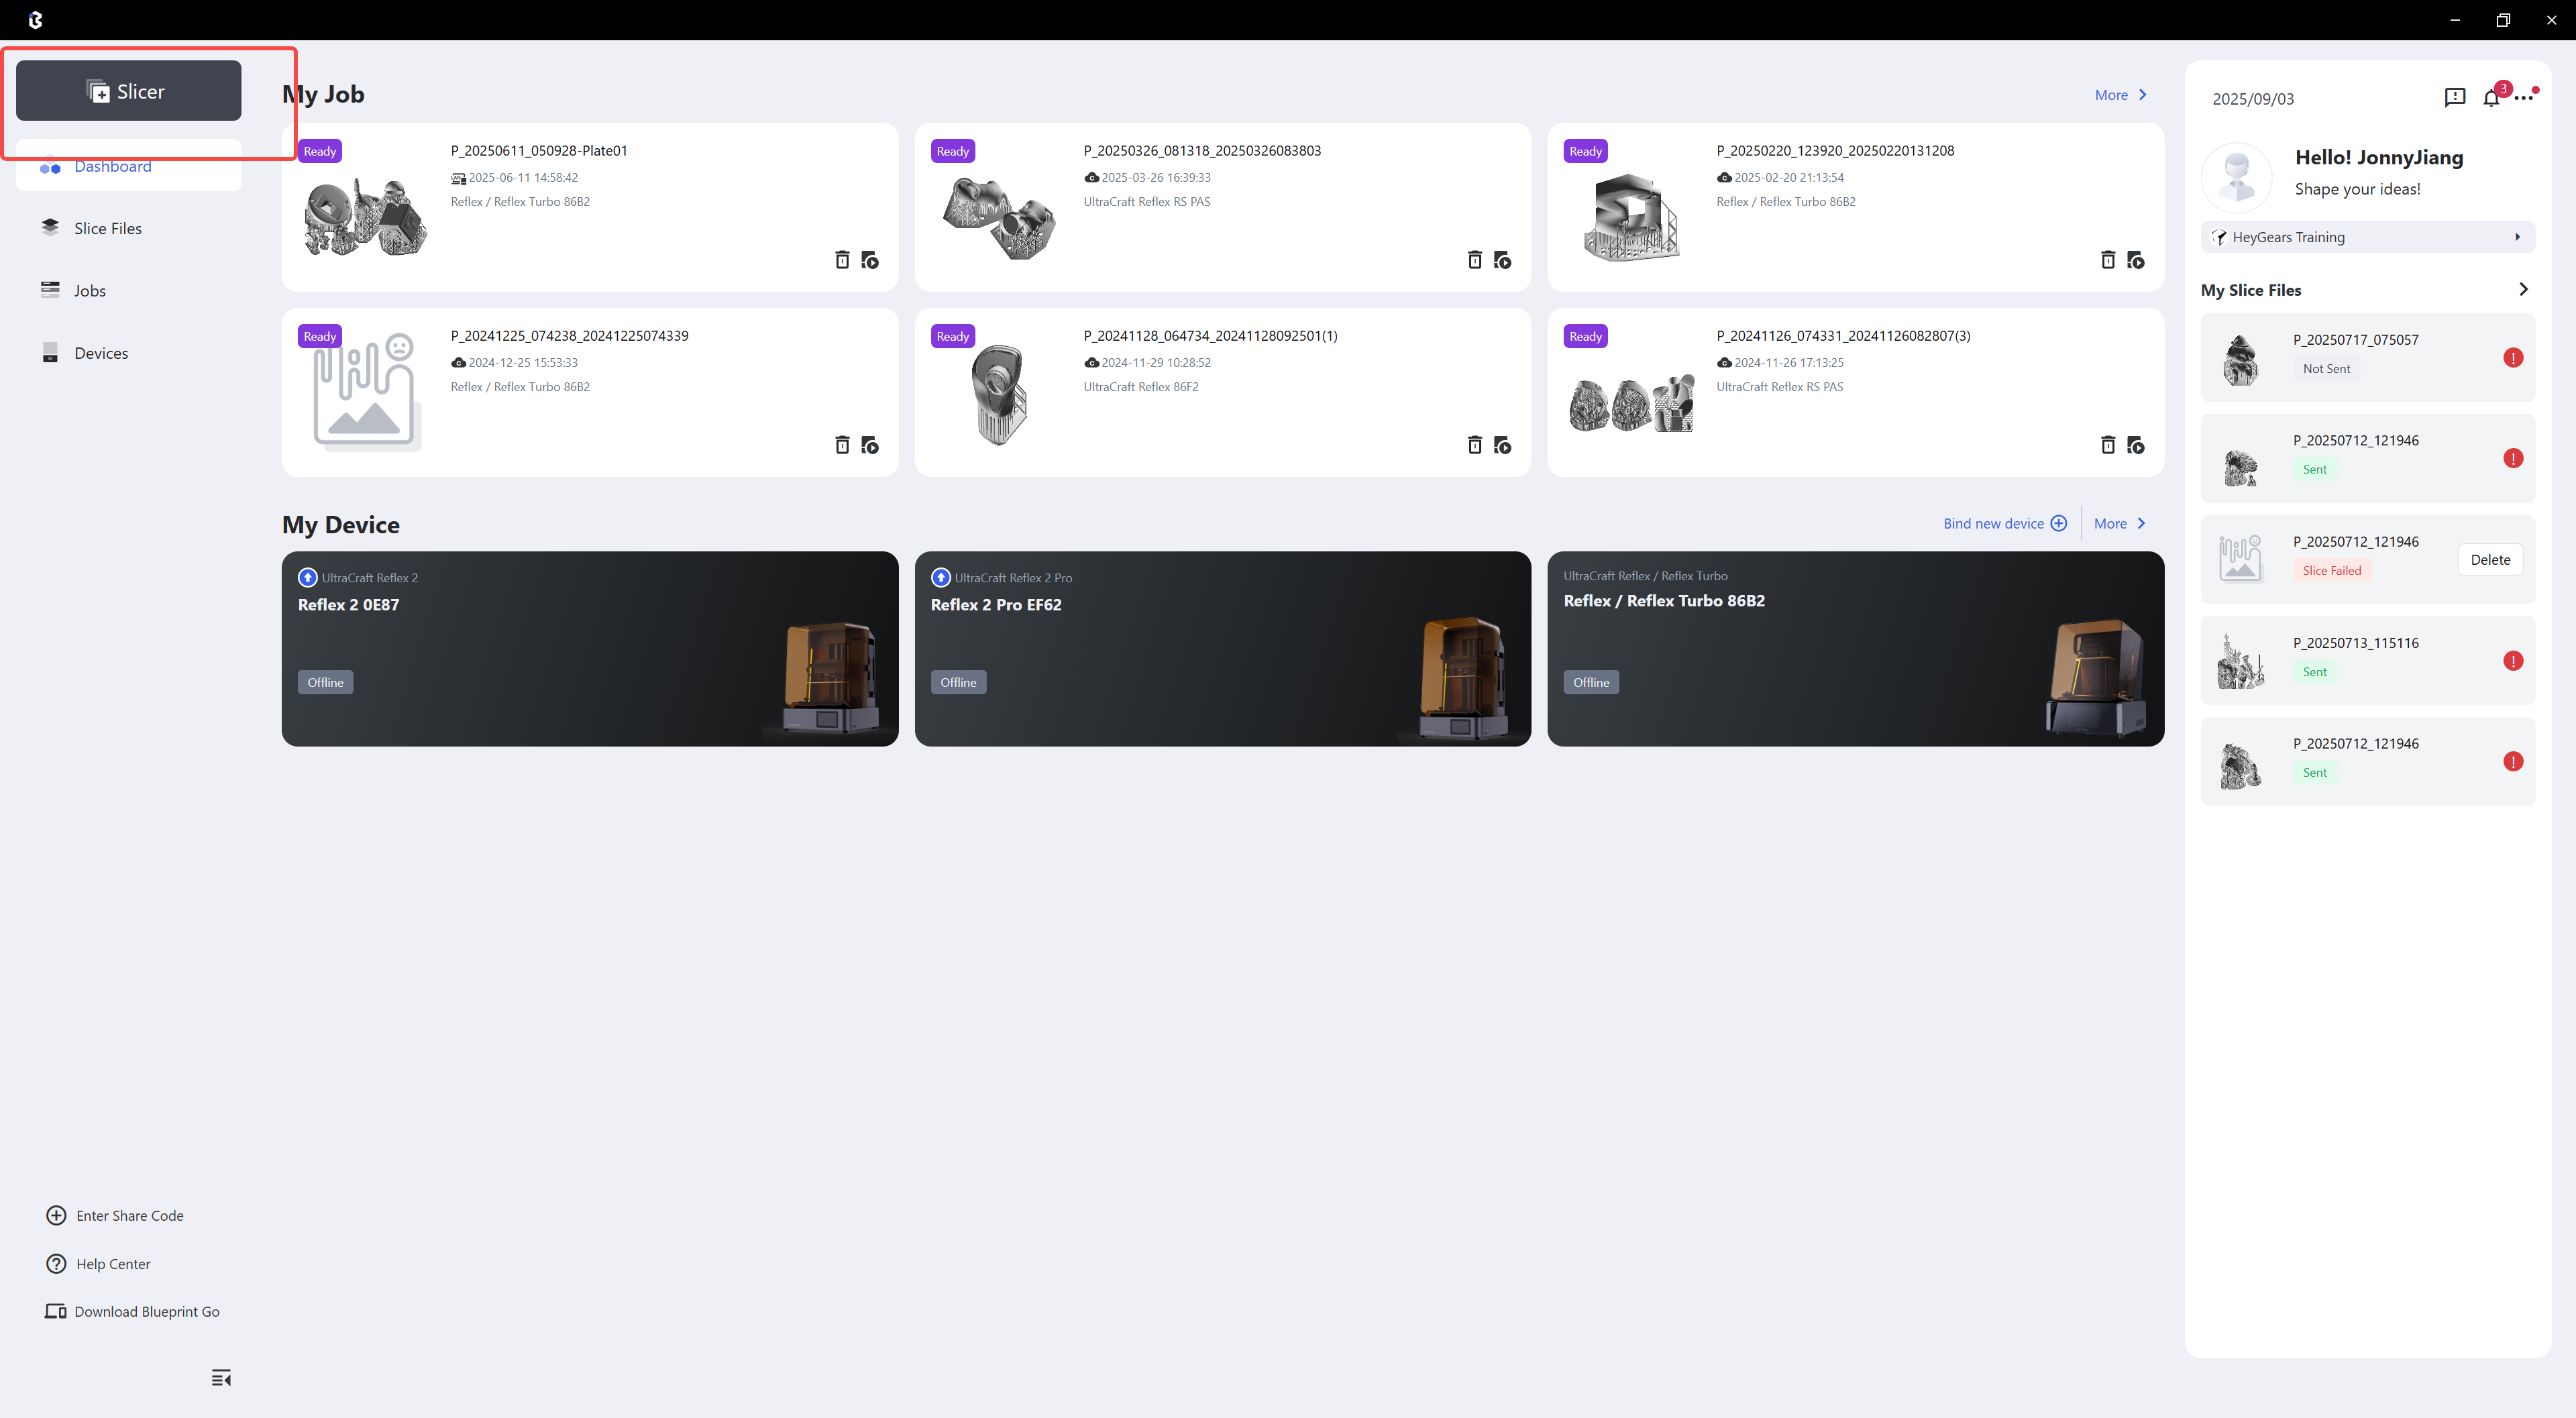
- BluePrint Studio Model Processing
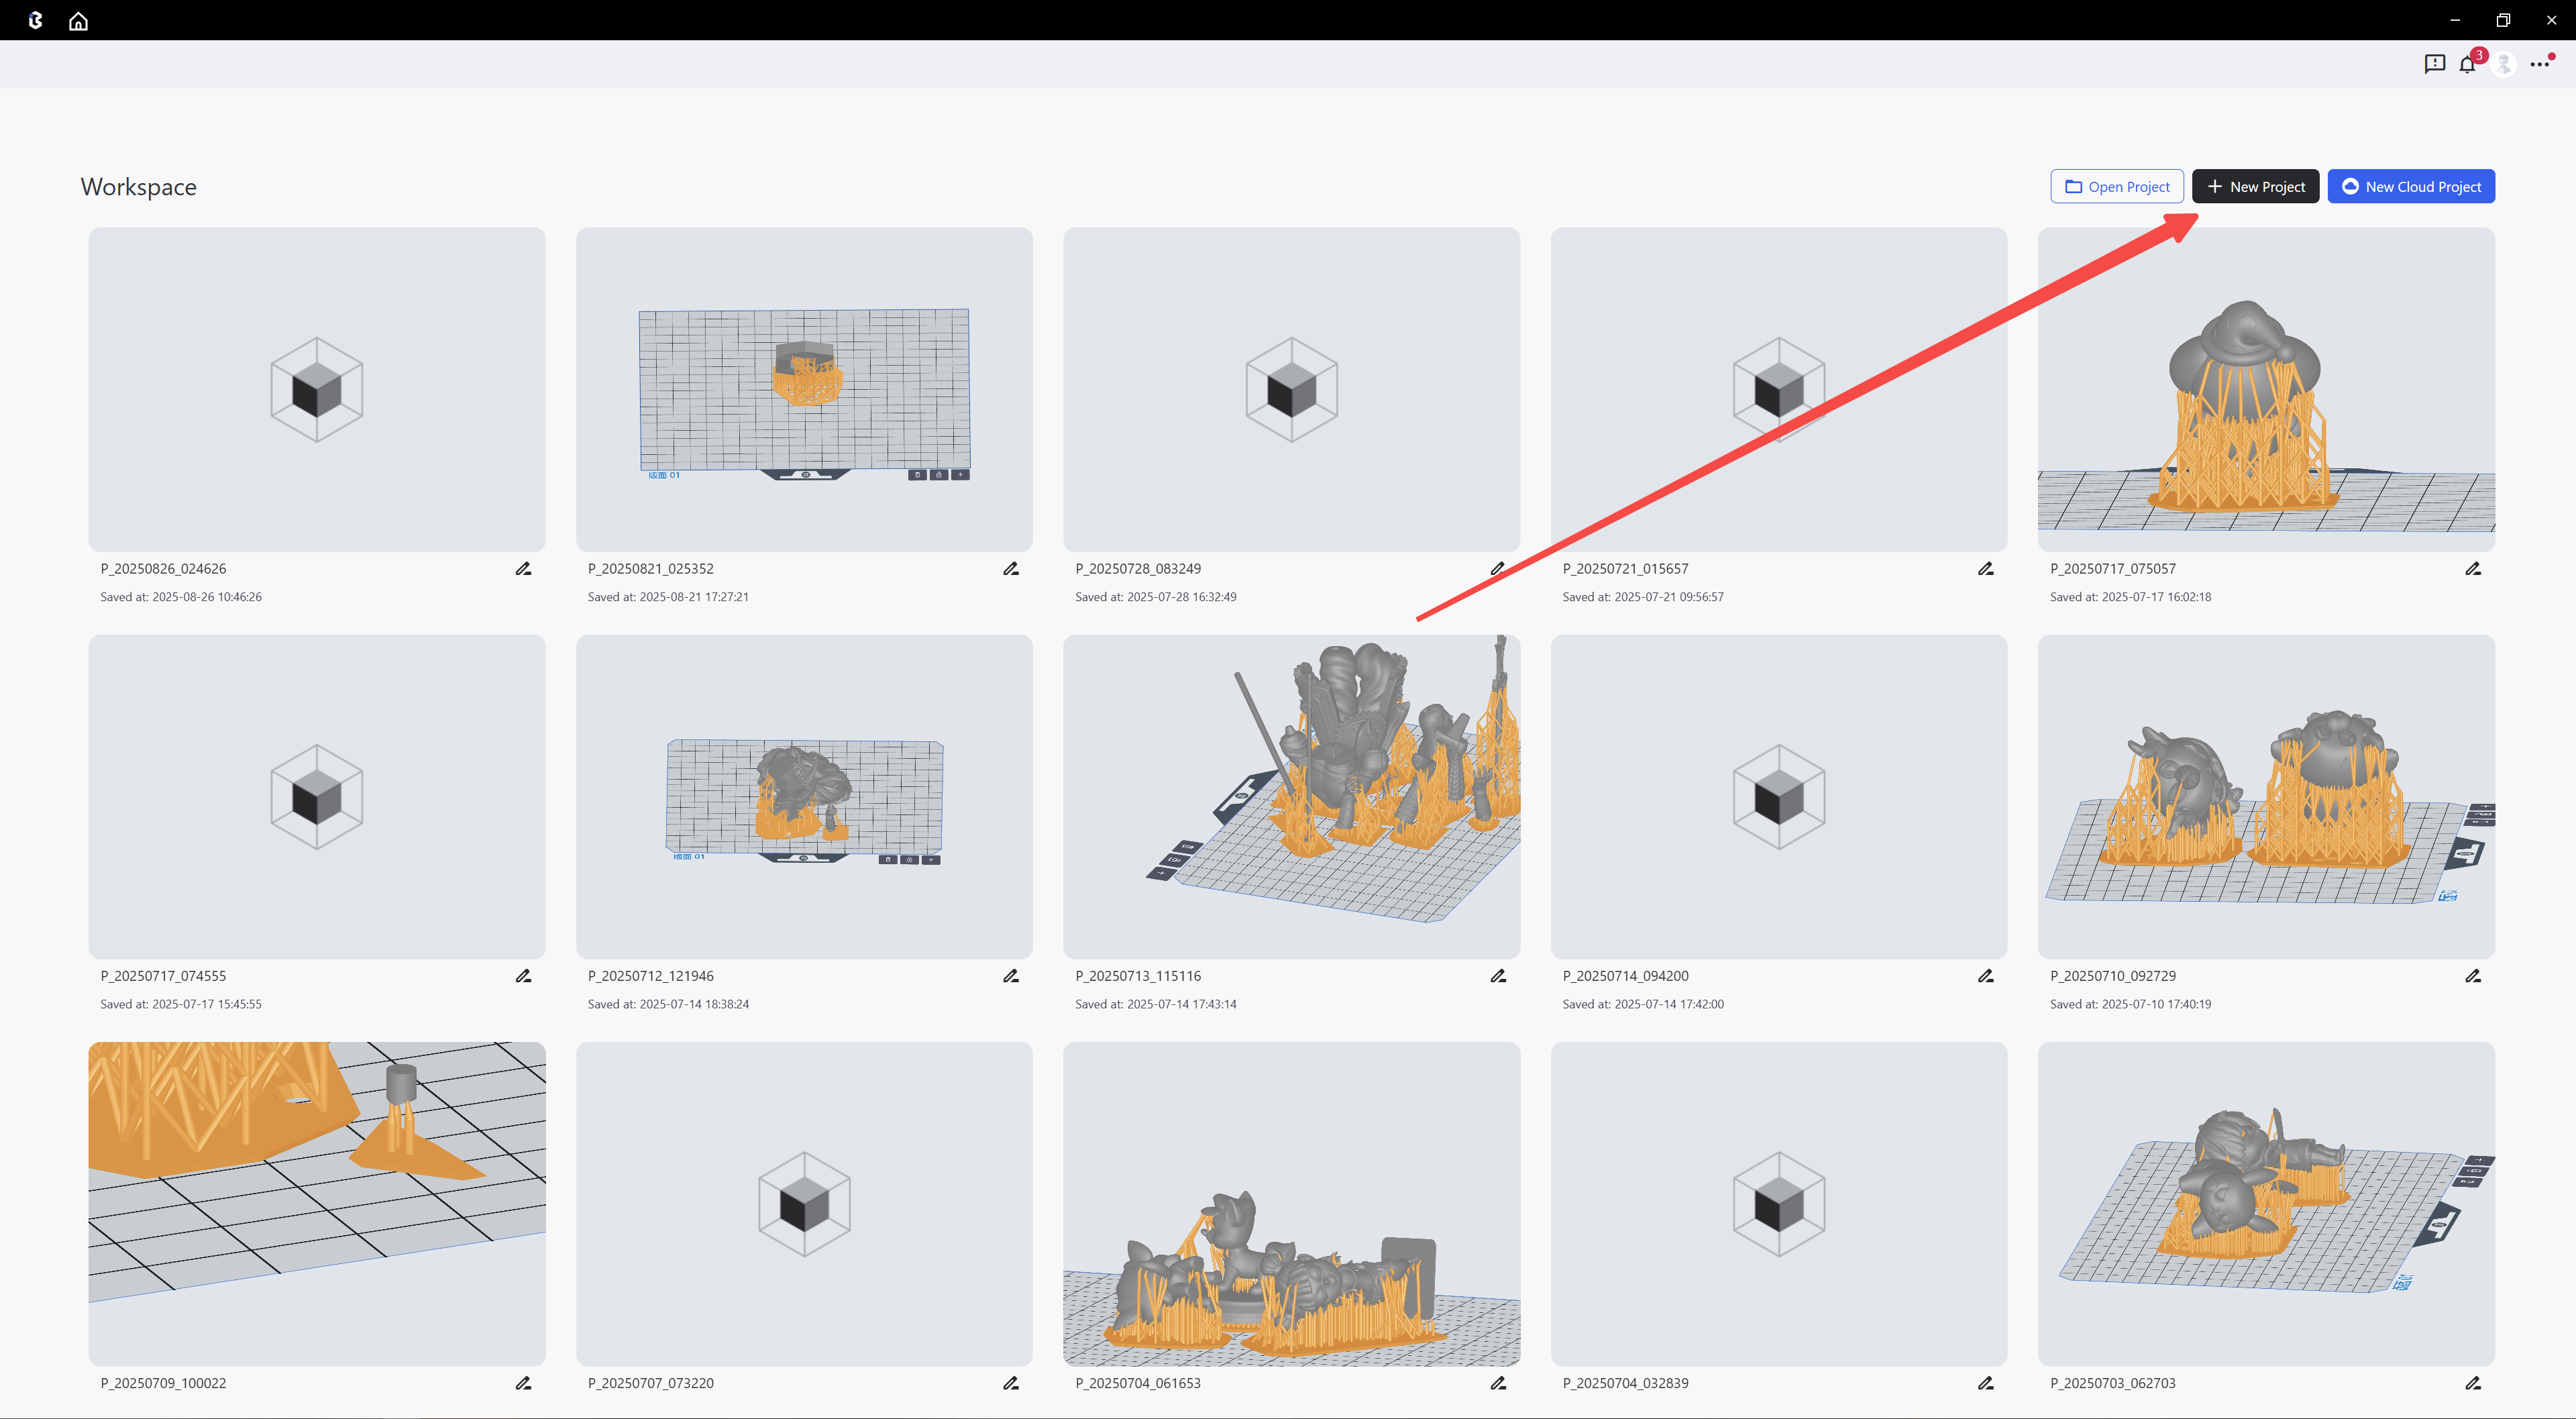
| Step 1: Click slicer | Step 2: Click New Project |
 |
 |
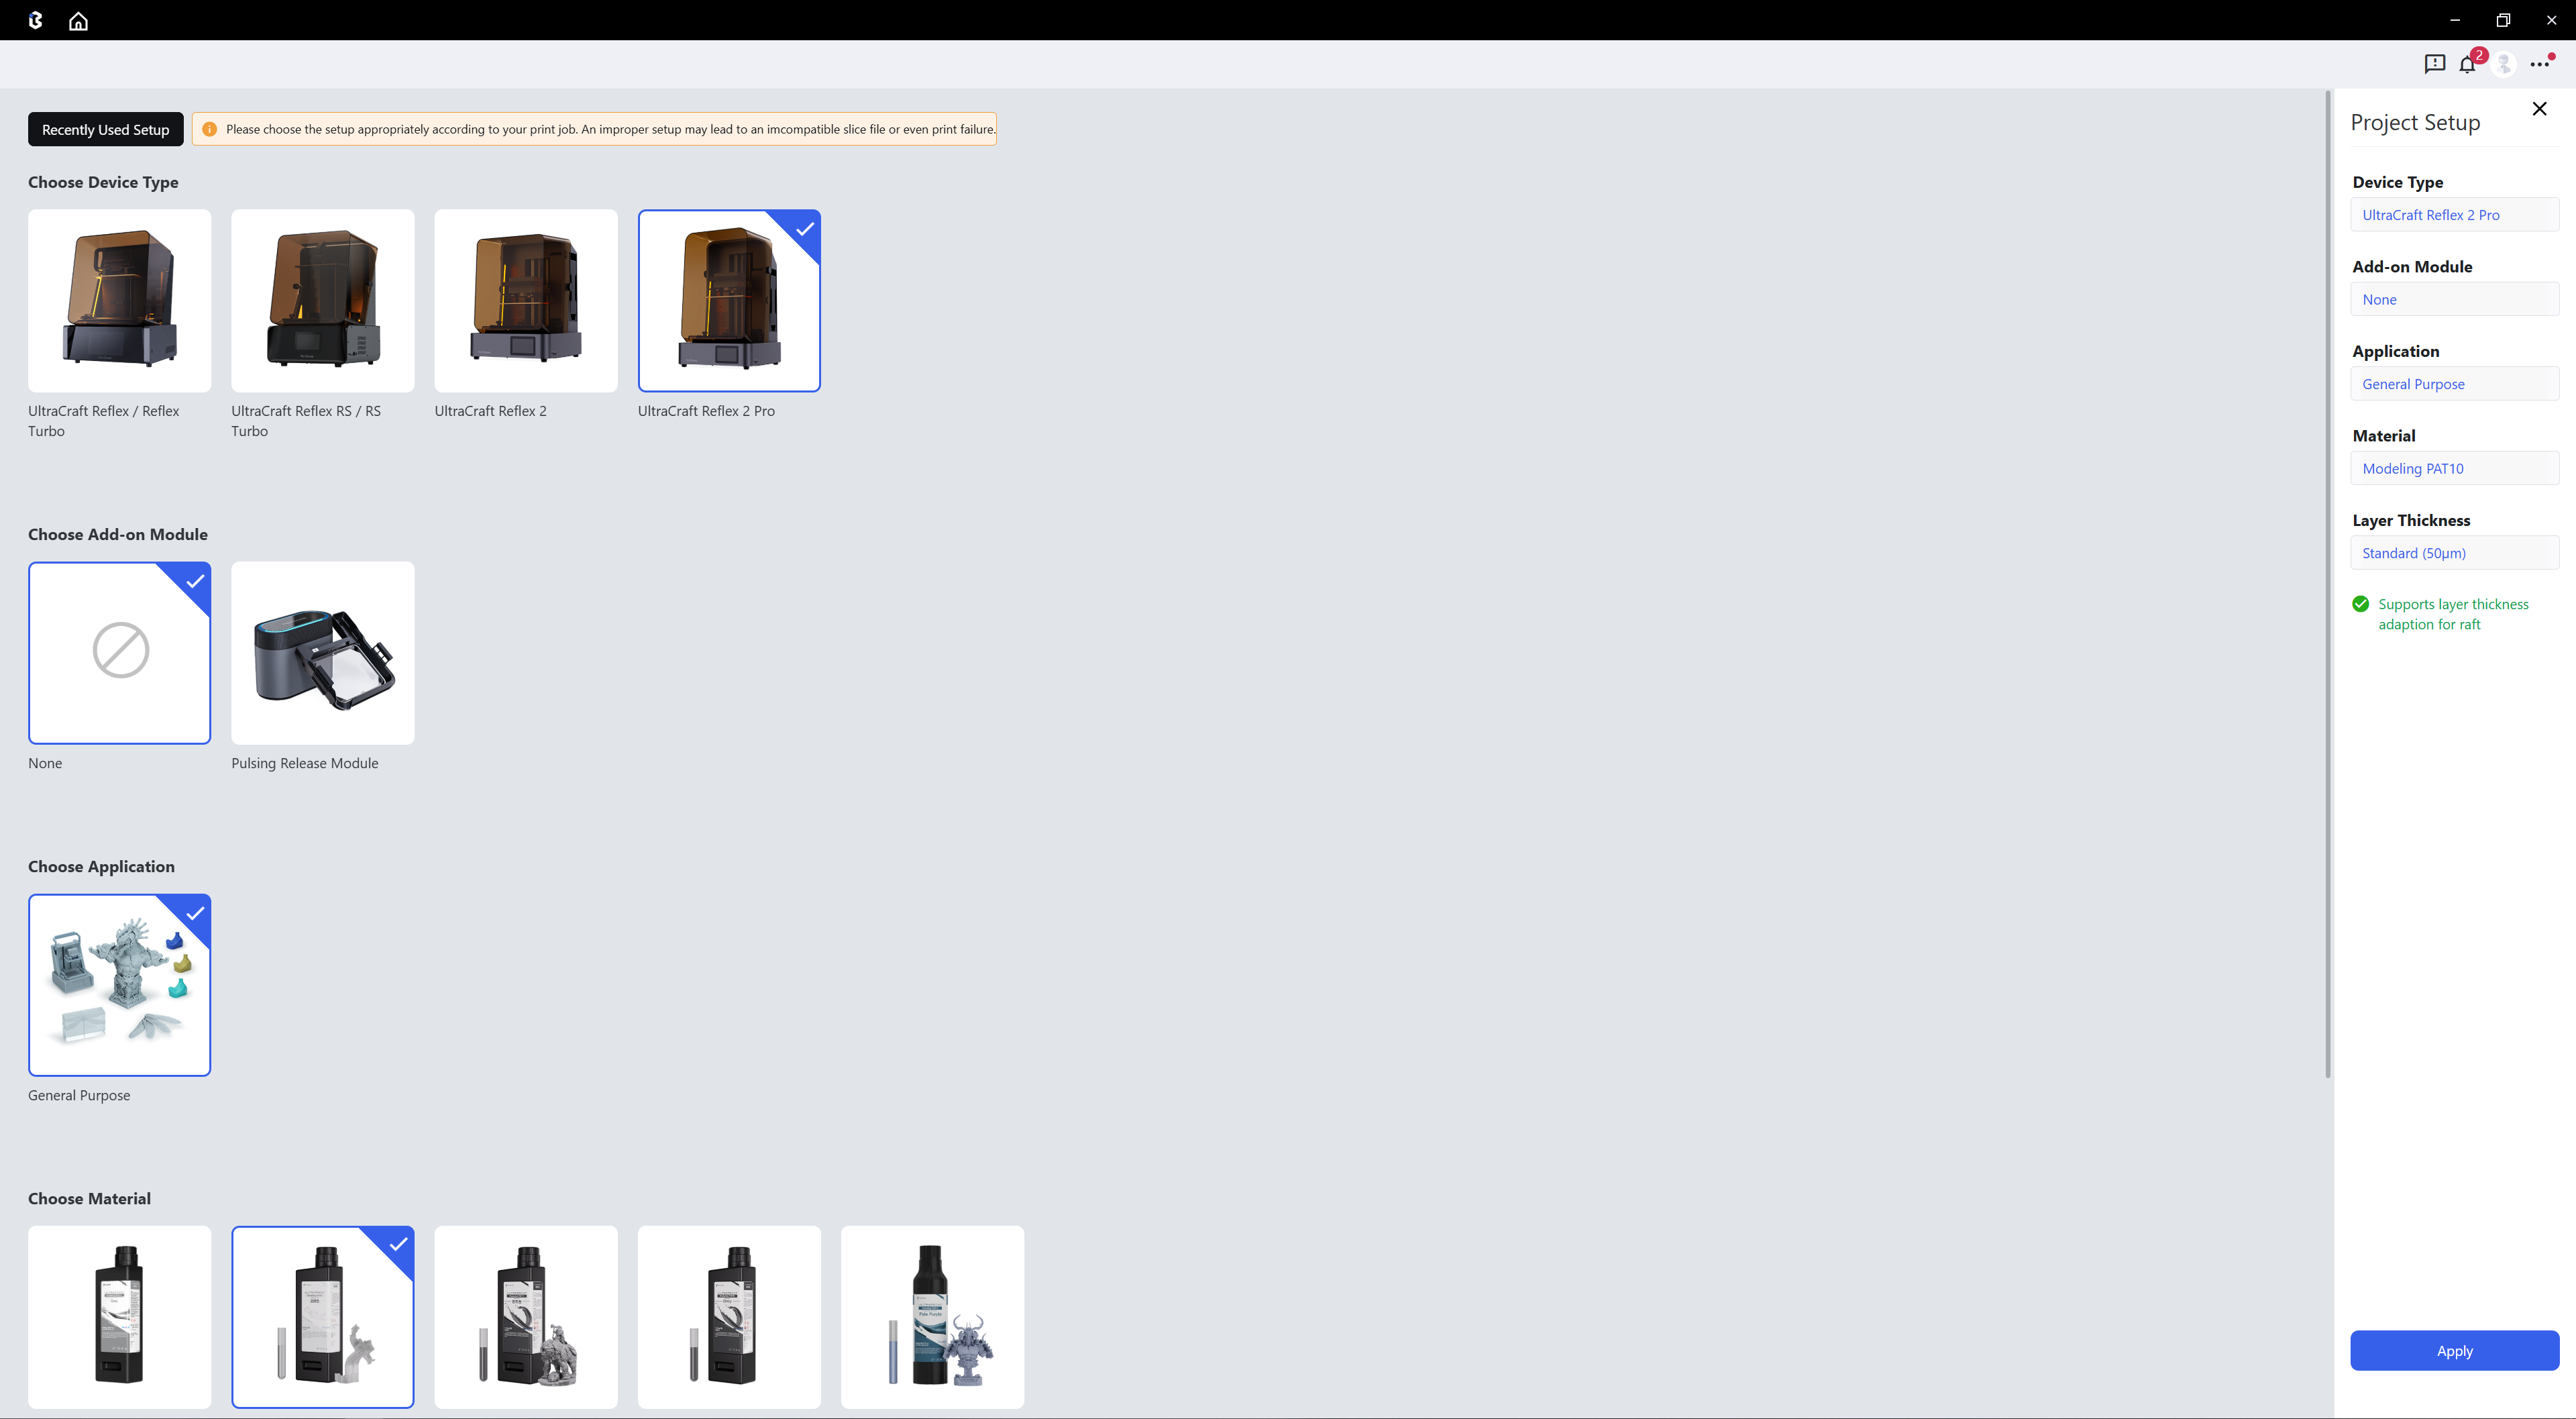
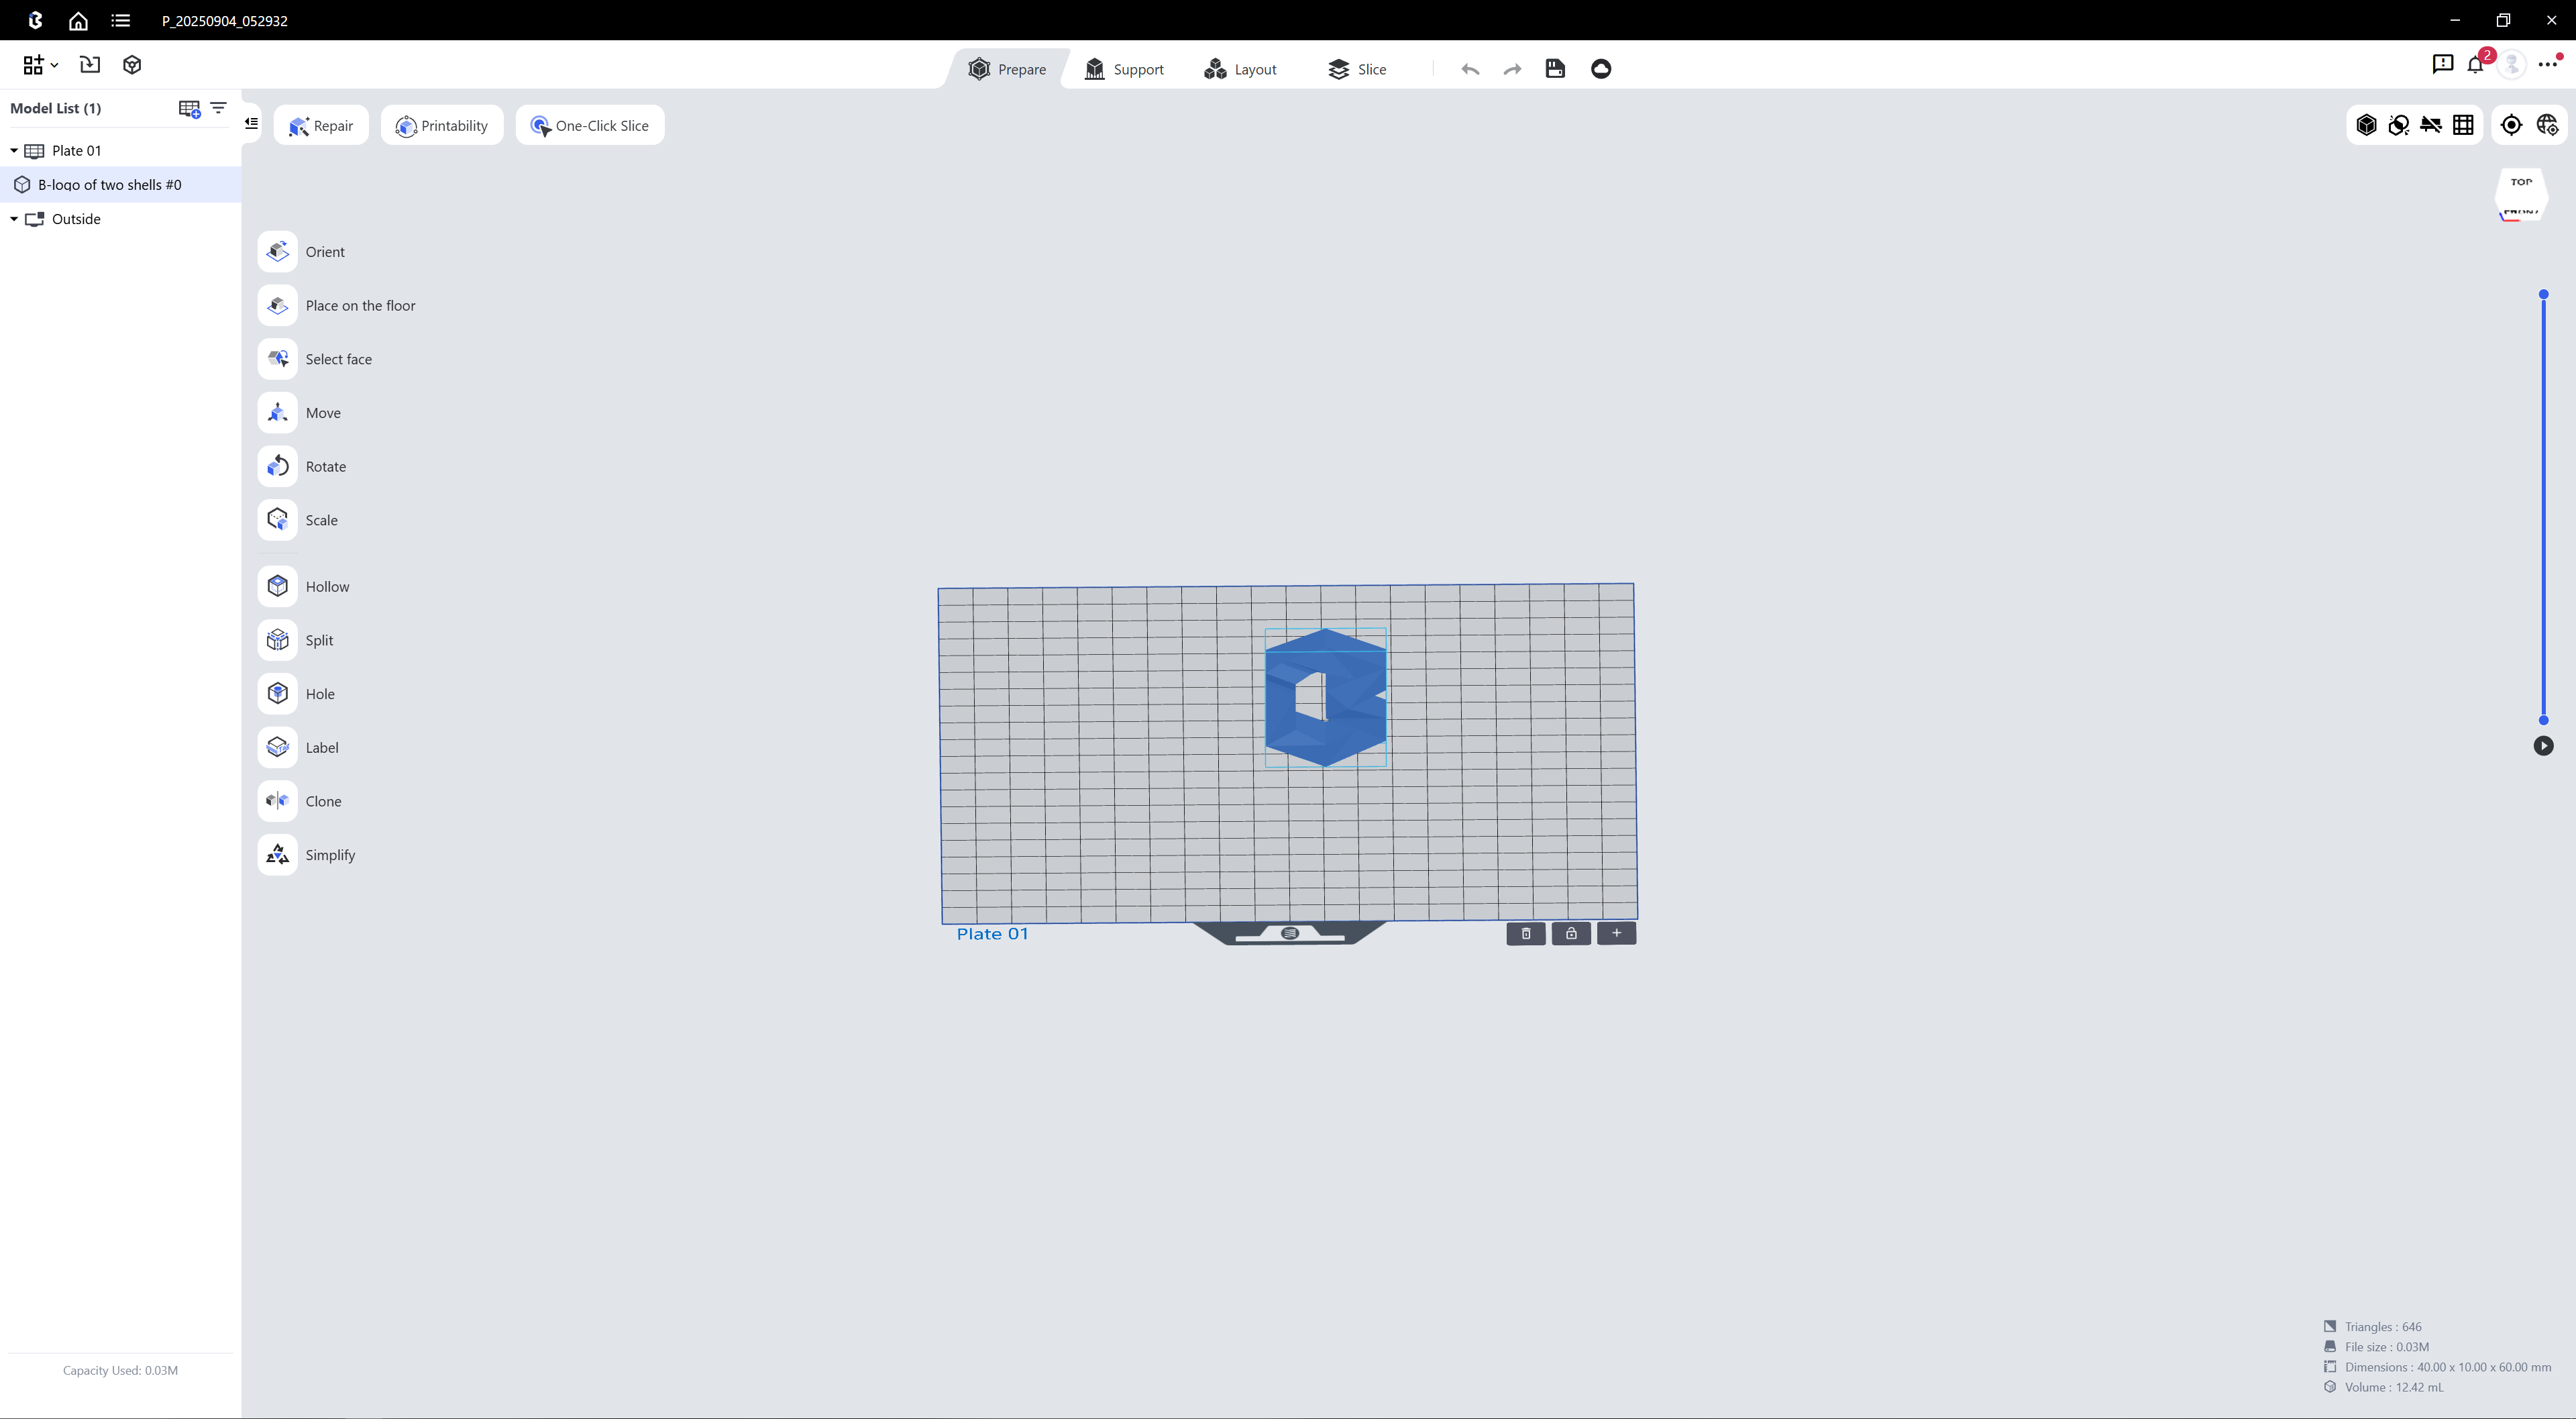
| Step 3: Select the device and the materials you use | Step 4: Import the model and use the editing tool to complete operations such as moving, scaling, hollowing, punching, marking, and cloning of the model |
 |
 |
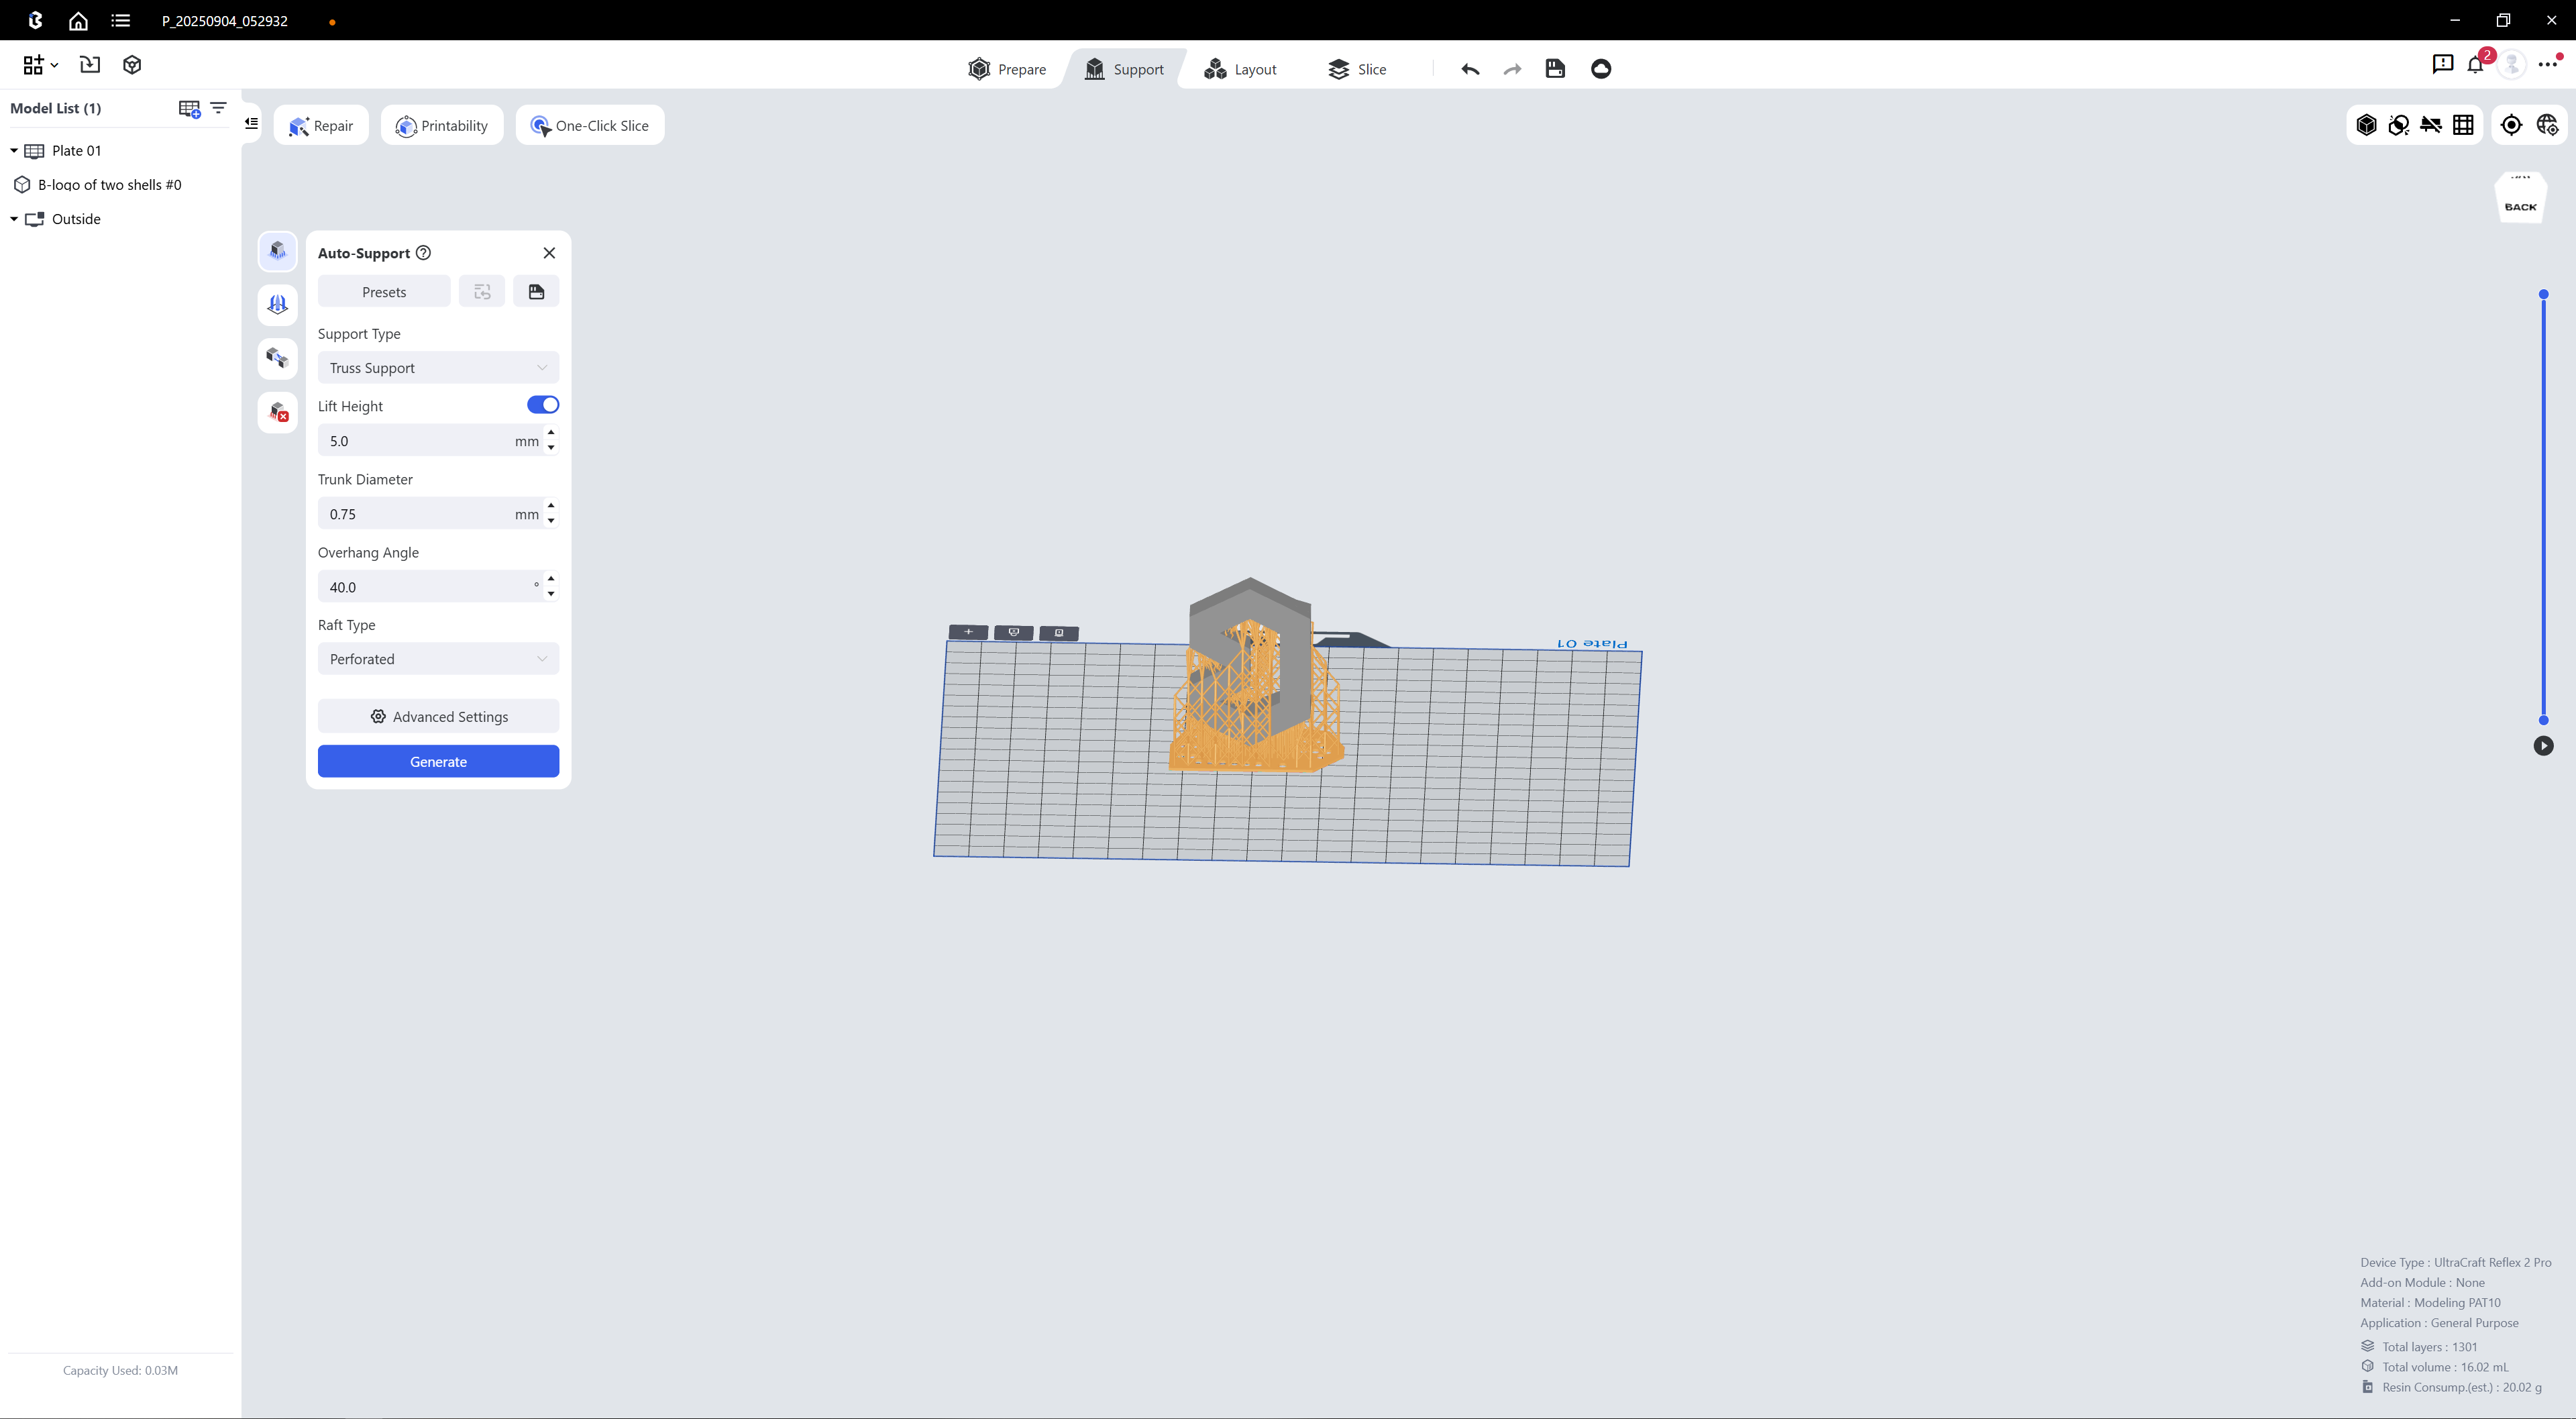
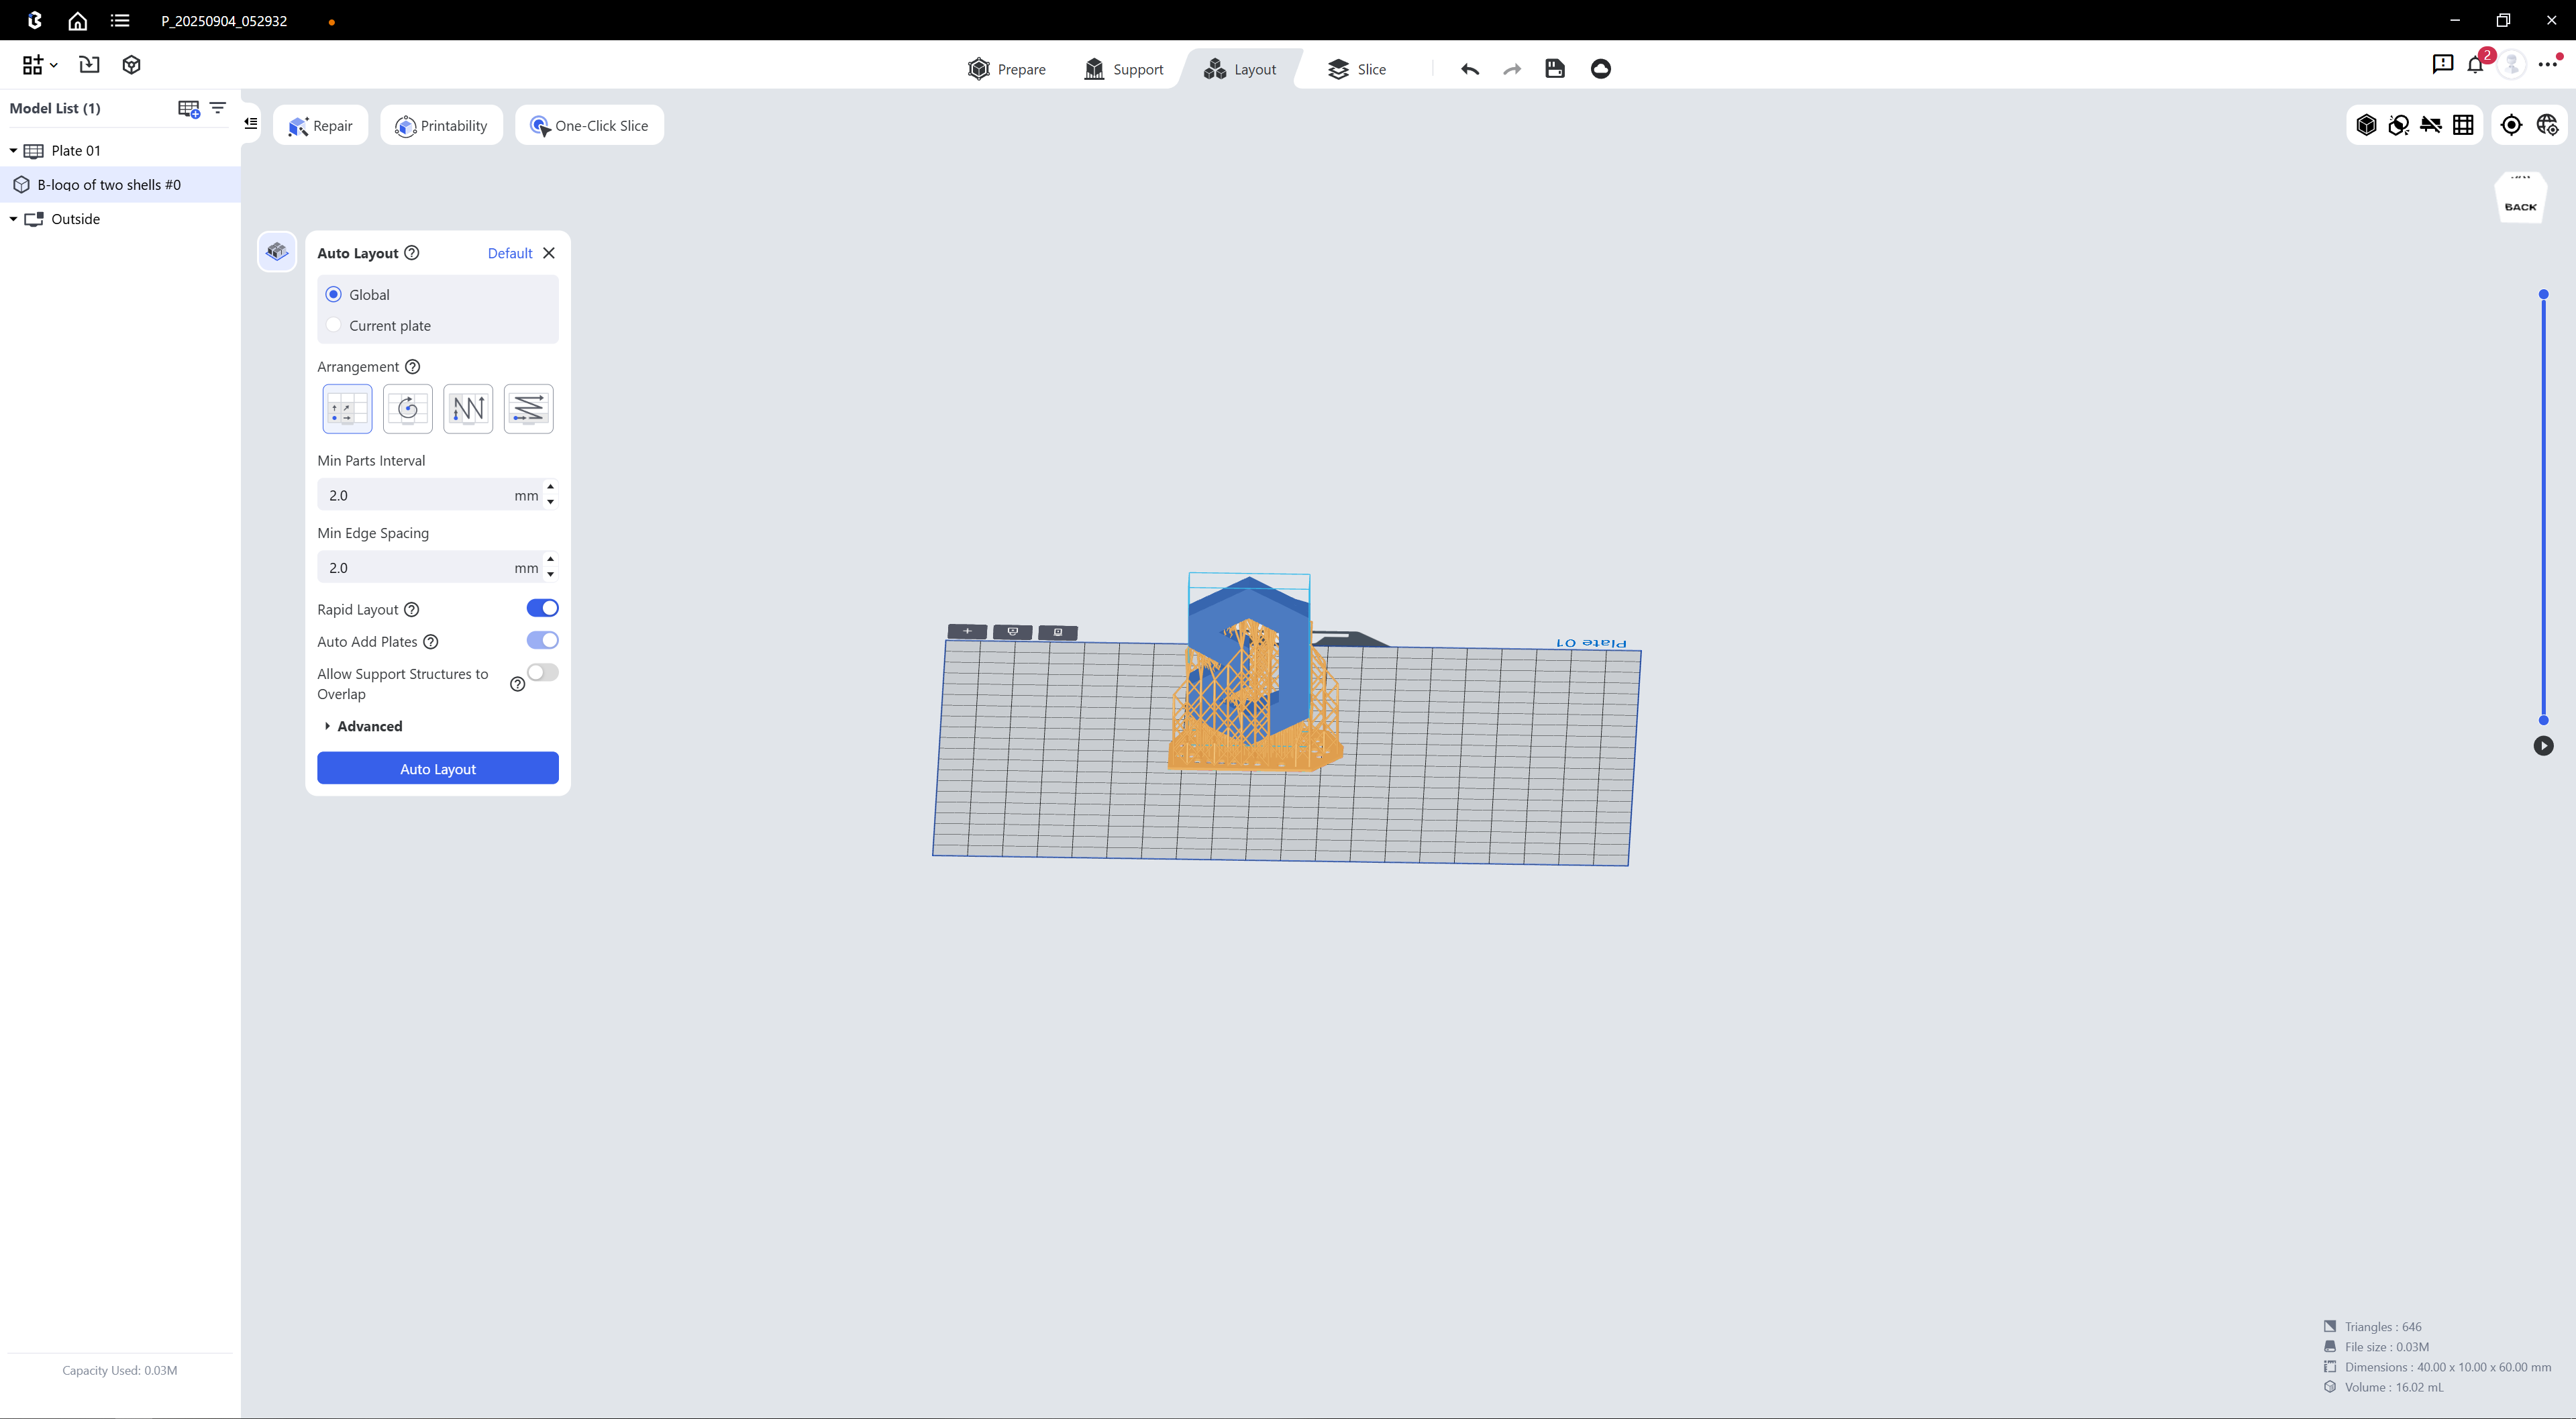
| Step 5: By default, select Truss Support and complete the addition of the support | Step 6: Select auto Layout |
 |
 |
| Step 7: Select the slice to slice the model, and change the file name on the left if necessary | Step 8: After slicing is completed, you can view and distribute slices in the slice library |
¶ 2. Start Printing
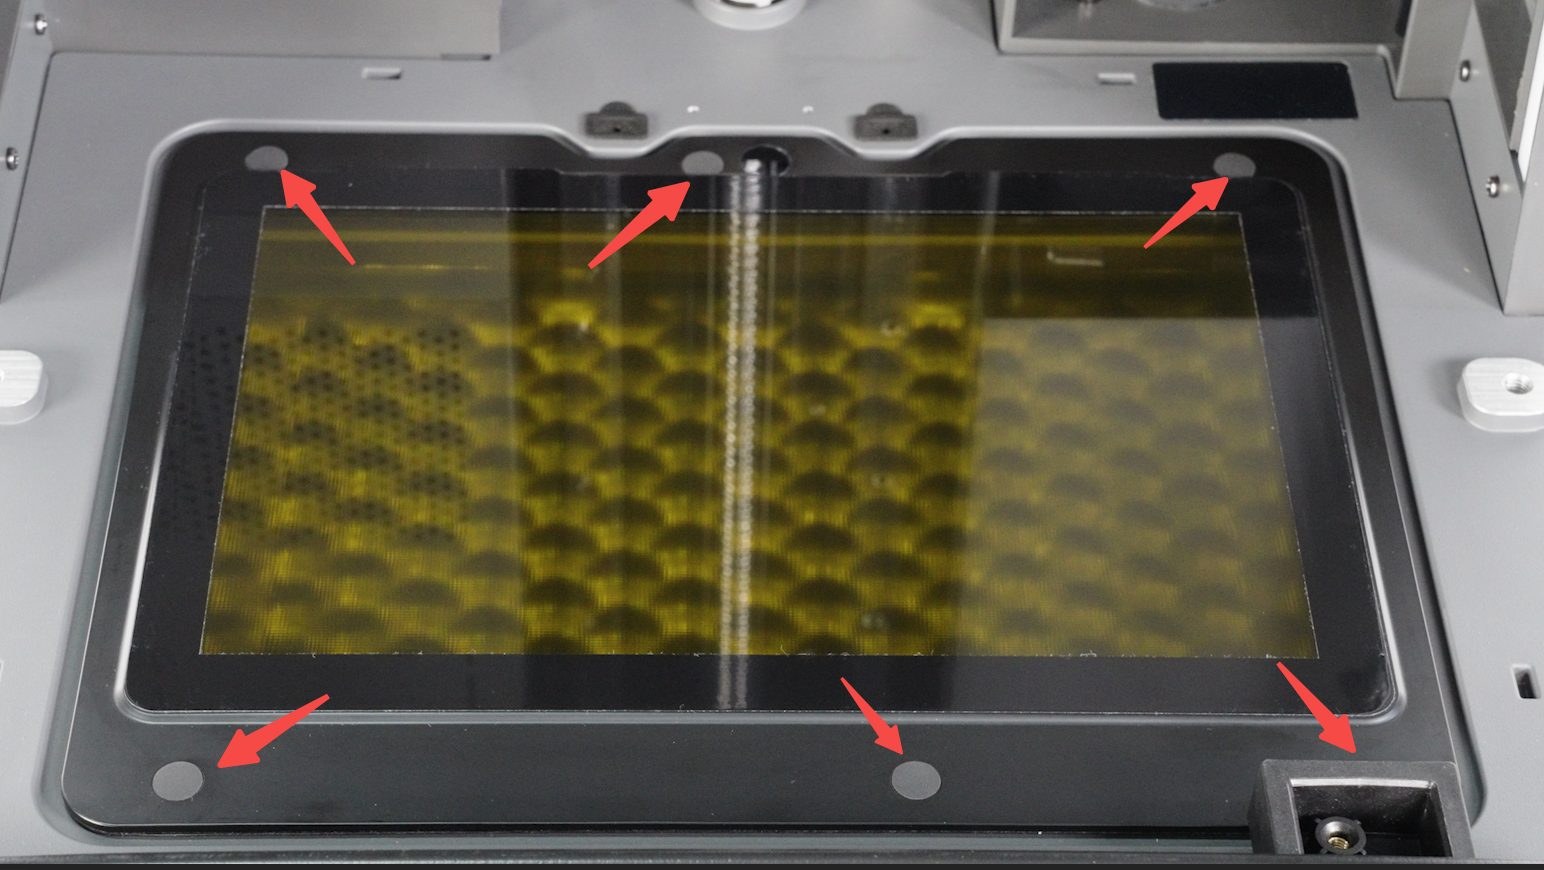
- During transportation, the rubber stoppers under the resin tank may protrude. Check if the rubber stoppers are protruding, and if so, simply press them down.
 |
 |
-
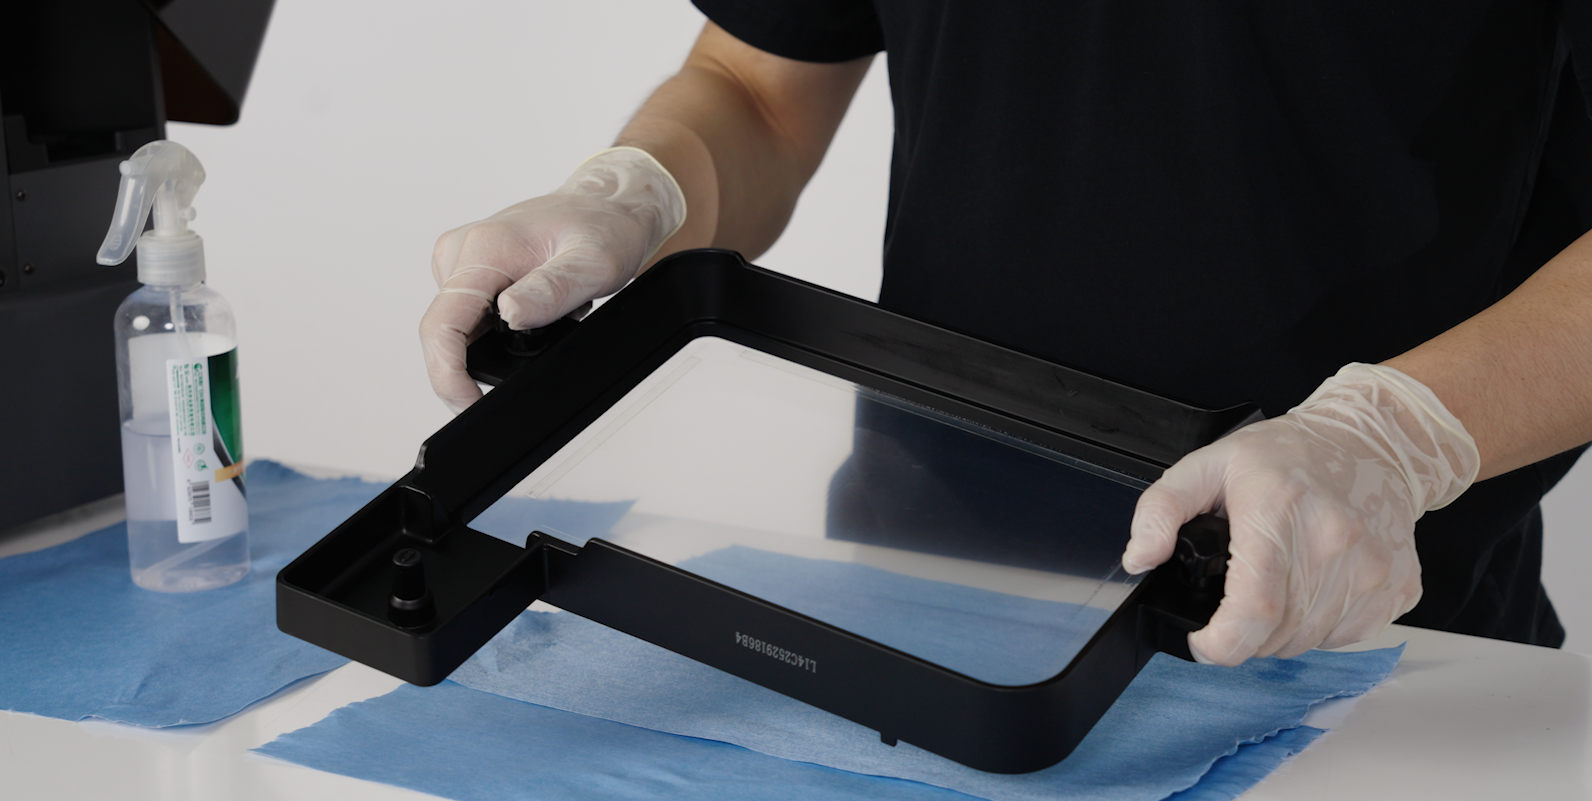
Check if the LCD screen is clean. If there are any foreign objects, please evenly spray glasses cleaning solution on a non-woven fabric, and then wipe the LCD screen in one direction.
-
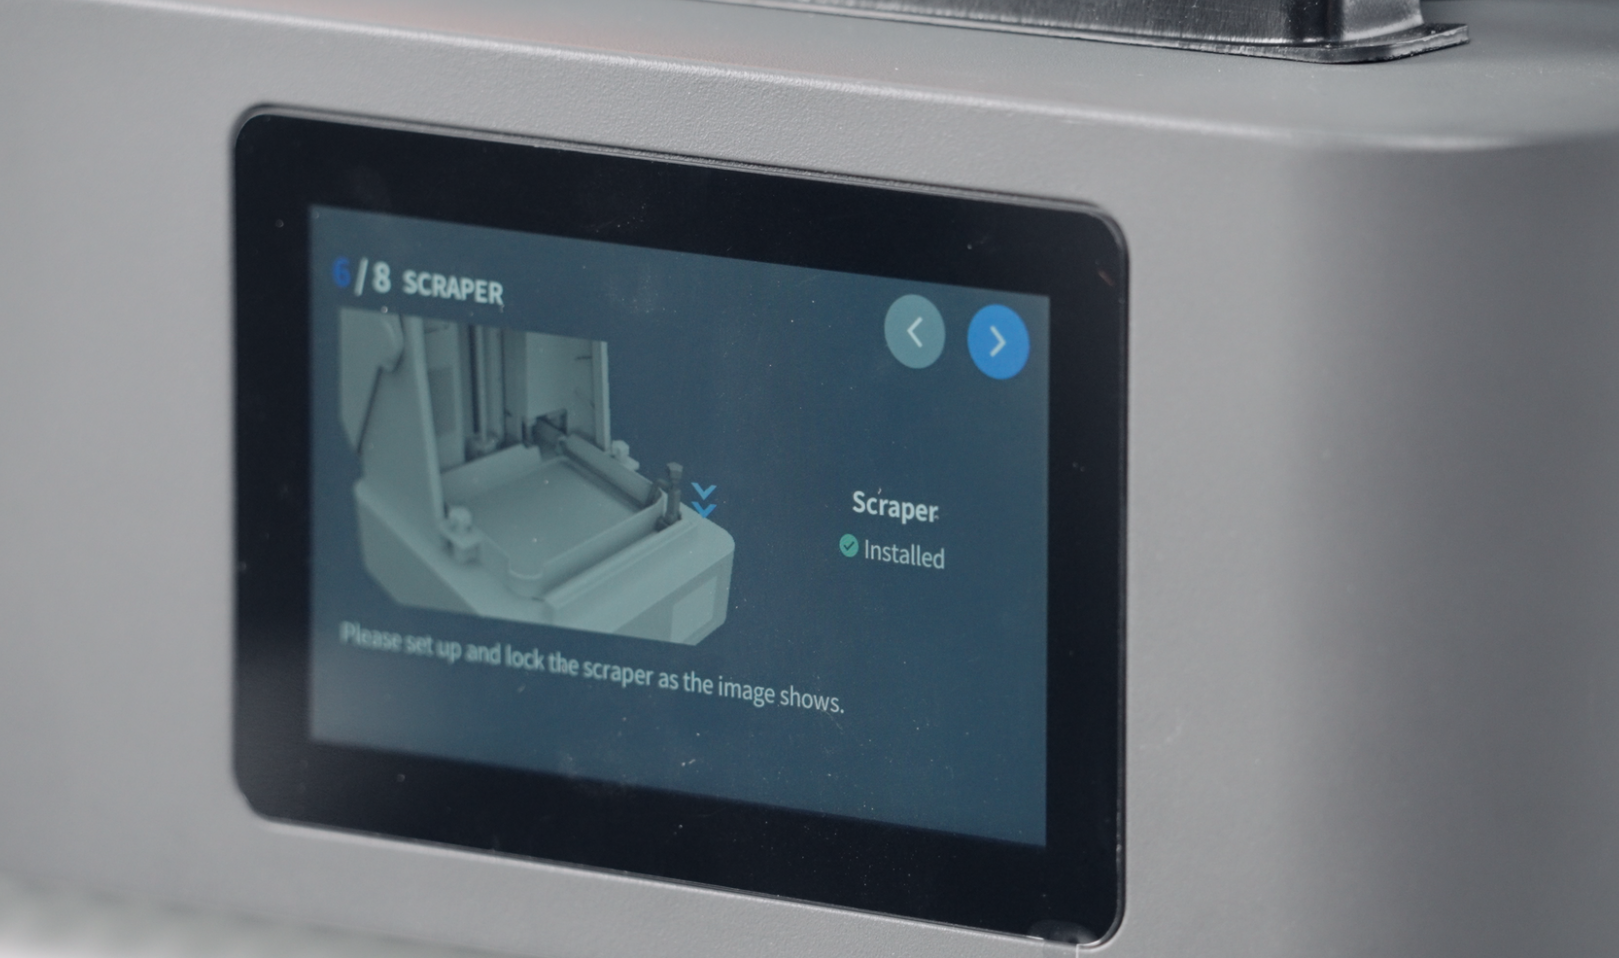
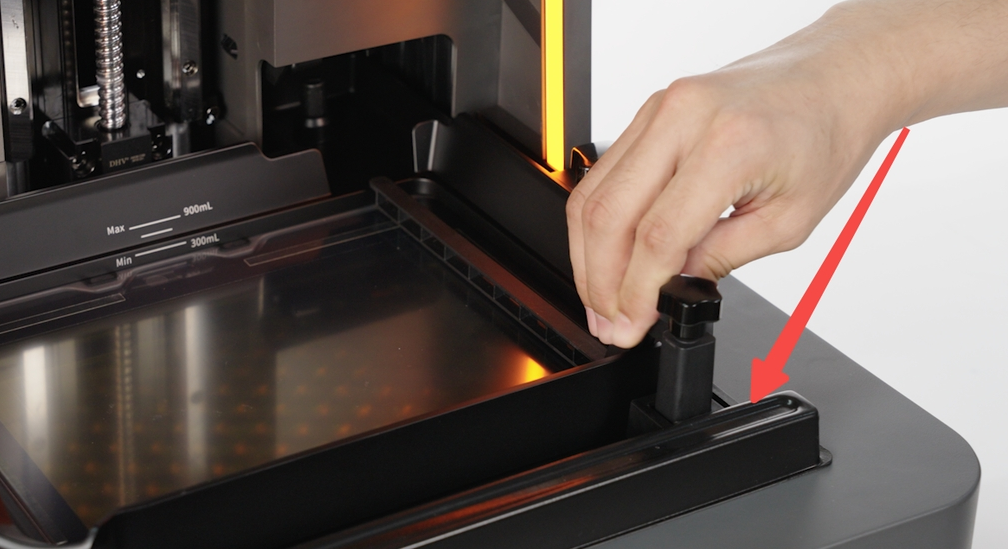
Install the clean resin tank and build platform, then insert the scraper, open the liquid level sensor.
 |
 |
 |
- Insert the resin bottle into the resin cartridge slot (currently, the recommended filling method is automatic filling)
- Resin bottle combination methods: new refill cap + old resin bottle, new refill cap + new resin bottle.

- Start printing
A. Send slicing files from BluePrint Studio: Select the corresponding print file in the task queue of the device.
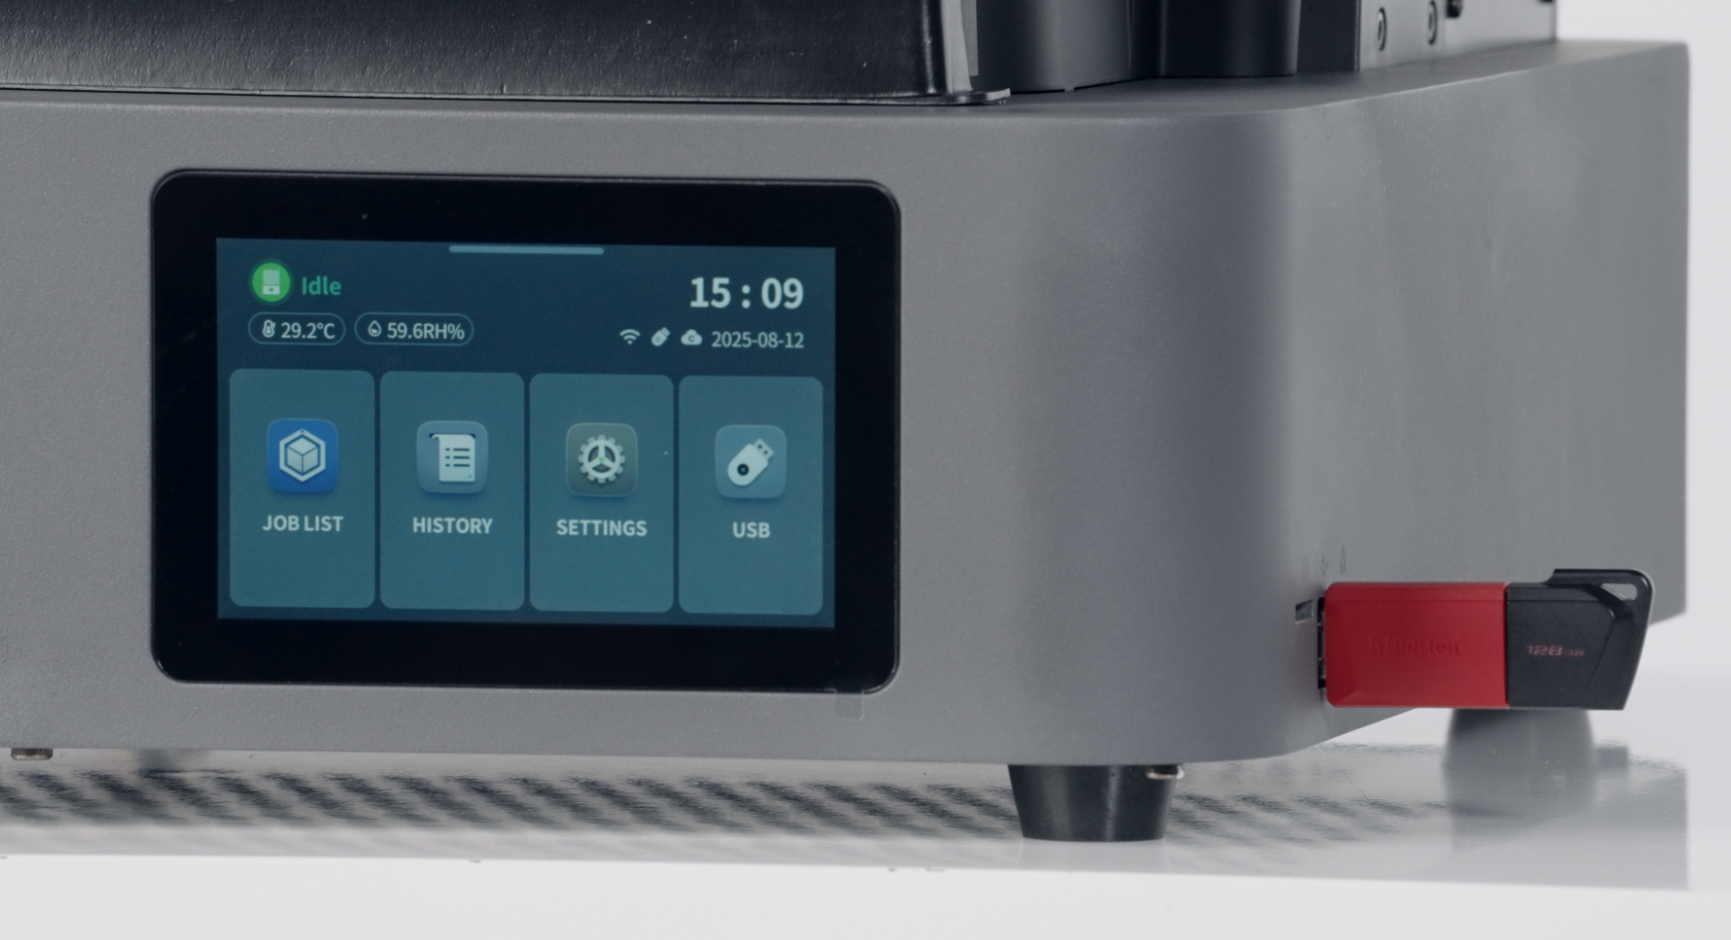
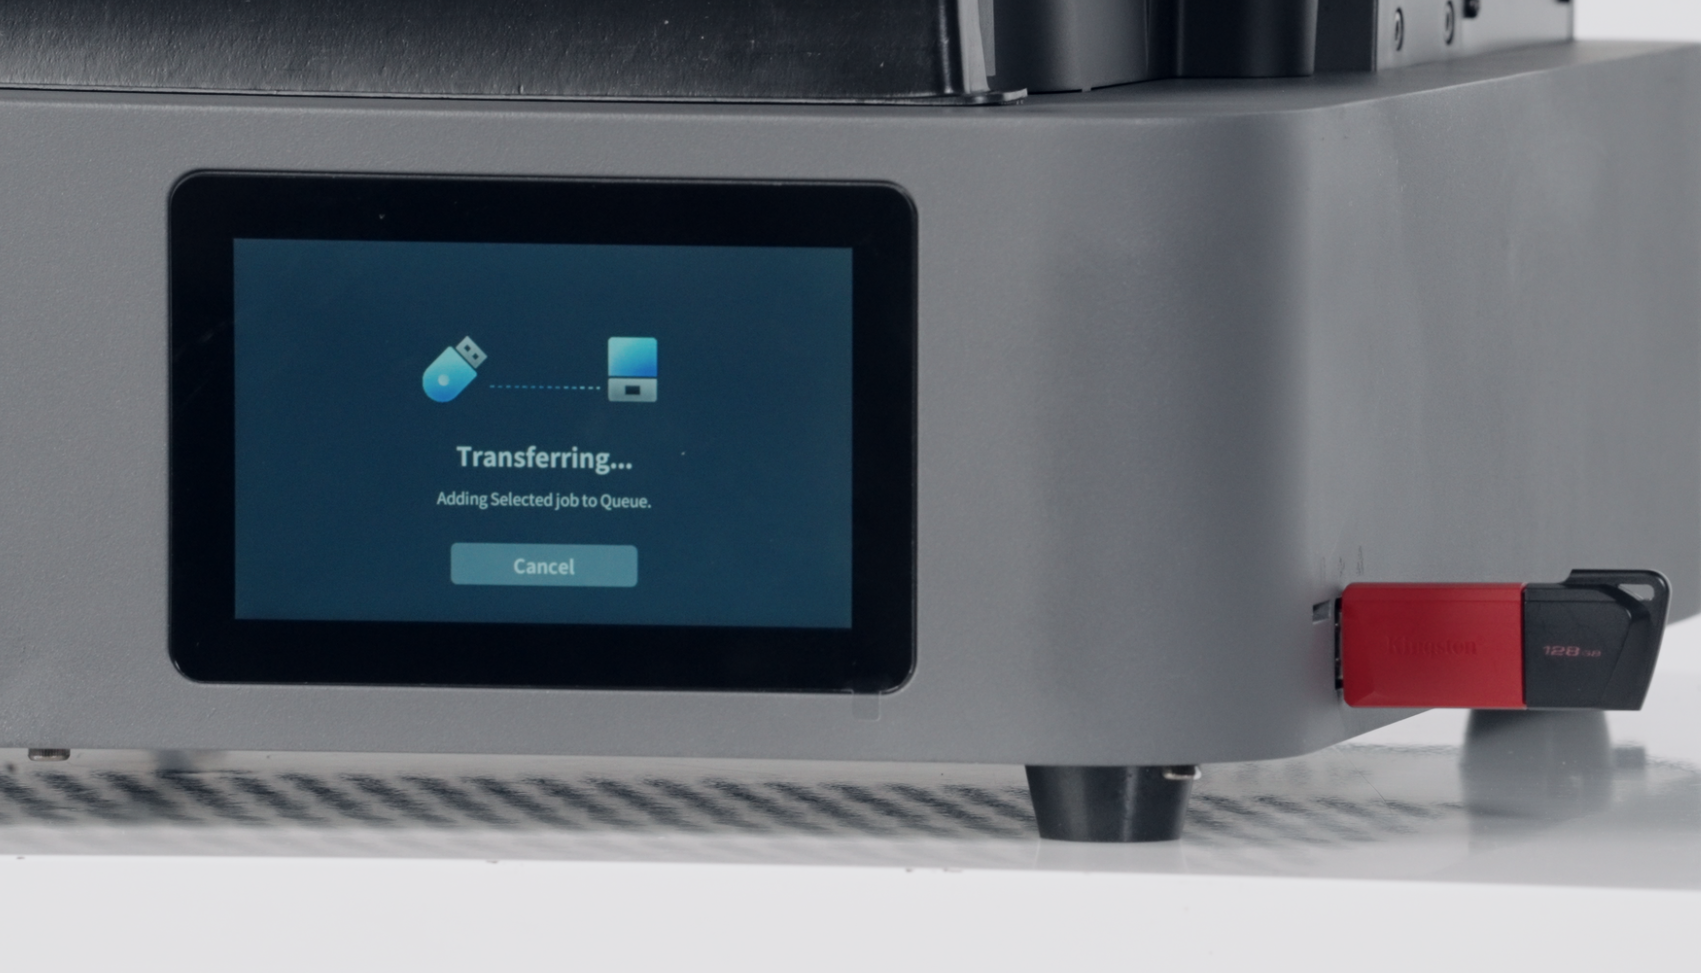
B. Print after inserting the USB drive: After inserting the USB drive, click on the USB drive in the device and select the corresponding print file.
 |
 |
Note: Do not unplug the scraper while it is in motion or being heated.
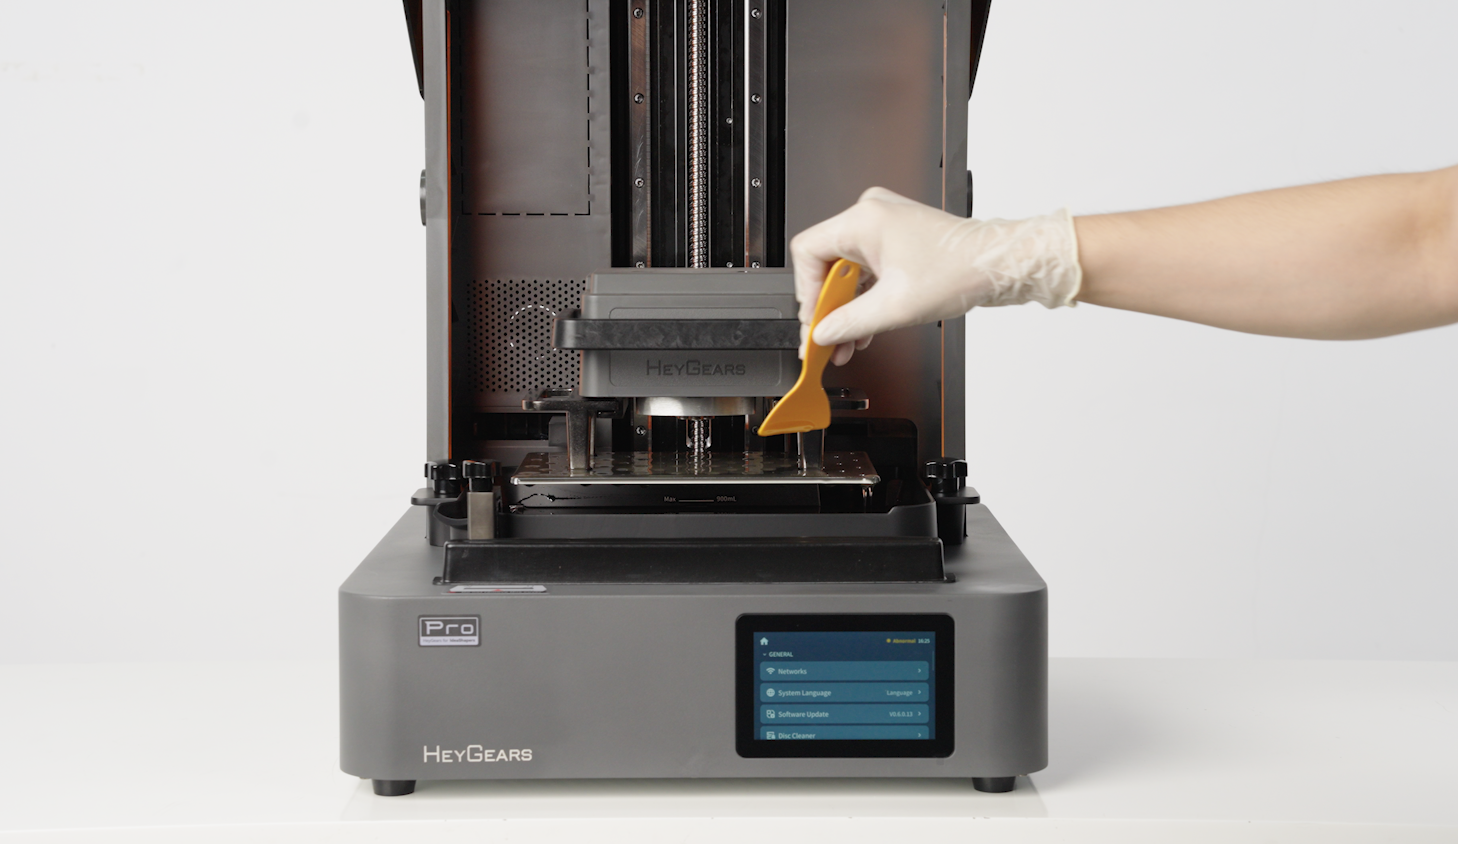
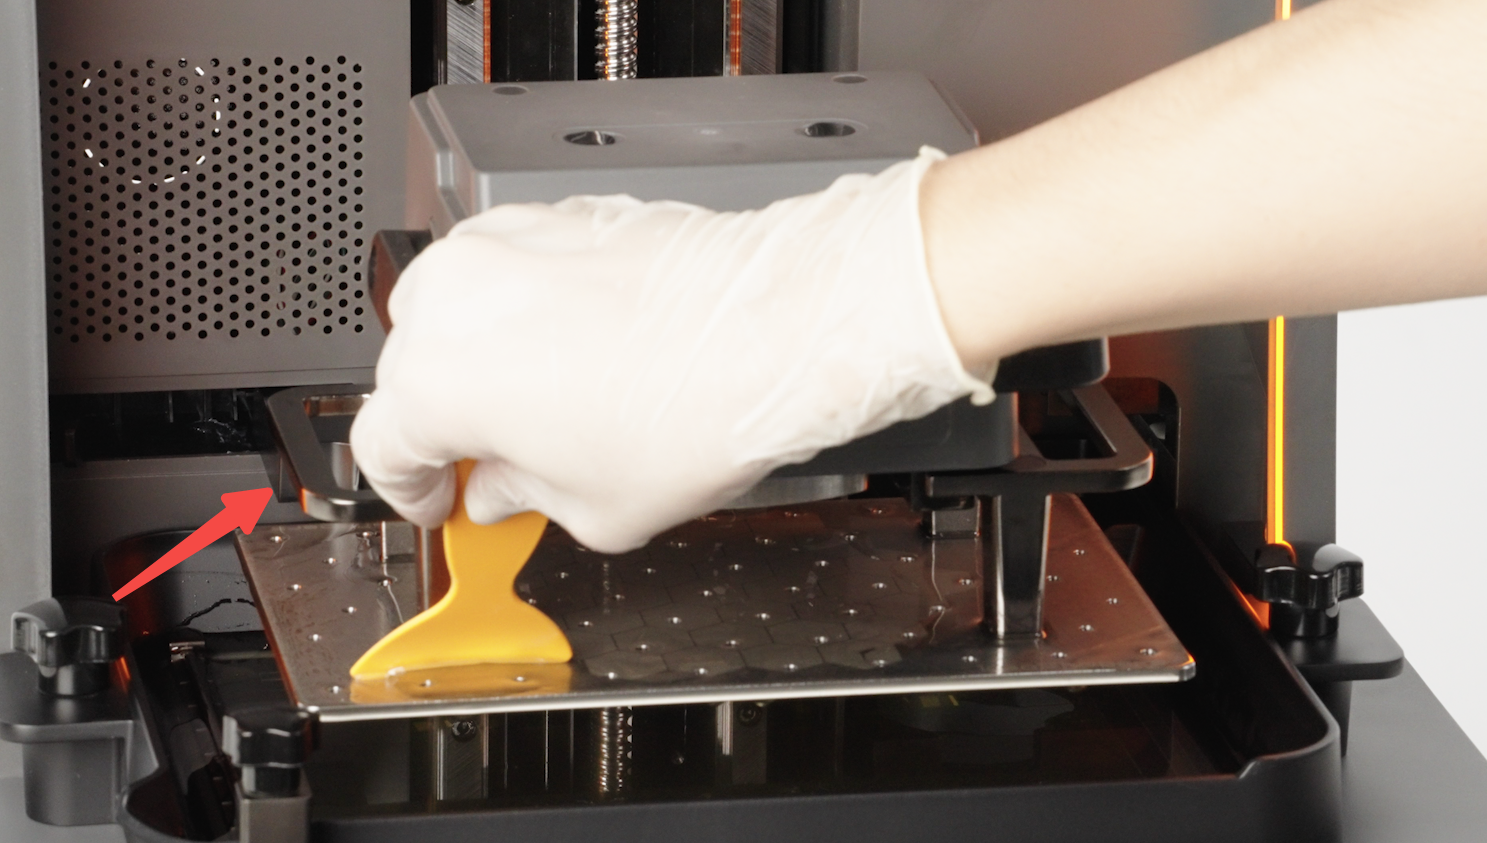
- After printing is completed, can use a scraping tool to scrape the residual resin on the build platform into the resin tank.
- Note: Please be careful not to scrape resin onto the liquid level sensor during use.
 |
 |
¶ 3. Maintenance
¶ 1.Resin Replacement
- Remove the resin bottle
- Lift the resin bottle and hold it for 3 - 4 seconds.
- Then use a lint-free cloth to hold the bottle mouth.
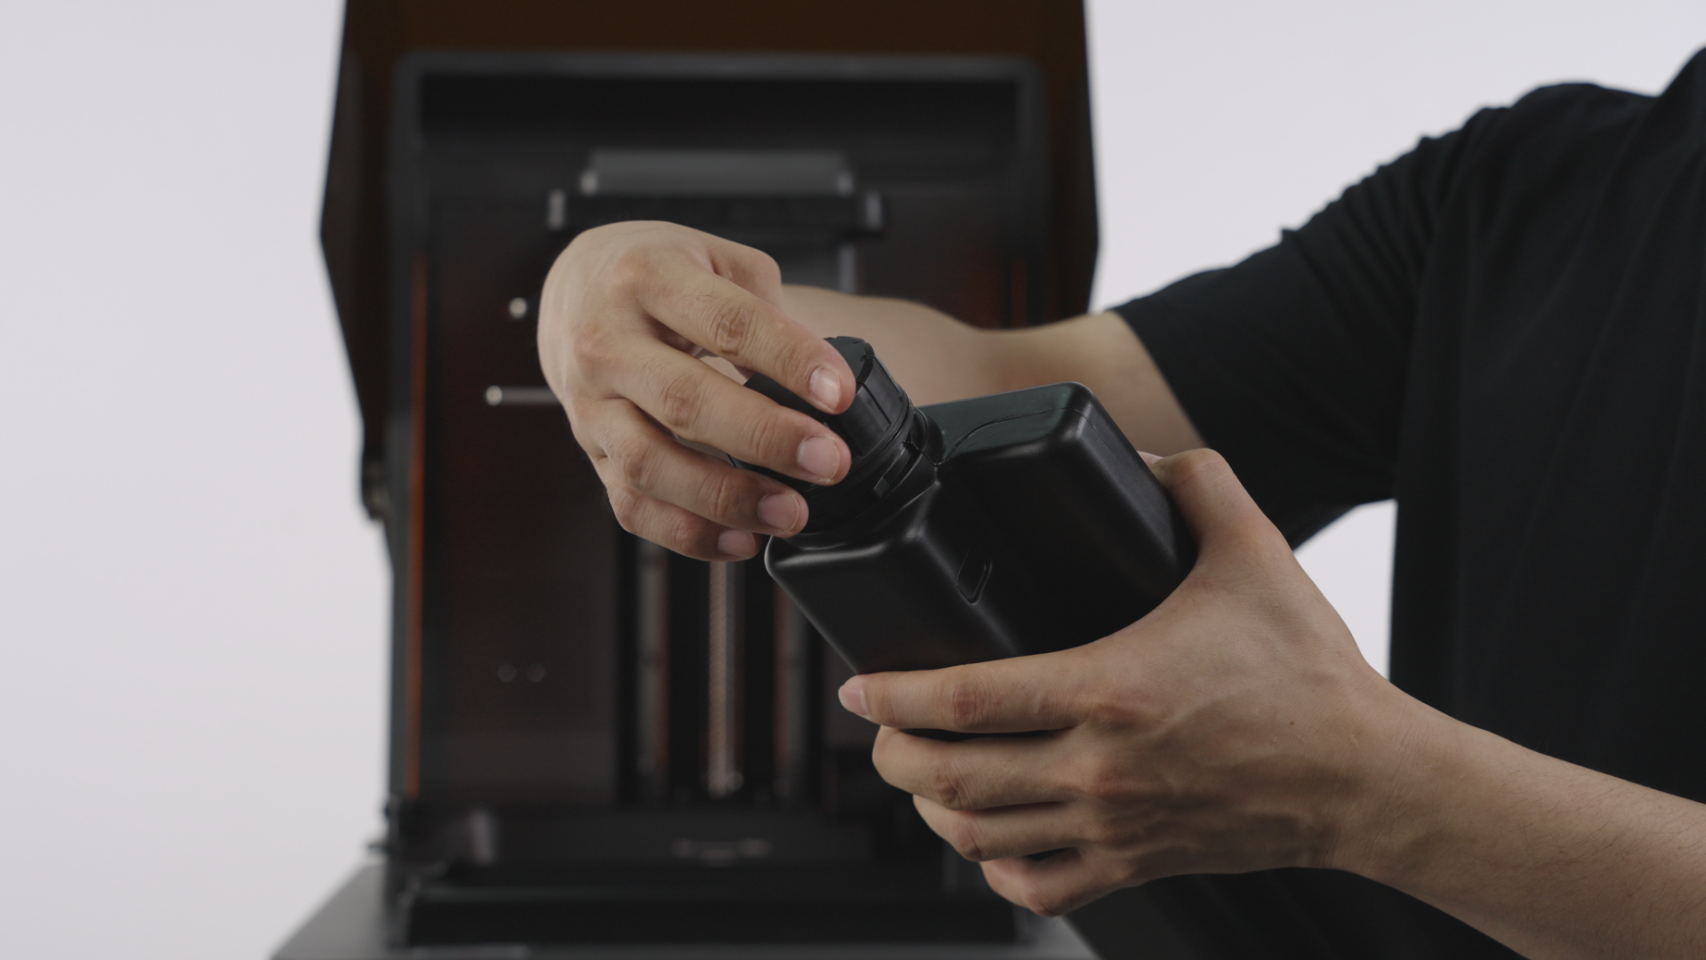
- Clean the resin-refill lid (users who use the refill lid of a new resin bottle need to clean the resin-refill lid thoroughly when replacing the resin)
- Remove the resin-refill lid on the resin bottle, and use the cap to tighten and seal it.
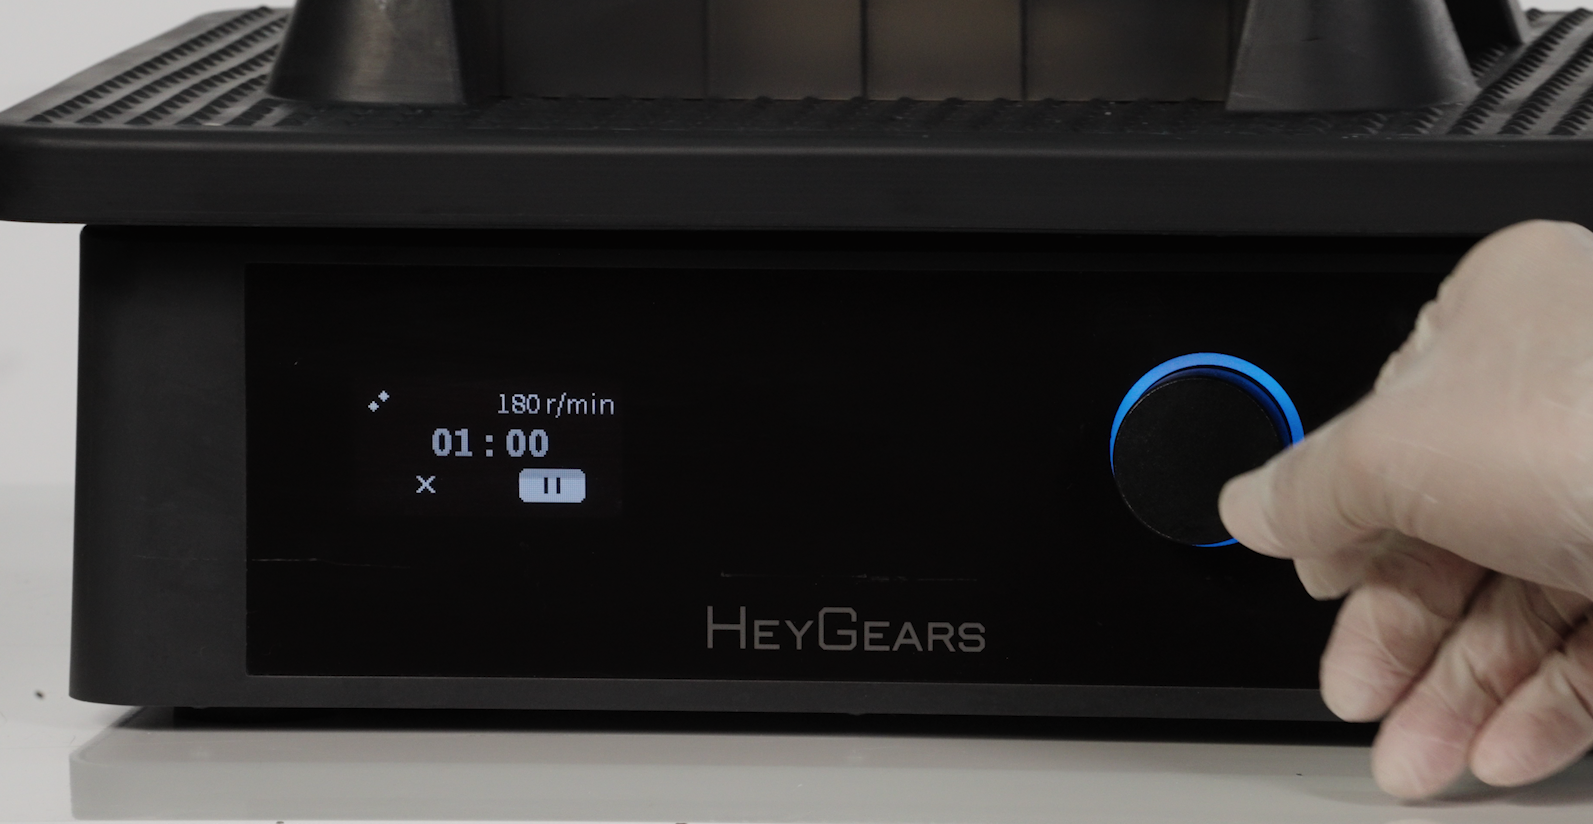
- Place the resin-refill lid into the cleaning box, set the UltraCraft Wash to 1 minute at 180 revolutions per minute, and start the cleaning process.
 |
 |
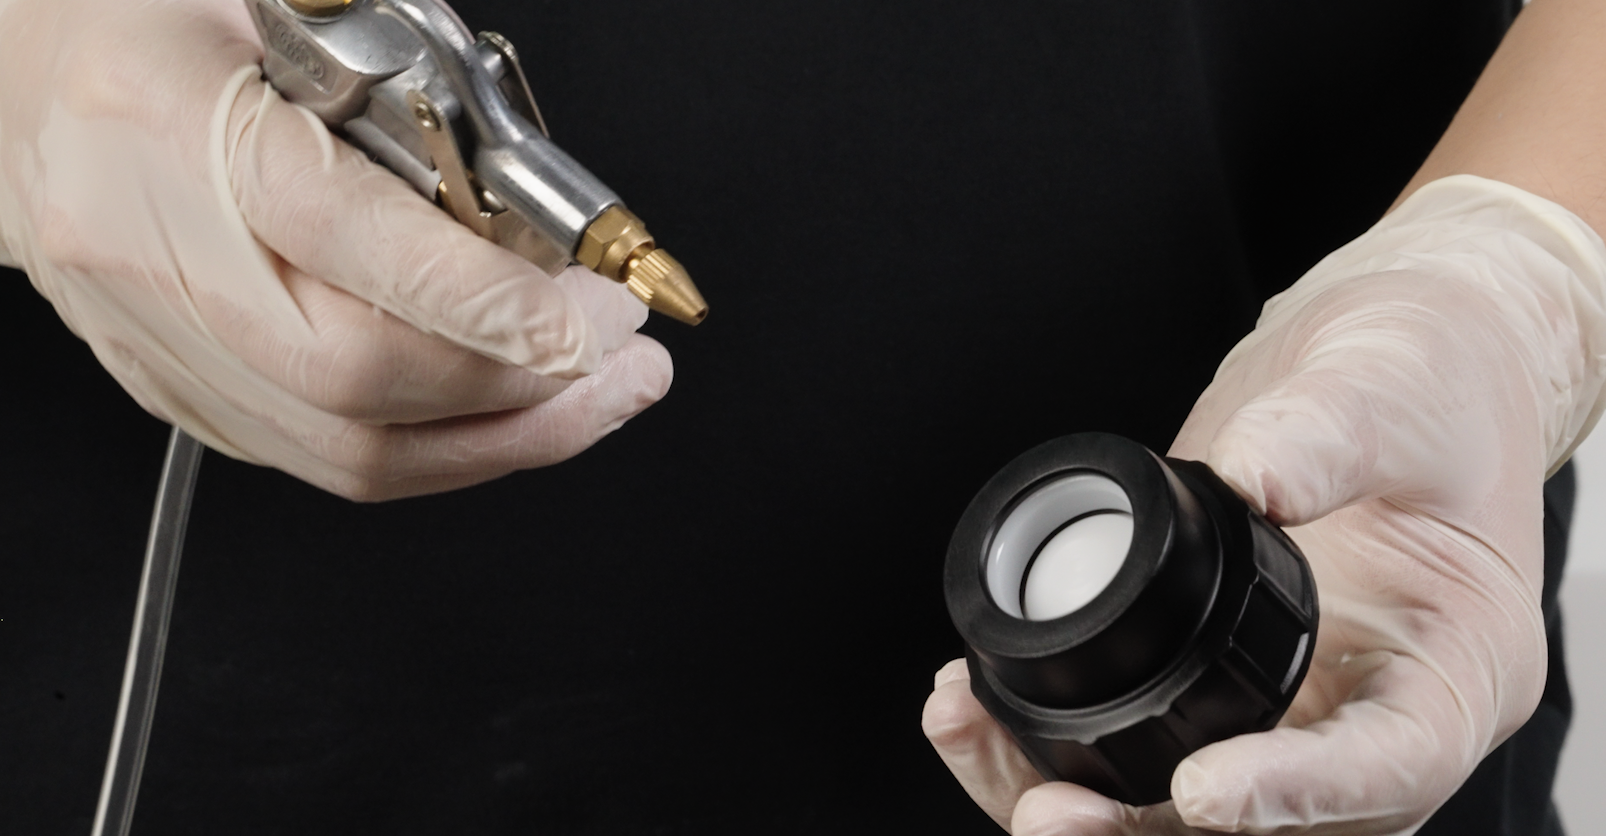
- After washing step, take out the resin-refill lid, use a lint-free cloth to press and wipe the ball valve in the resin-refill lid, and then wipe the internal threads of the resin-refill lid.
 |
 |
-
After wiping off the residual resin, place the resin-refill lid back into the UltraCraft Wash for a 1-minute, 180r/min cleaning.
-
After washing, use an air gun to blow dry the residual cleaner.
|
 |
-
Check if it is clean and free of resin residue; if necessary, repeat the above steps for cleaning.
-
Install the cleaned resin-refill lid onto the resin bottle that needs to be used.
¶ 2. LCD Screen Cleaning
¶ 2.1 Cleaning Scraper:
-
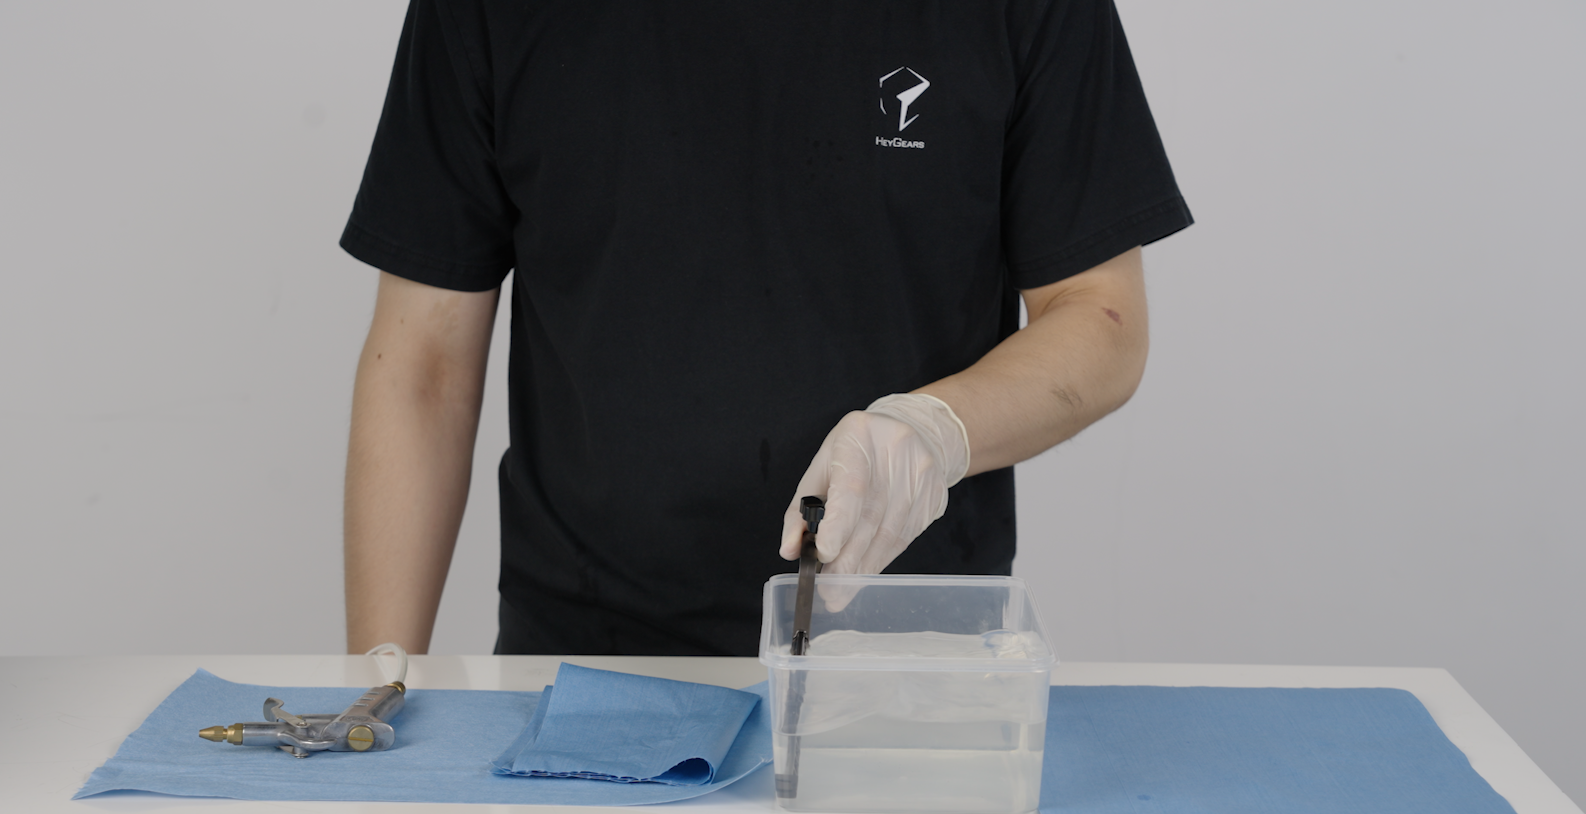
Prepare a cleaning container with dimensions approximately 215mm x 145mm (it only needs to be larger than the length of the scraper)
-
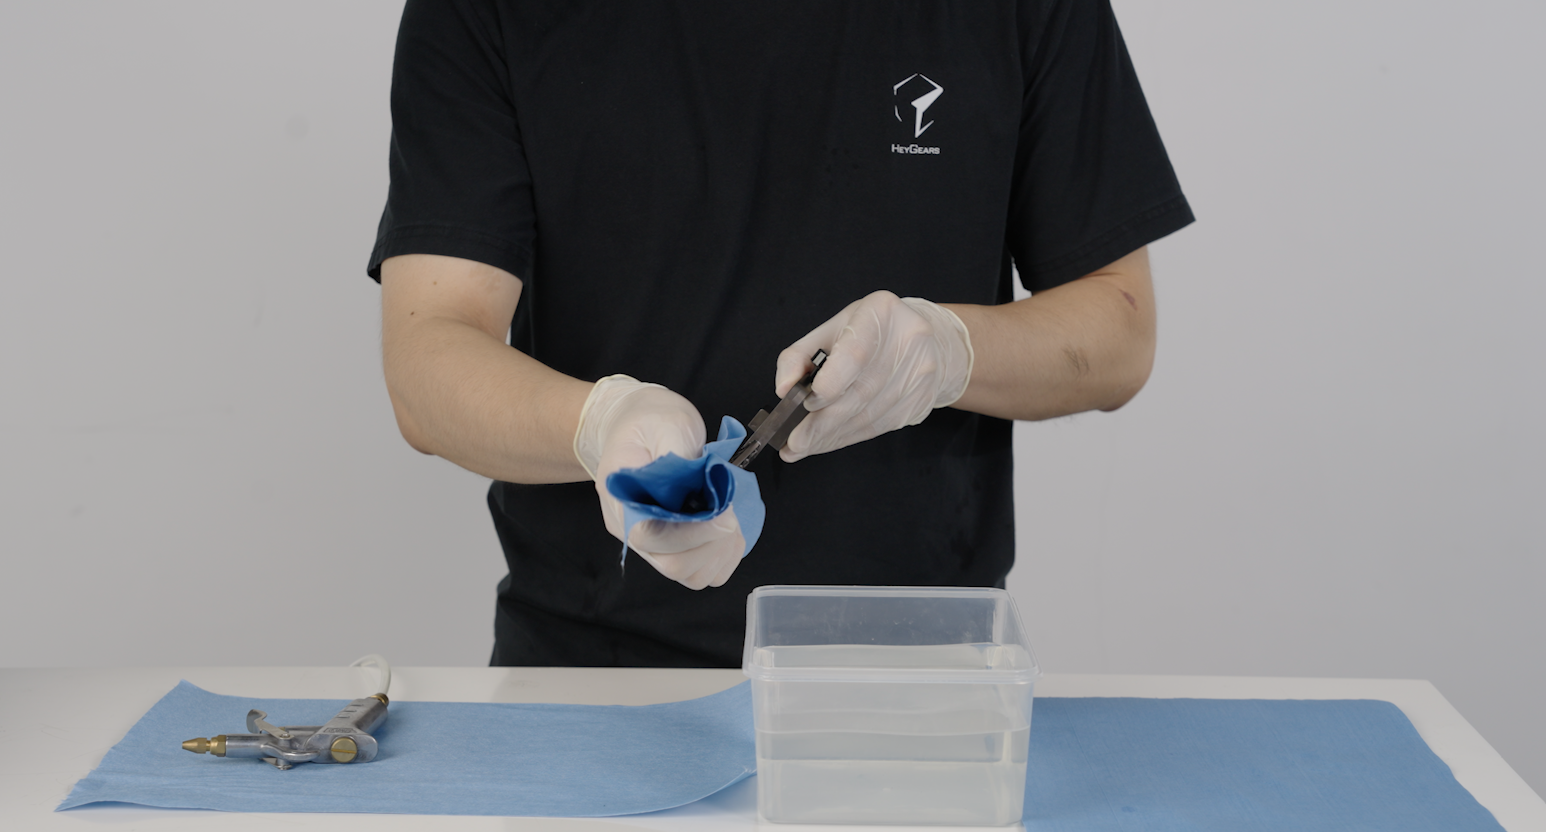
Remove the scraper from the resin tank.
-
Place the front part of the scraper (the part in the resin tank) into 95% alcohol or IPA that is higher than the scraper (Note: Do not let the back end of the scraper touch the cleaning agent)
-
Hold the end of the scraper and swing it left and right to clean.
 |
 |
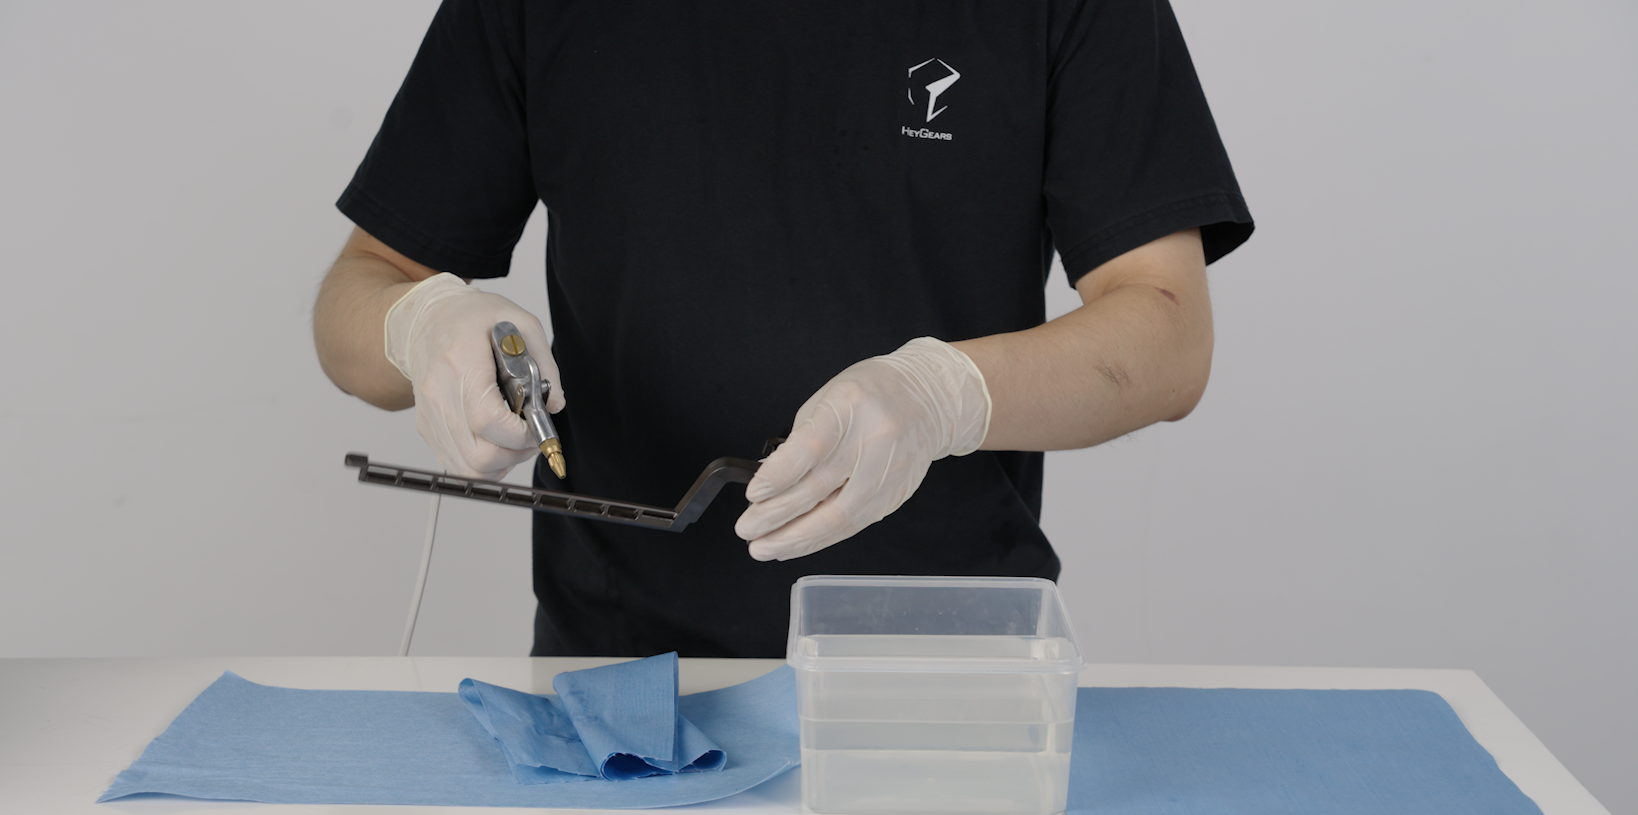
-
Use an air gun to blow dry the residual cleaning agent in the holes of the scraper.
-
After drying, check if the scraper is clean. If there is still resin residue, repeat the above steps.
¶ 2.2 Build Platform Cleaning
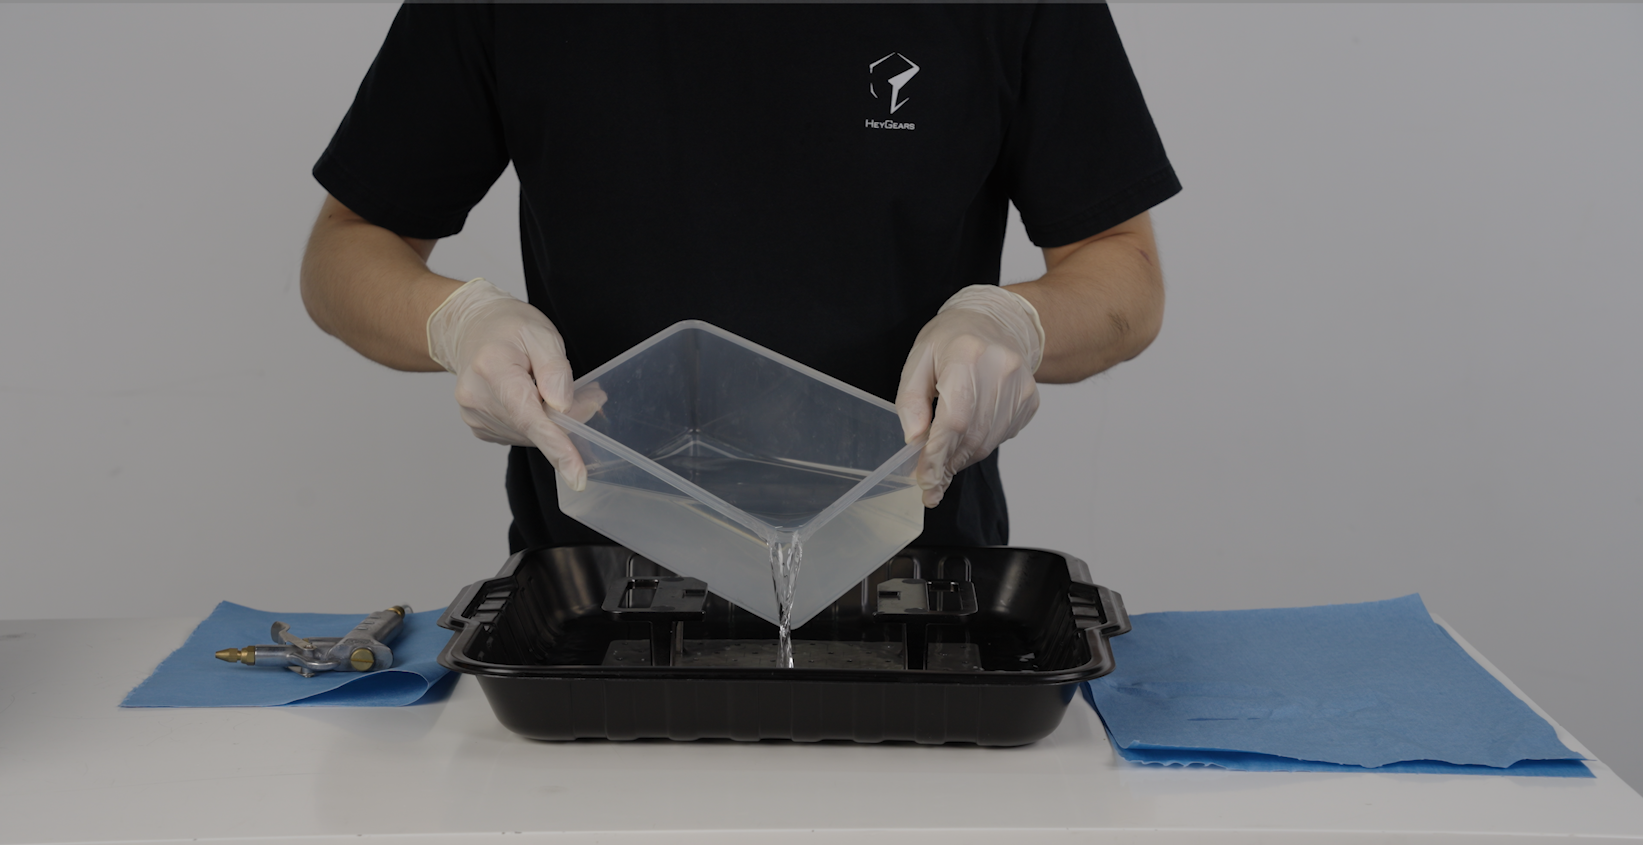
-
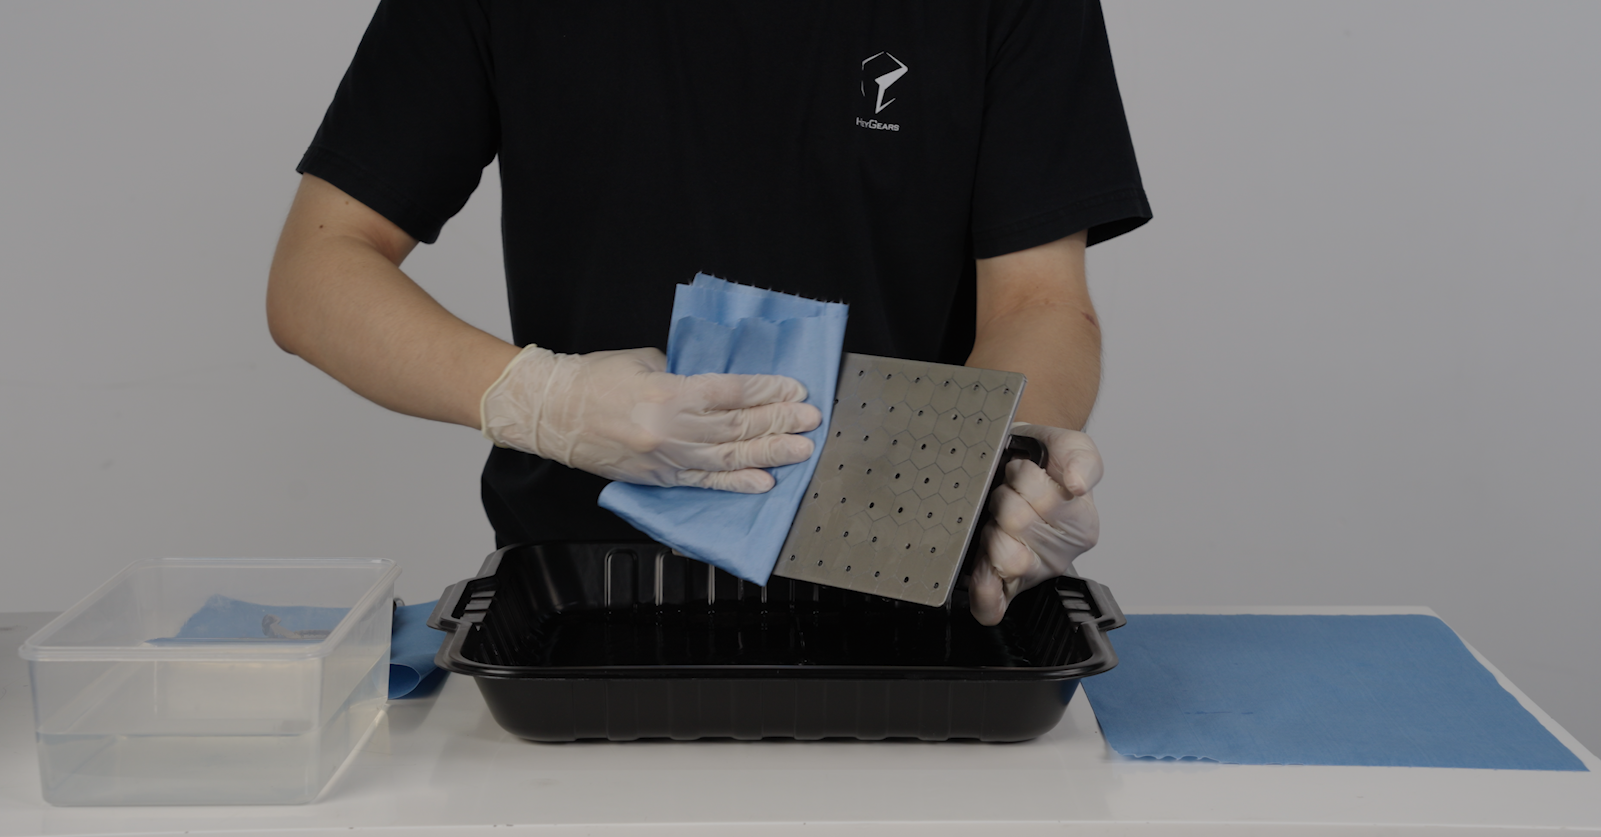
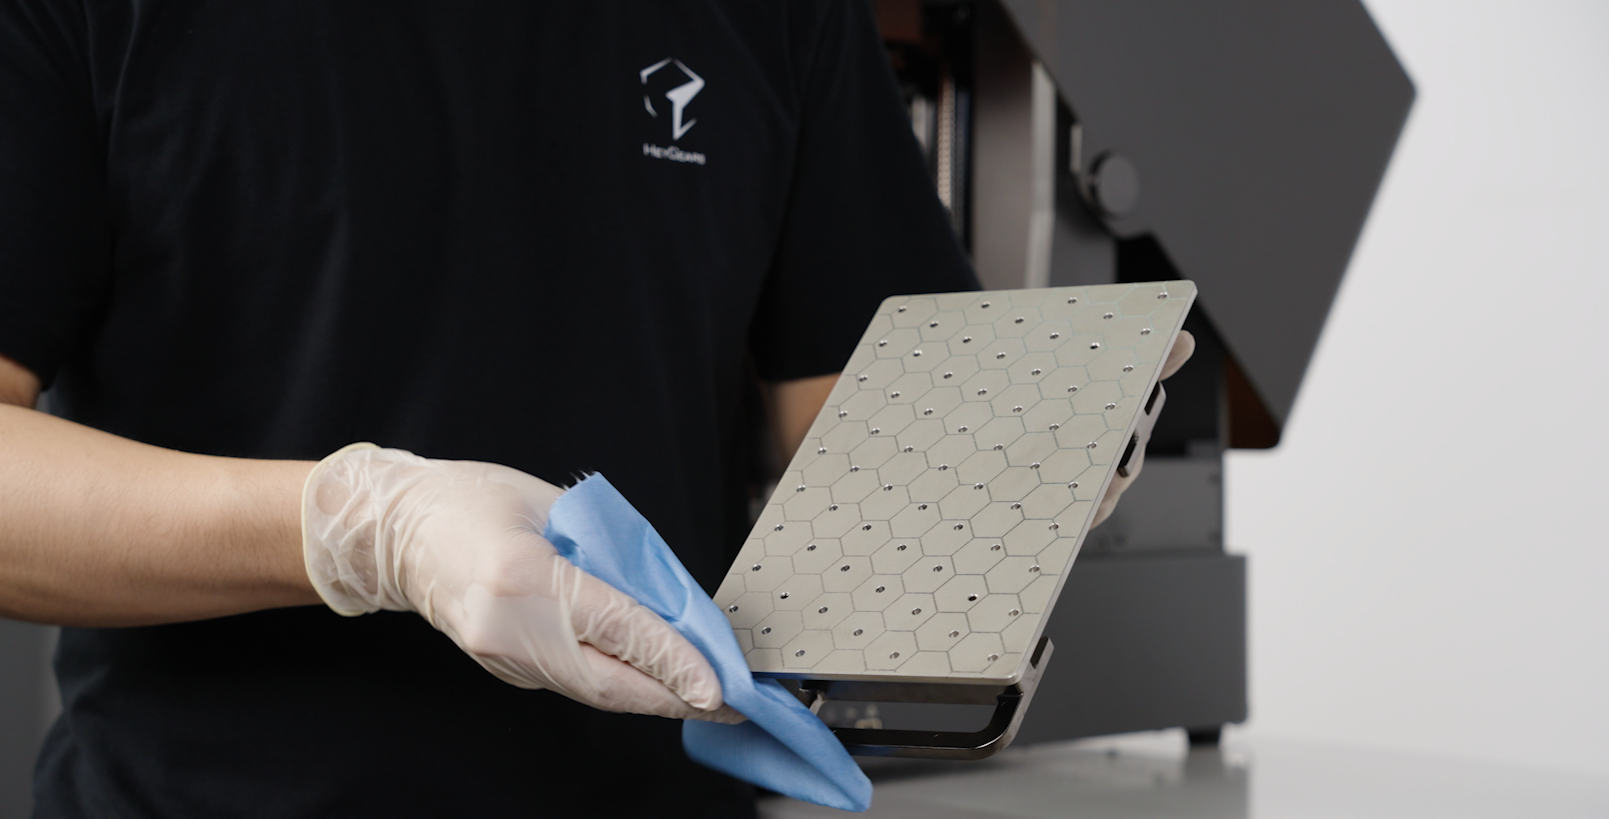
Place the build platform into a tray, and pour an appropriate amount of 95% alcohol or IPA.
-
Then wipe the build platform with a lint-free cloth
 |
 |
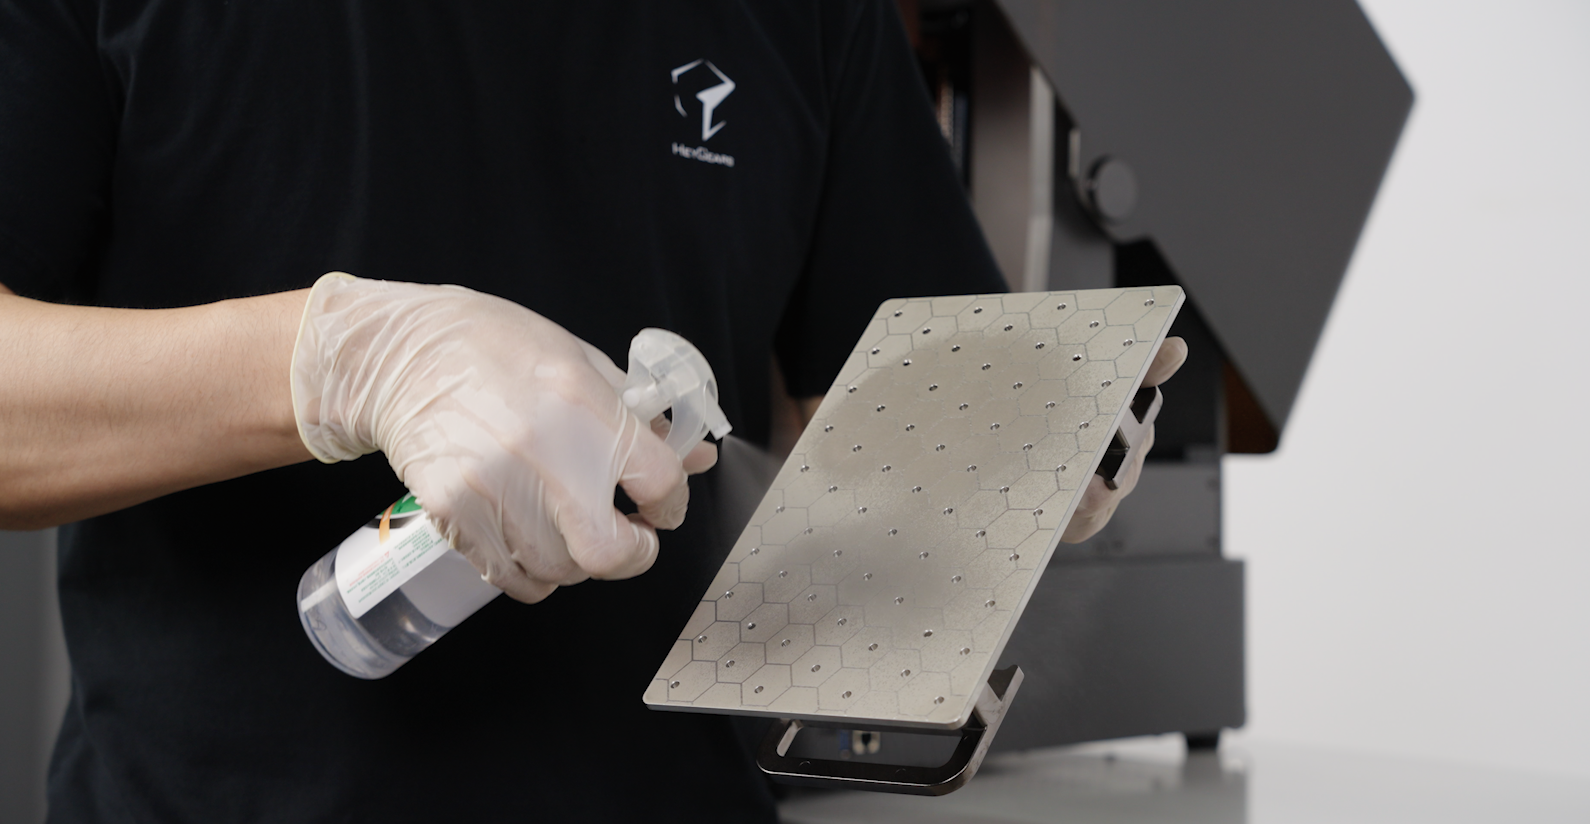
- Can also use a spray bottle to spray alcohol or IPA into the holes of the build platform for cleaning.
 |
 |
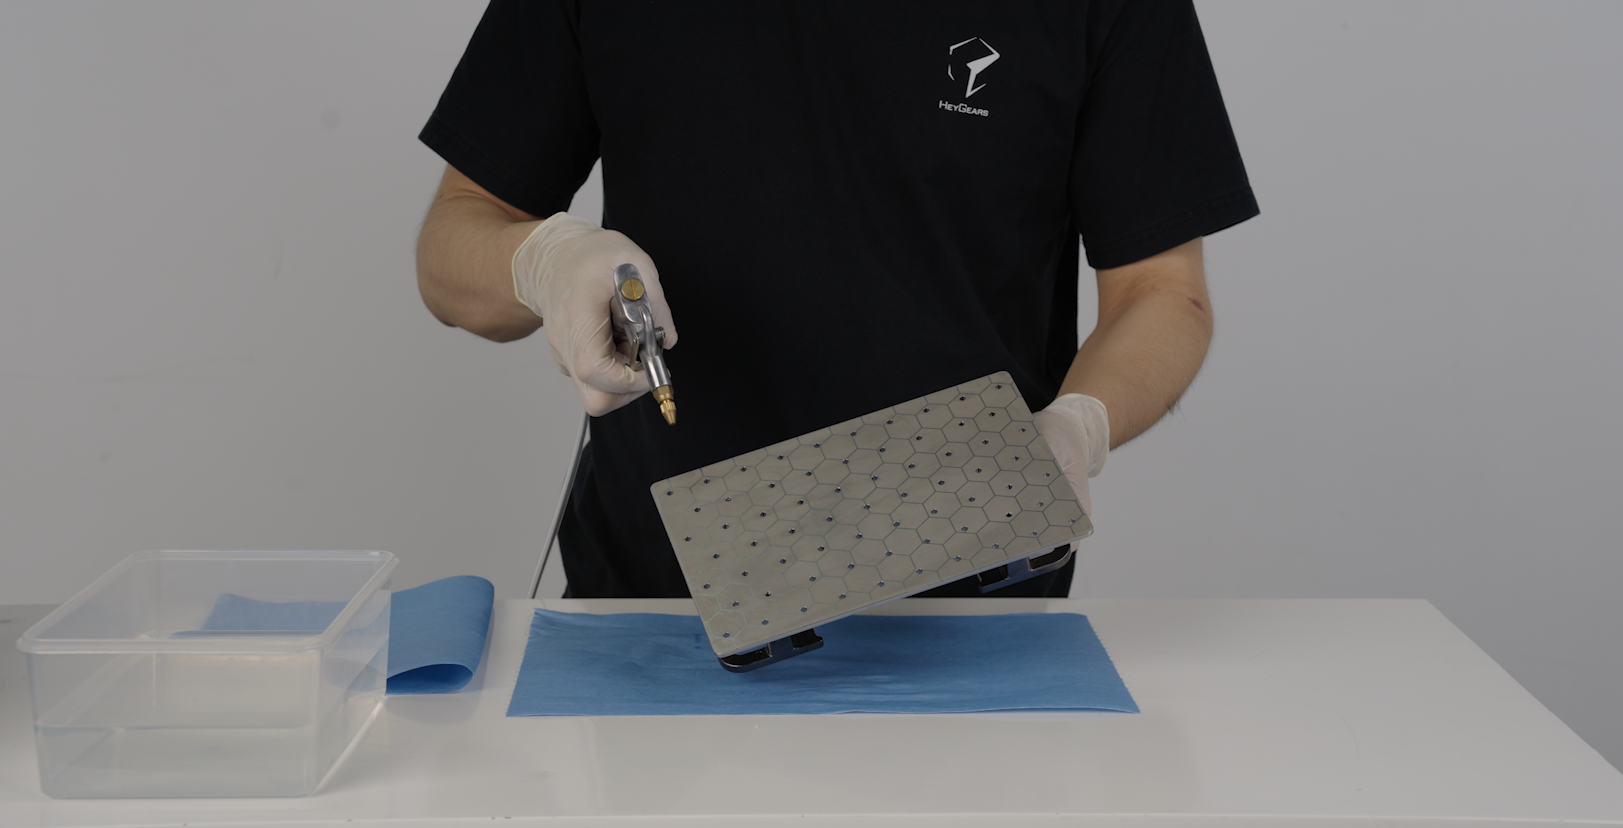
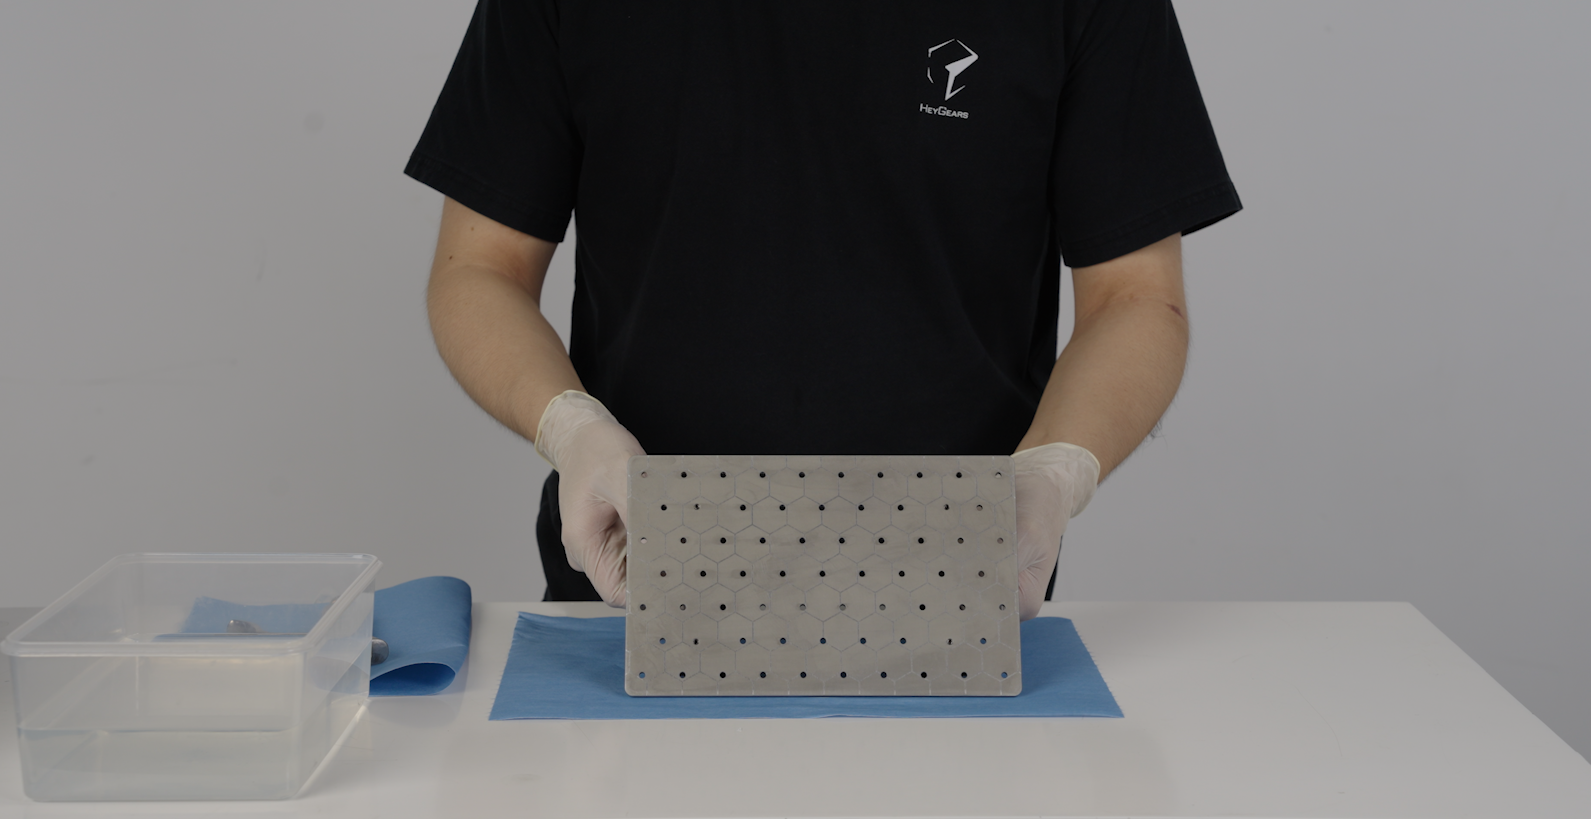
-
Repeat the above steps until the surface of the build platform is clean and free of residual resin.
-
Use an air gun to blow dry the cleaning agent on the build platform and in the gaps. After drying, check if the build platform is clean.
 |
 |
¶ 2.3 Resin Tank Cleaning
-
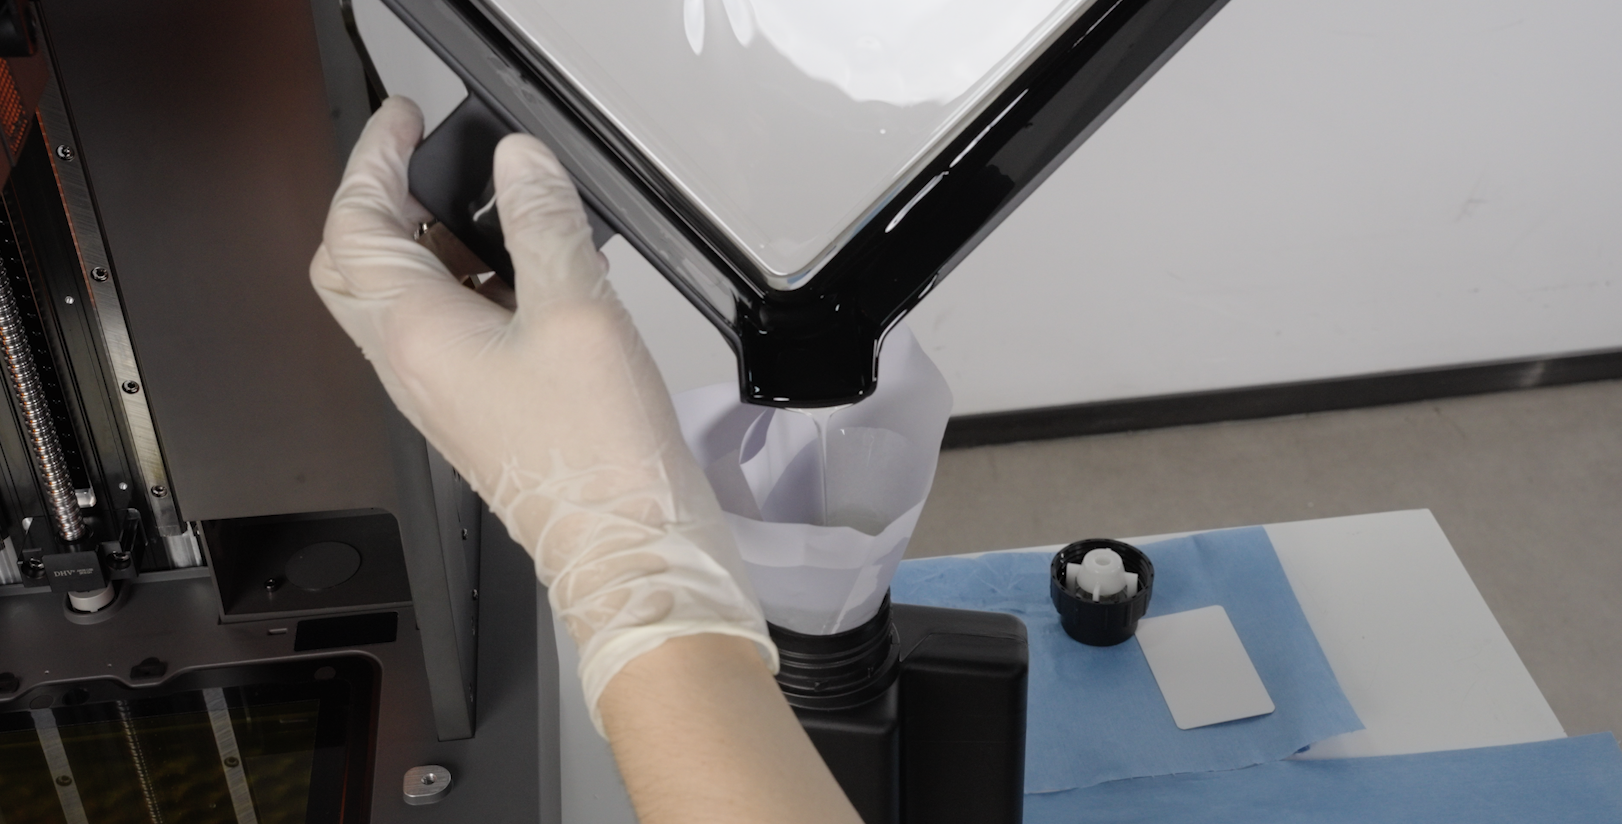
Recycle the remaining resin in the resin tank, using a 120-mesh filter and pour the resin back into the corresponding resin bottle.
-
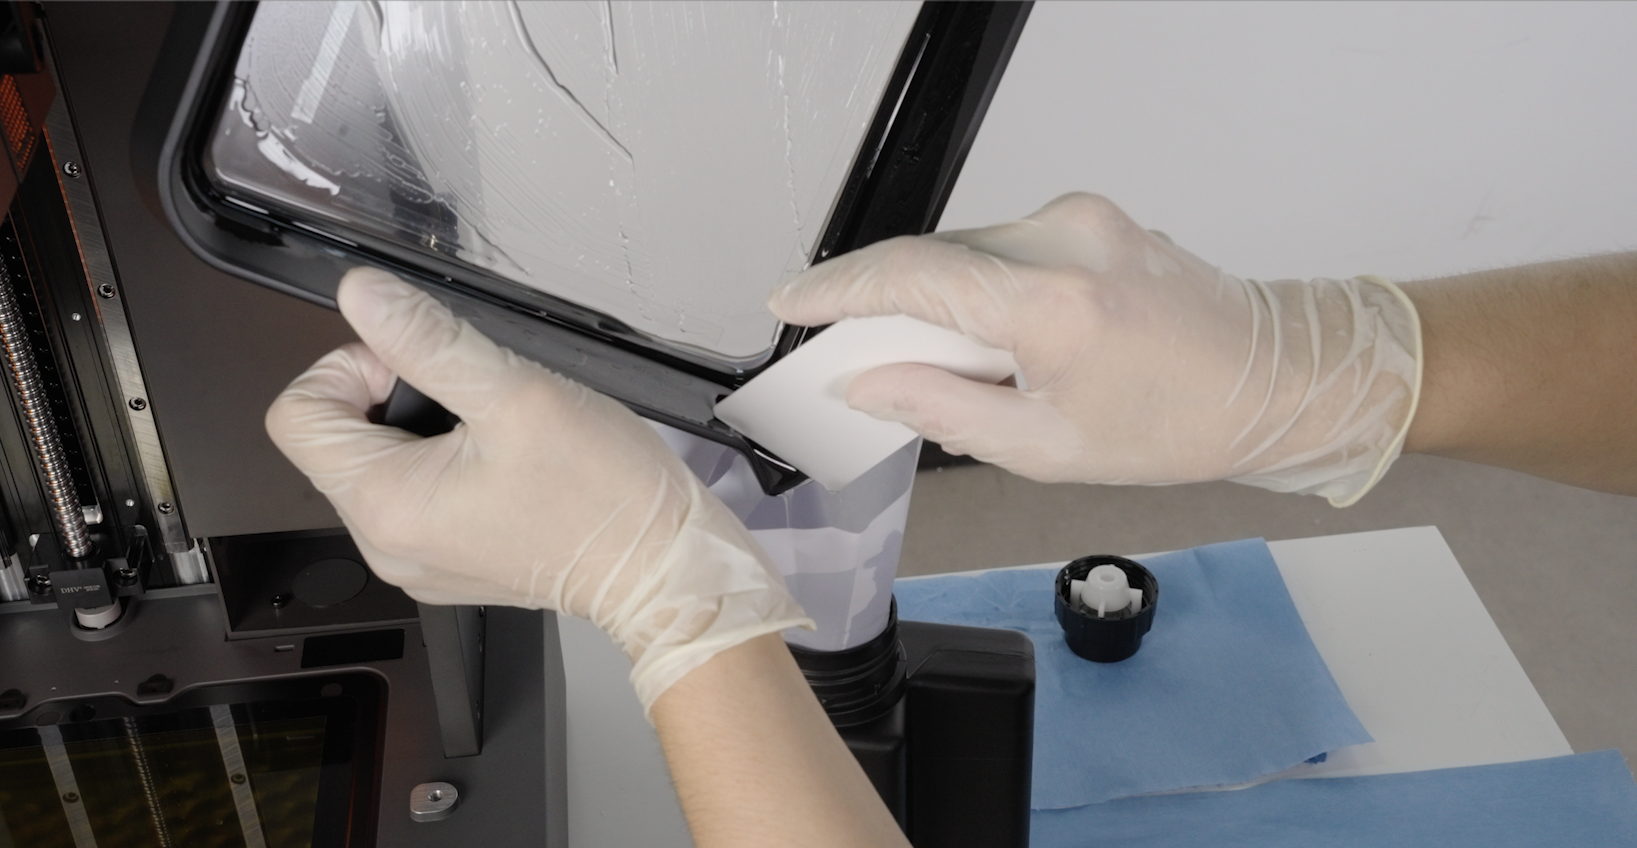
Use a spatula or scraper card to scrape the remaining resin into the filter mesh.
 |
 |
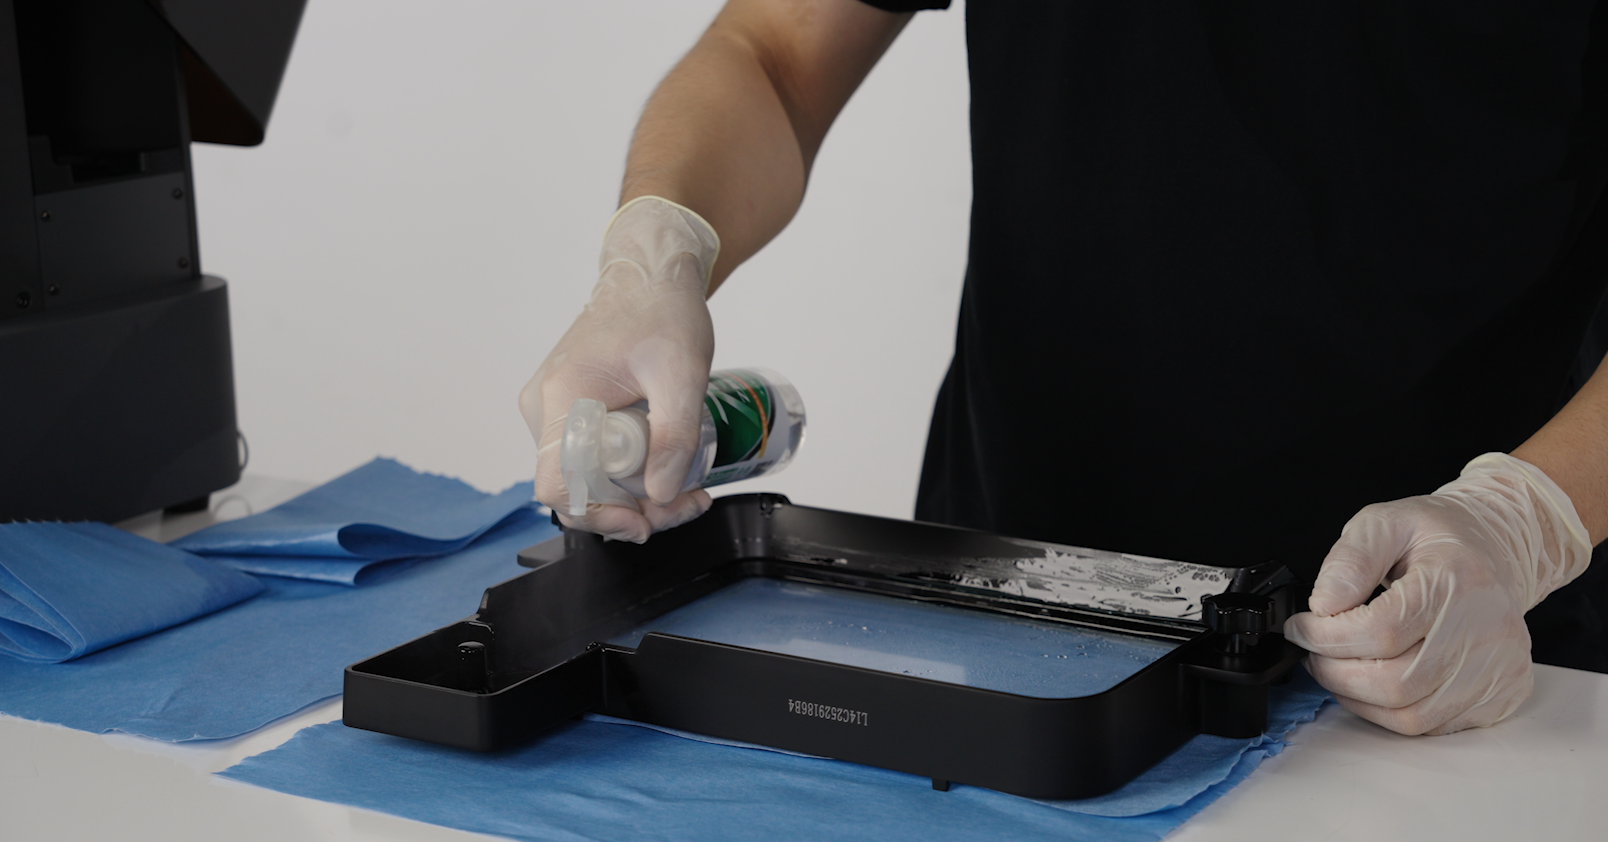
- Use alcohol or IPA to spray evenly inside the tank, and use a lint-free cloth to wipe off any residual resin inside the tank.
 |
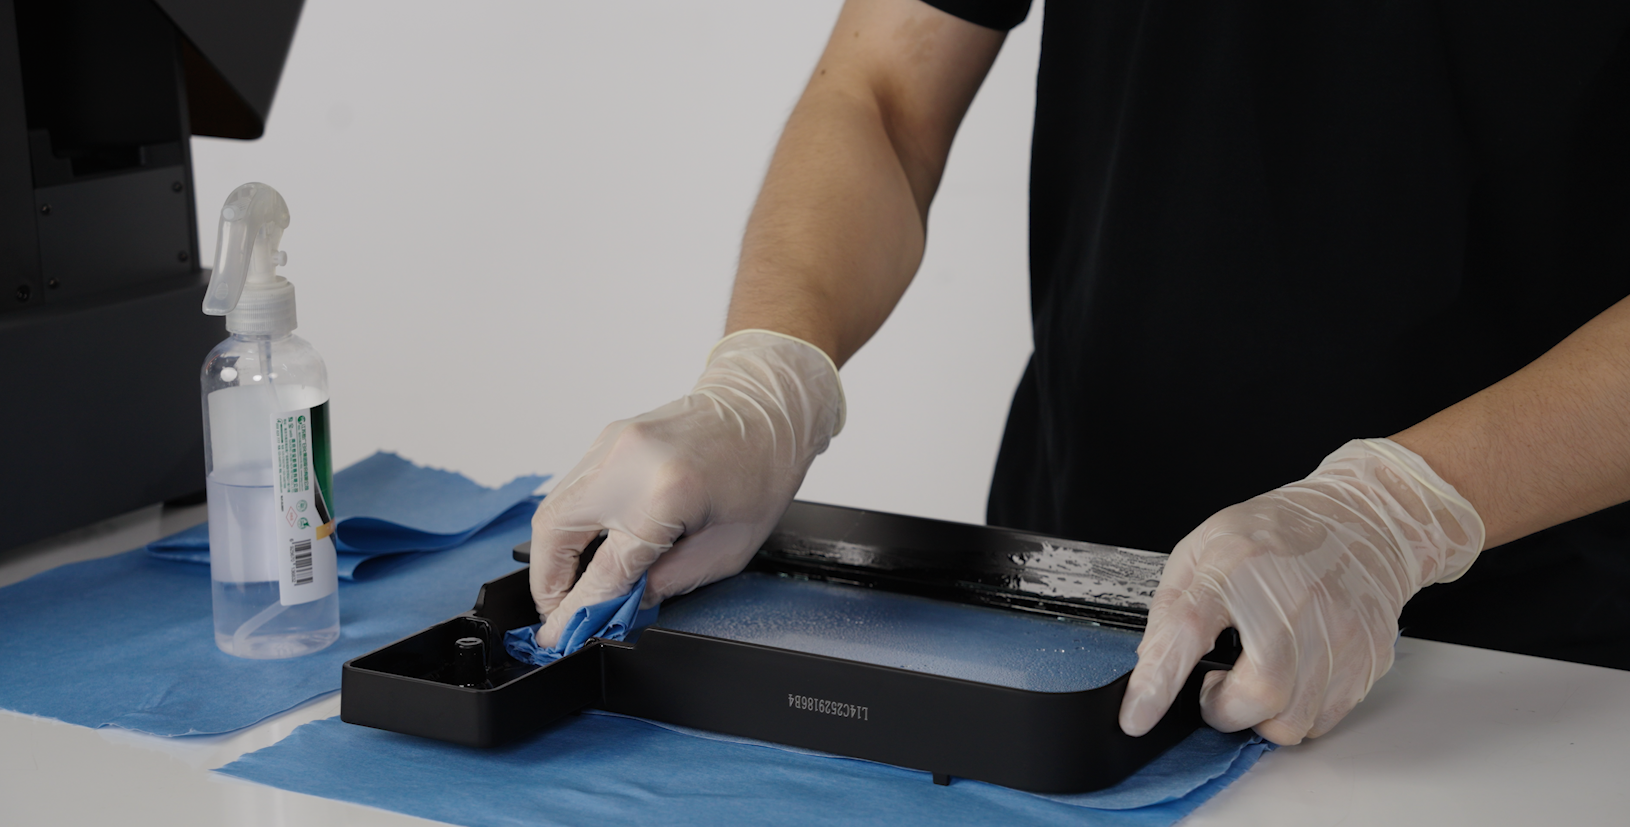 |
- After cleaning, check whether the resin tank is clean, with no resin or cleaning agent residue.
¶ 2.4 LCD Screen Cleaning
| Use glass cleaning solution to evenly spray on the non-woven fabric, and wipe the LCD screen in one direction. |
 |
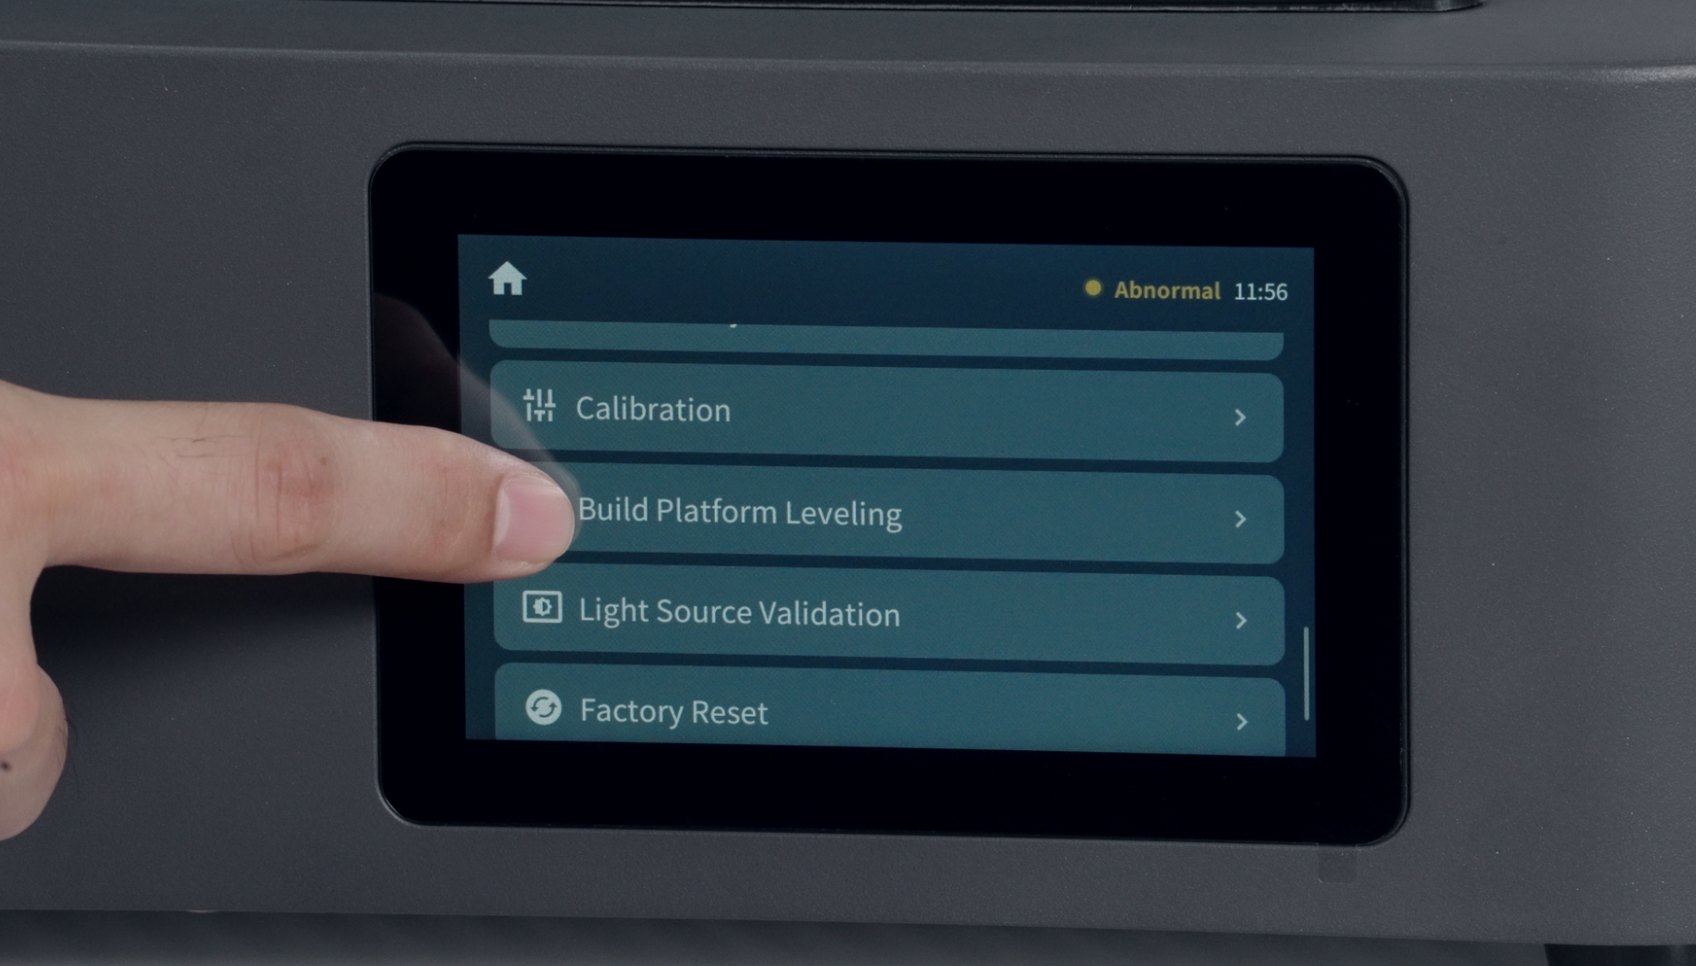
¶ 3. Build Platform Leveling
-
Required tools: T-Type Wrench, Tweezers
-
Enter the settings and select build platform leveling, then use tweezers to remove the two ruber on top of the platform base.
 |
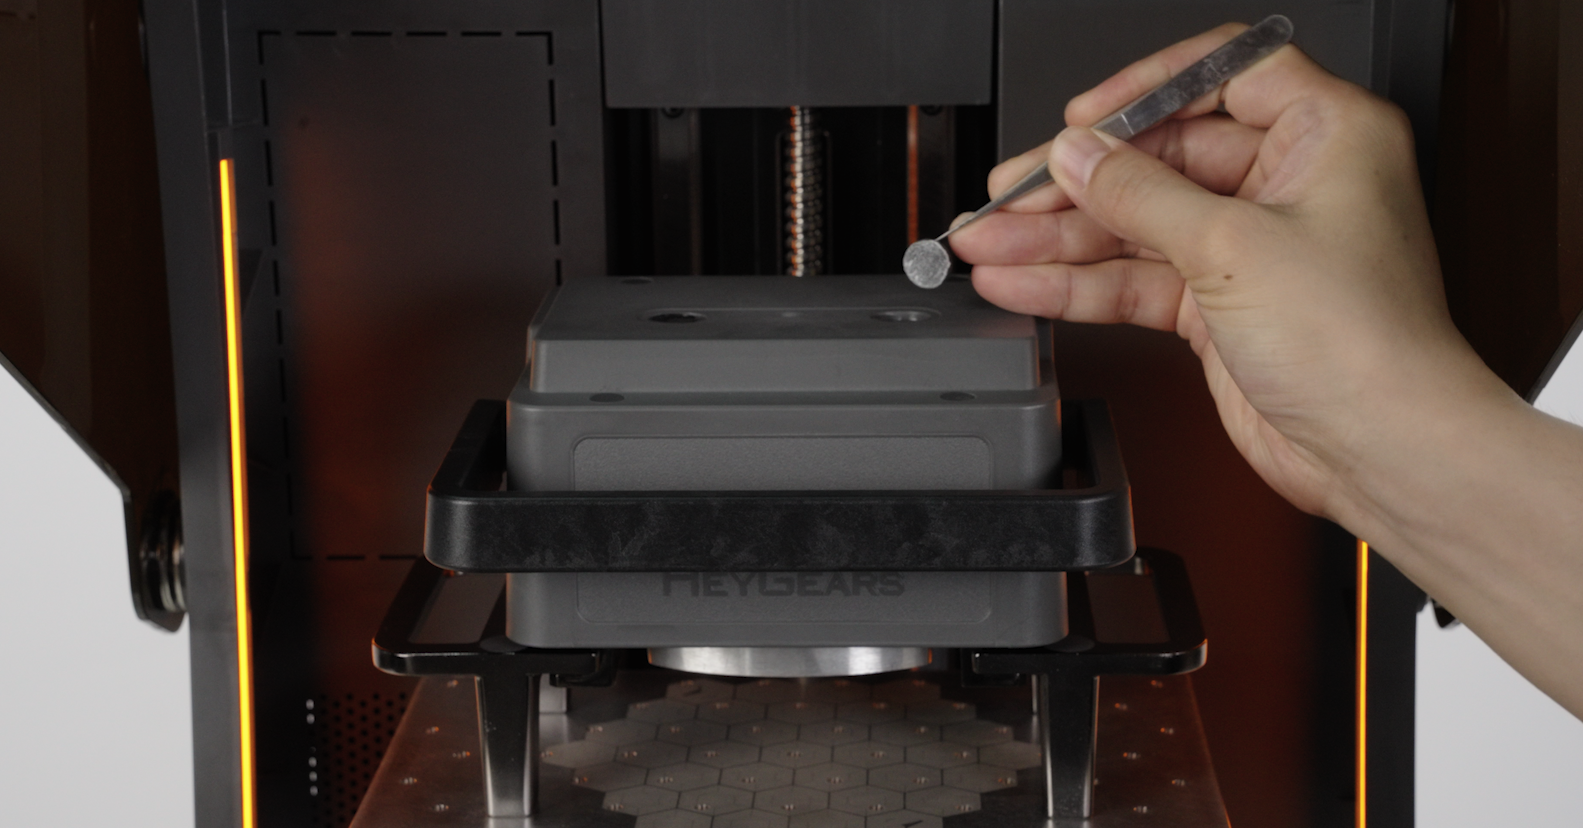 |
- Confirm that the platform surface and the resin tank are clean and free of foreign objects, and confirm that the platform and the resin tank are in a locked state.
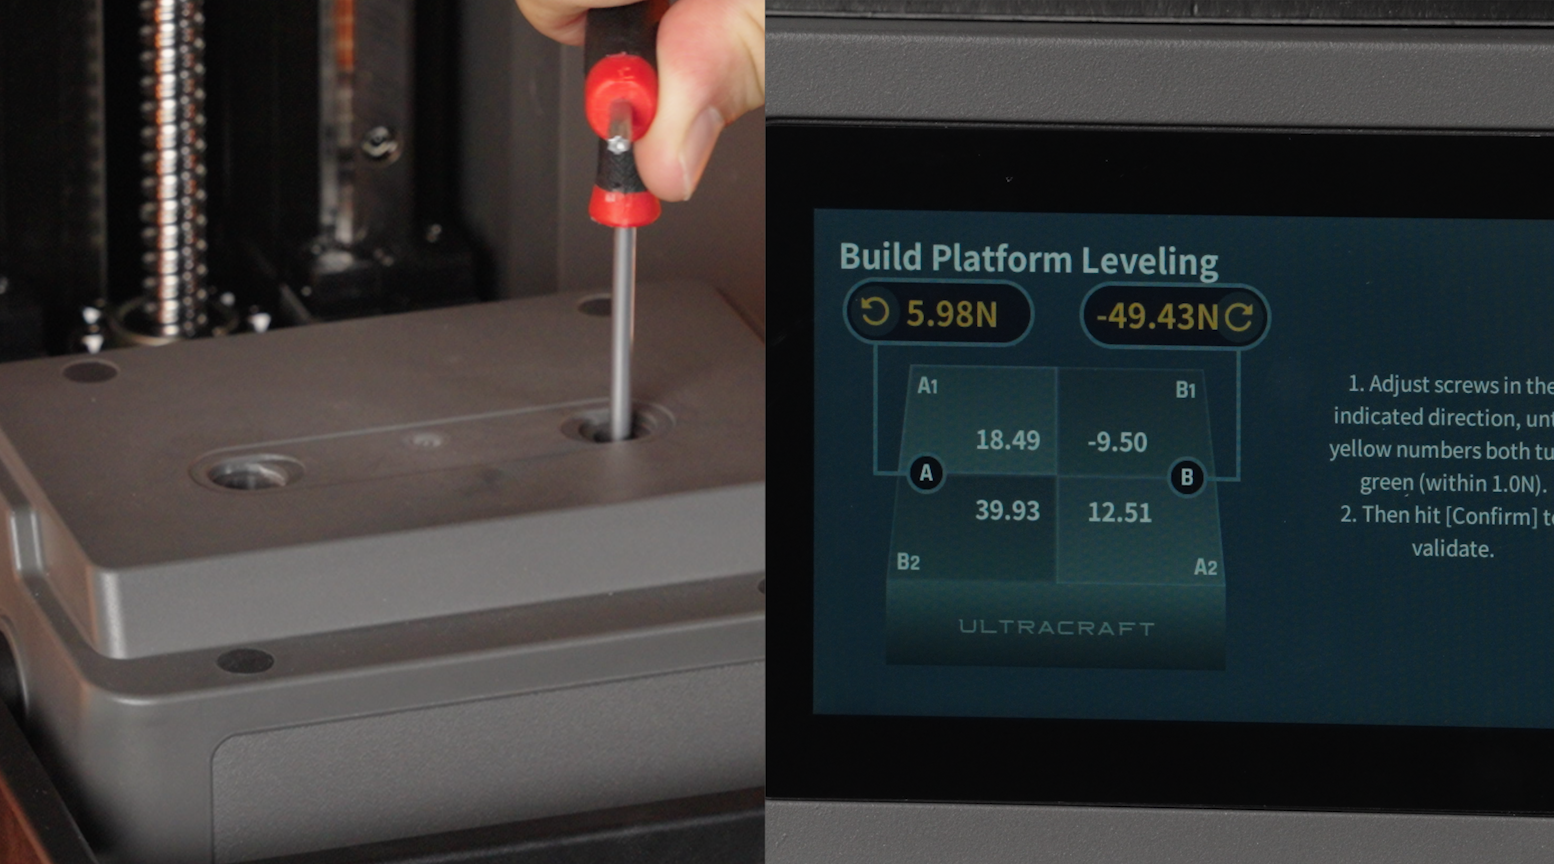
- Use a T-Type wrench to turn the screw on the platform base and follow the rotation direction indicated on the screen until the value on the screen turns green.
 |
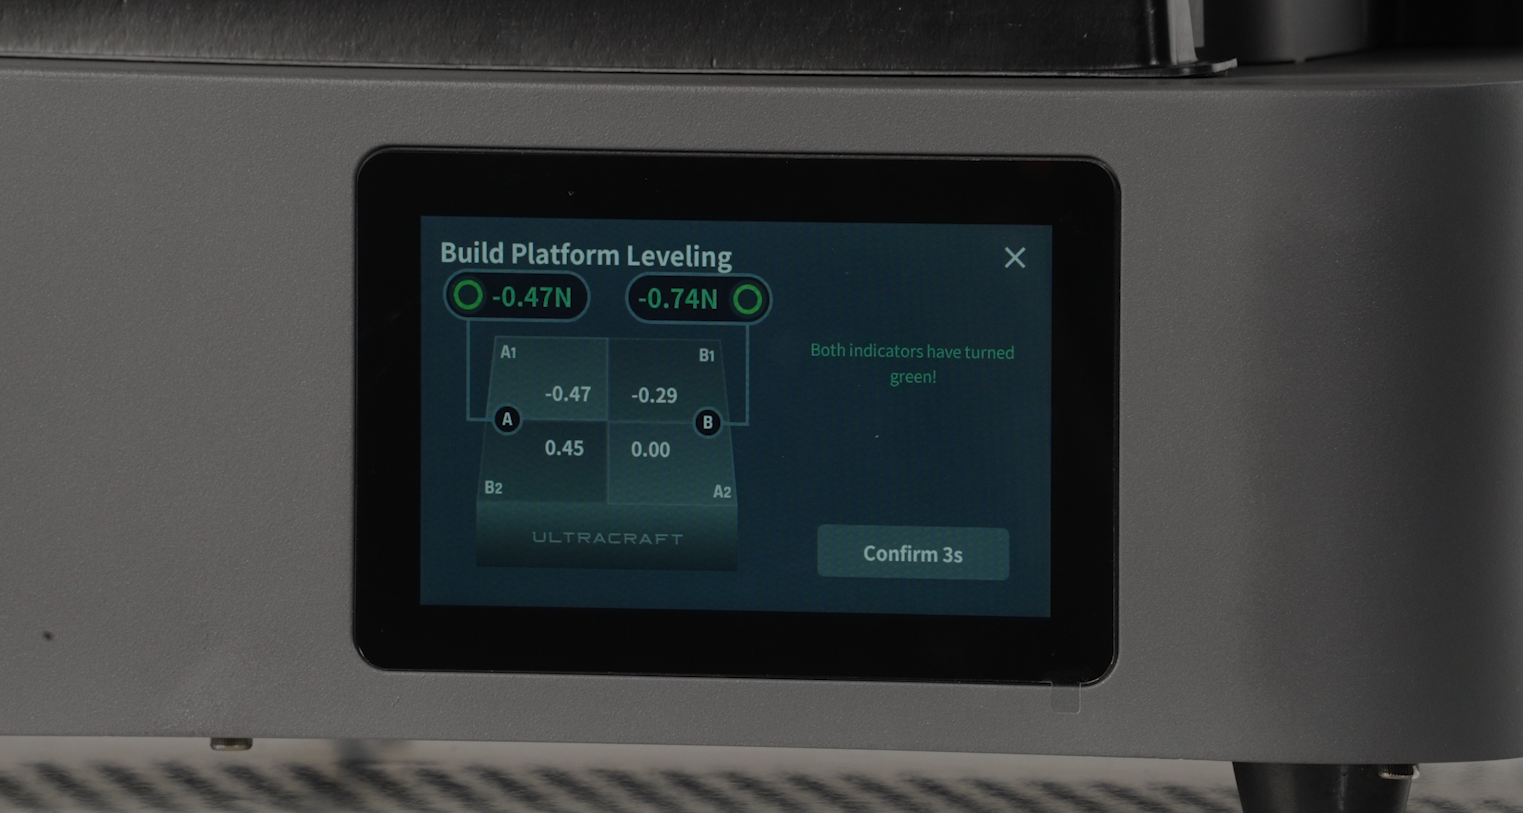 |
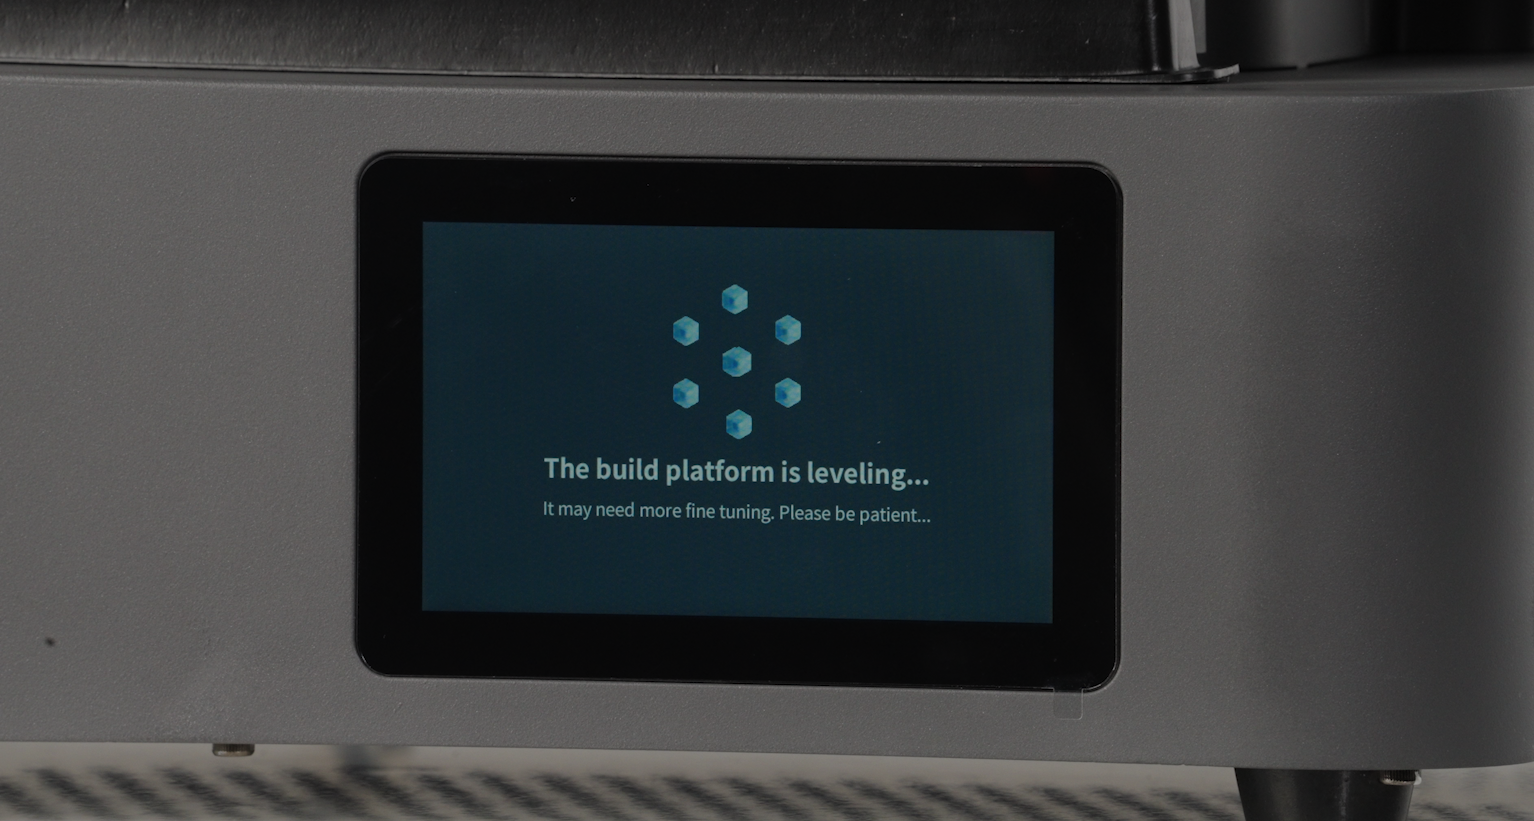
- After clicking Confirm, the system will perform a recheck. Depending on the screen instructions, fine-tuning may be required; if not, device will directly show leveling success.
 |
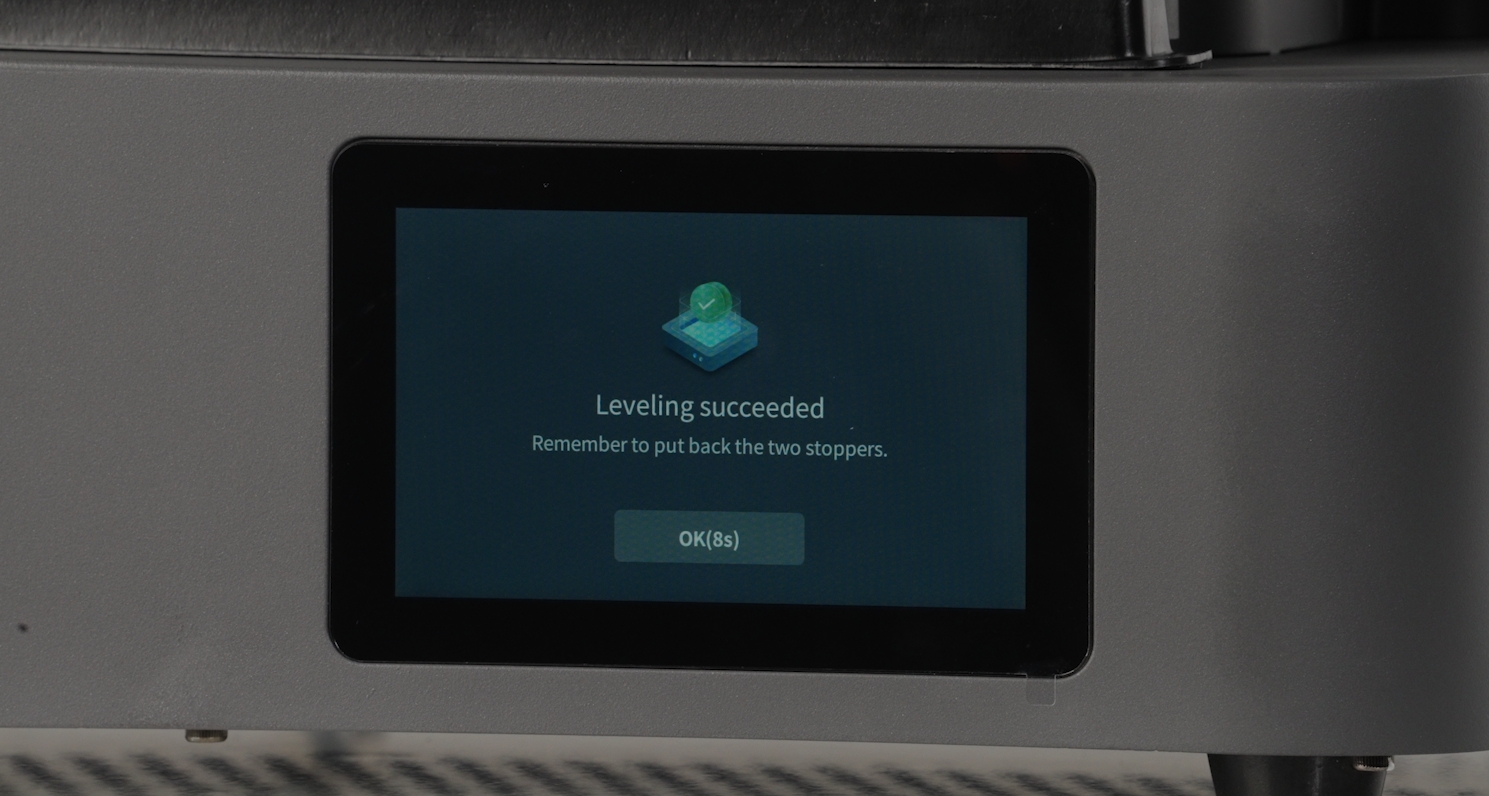 |
- Reinstall the two rubber stoppers back to their original positions, and click "OK" to automatically reset the platform.
|
 |
¶ 4. Device Repackaging
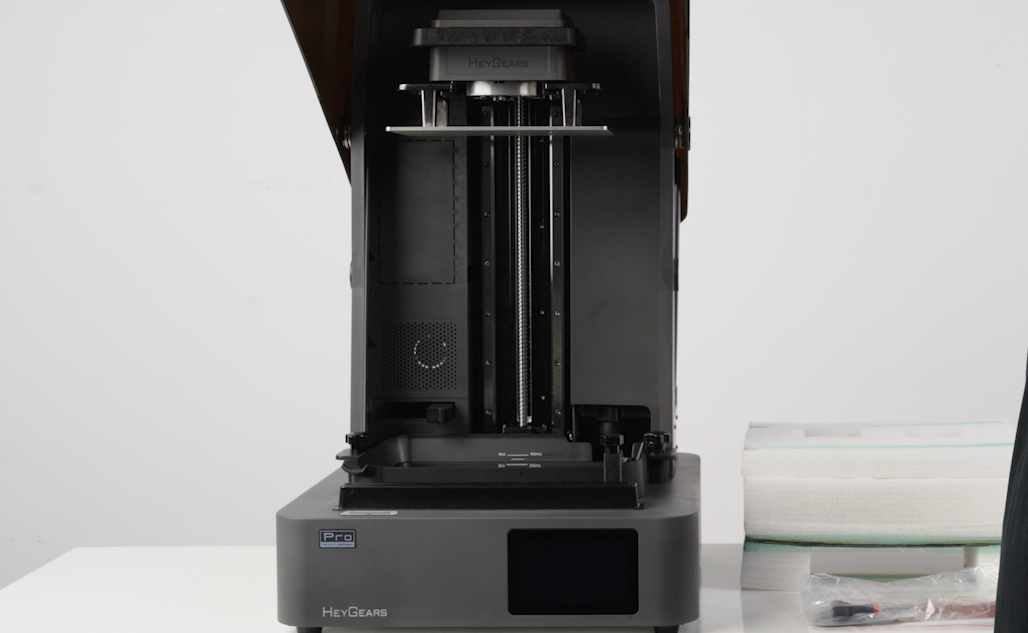
- First, the device needs to be turned off and unplugged. Before repackaging, it is necessary to confirm that the resin cartridge slot, build platform, scraper, and resin tank of the device are in a clean state.
 |
 |
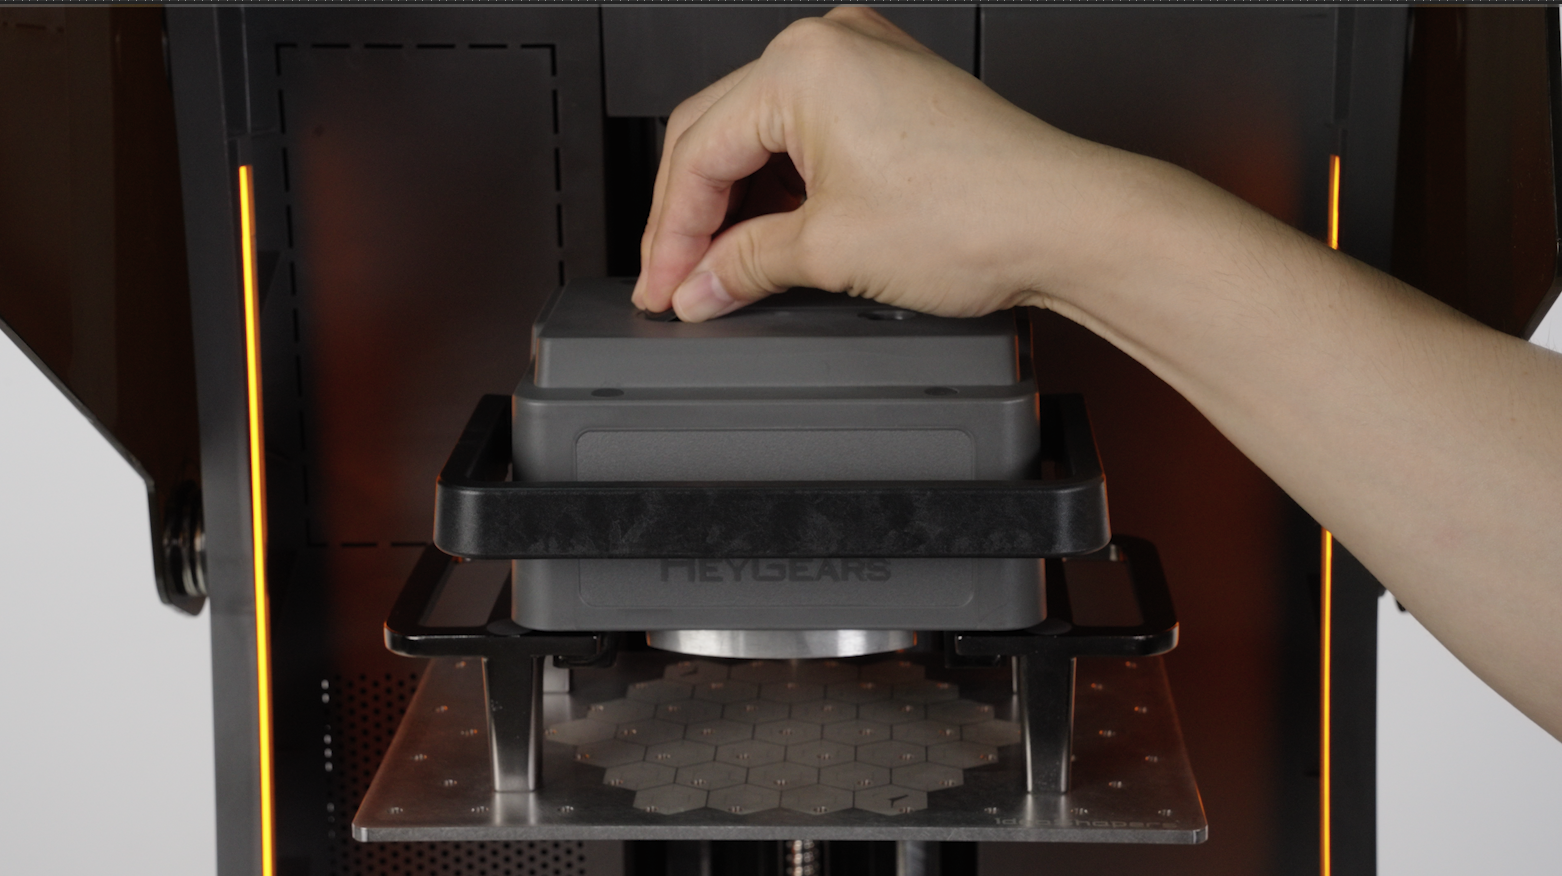
- Remove the forming platform, place it in a packaging bag, and then put it into the reserved space in the foam.
 |
 |
- Remove the scraper and place it in the reserved space of the foam, then put the part remover tool, speatula, and T-type wrench into the packaging bag and place them in the reserved space of the foam.
 |
 |
- Check if the tank is clean and tightened onto the device, confirm that the liquid level sensor is in the off state.
 |
 |
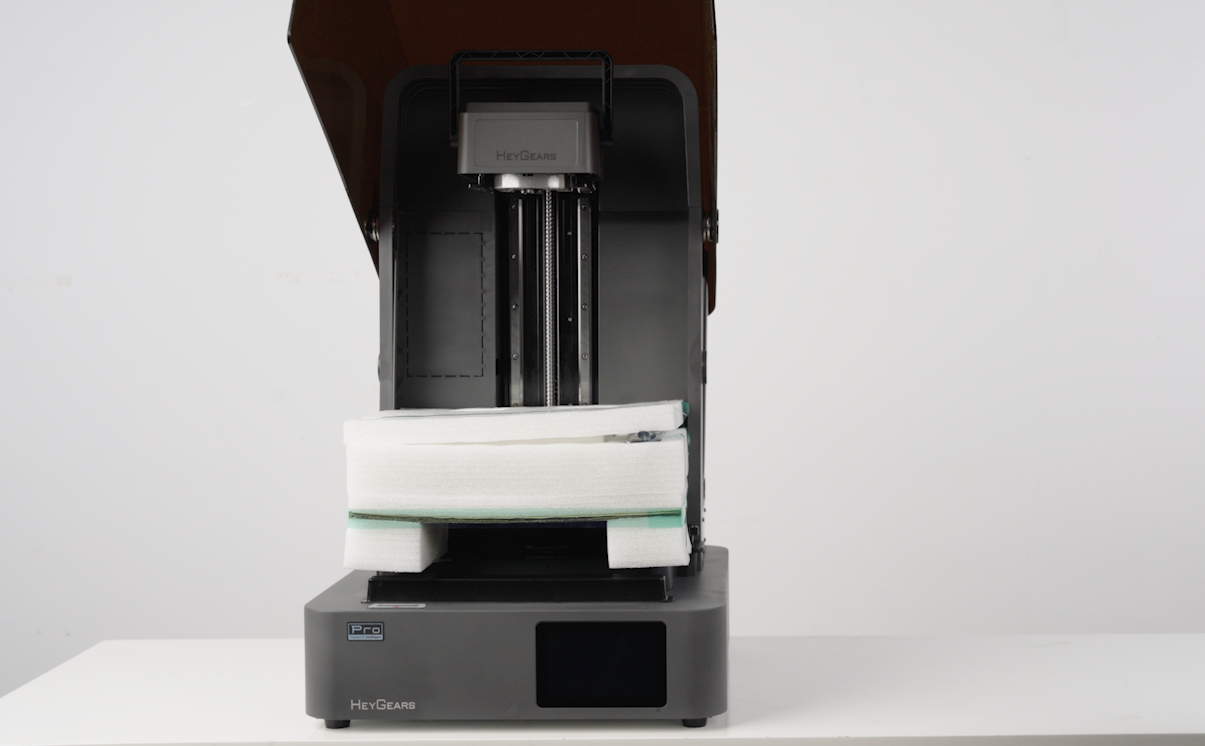
- then place the foam containing the accessories above the tank, press down the fixing foam to install.
|
|
- Use tape to secure two pieces of foam, then attach and secure them tightly from above the platform base.
 |
 |
- Close the hood, insert the resin bottle into the carton in the resin cartridge slot, and attach the door protective film to the front of the hood and the outer frame.
 |
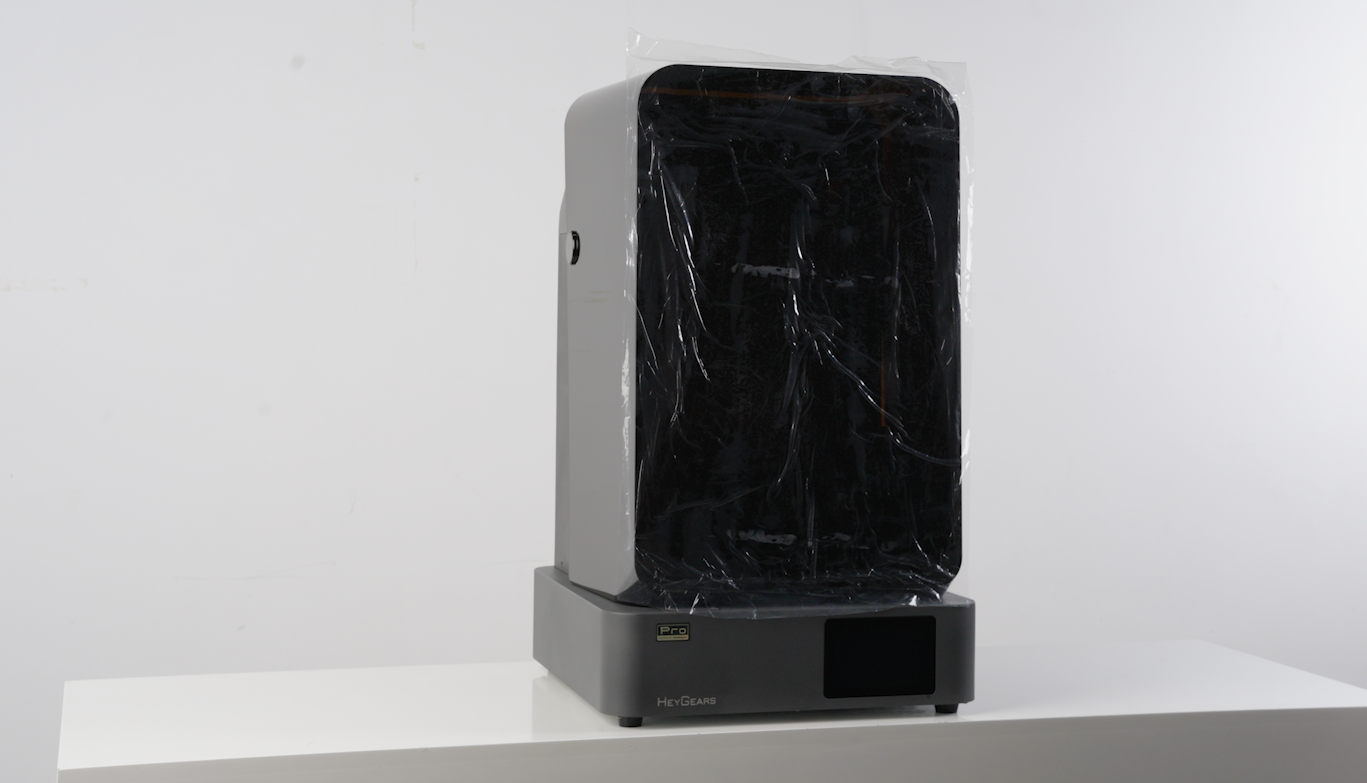 |
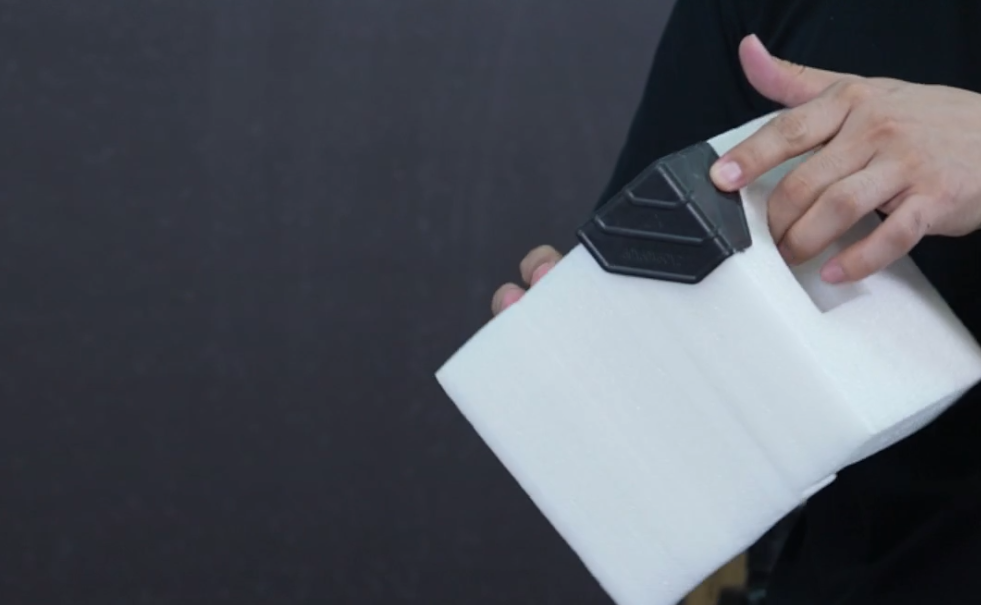
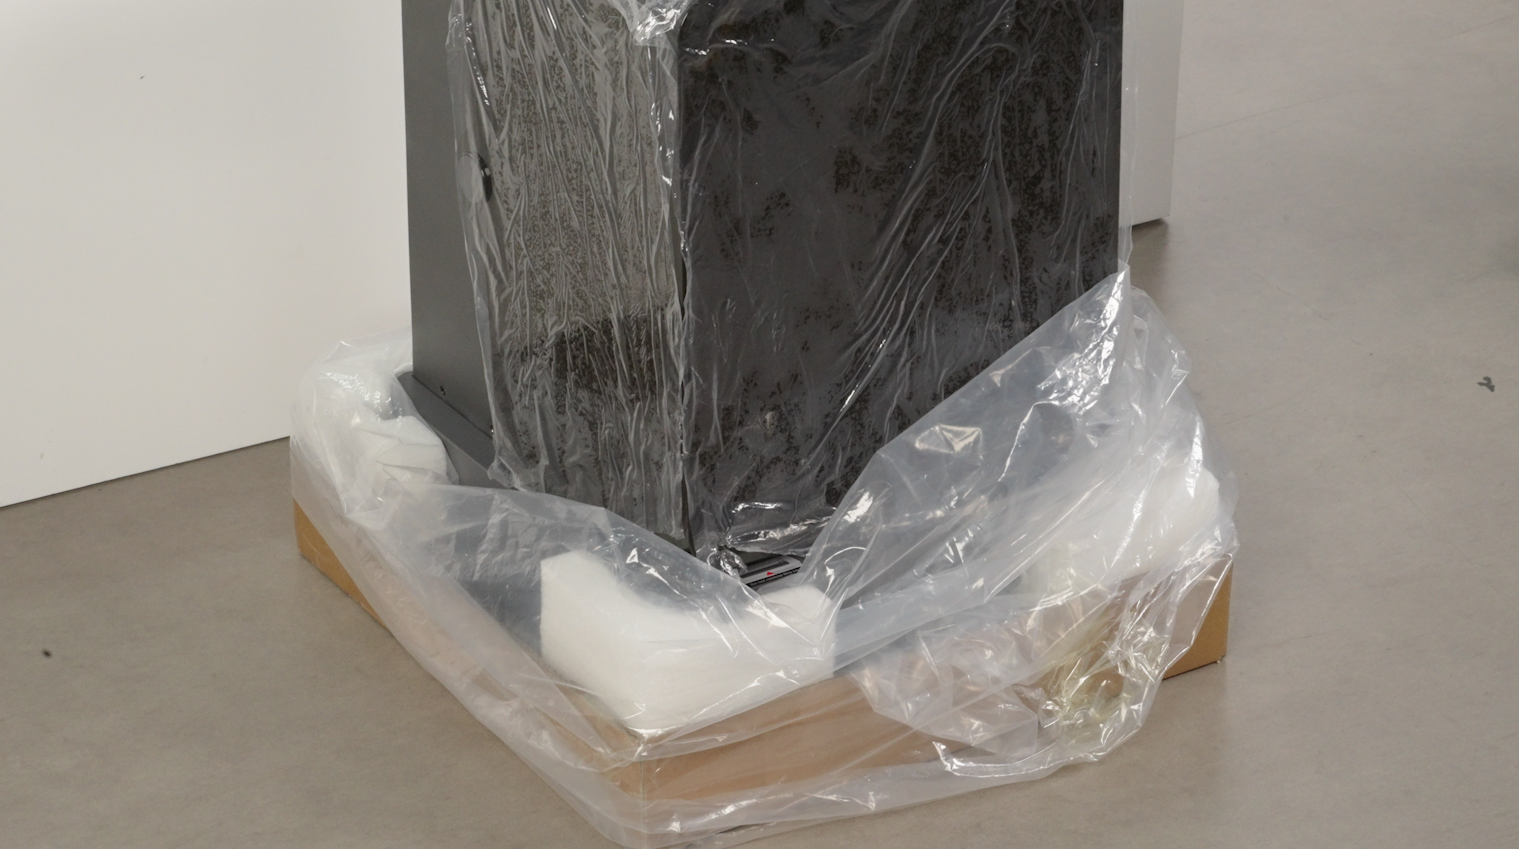
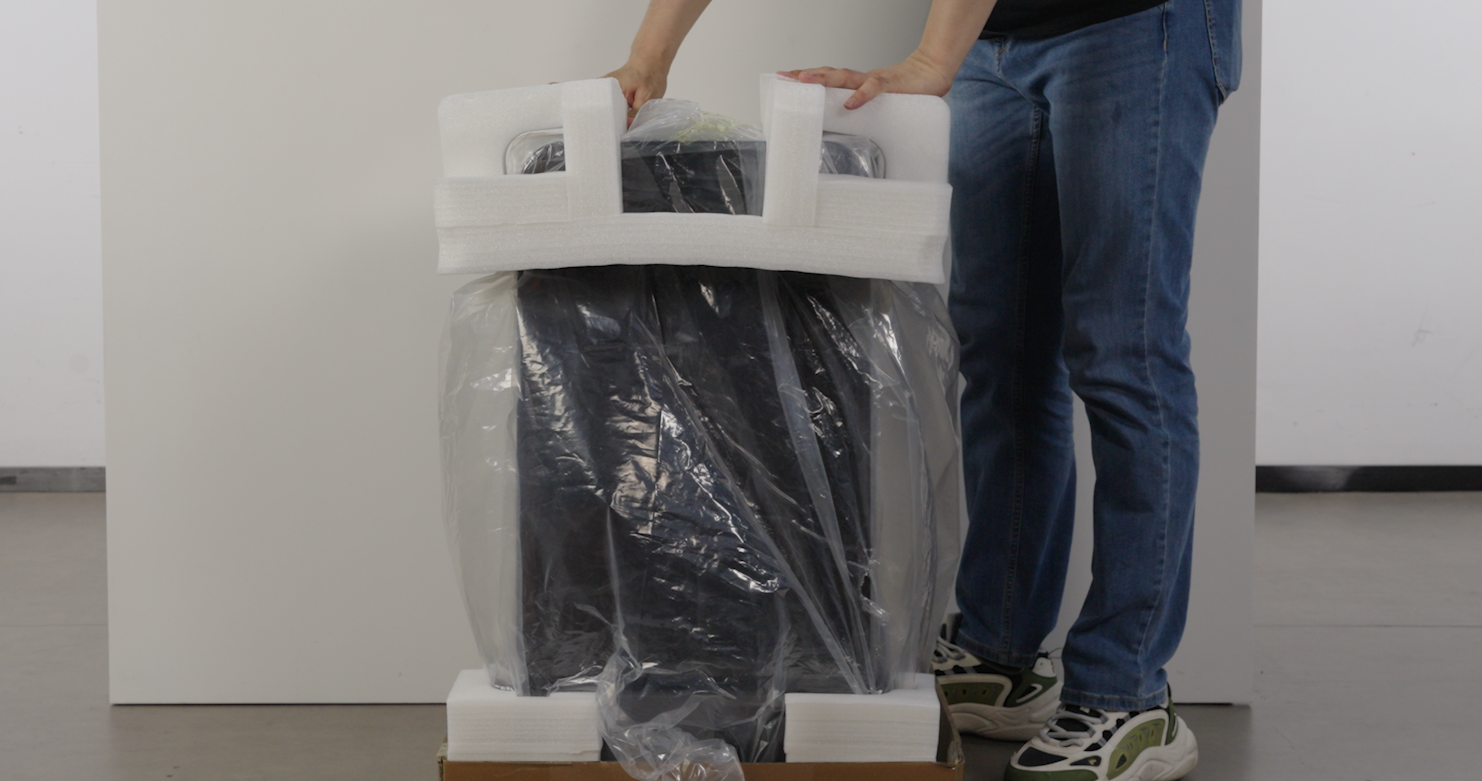
- Move the device to the packaging base: (two or more than two people to move the device )
Note: First, install the foam on the outer shell. Then, ensure that the outer shell (with the foam attached) is positioned at the four corners inside the base, and finally fit it into the plastic outer packaging bag.
 |
 |
- Then place the device inside, tightly wrap the outer packaging bag, and seal it with tape.
 |
 |
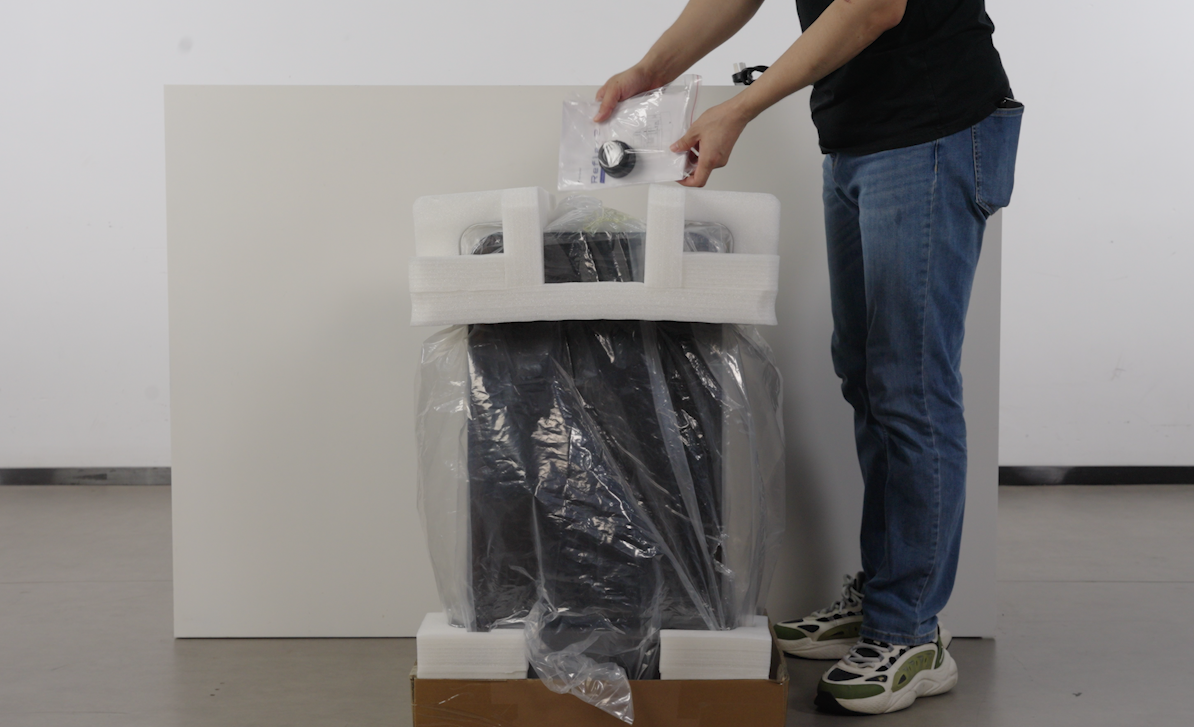
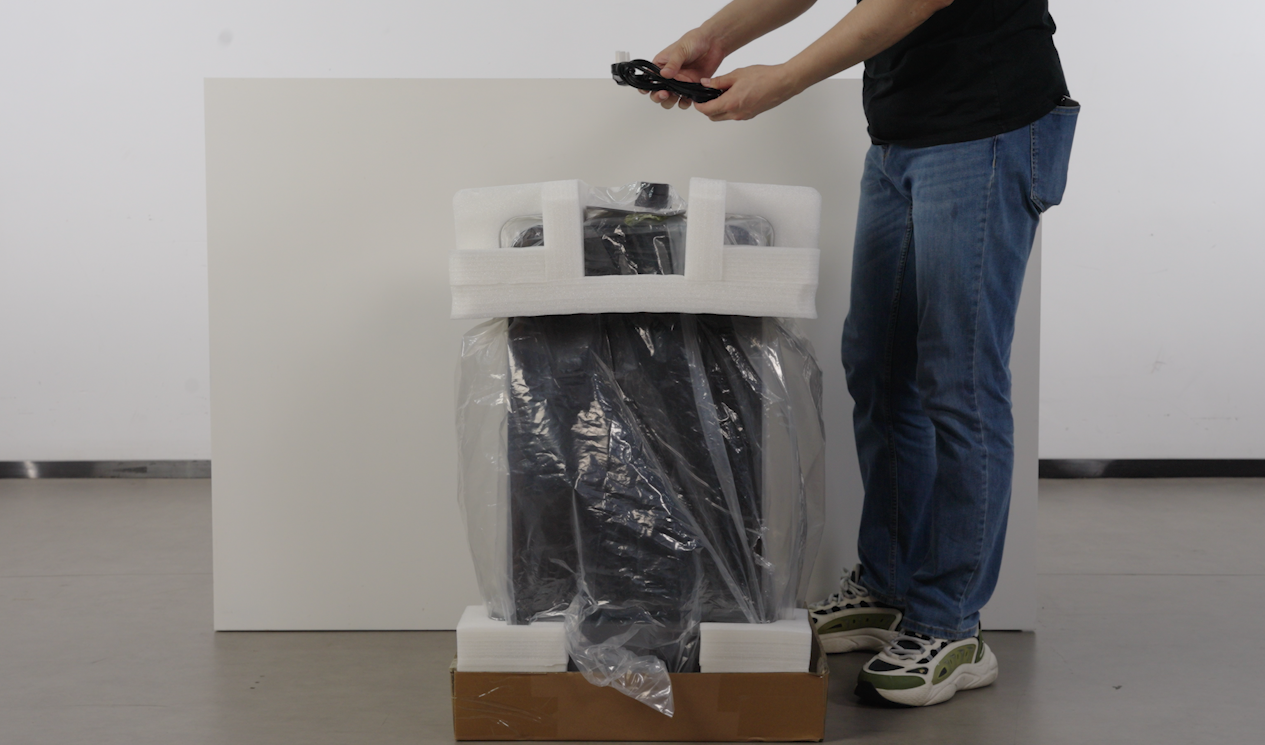
- Install the foam above the device and place the device accessory bag: resin-refill lid, quick start guide, after-sales guide, and power cord.
 |
 |
 |
- Recheck whether all accessories in the device have been reinstalled.
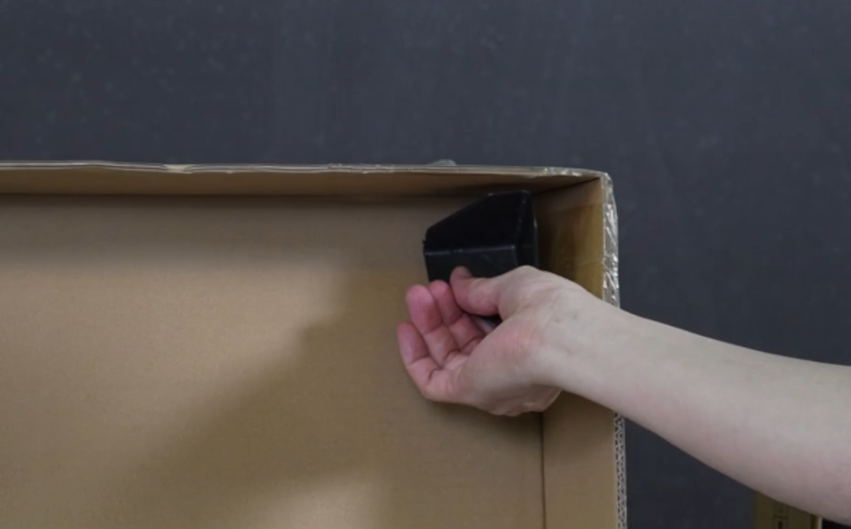
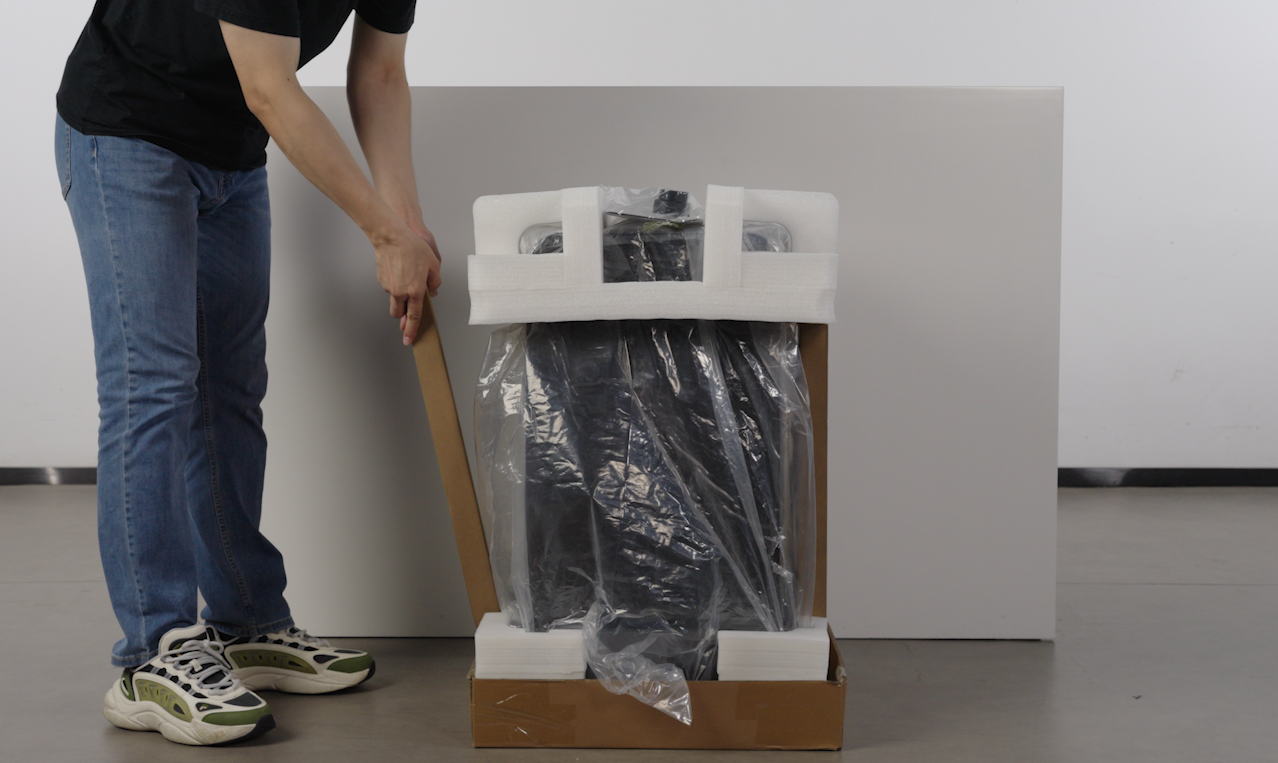
- Insert two packaging cardboard pieces on each side of the device respectively, and then install the packaging shell.
 |
 |
- Use tape to adhere the packaging shell to the base from top to bottom.
