¶ Overview
This is the operation guide for automatic model lattice generation in Blueprint Studio, and explains the relevant steps and precautions in detail.
- Operation: complete 4 steps in turn - project setup, solid model import, lattice parameter configuration and effect generation - to finish the process.
- Key parameters: you may adjust the crystal cell type, strut diameter, voxel resolution and other parameters as needed. By default, the fcc cell and the Medium voxel resolution are recommended.
- Precautions: before the operation, make sure the model has no broken faces. For repeated generation, click [Undo] to revert to the solid model state. After the lattice is generated, refer to BPS Lattice Model Auto-support Parameter Setting SOP to configure supports. For reference results, see the corresponding samples in this document.
¶ 1. Operation
¶ 1.1 Project Setup
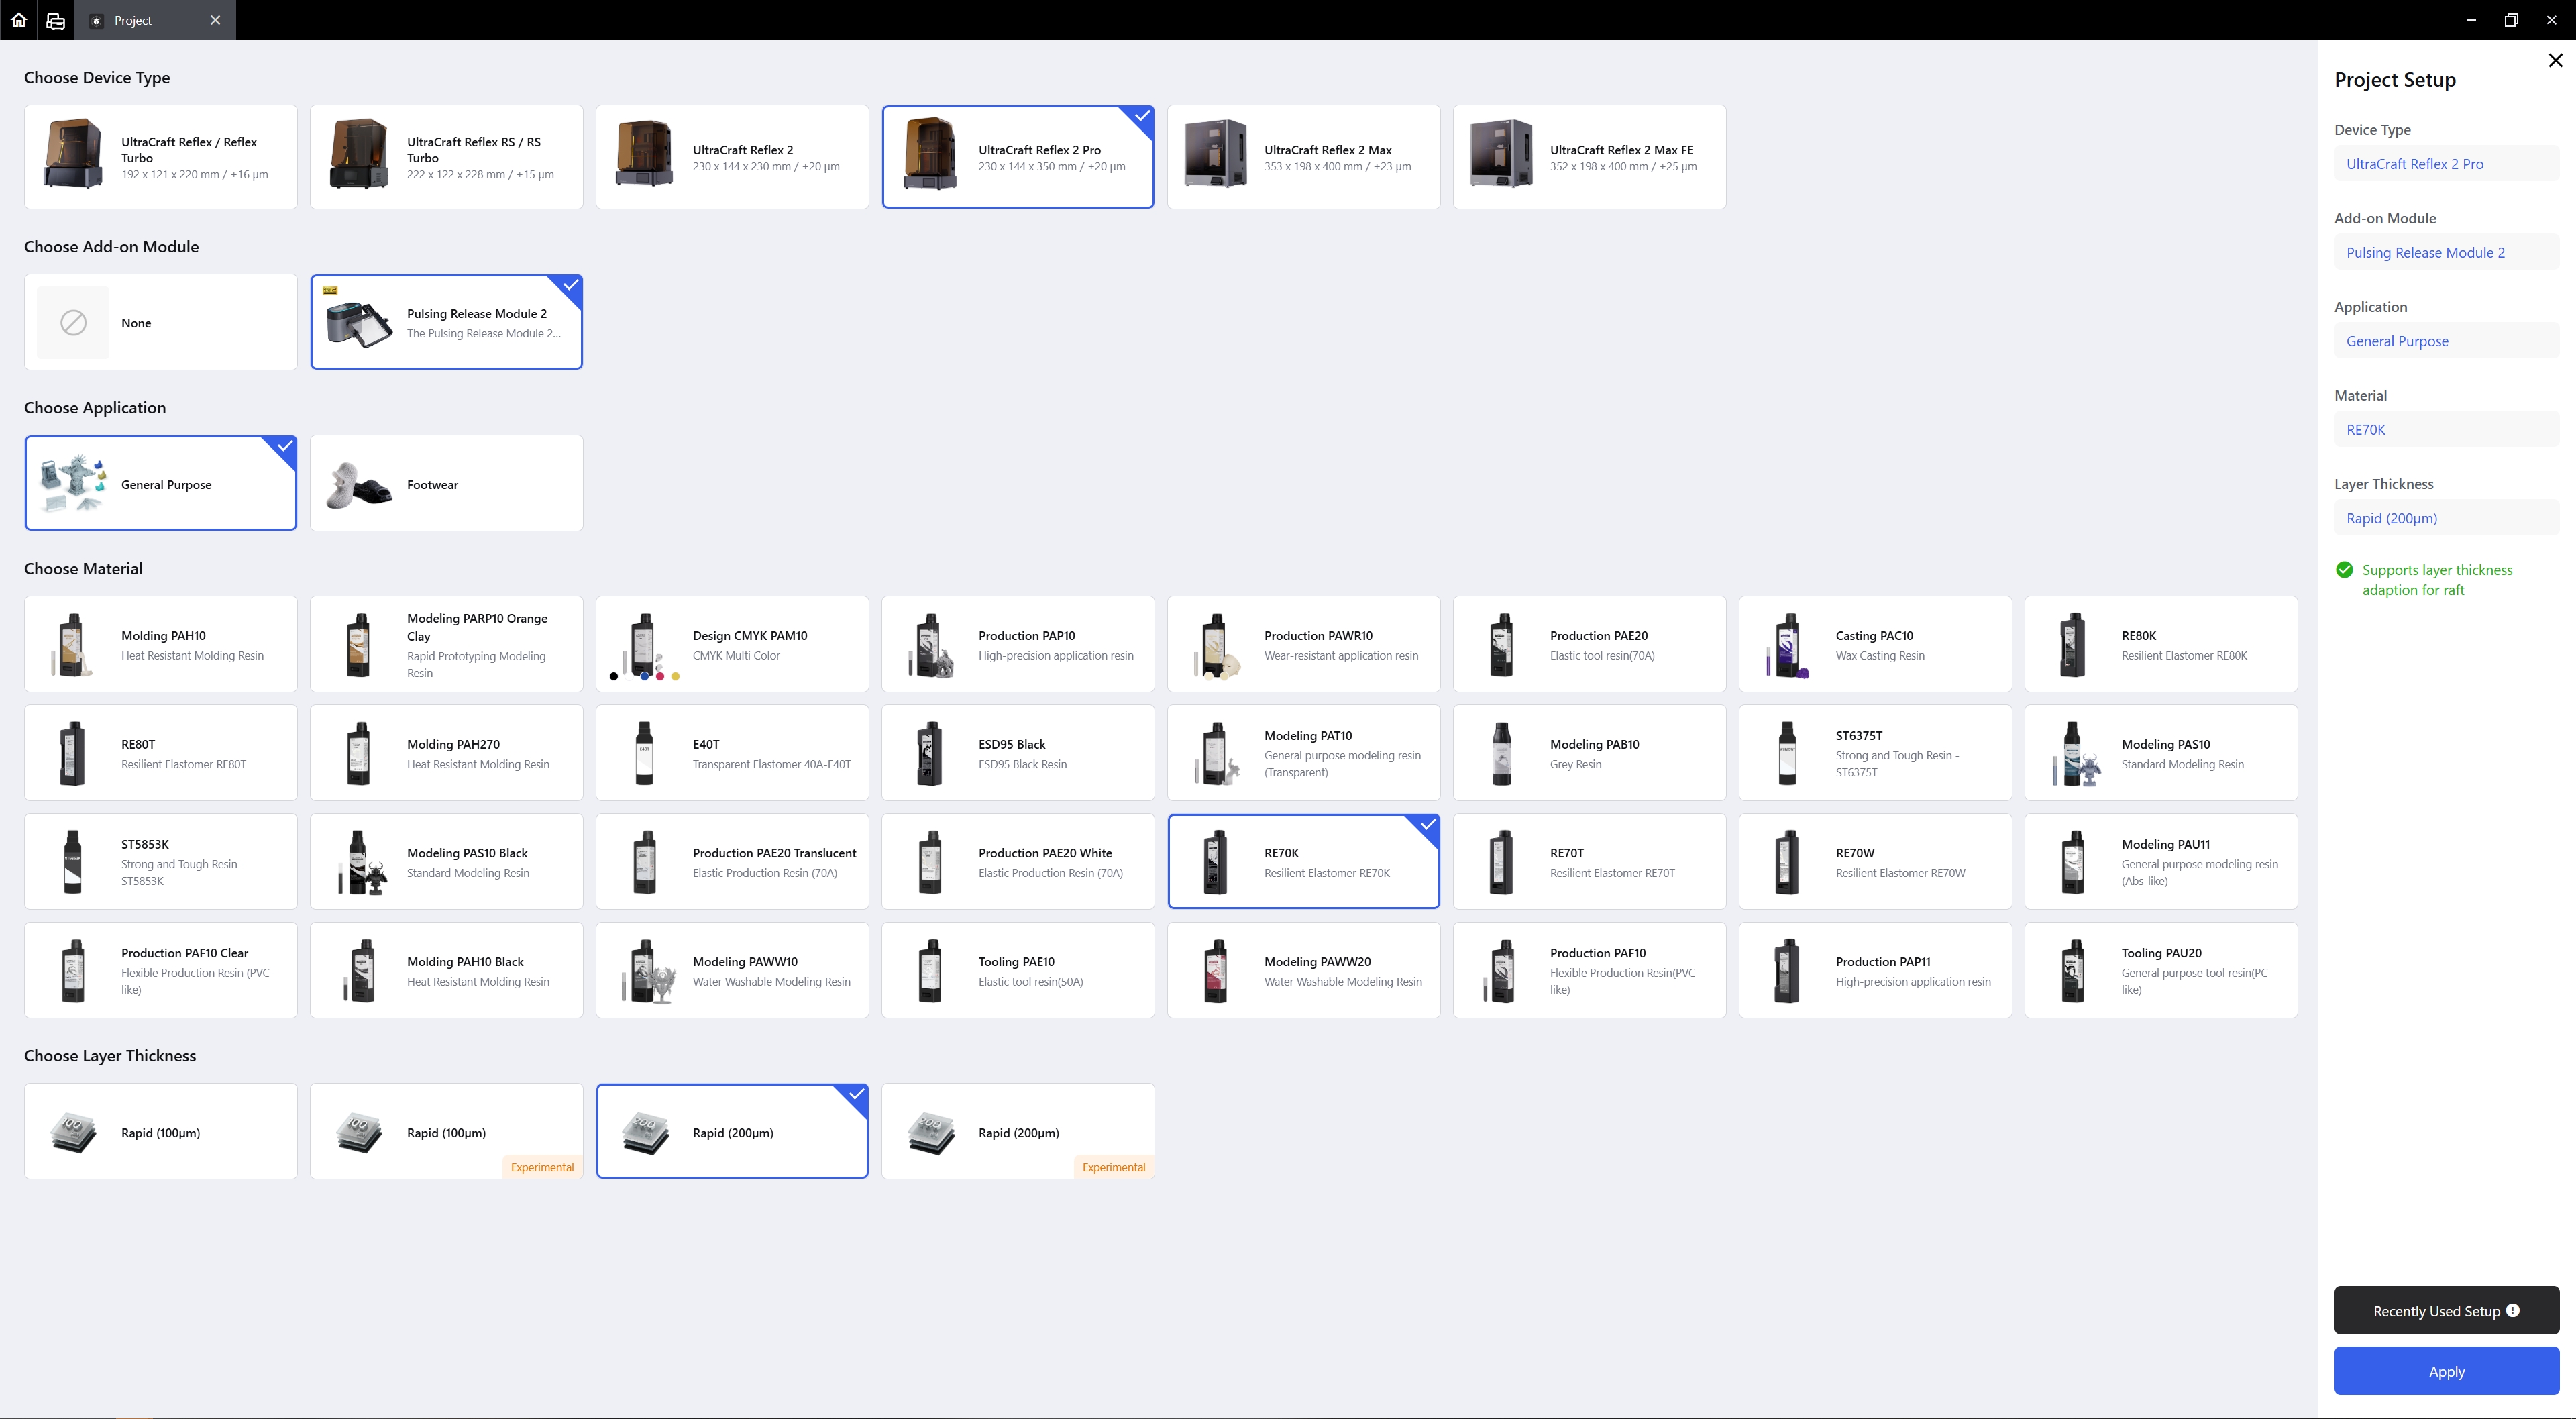
Select the device and the rest setup to enter the pre-pocessing page.
¶ 1.2 Import the Model
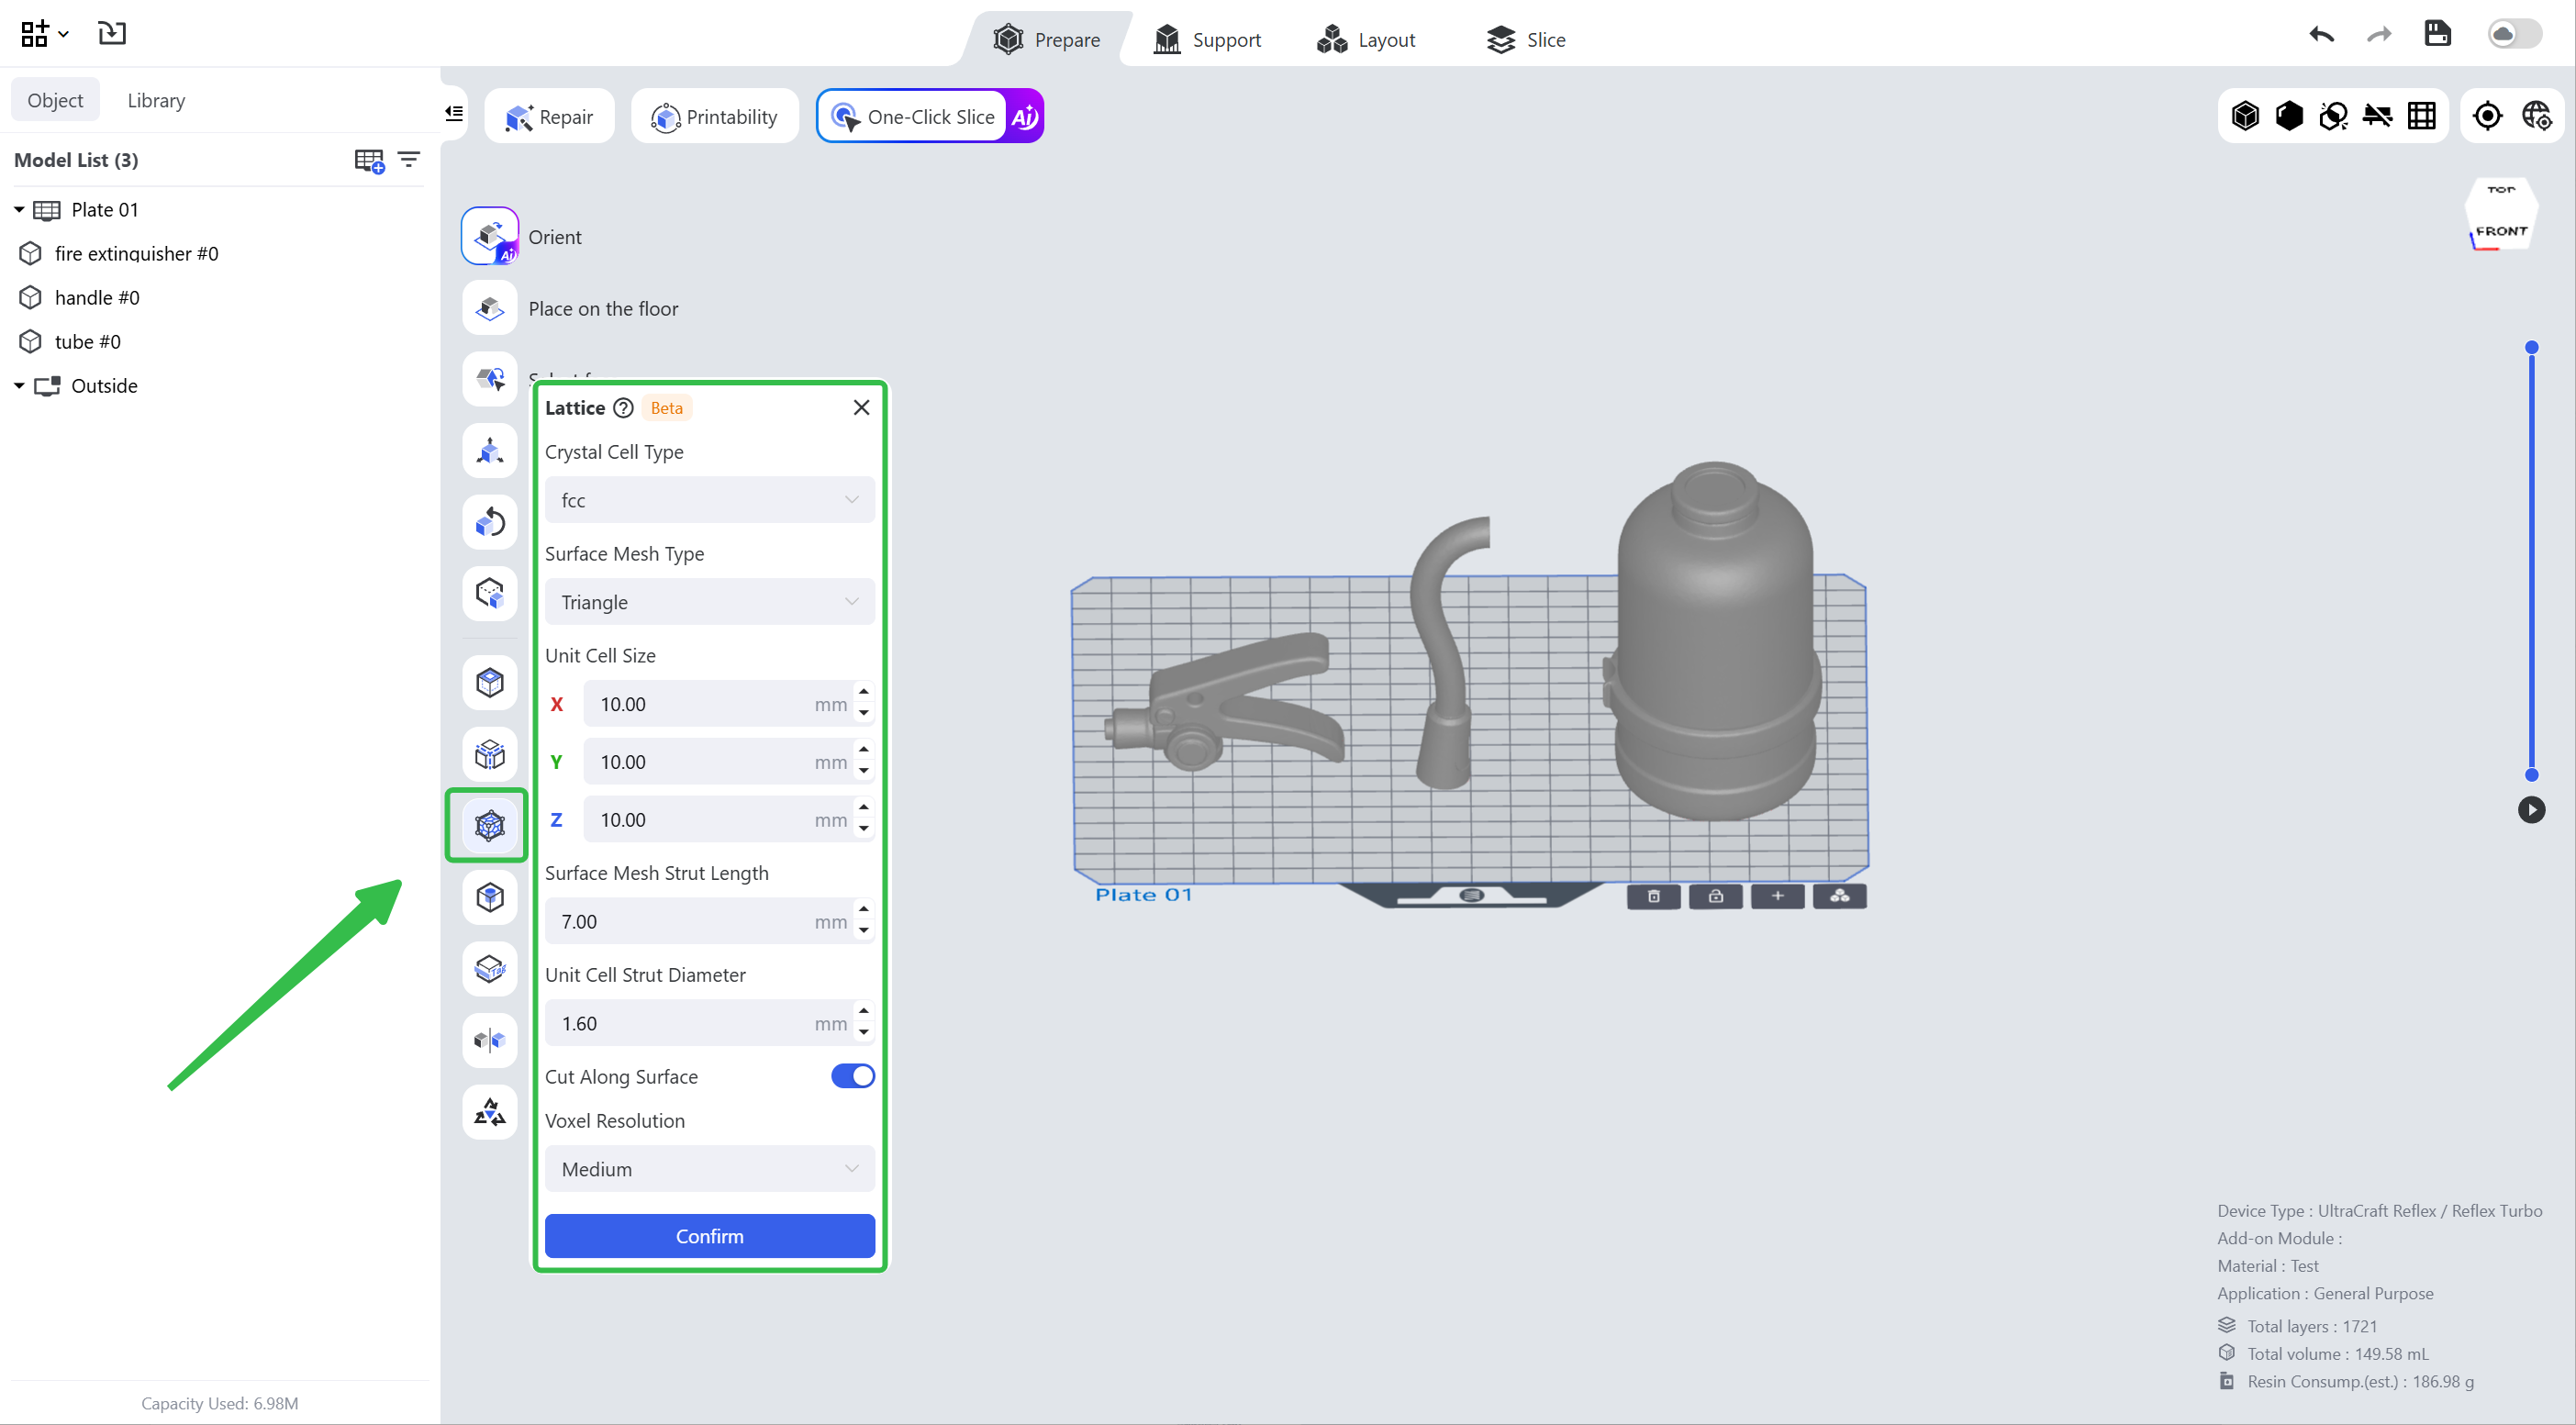
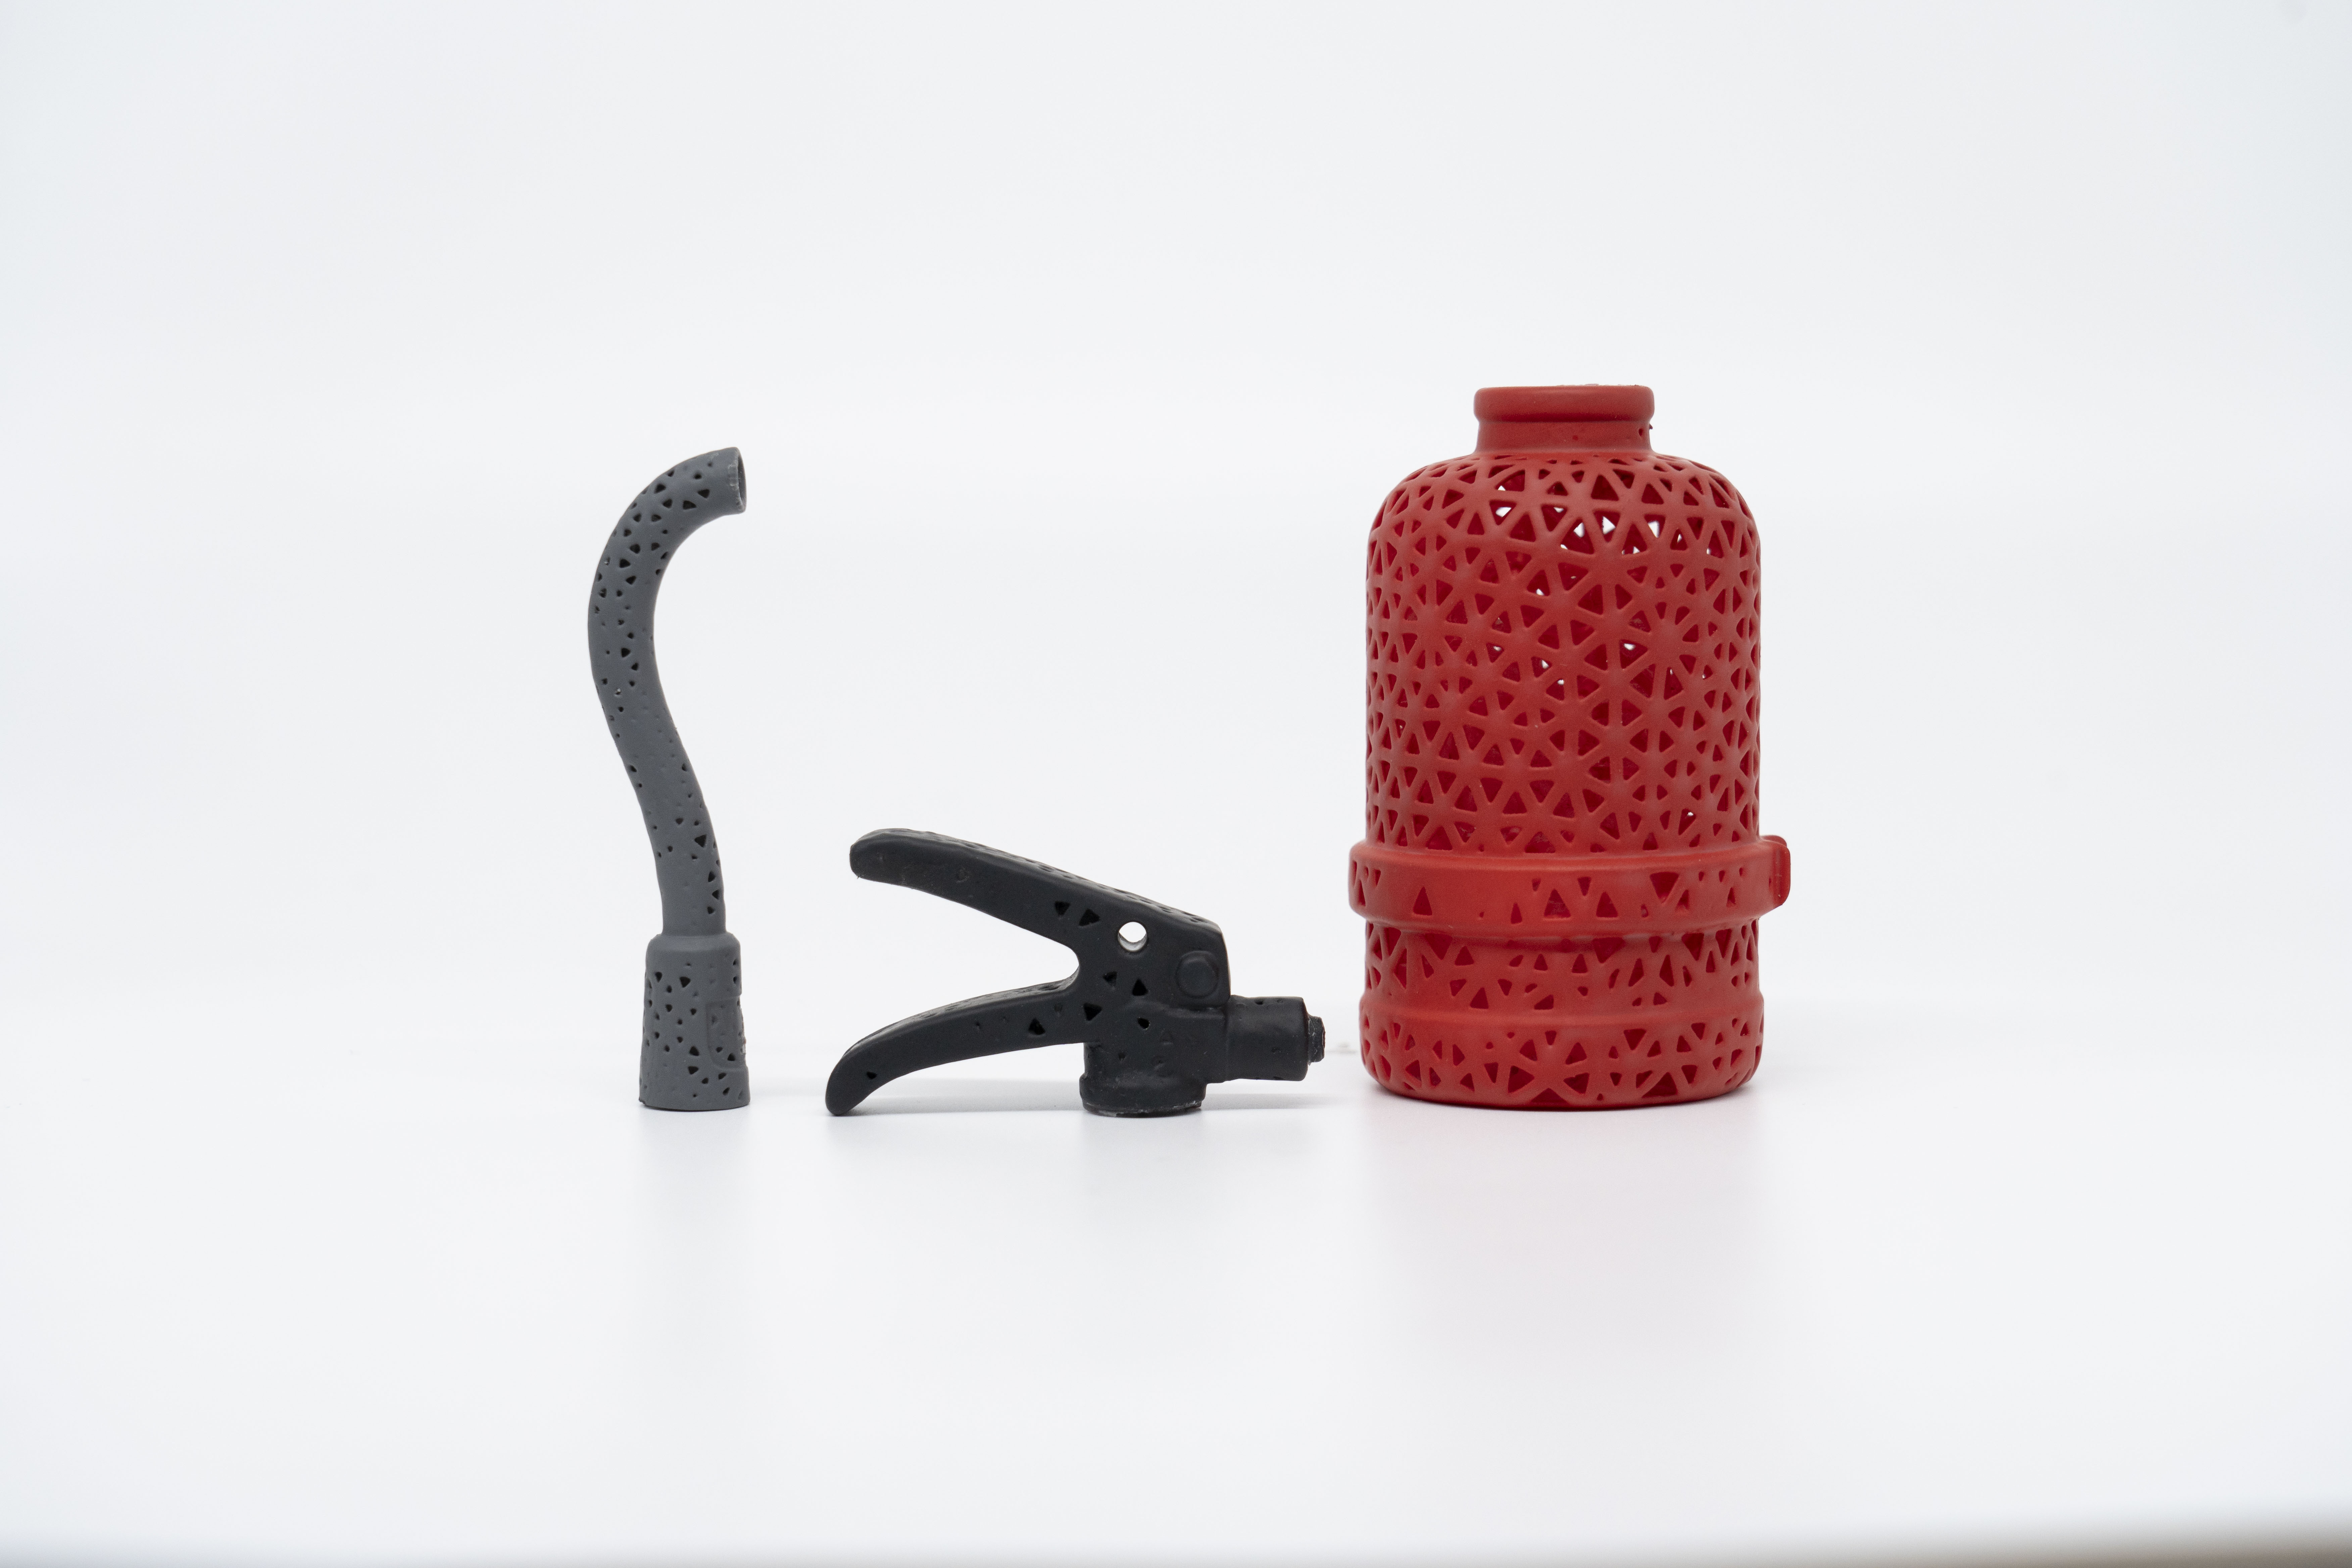
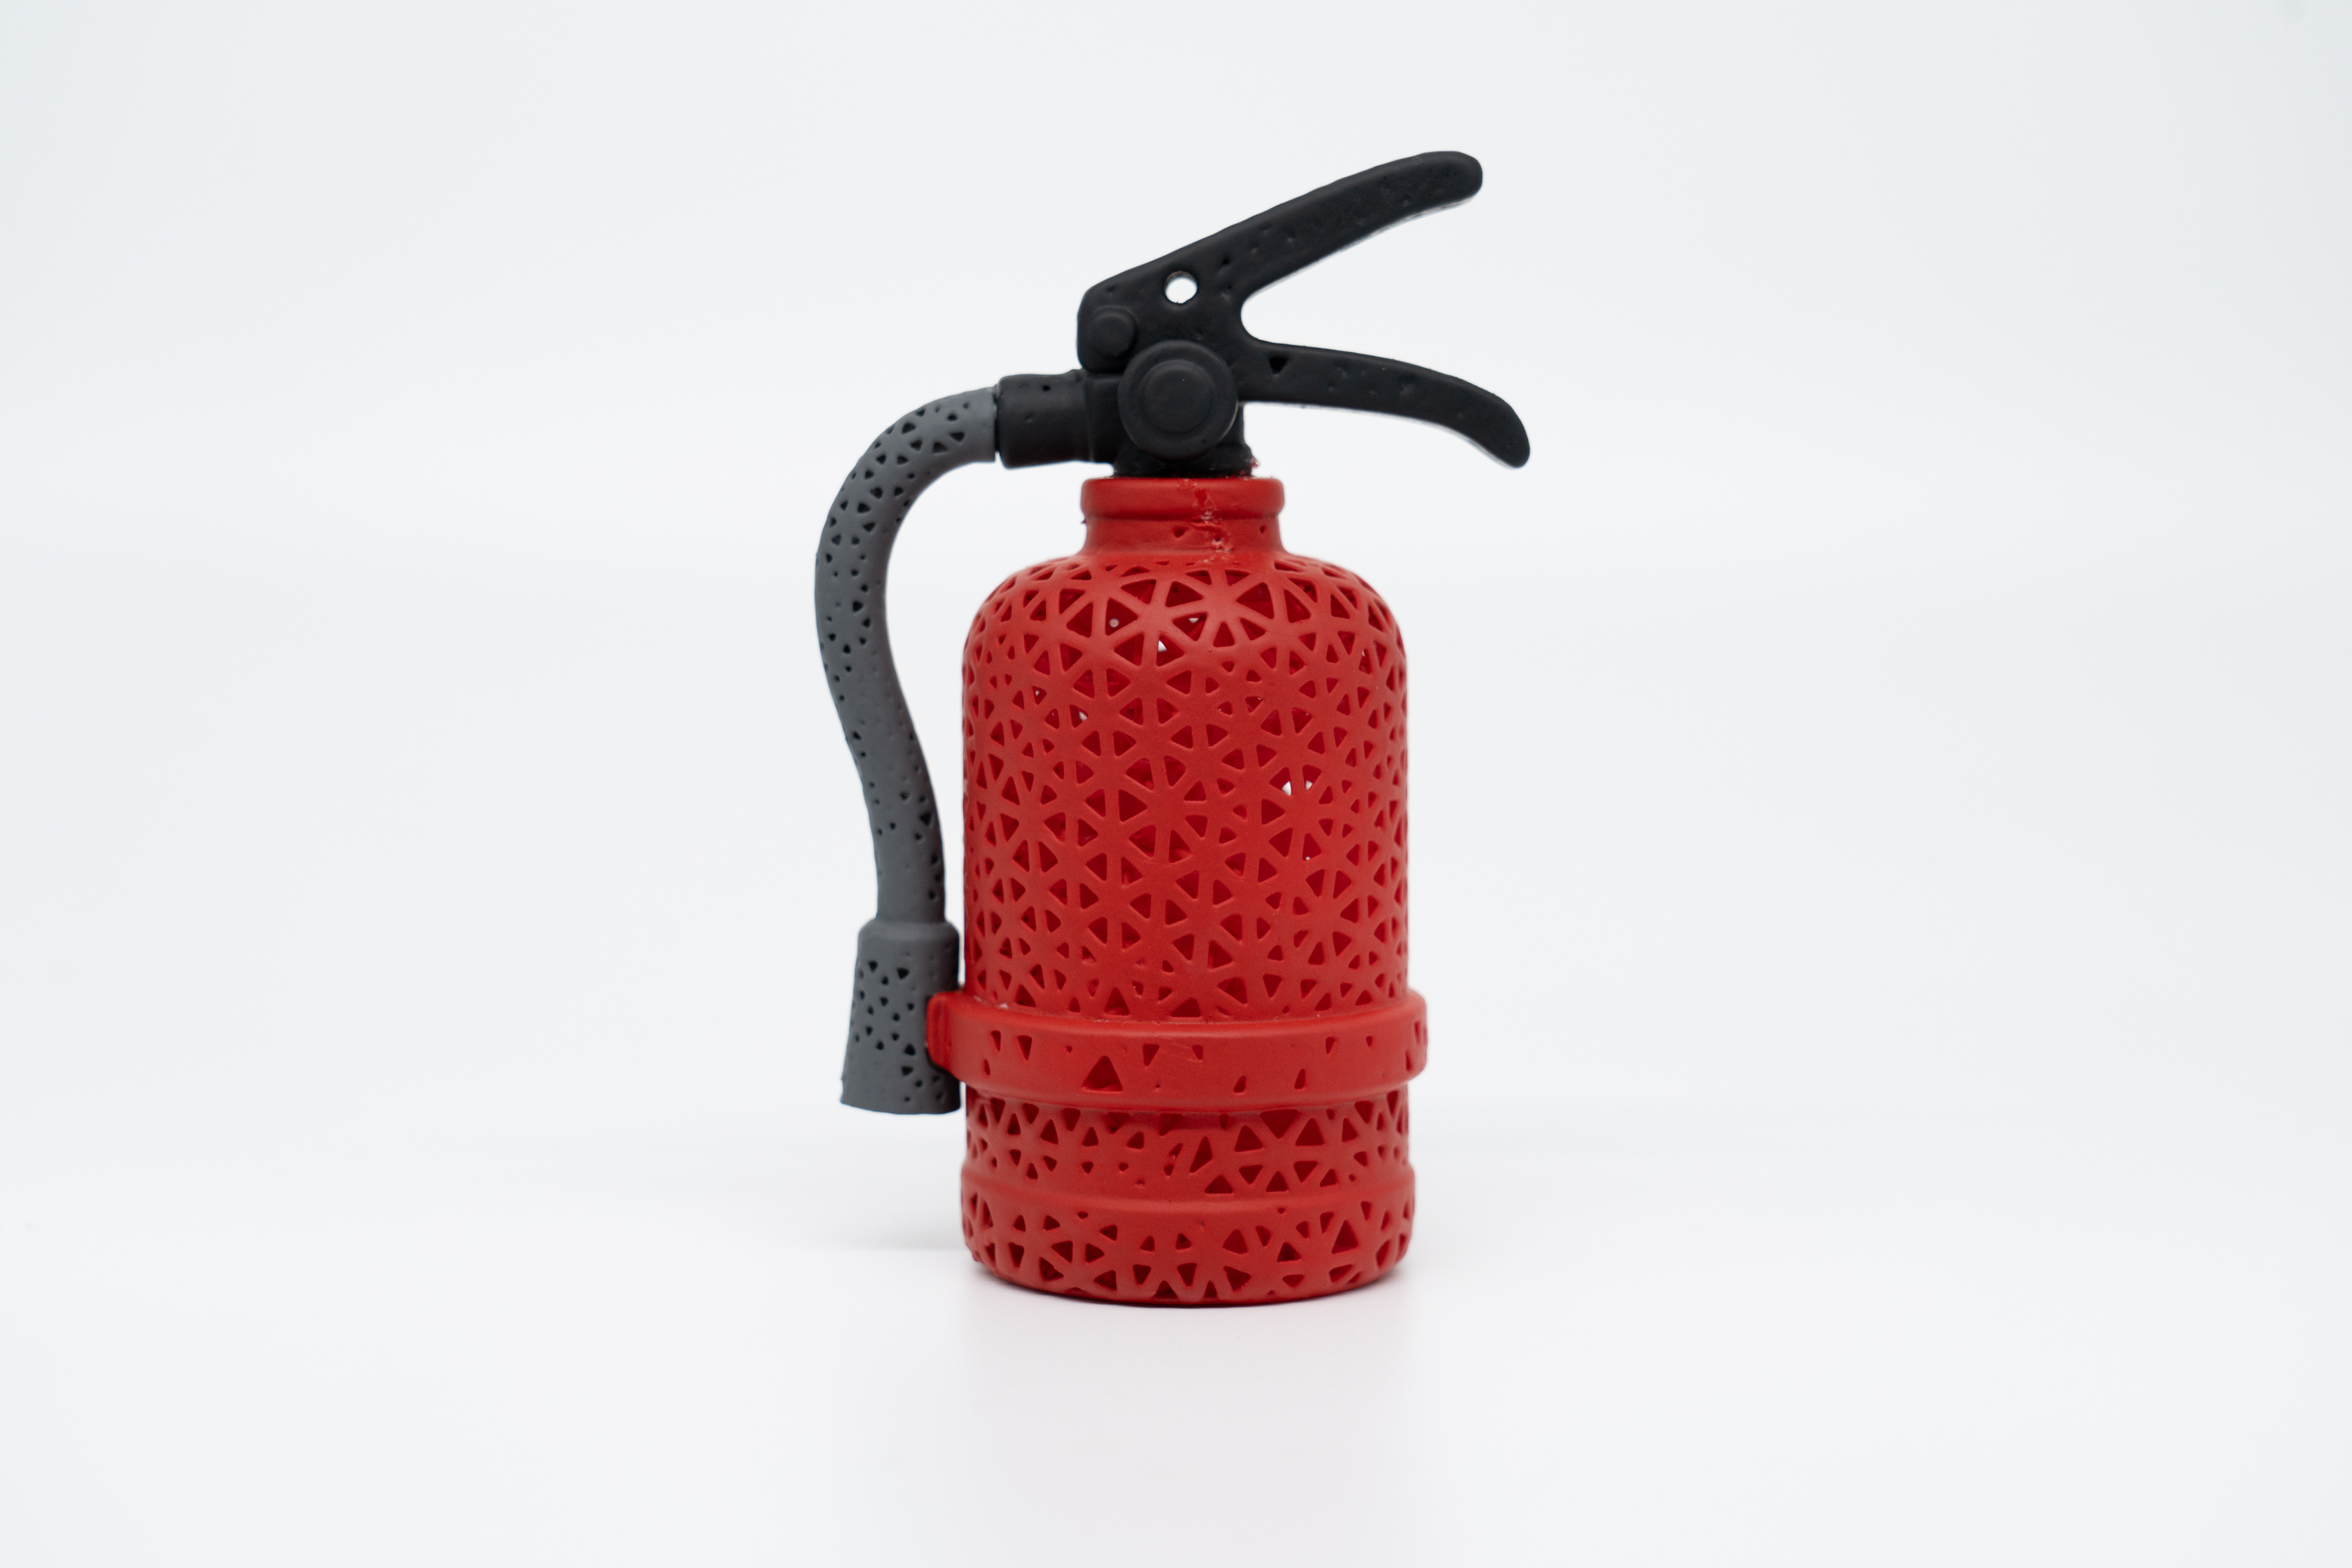
Select and import the solid model to be latticed (if color-separated spraying is required, print the parts separately).
¶ 1.3 Lattice
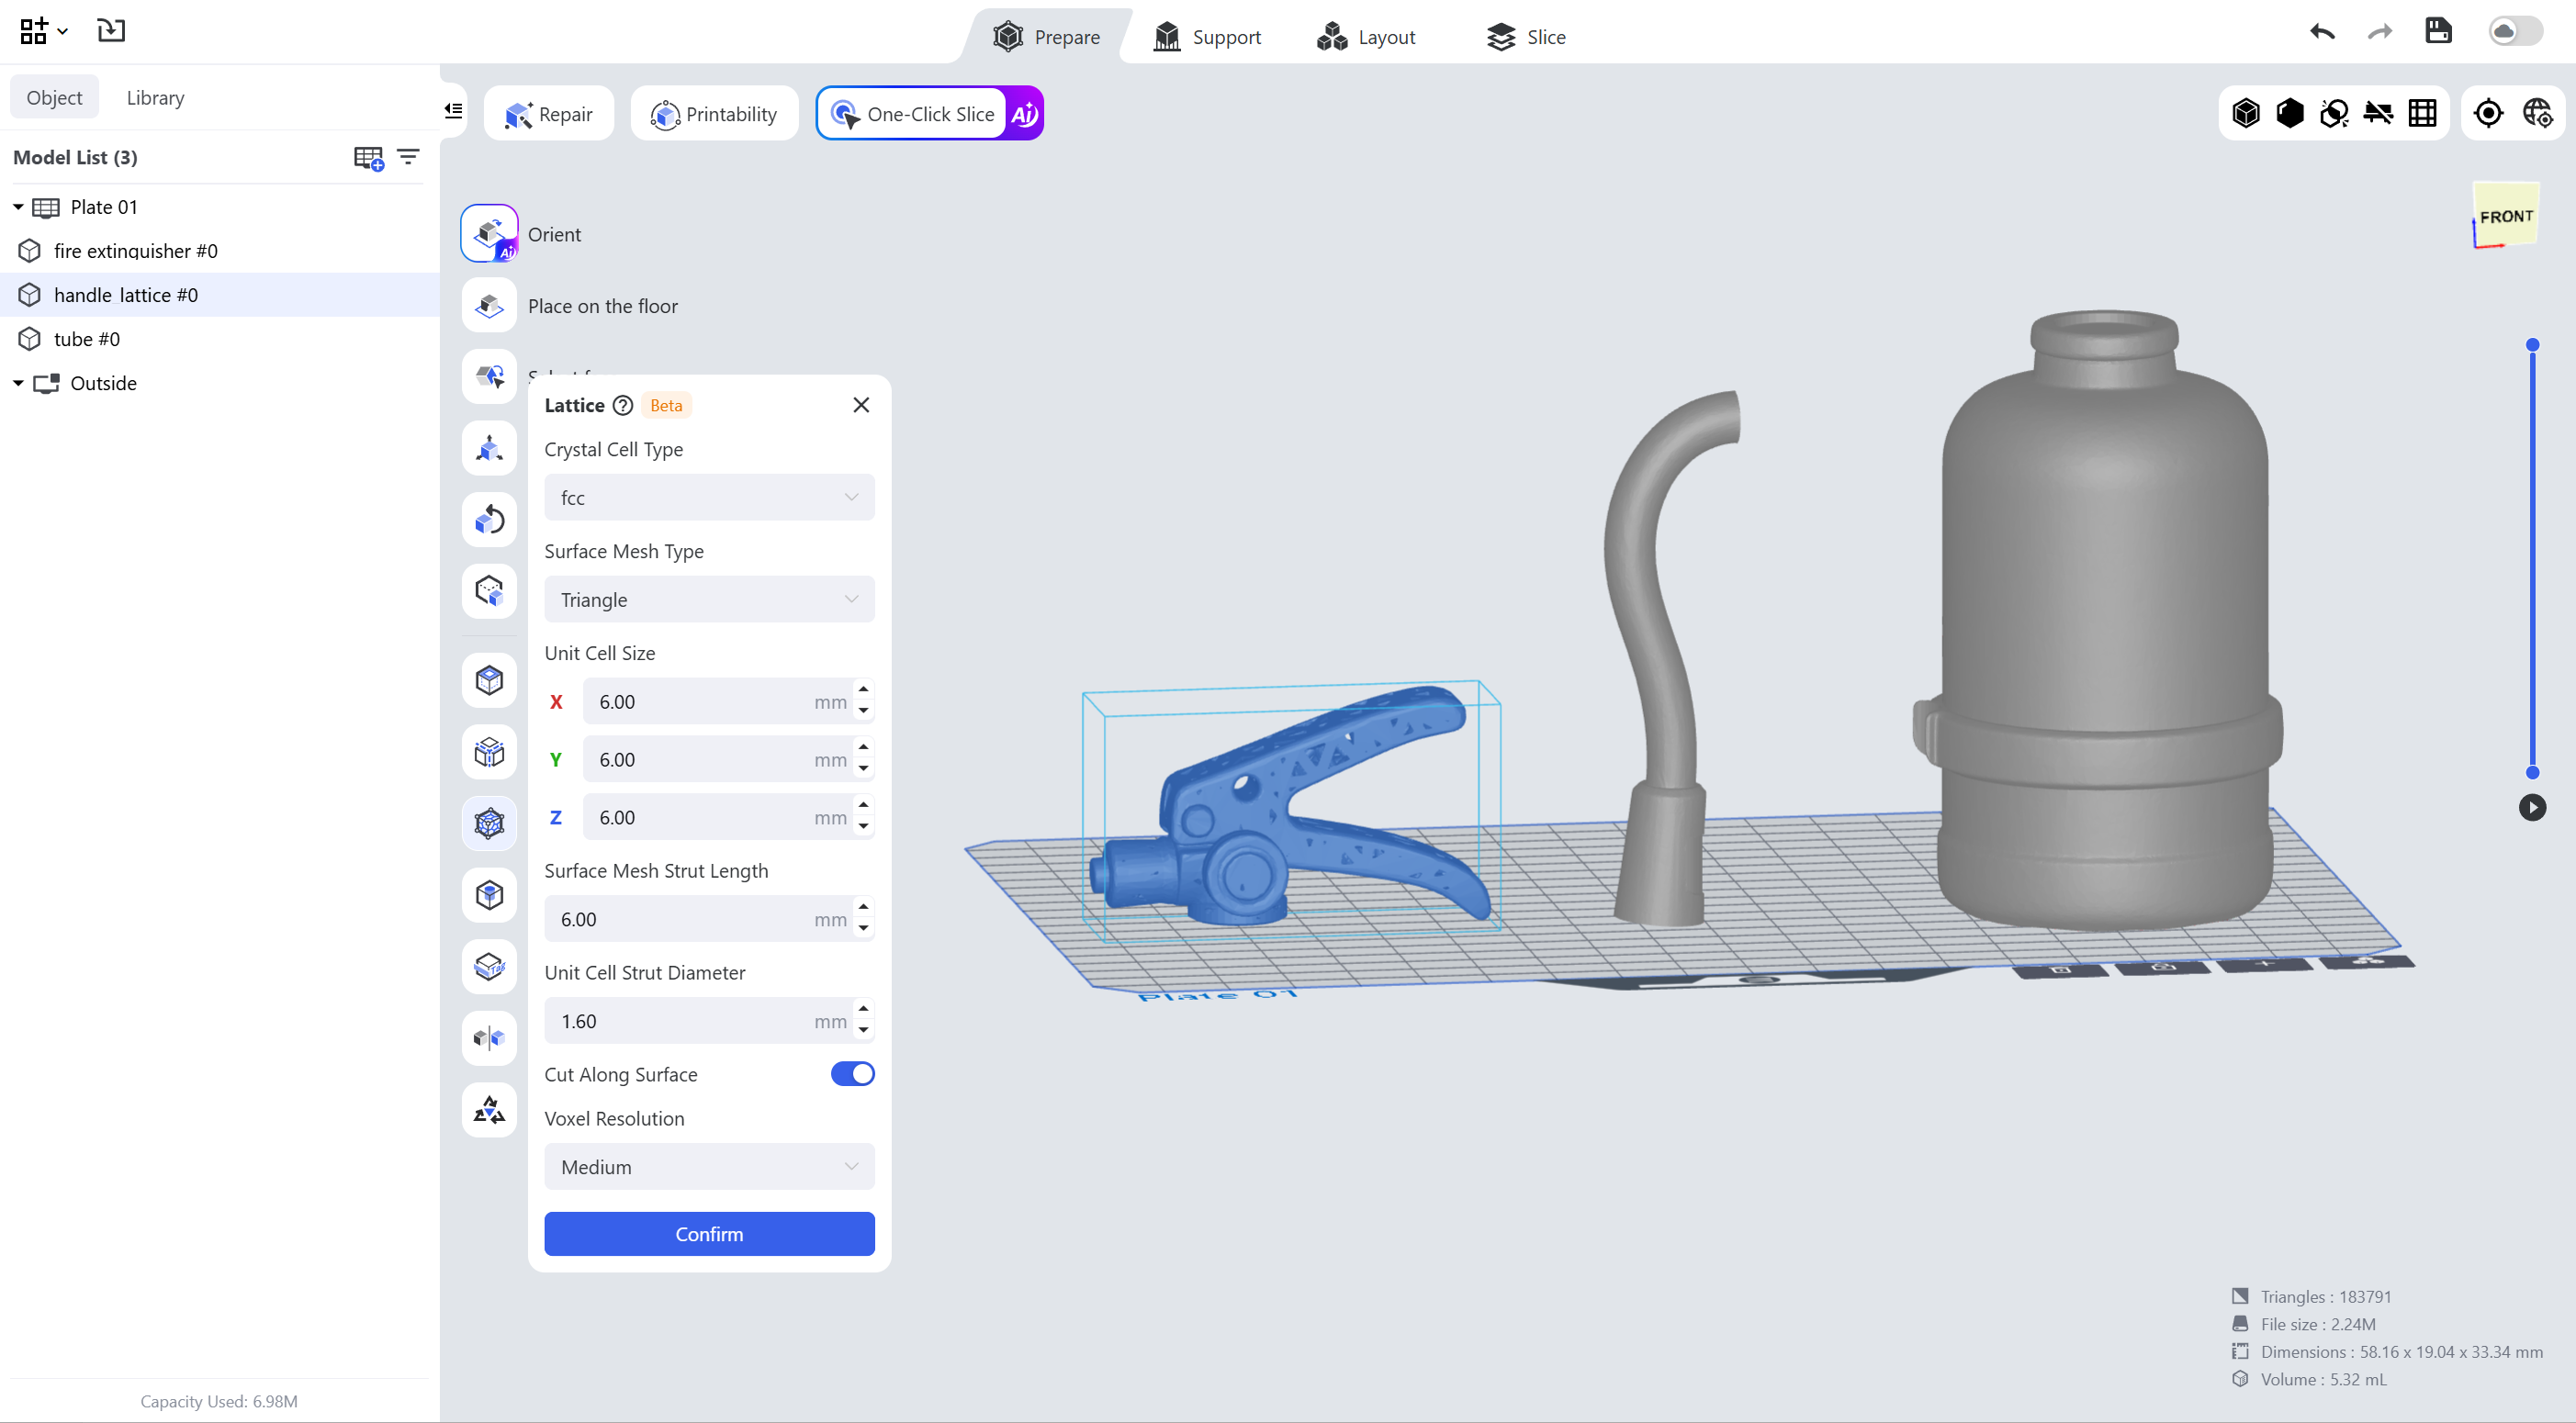
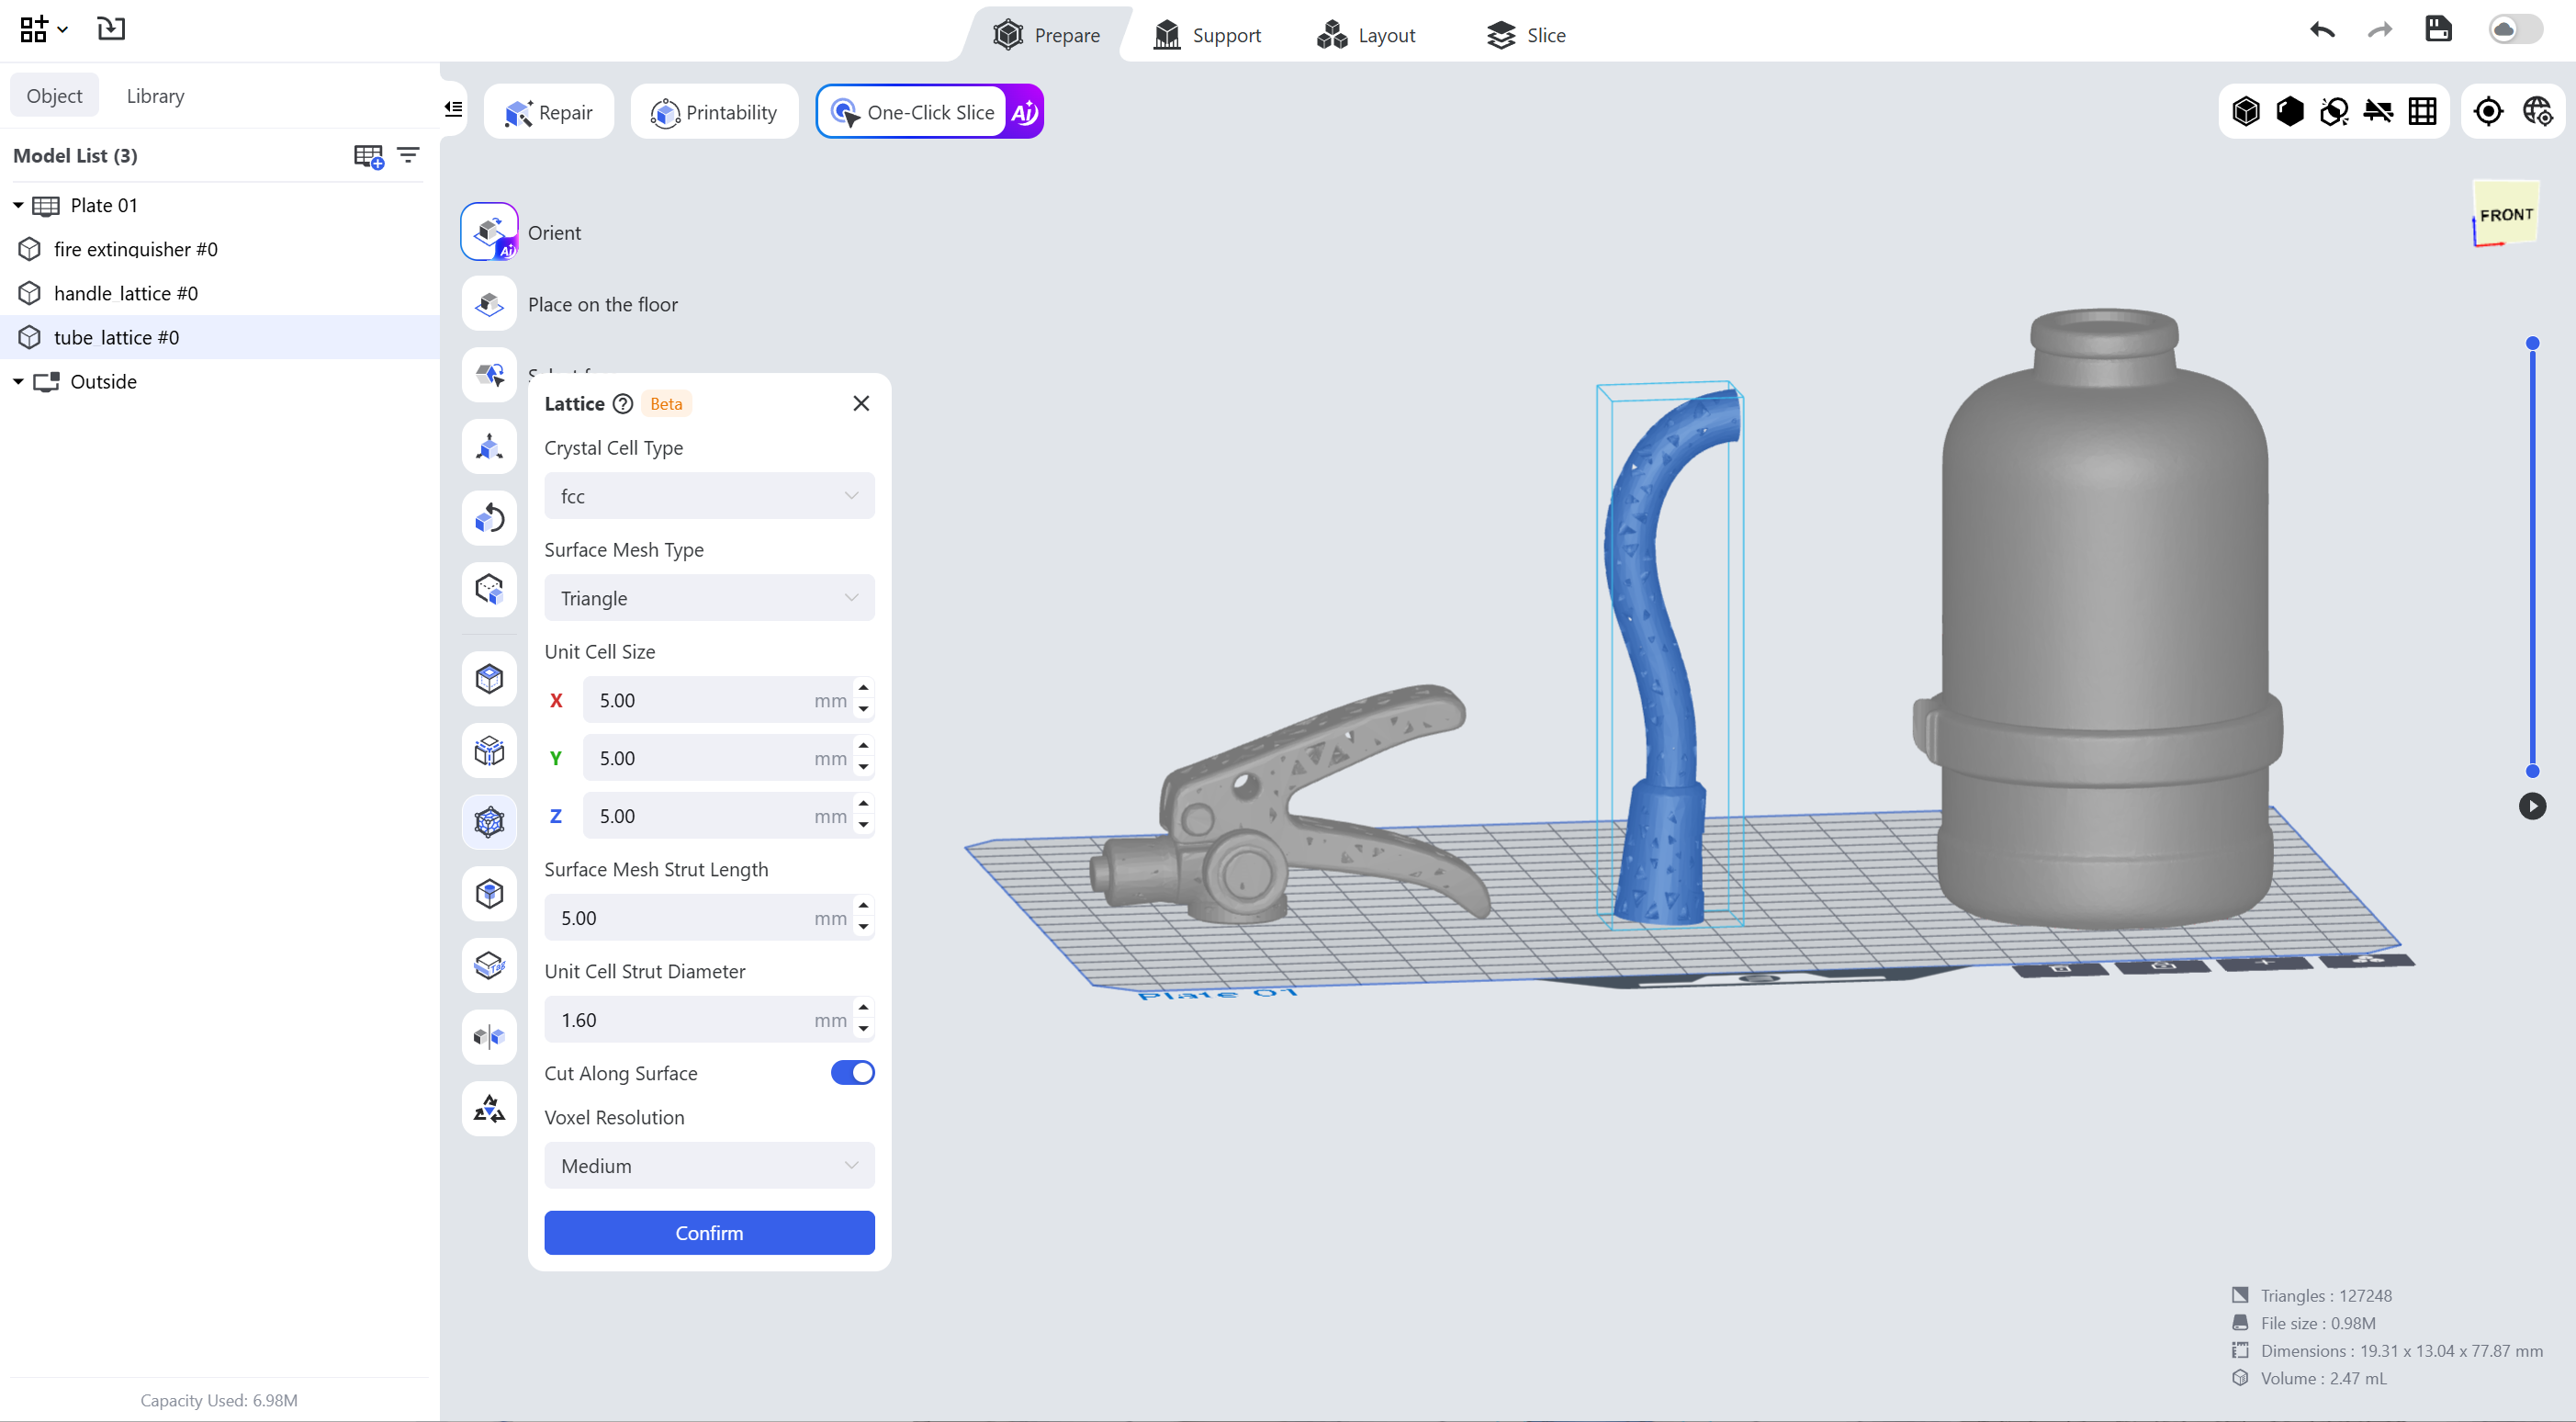
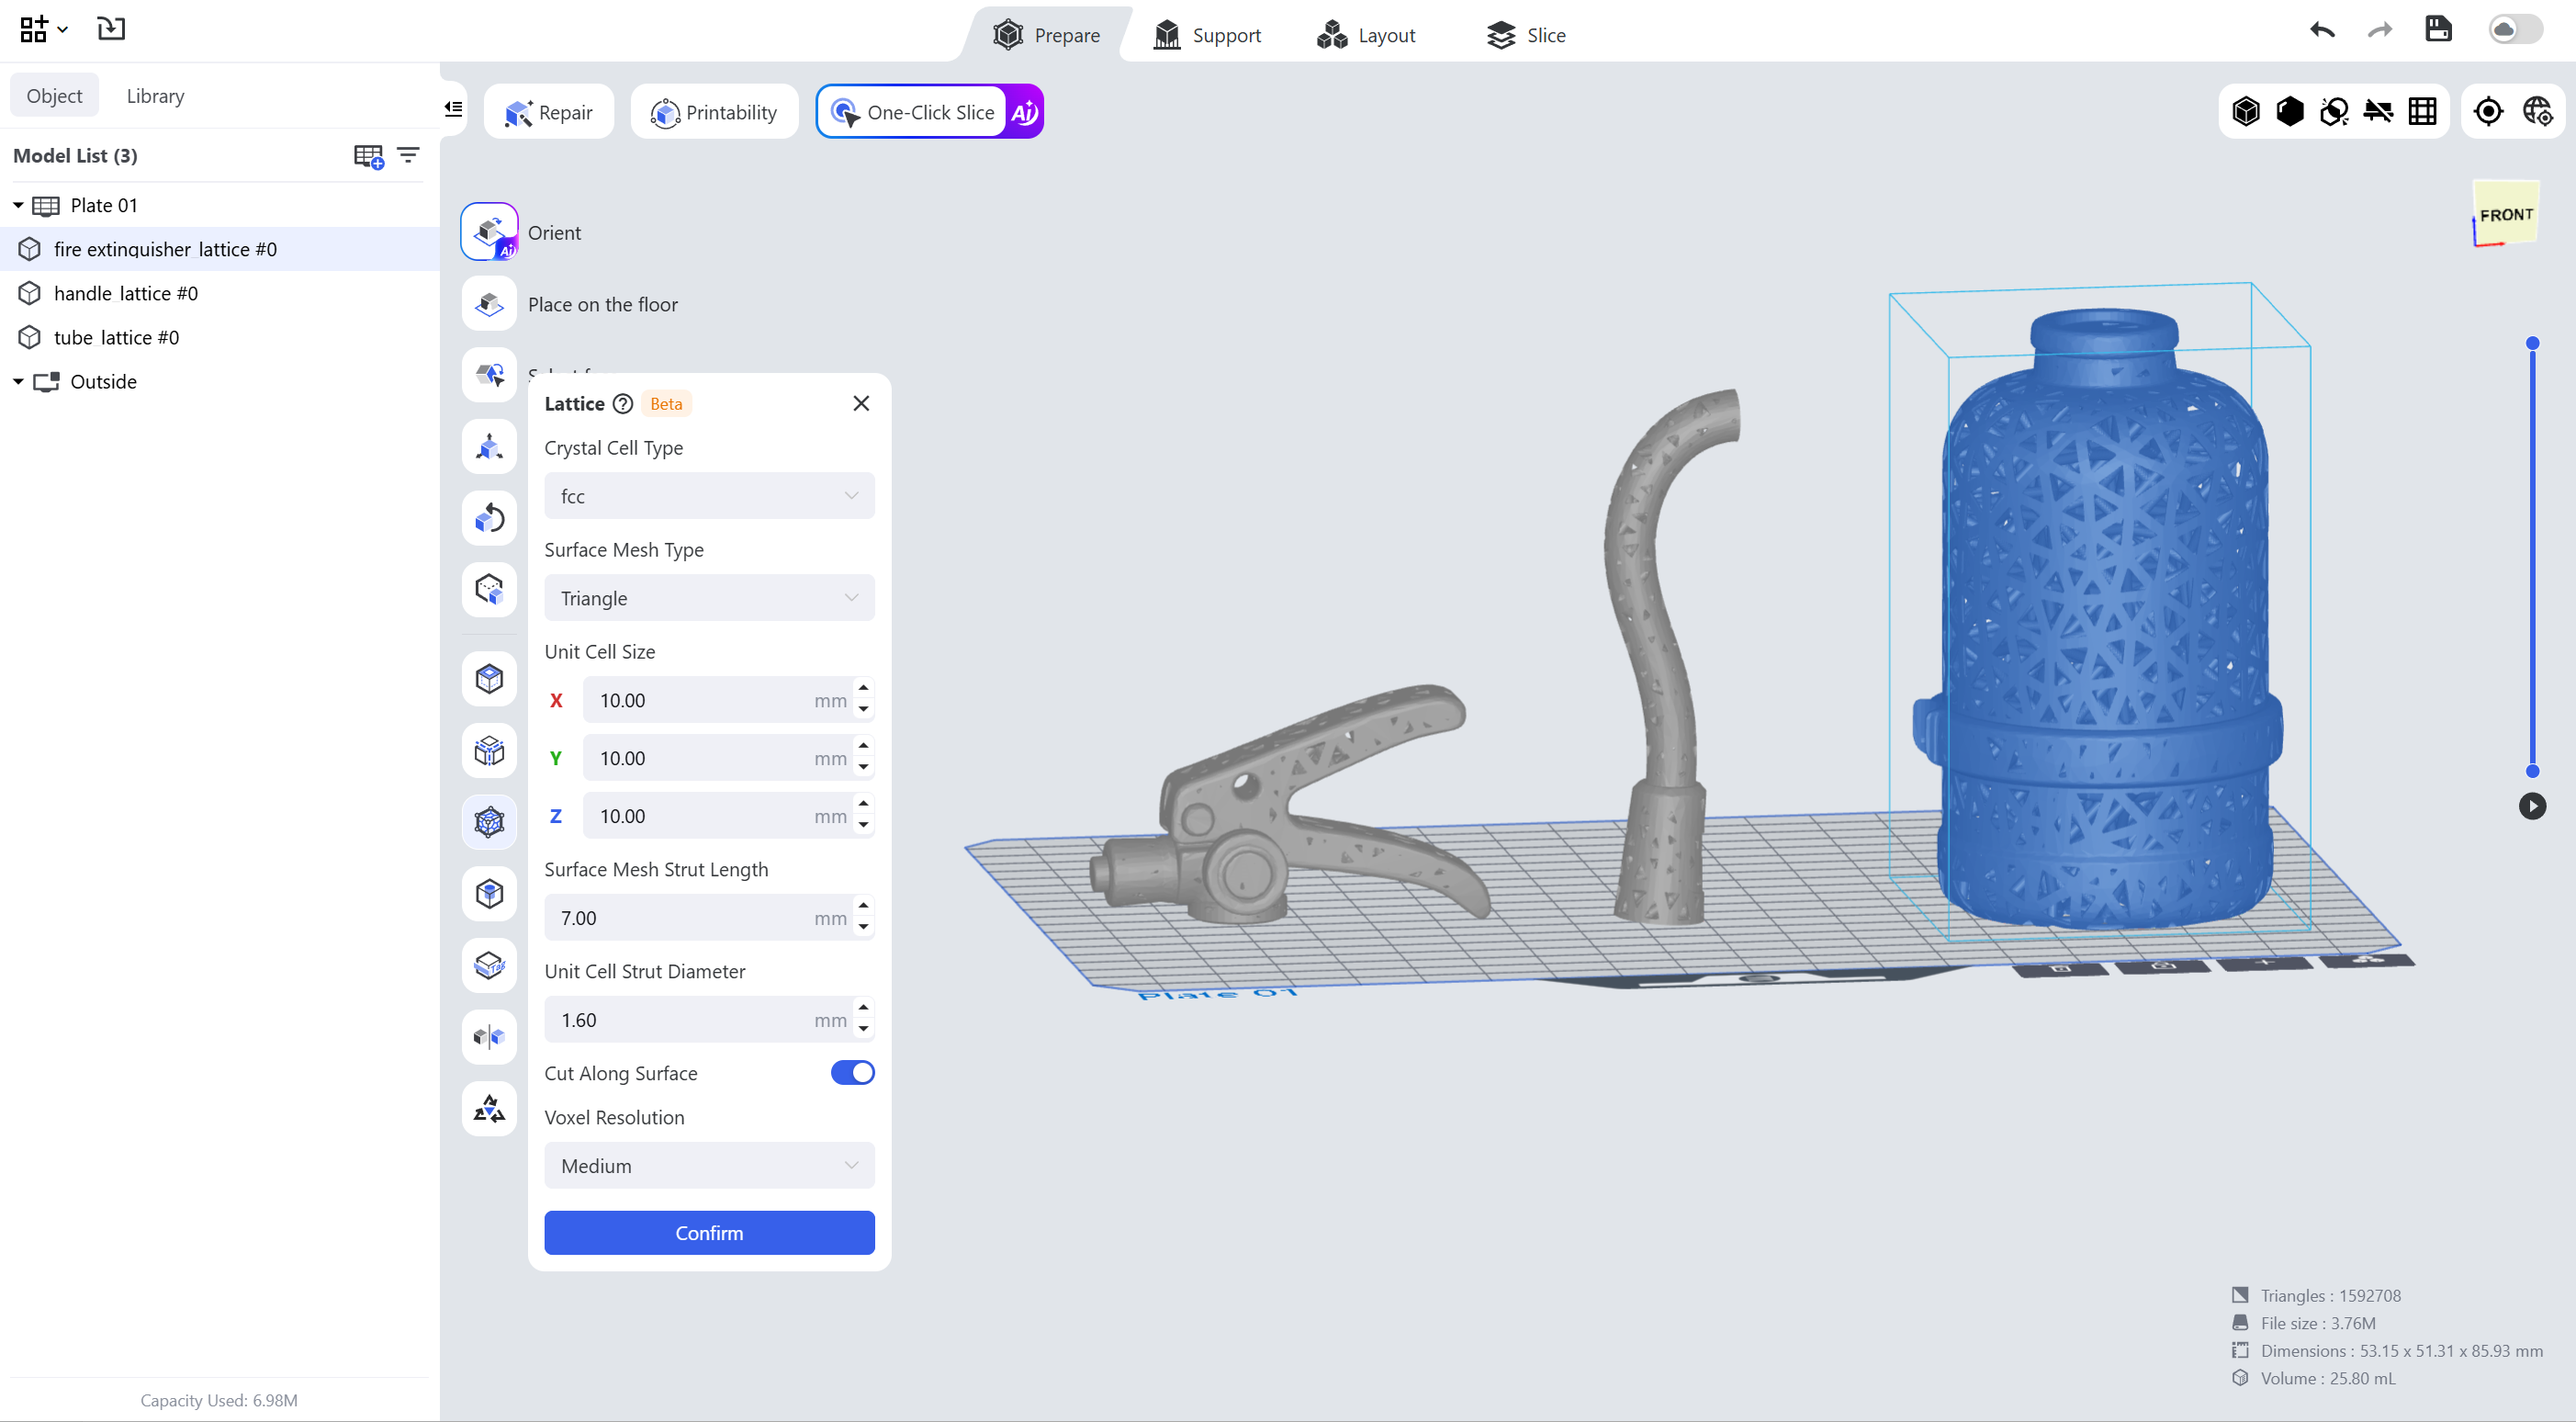
Select the model to be latticed and click Confirm in the lattice module.
Parameters:
- Crystal Cell Type: the basic cell of the internal lattice, which generates the internal porous structure by periodically arraying repeated units (cells) (the fcc cell is recommended for lattice generation).
- Surface Mesh Type: choose different surface effects (Triangle / Voronoi polygon / Rhombus).
- Unit Cell Size: the edge length of the lattice cell. The larger the size, the softer the overall structure and the larger the pores (if the model volume is rather small, reduce the cell size for filling).
- Surface Mesh Strut Length: the length of the surface mesh. The larger the length, the larger the pores on the surface.
- Unit Cell Strut Diameter: the diameter of the cell strut. The larger the value, the harder the overall structure and the higher the supporting strength.
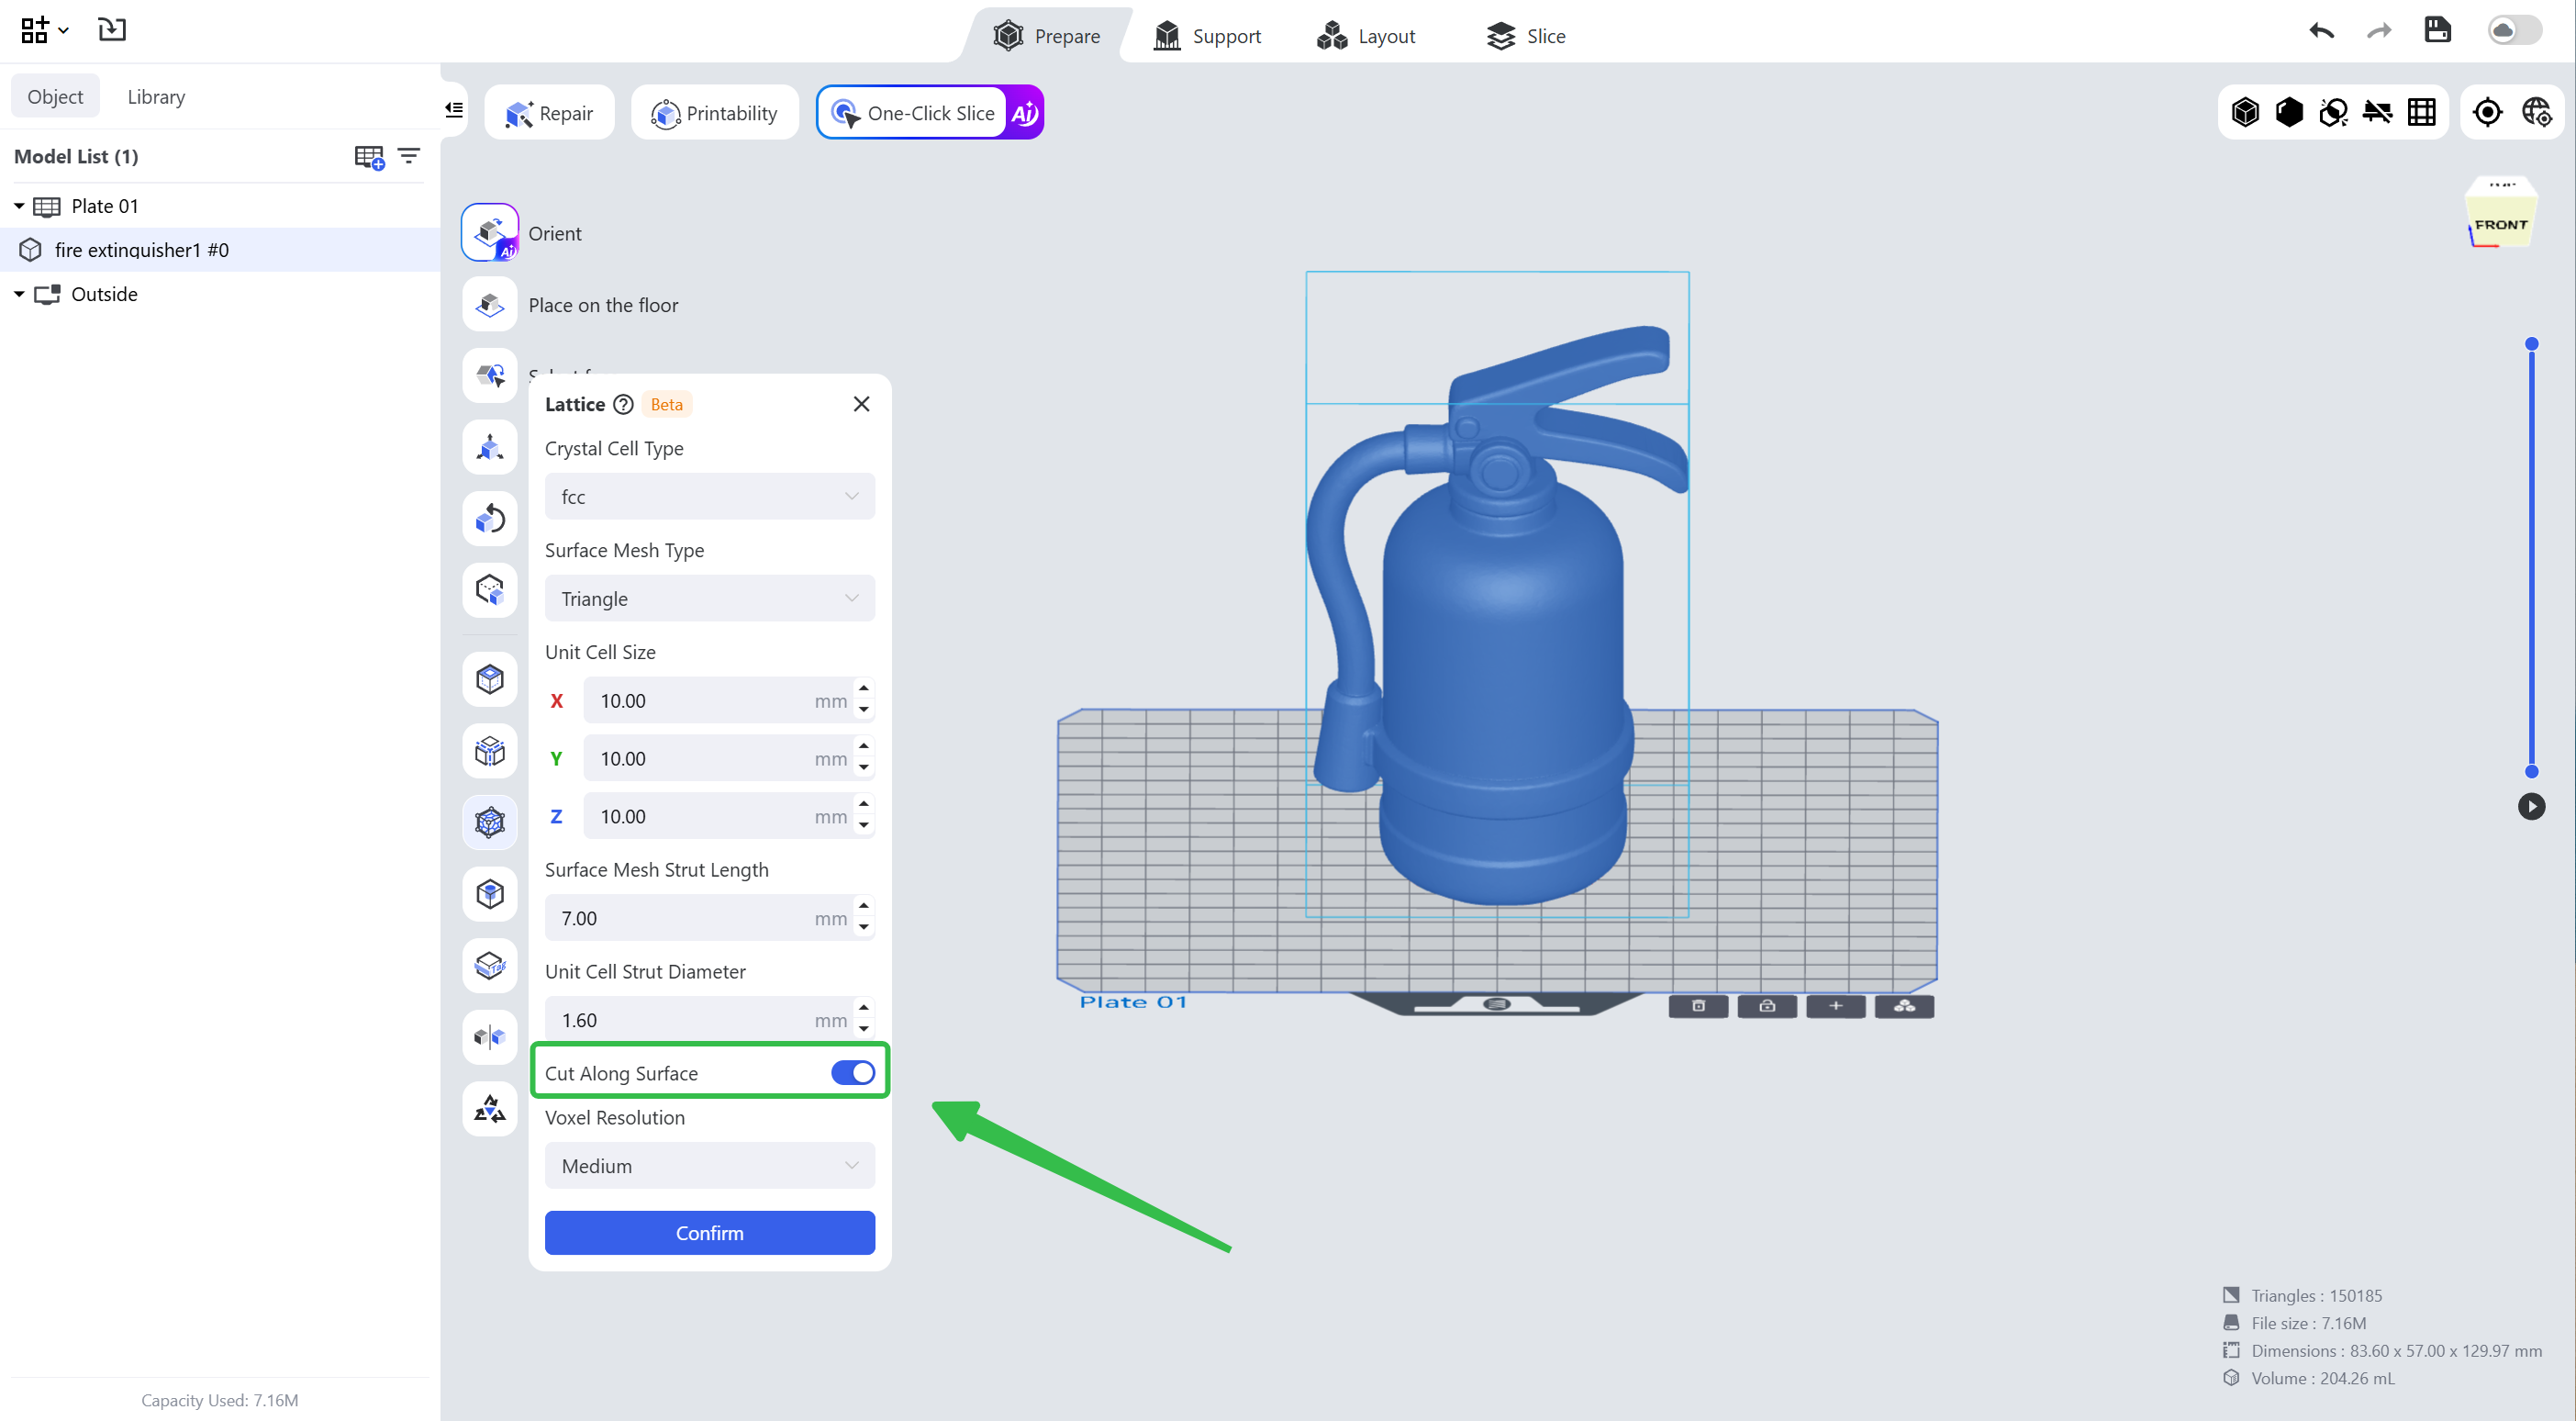
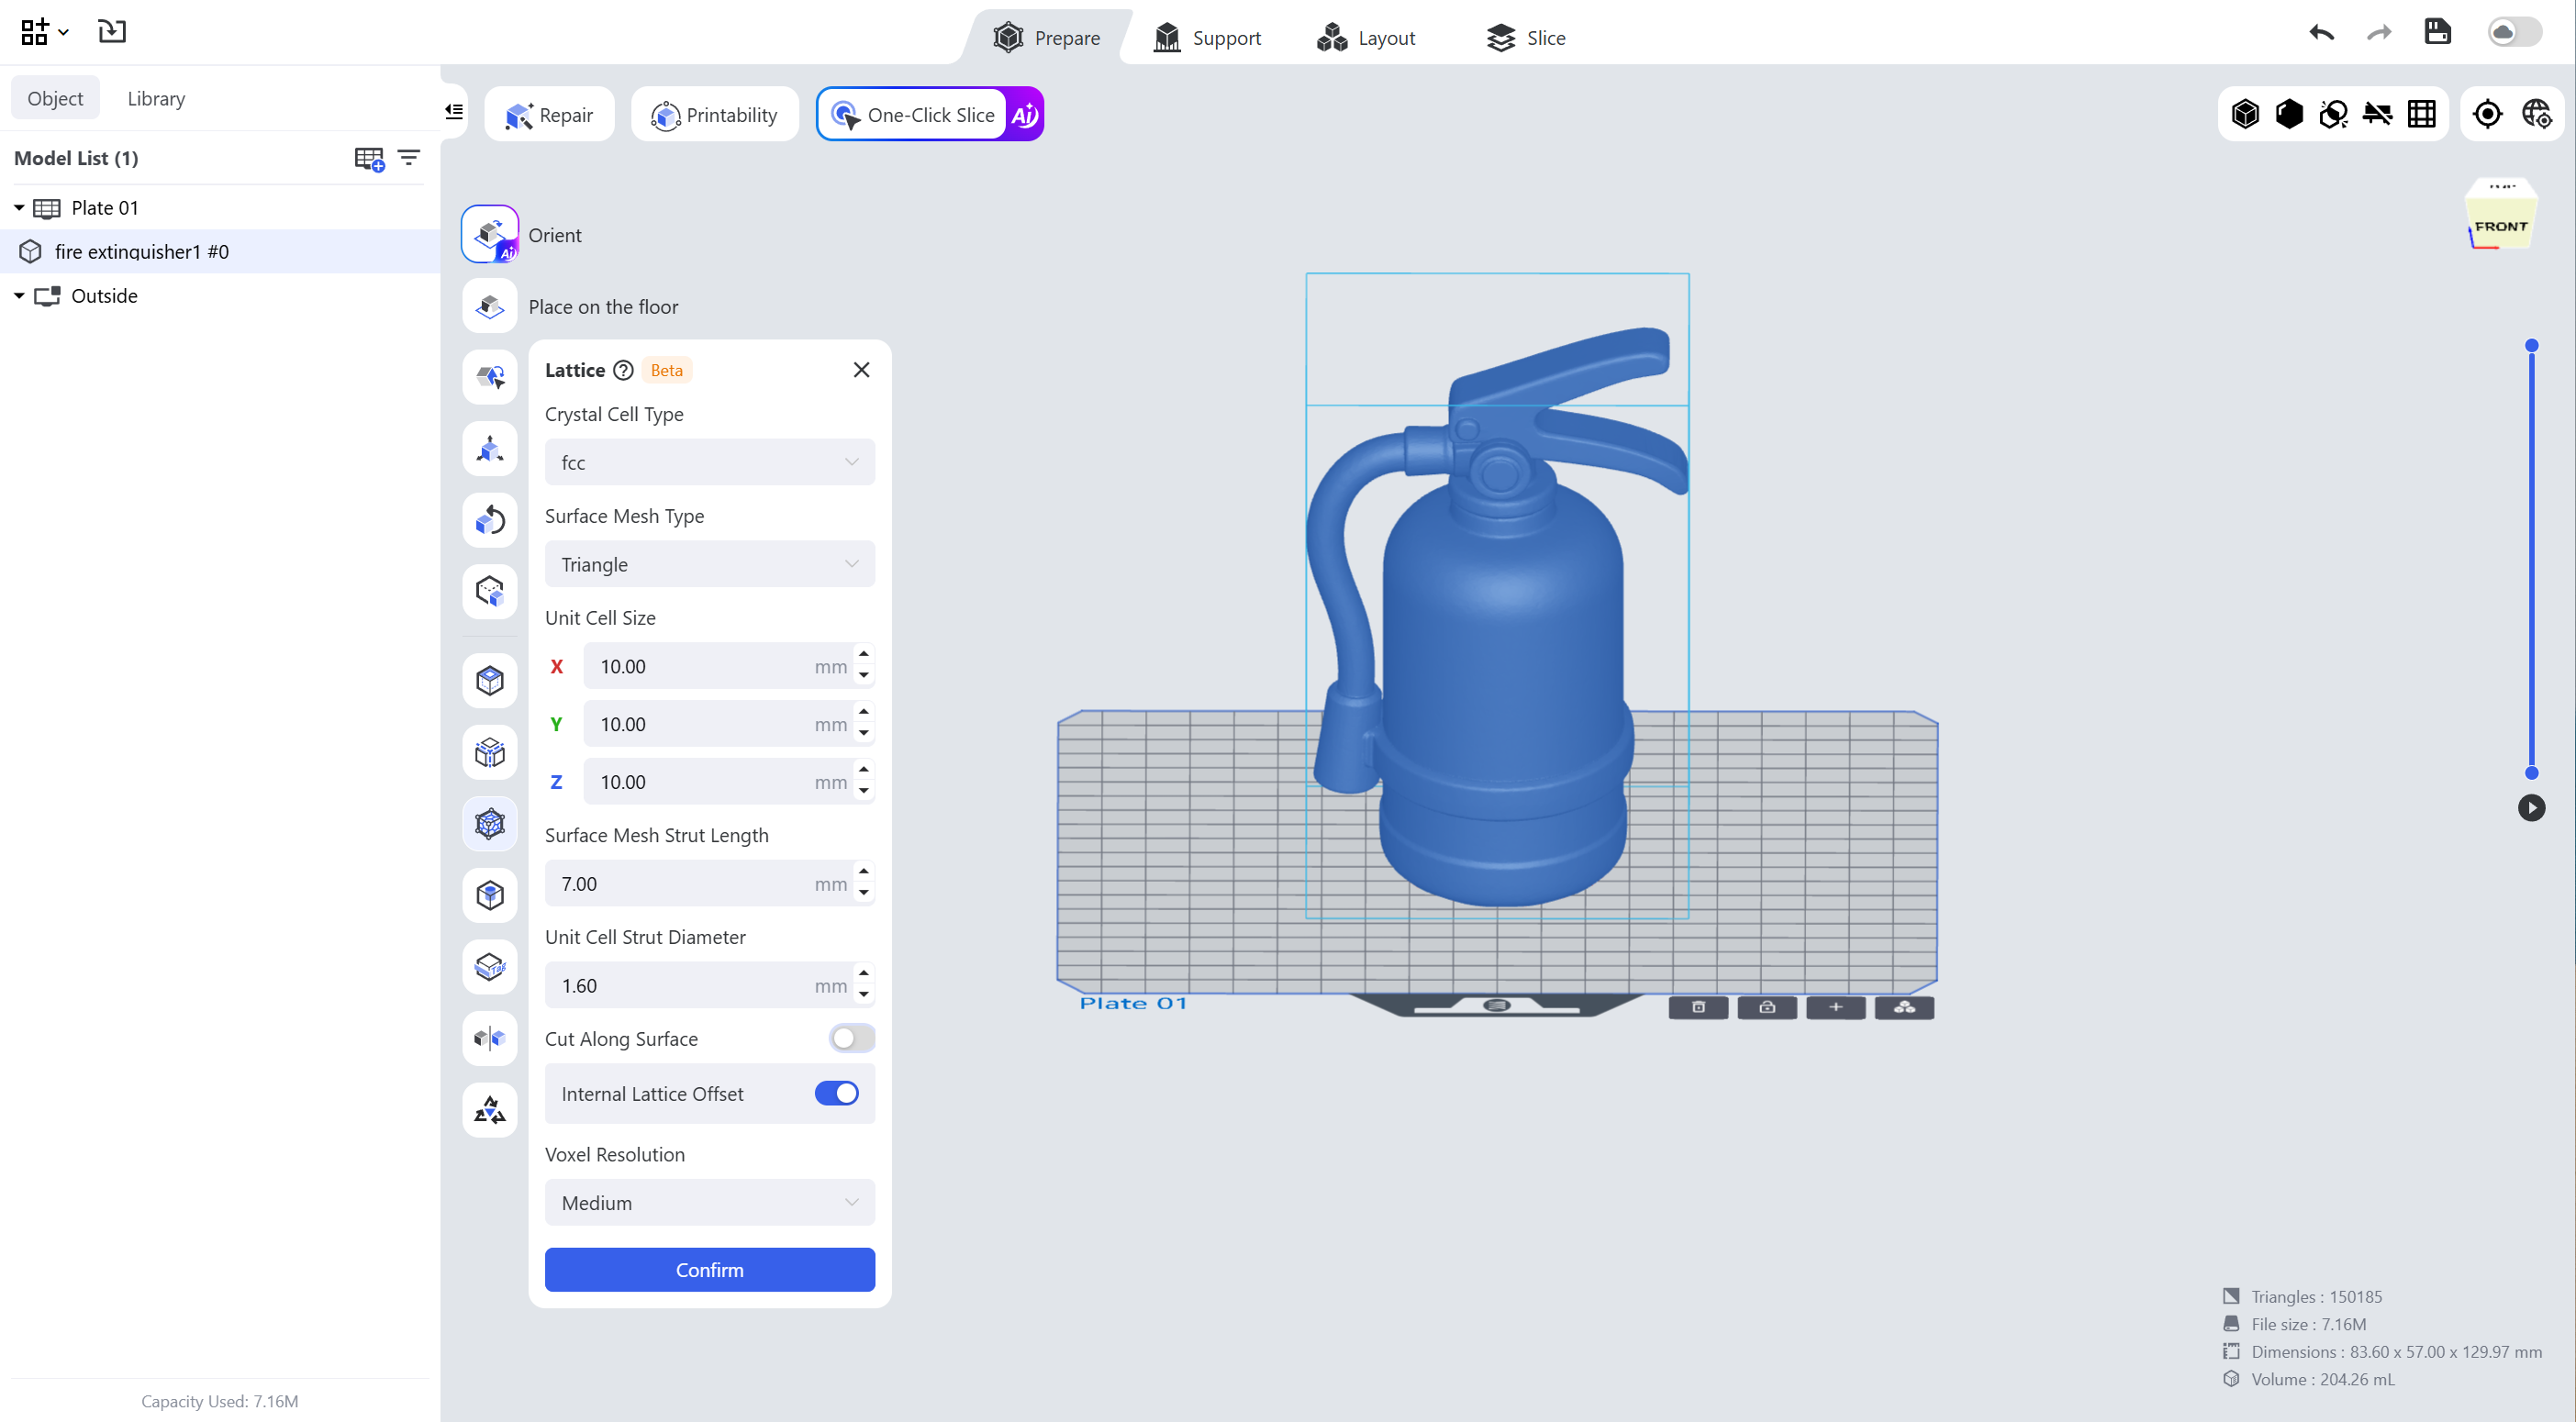
- Cut along Surface: whether to cut along the original model surface. As the cylindrical struts of the latticed surface protrude, if not cut, you may choose whether to scale the model back to the original size.
- Voxel Resolution: the model precision for lattice generation. Medium is recommended by default; if a large-volume lattice is to be generated, lower the voxel precision.
 |
 |
 |
Precautions
1. Model Repair
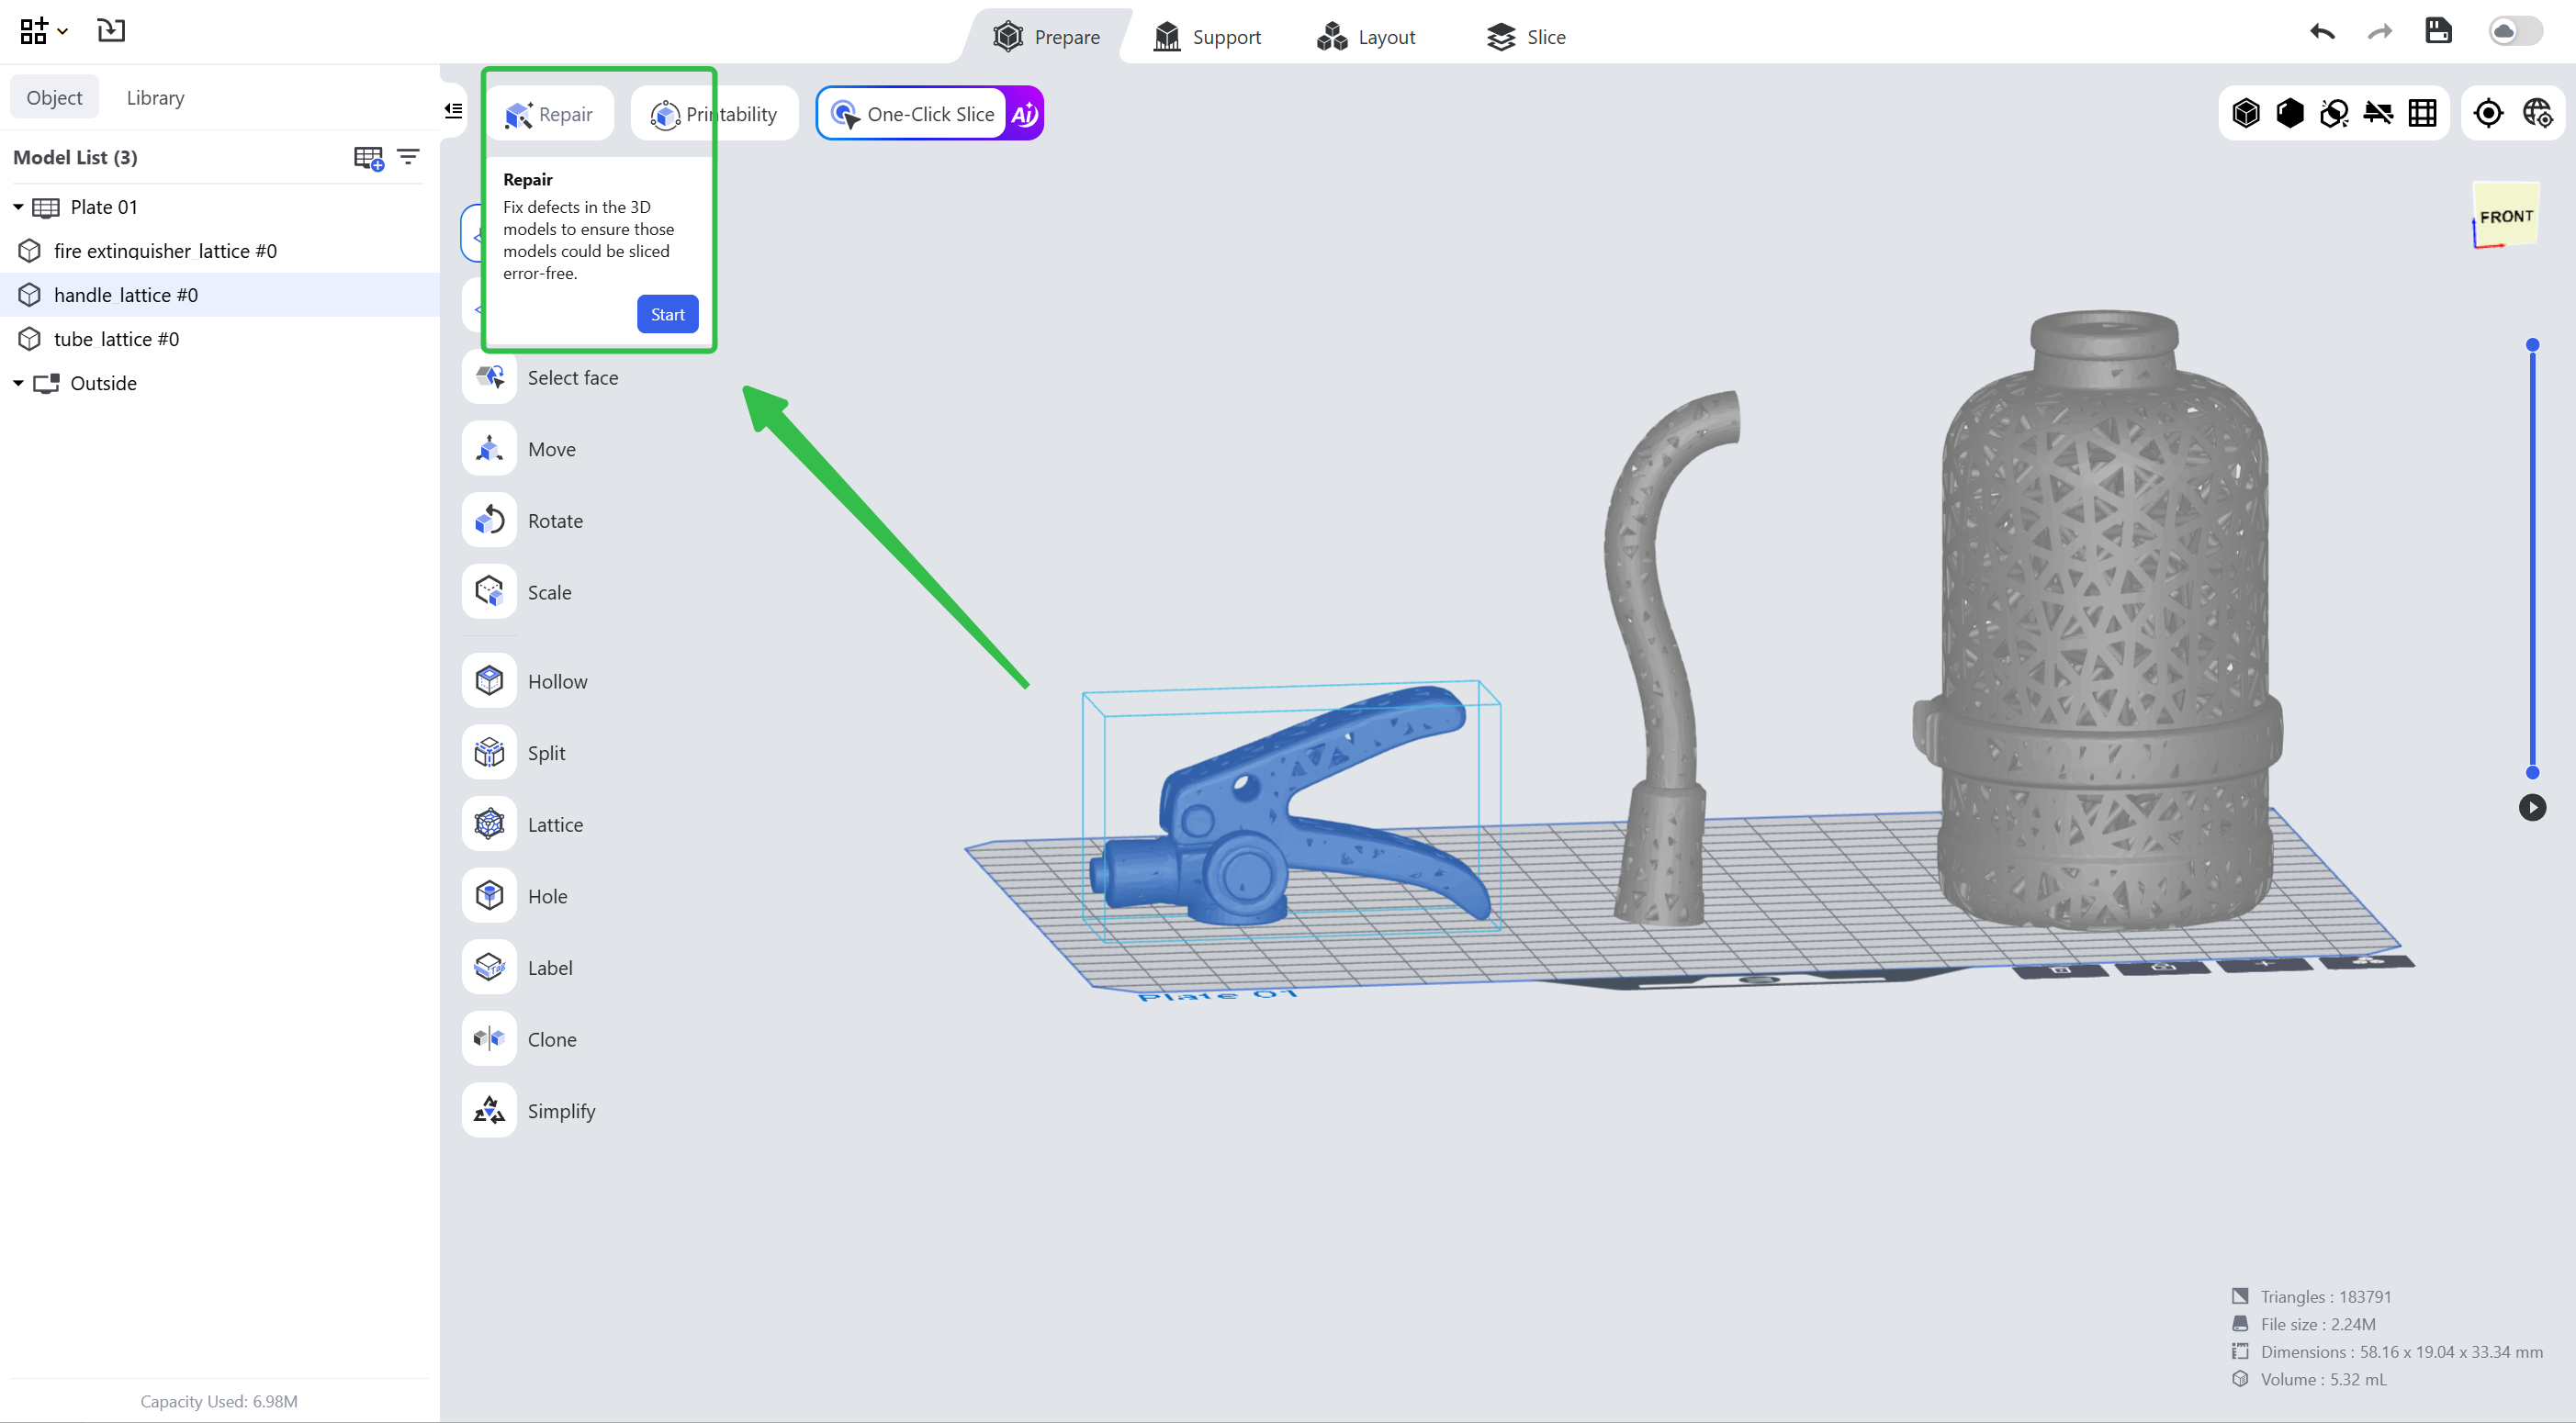
Before latticing a model, make sure the model has no broken faces. Click Model Repair to check.
2. Adjust Parameters
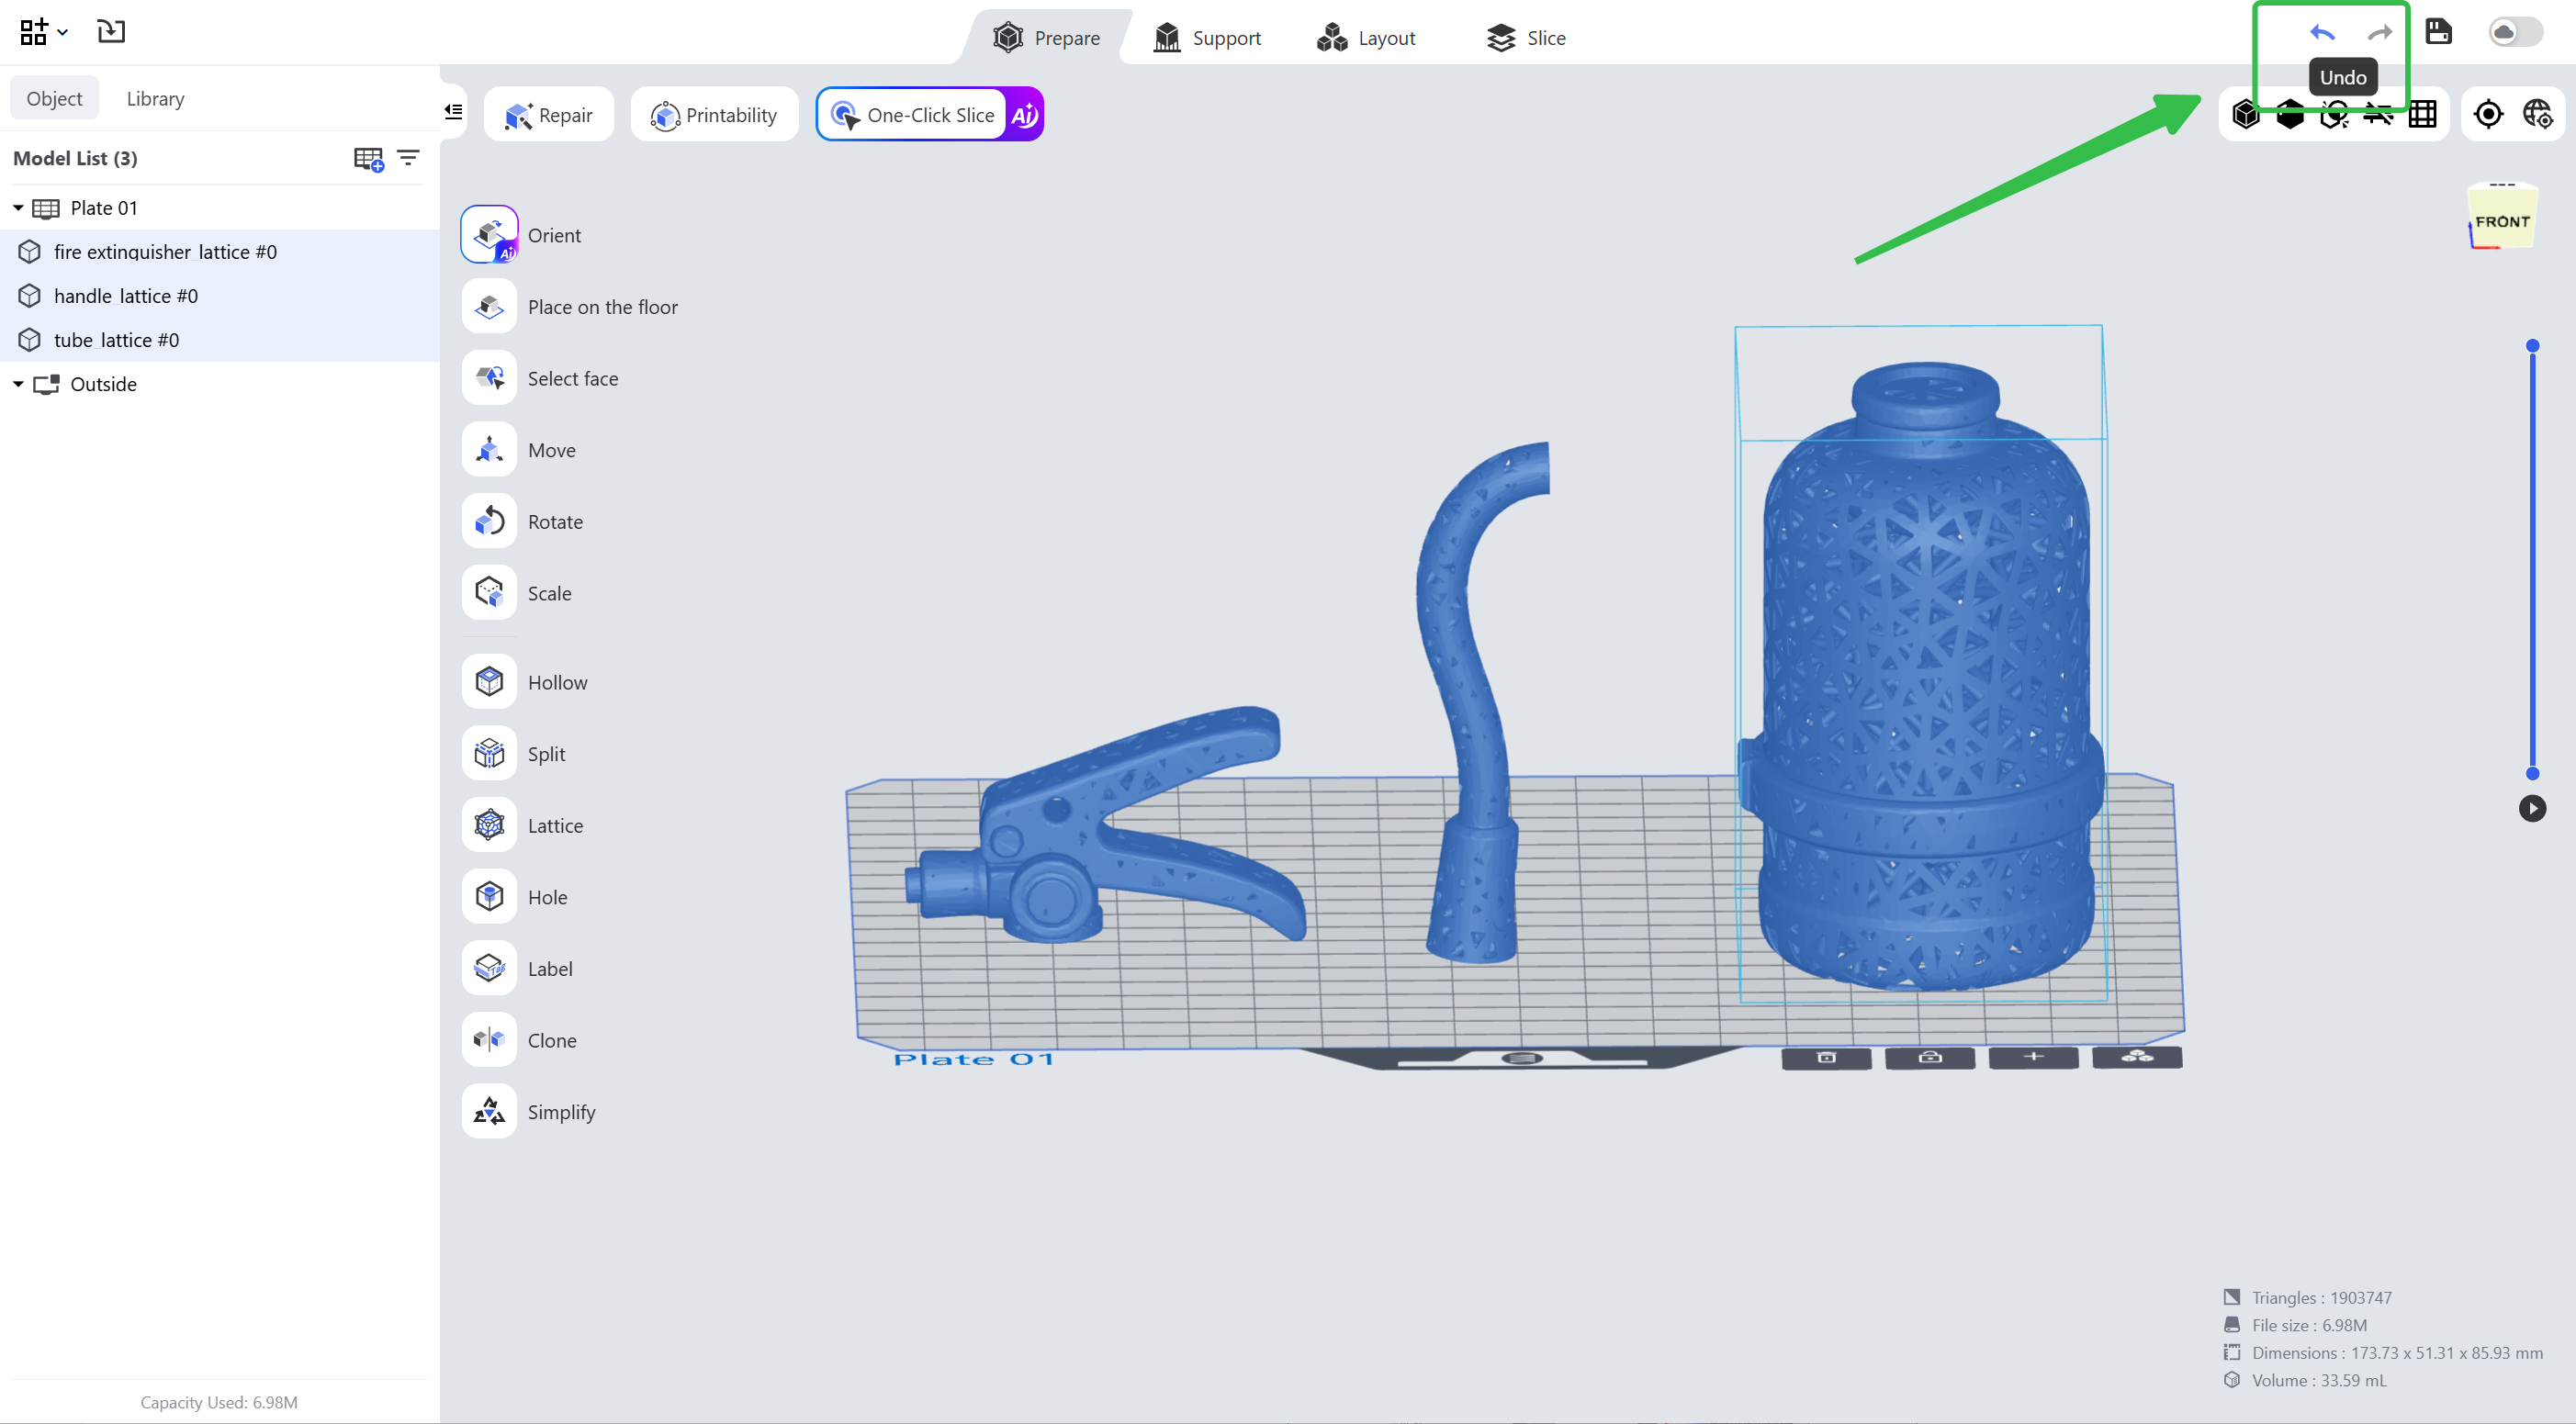
To adjust the lattice parameters of the same model, revert to the solid model and generate the lattice again. Generating the lattice on the same model repeatedly will cause broken faces and affect printing.
3. Add Supports
After the lattice is generated, you need to add supports manually or automatically. See the BPS Lattice Model Automatic Support Parameter Setting SOP.
¶ 2. Samples
¶ 2.1 Cut along Surface
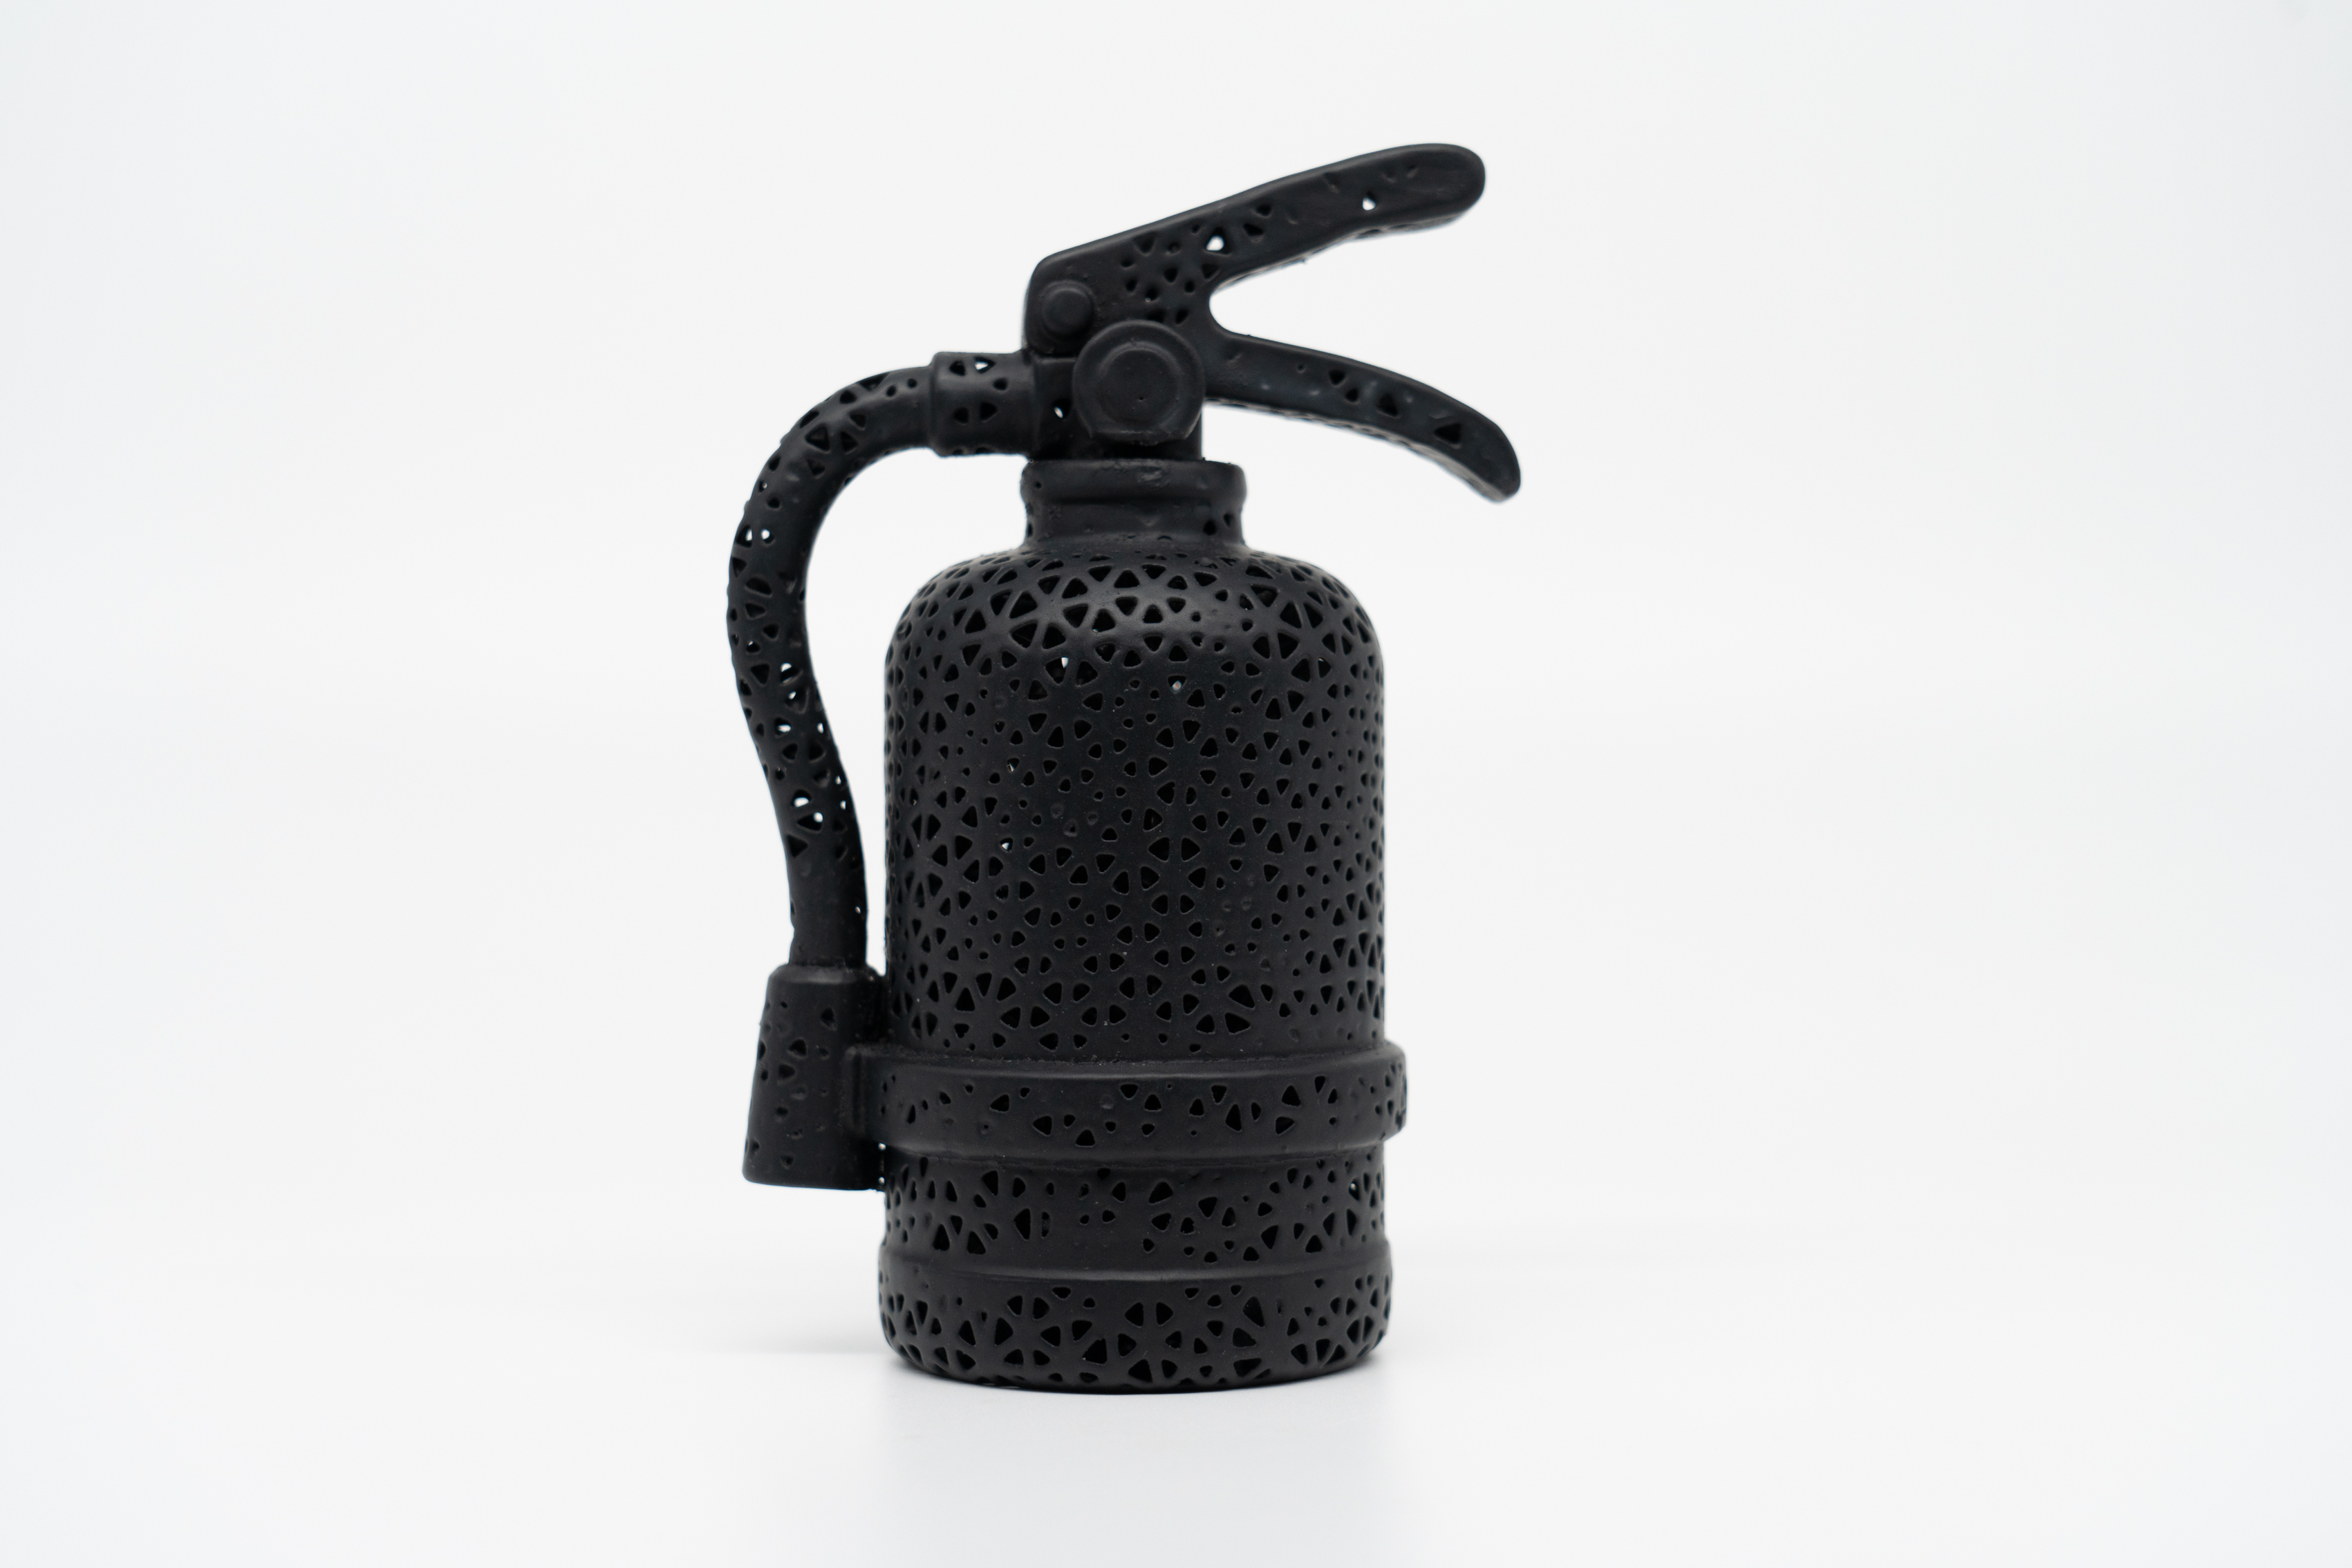
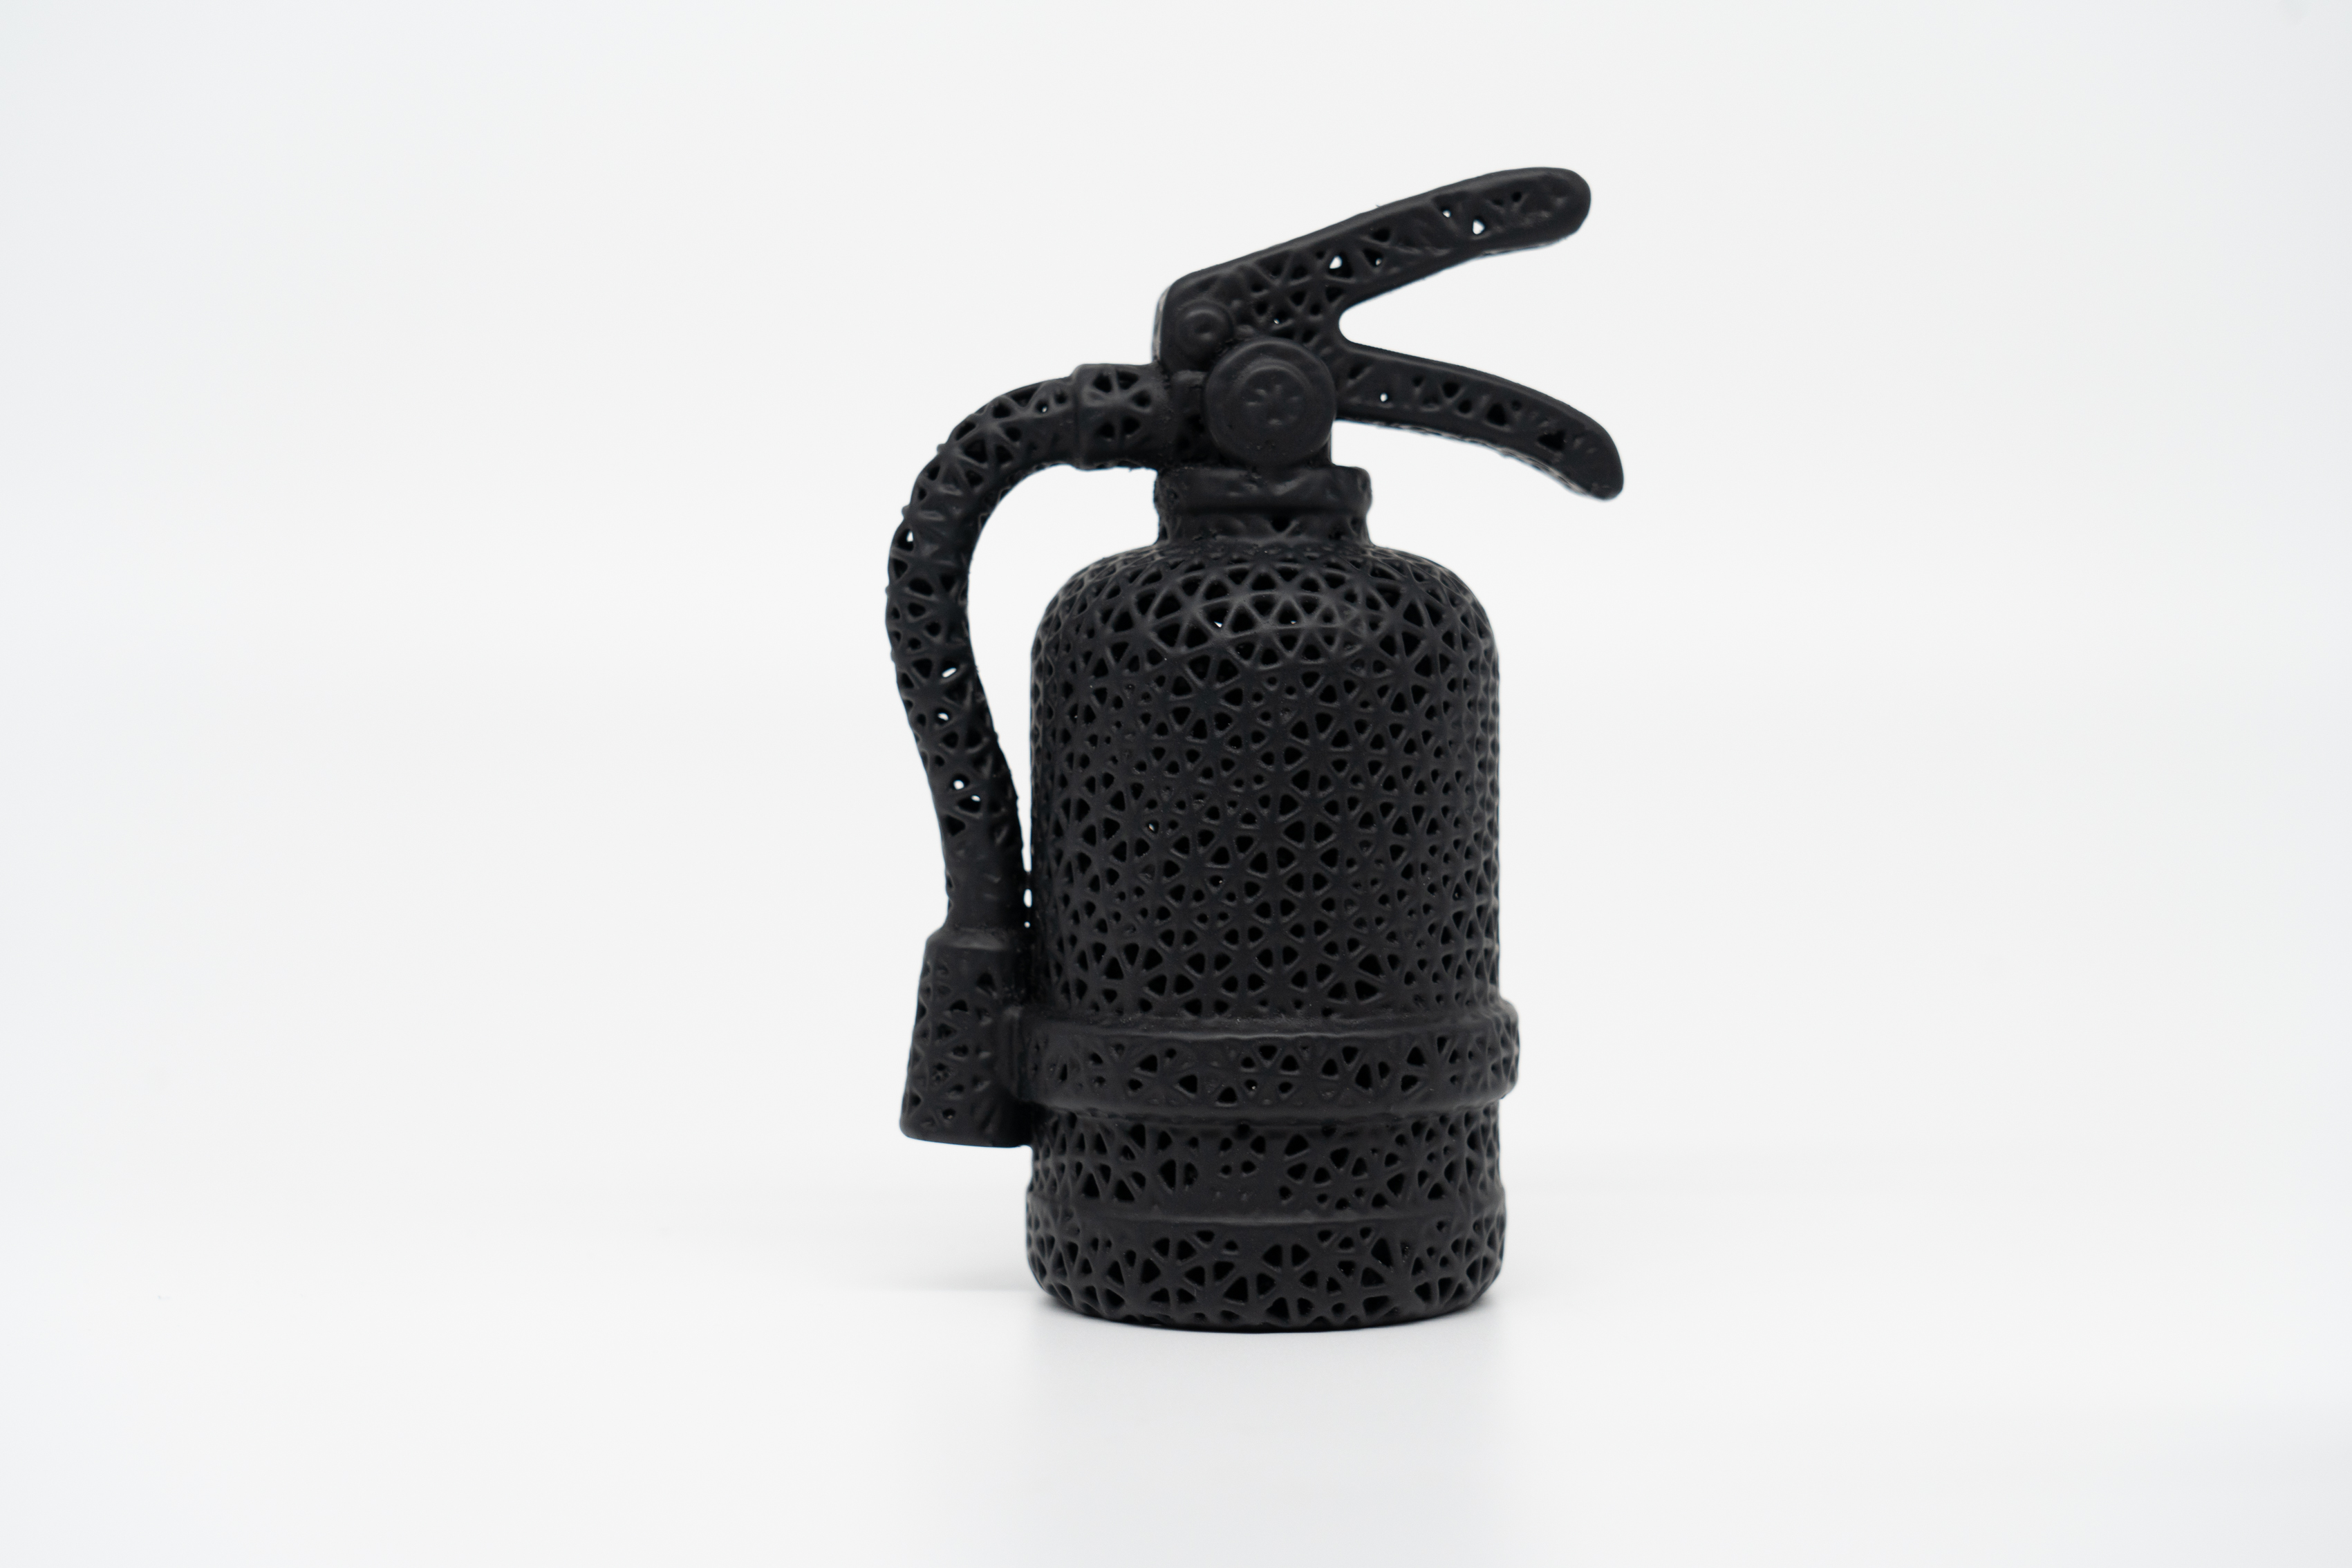
Cut along Surface: whether to cut along the original model surface. As the cylindrical struts of the latticed surface protrude, if not cut, you may choose whether to scale the model back to the original size.
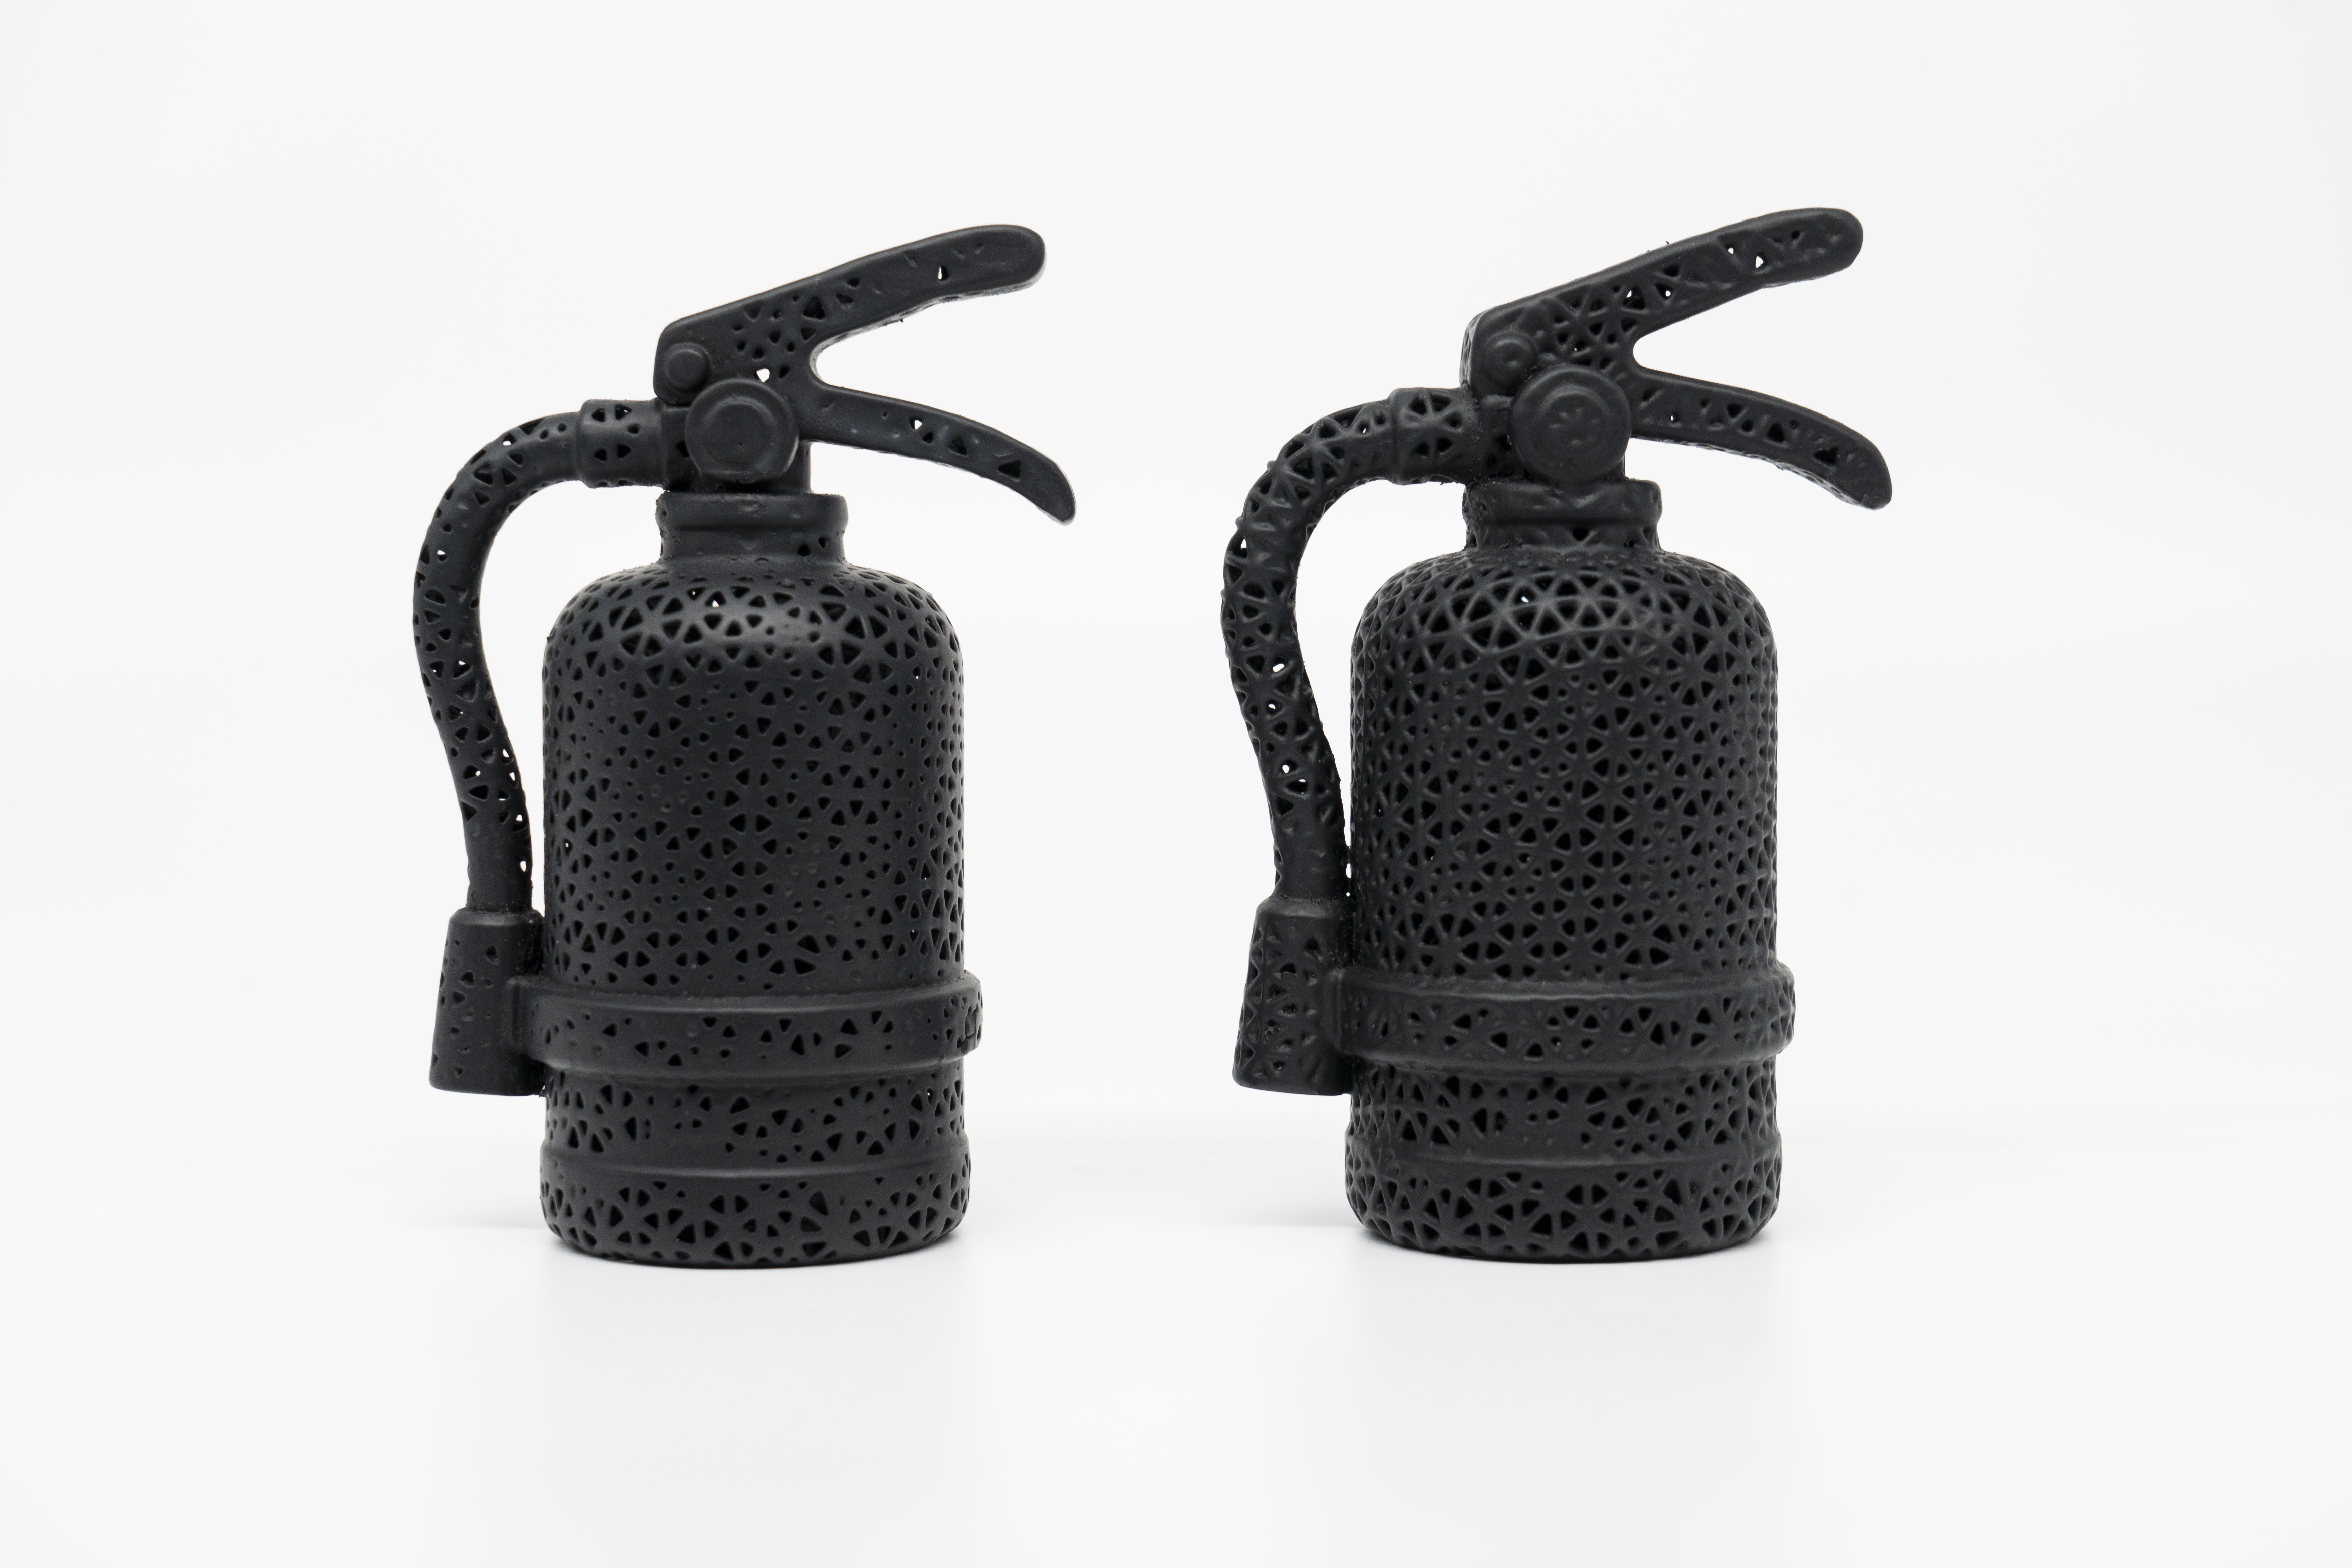
- Effect with <Cut along Surface> turned on
- Effect with <Cut along Surface> turned off
¶ 2.2 Coloring Effect of Split Printing
 |
 |
¶ Update History
| Version | Date |
|---|---|
| 1.0 | 2026-10-26 |