Pre-processing is based on project files. You may create a new project, or import or share an existing one, so that you can proceed with the following operations smoothly.
¶ 1. Create a Project
Blueprint Studio provides several entries for creating a project, so you can start pre-processing quickly.
¶ 1.1 Homepage
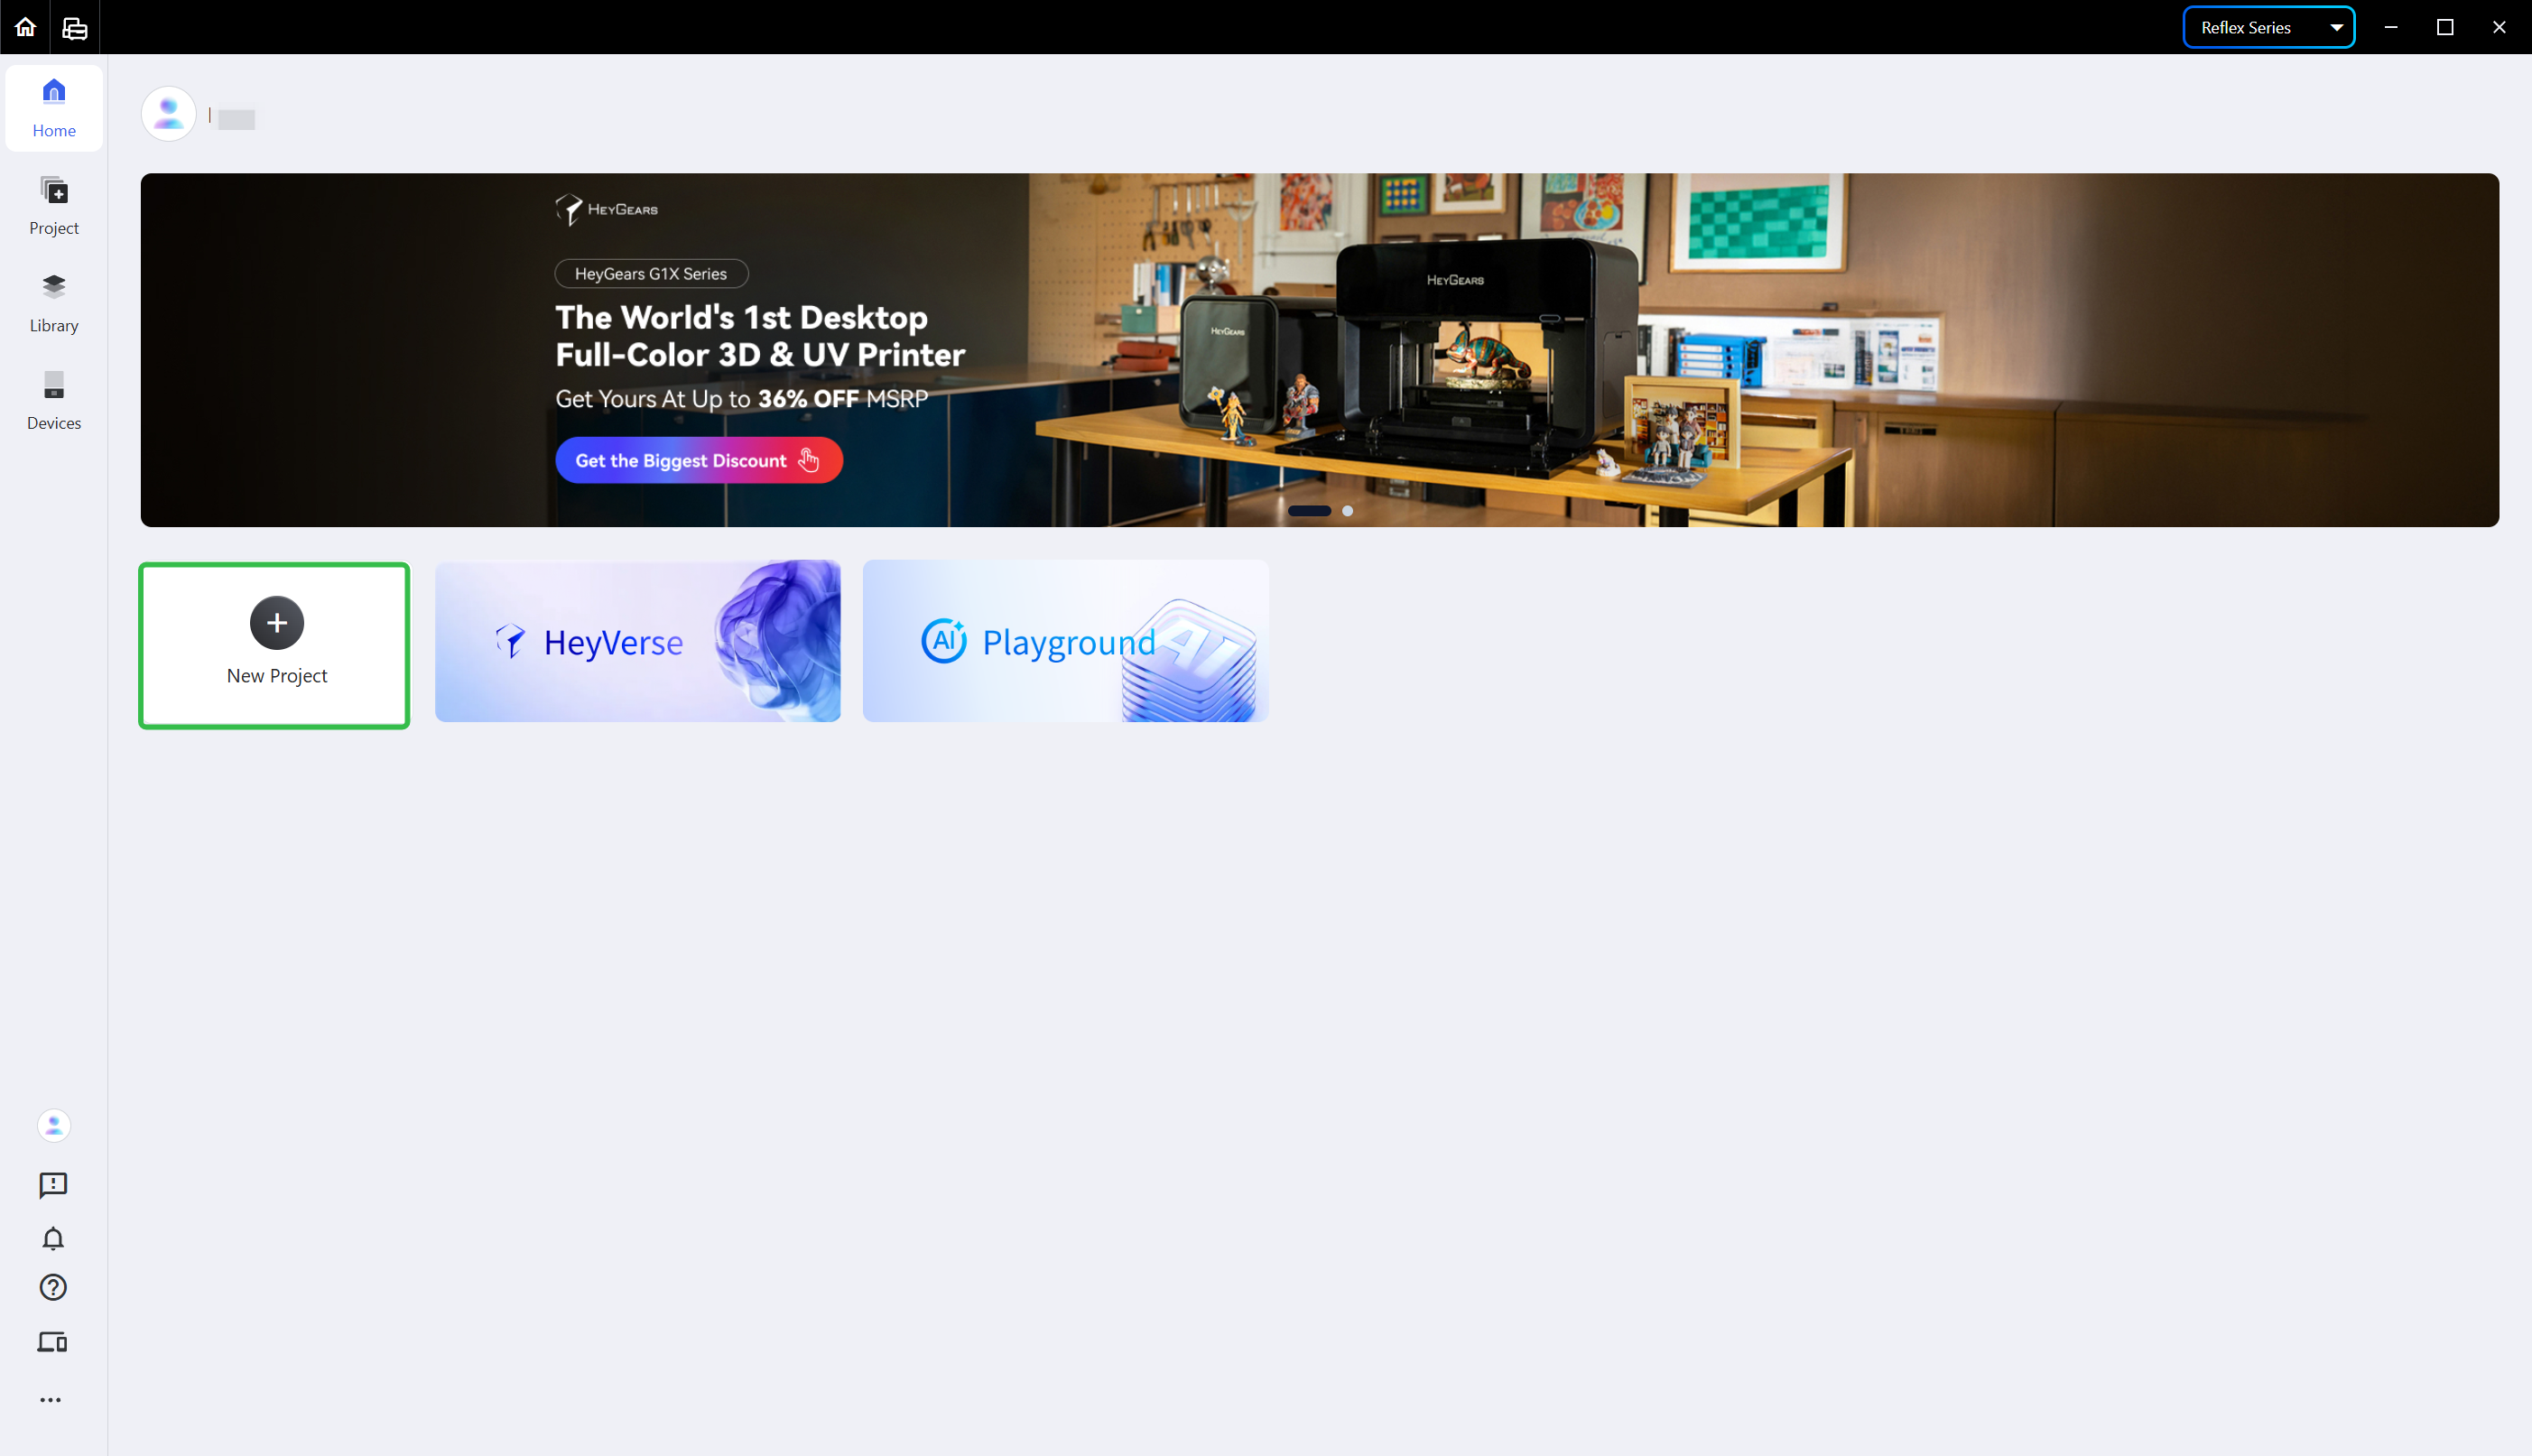
Click <New Project> on the homepage.
| R Series Homepage | G Series Homepage |
|---|---|
 |
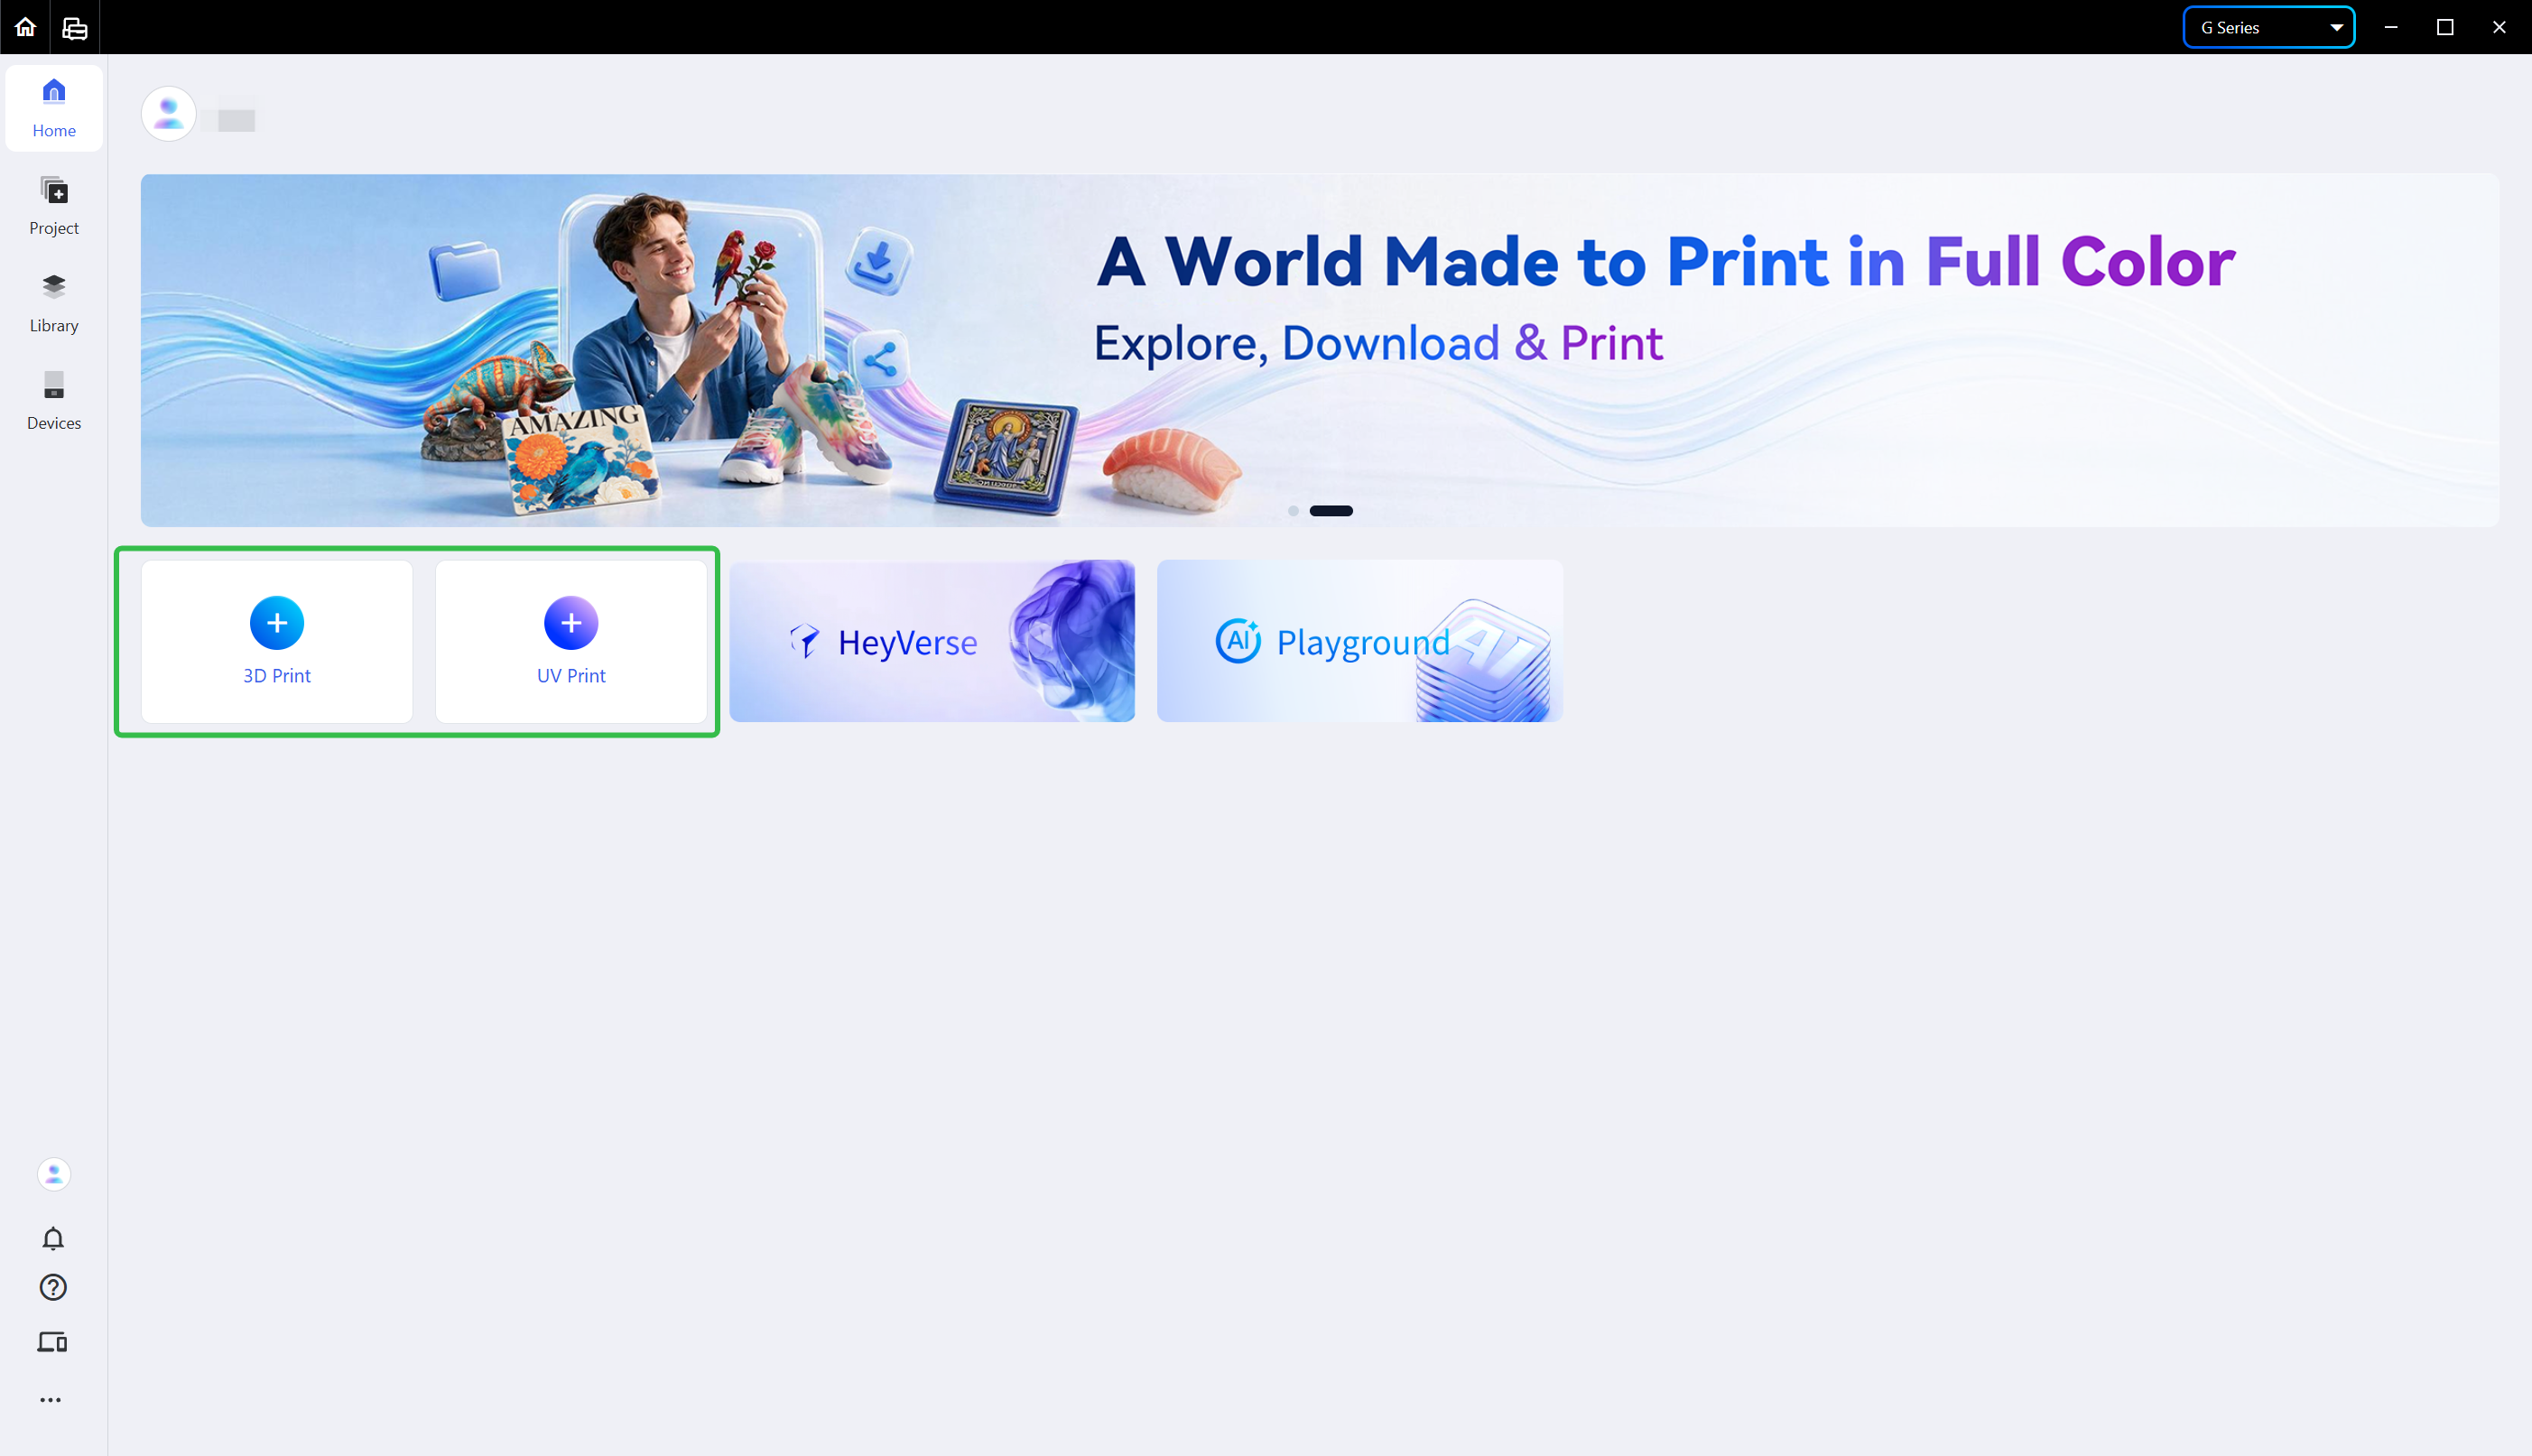 |
- In the G Series section, choose <3D Printing> or <UV Printing> when creating a project.
- Choose <Device Type>, <Add-on Module>, <Application>, <Material> and <Layer Thickness> in turn as required, then hit <Apply>.
- You may also hit <Recently Used Setup> to check all the setups used last time quickly.
Note: Choose the proper setups according to the print. Improper setups might make the slice file incompatible or even lead to a failed print.
¶ 1.2 [Project] Page
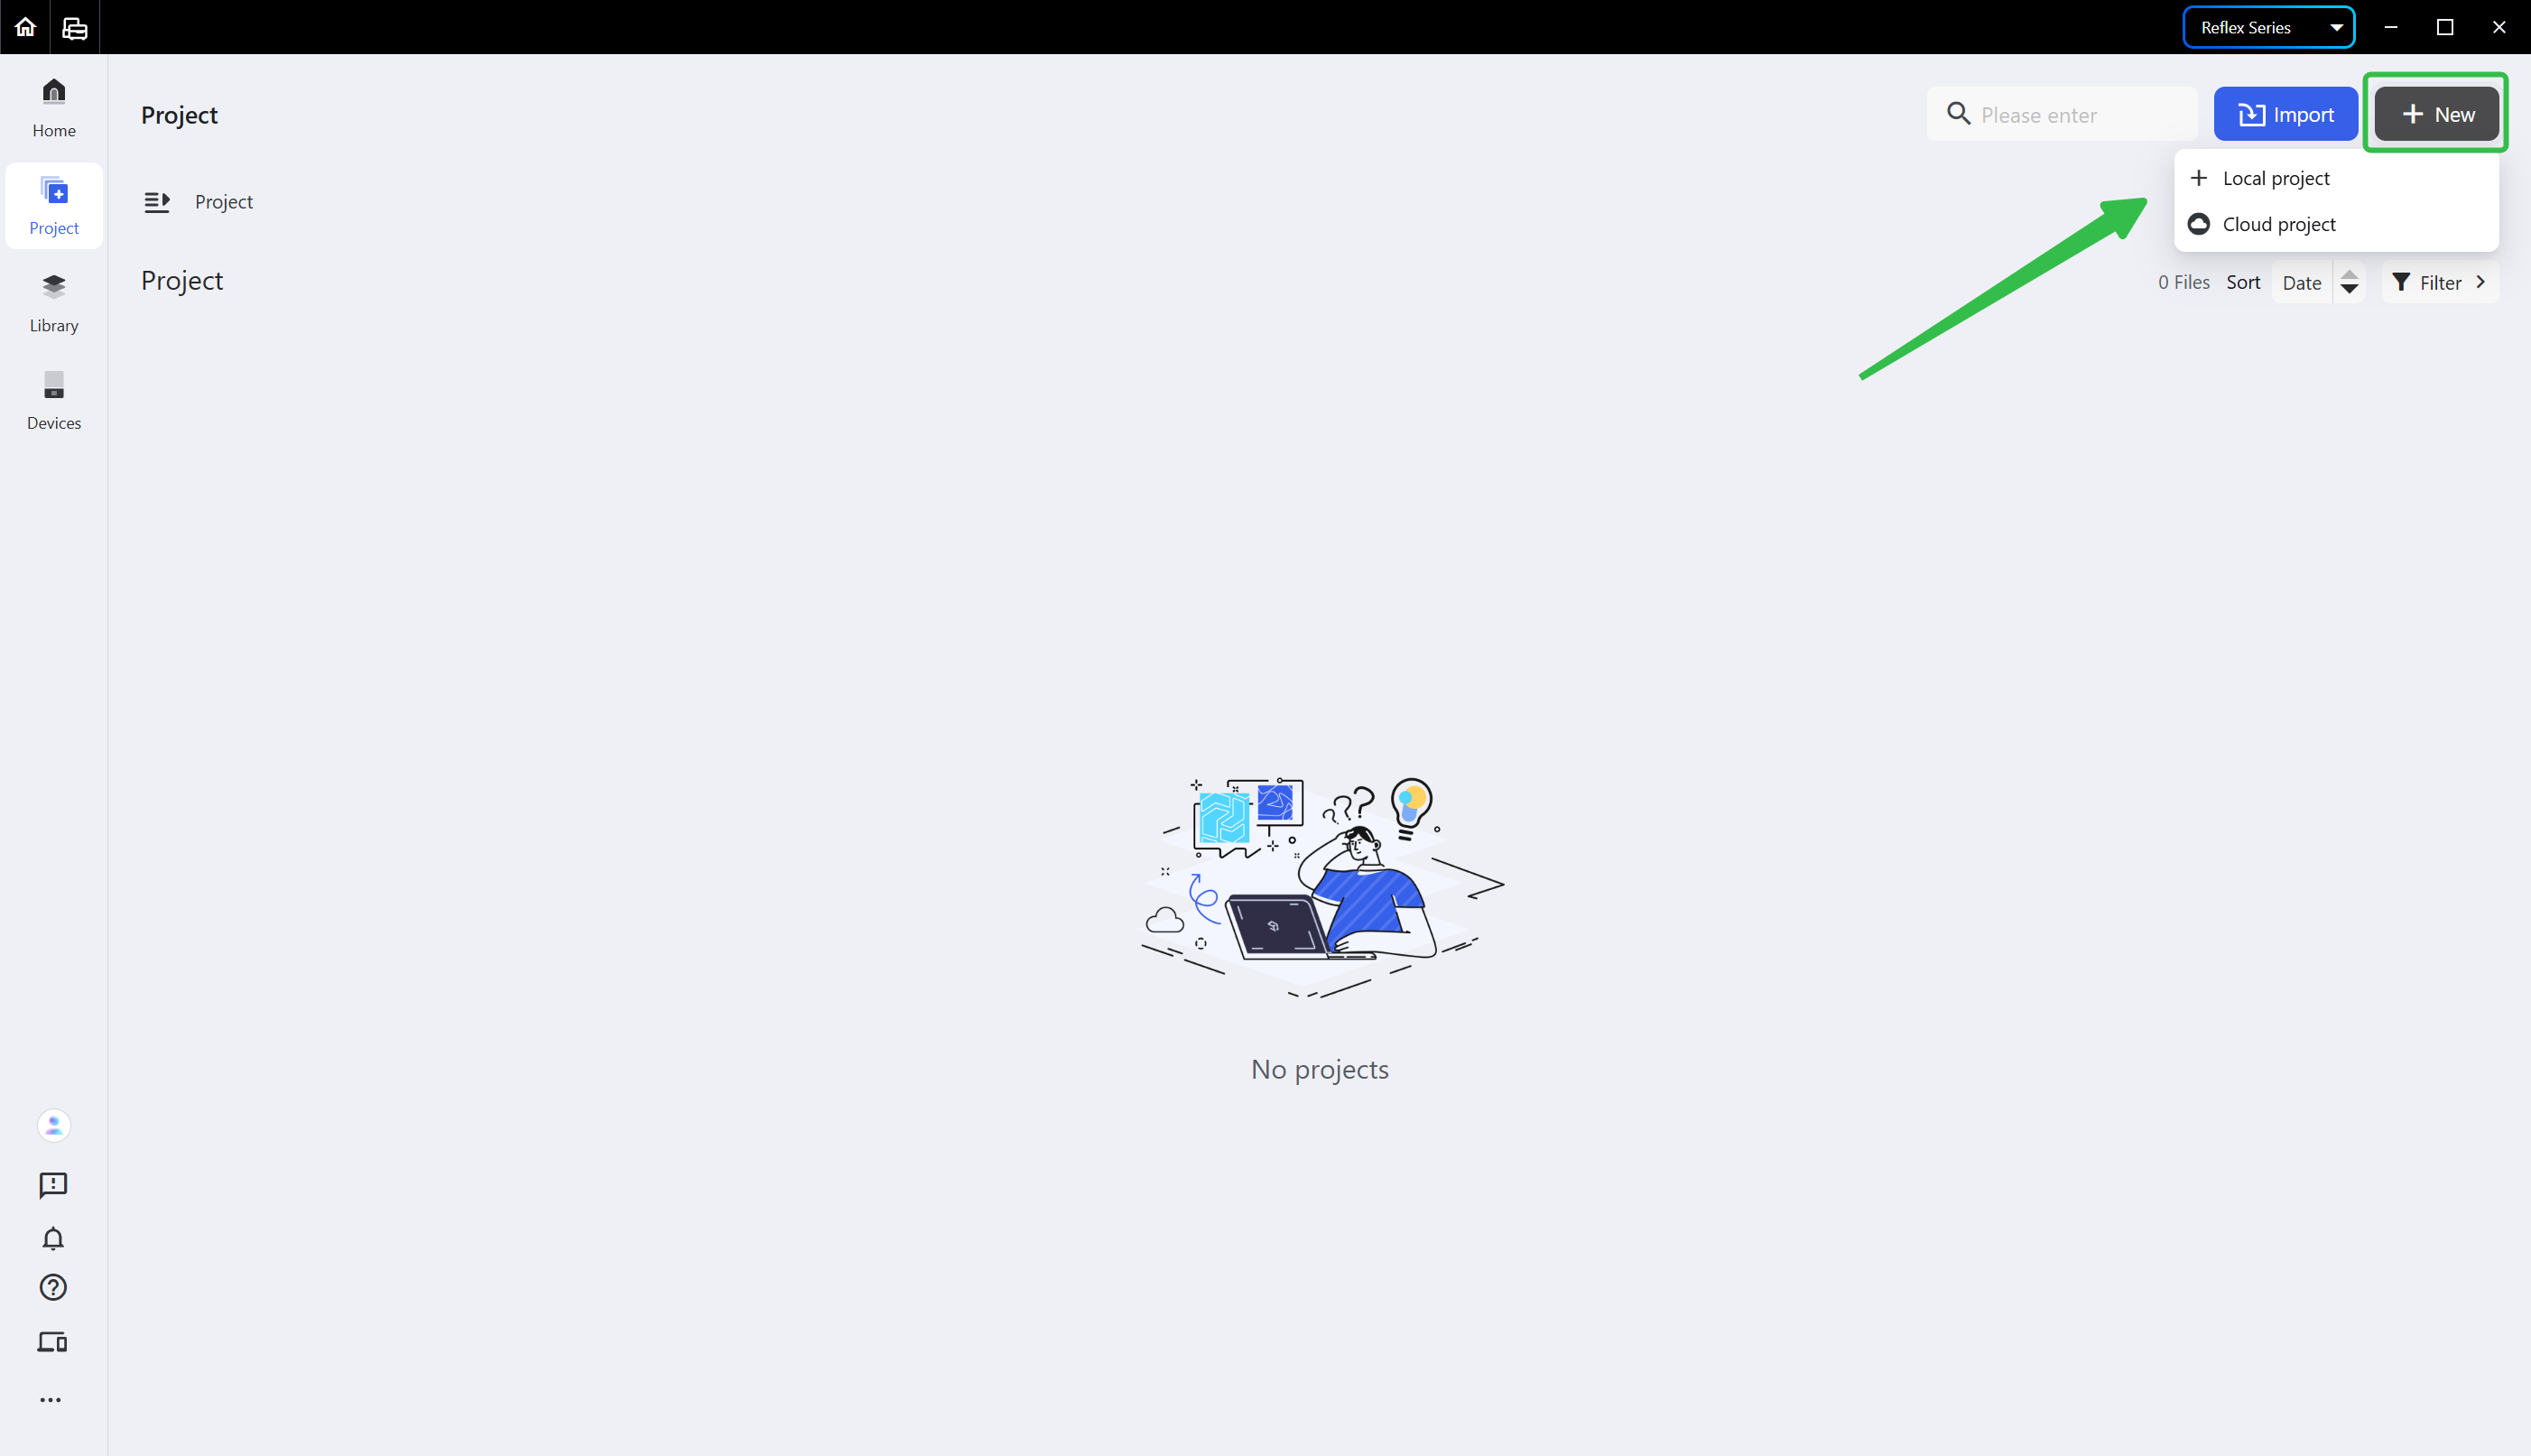
Click <+New> in the upper right corner of the project tab to create a local project or a cloud project.
- Local Project: data is saved only on the local computer and does not support cross-device access.
- Cloud Project: data is saved and synced to Cloud and supports cross-device access.
¶ 2. Import a Project
¶ 2.1 Import on the [Project] Page
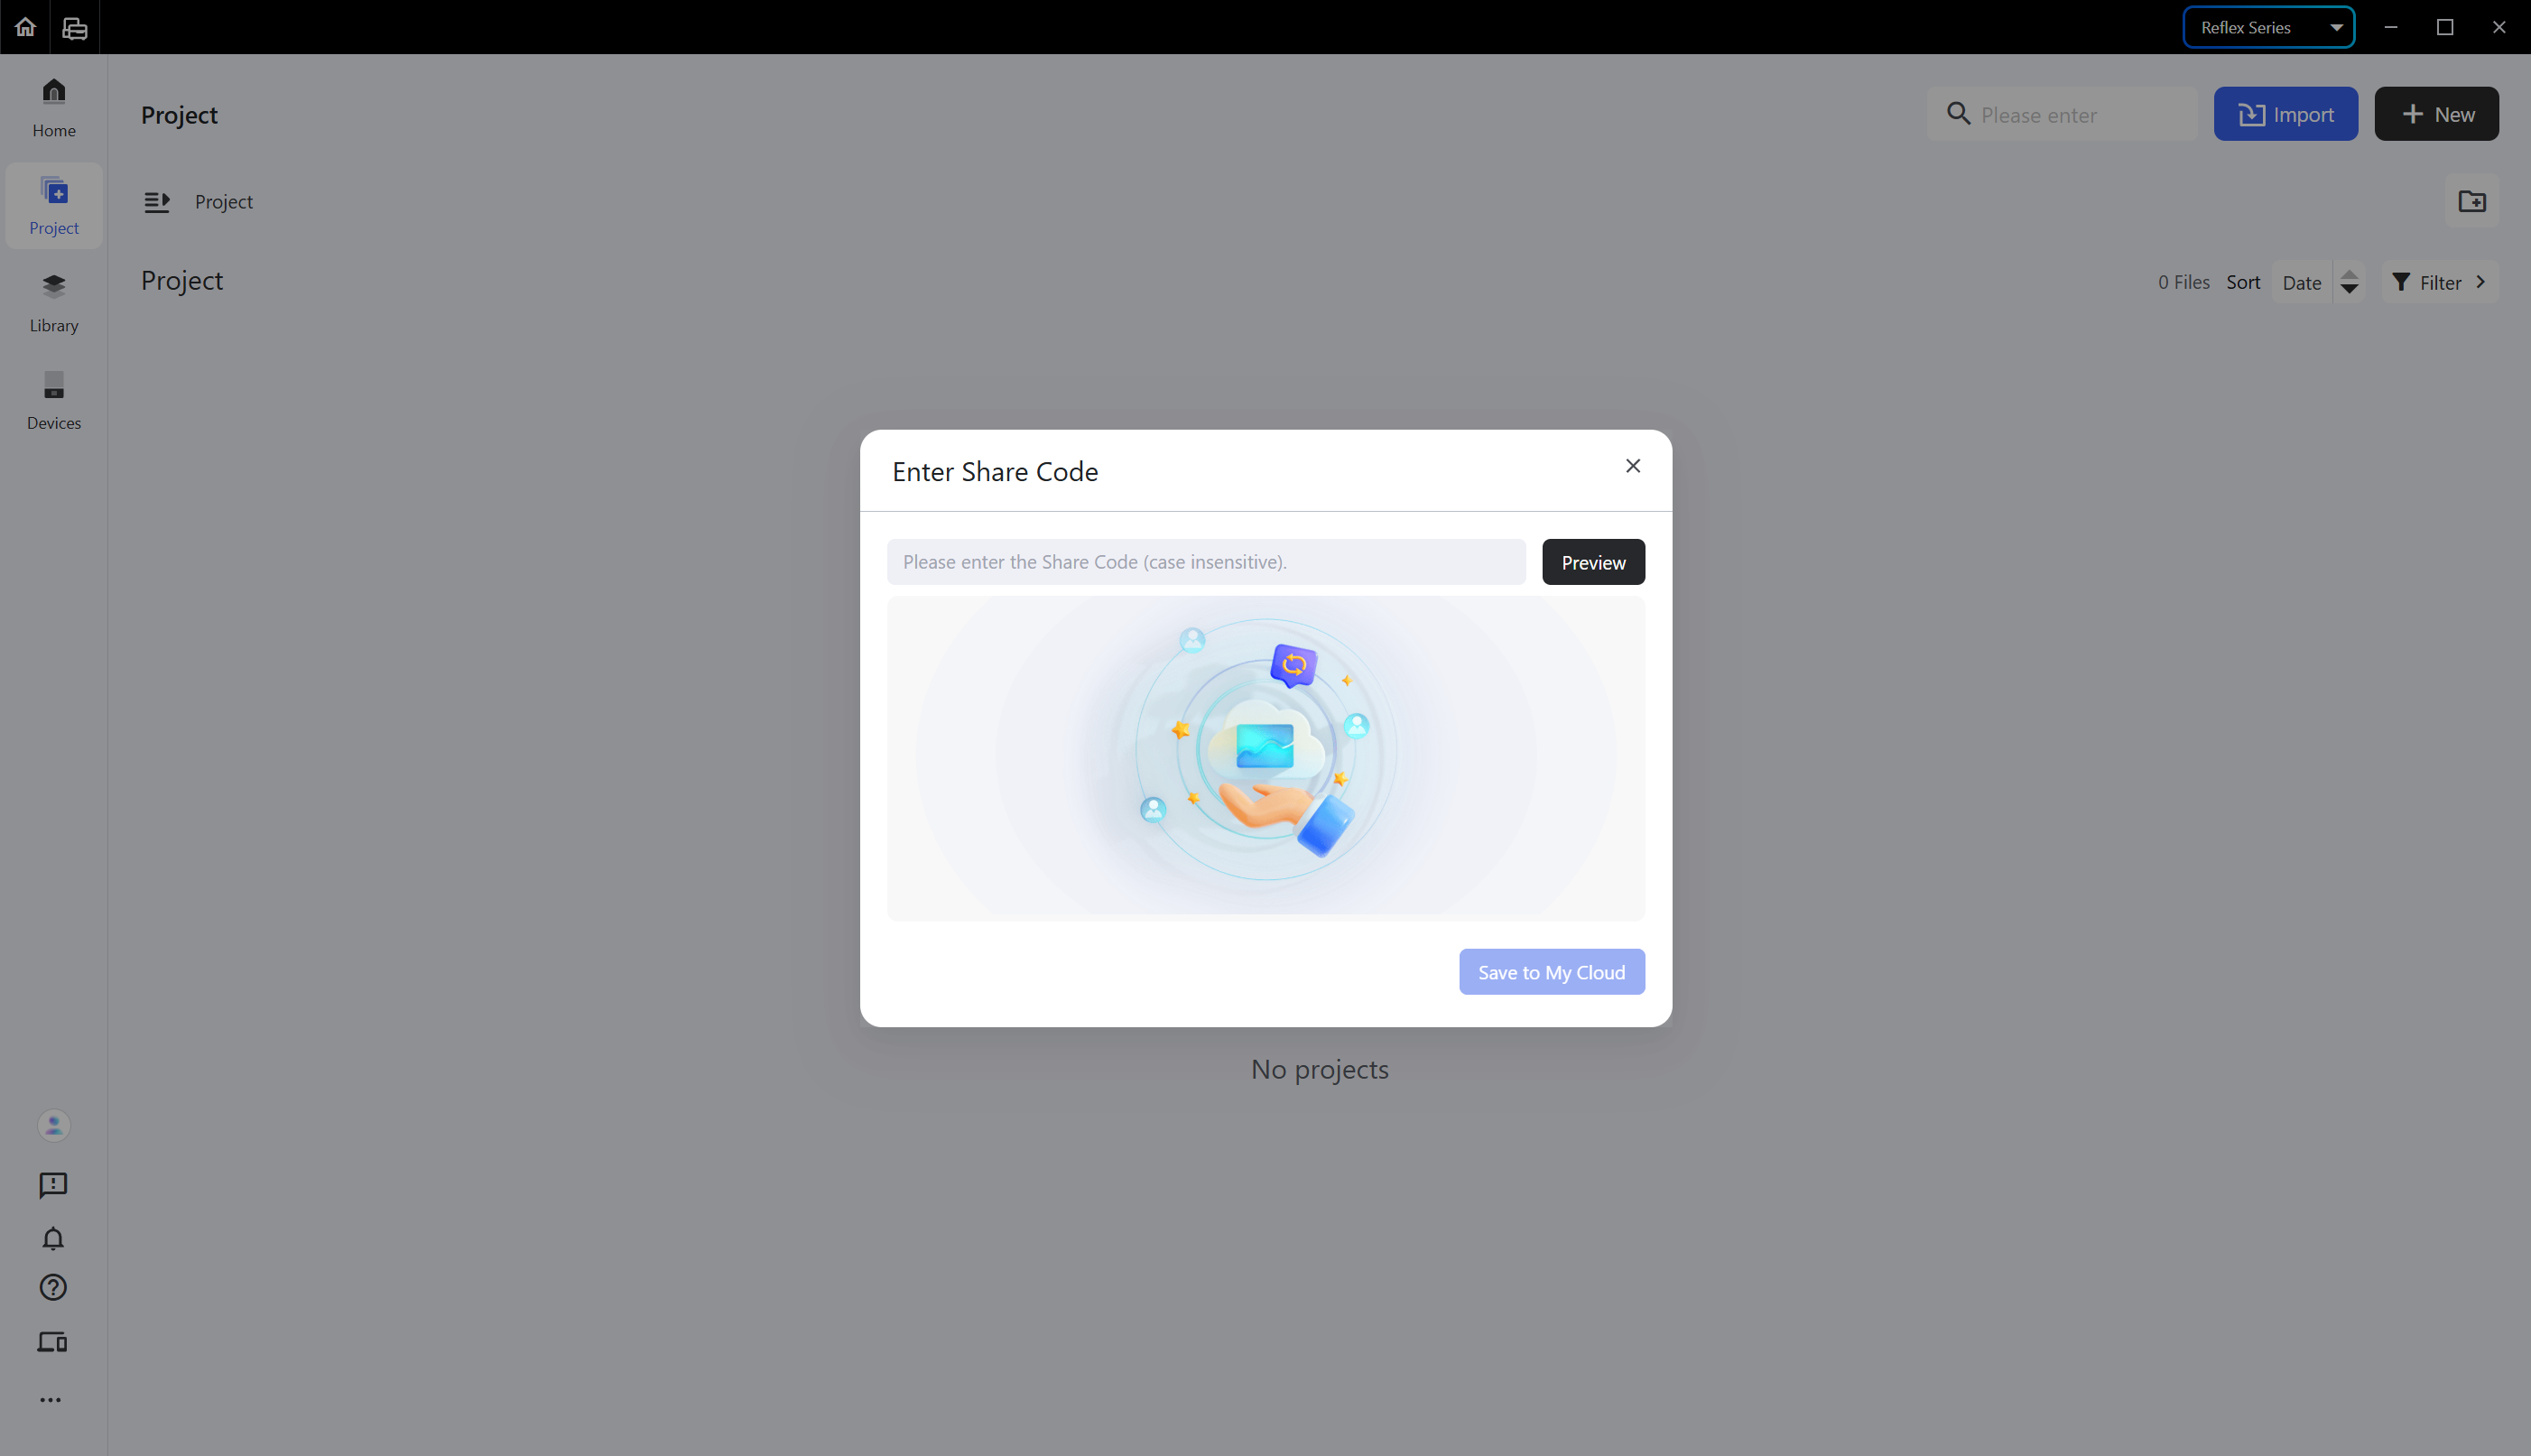
To pre-process an existing project, import it: click <Import> in the upper right corner, then choose <From Local Path> or <From Share Code>.
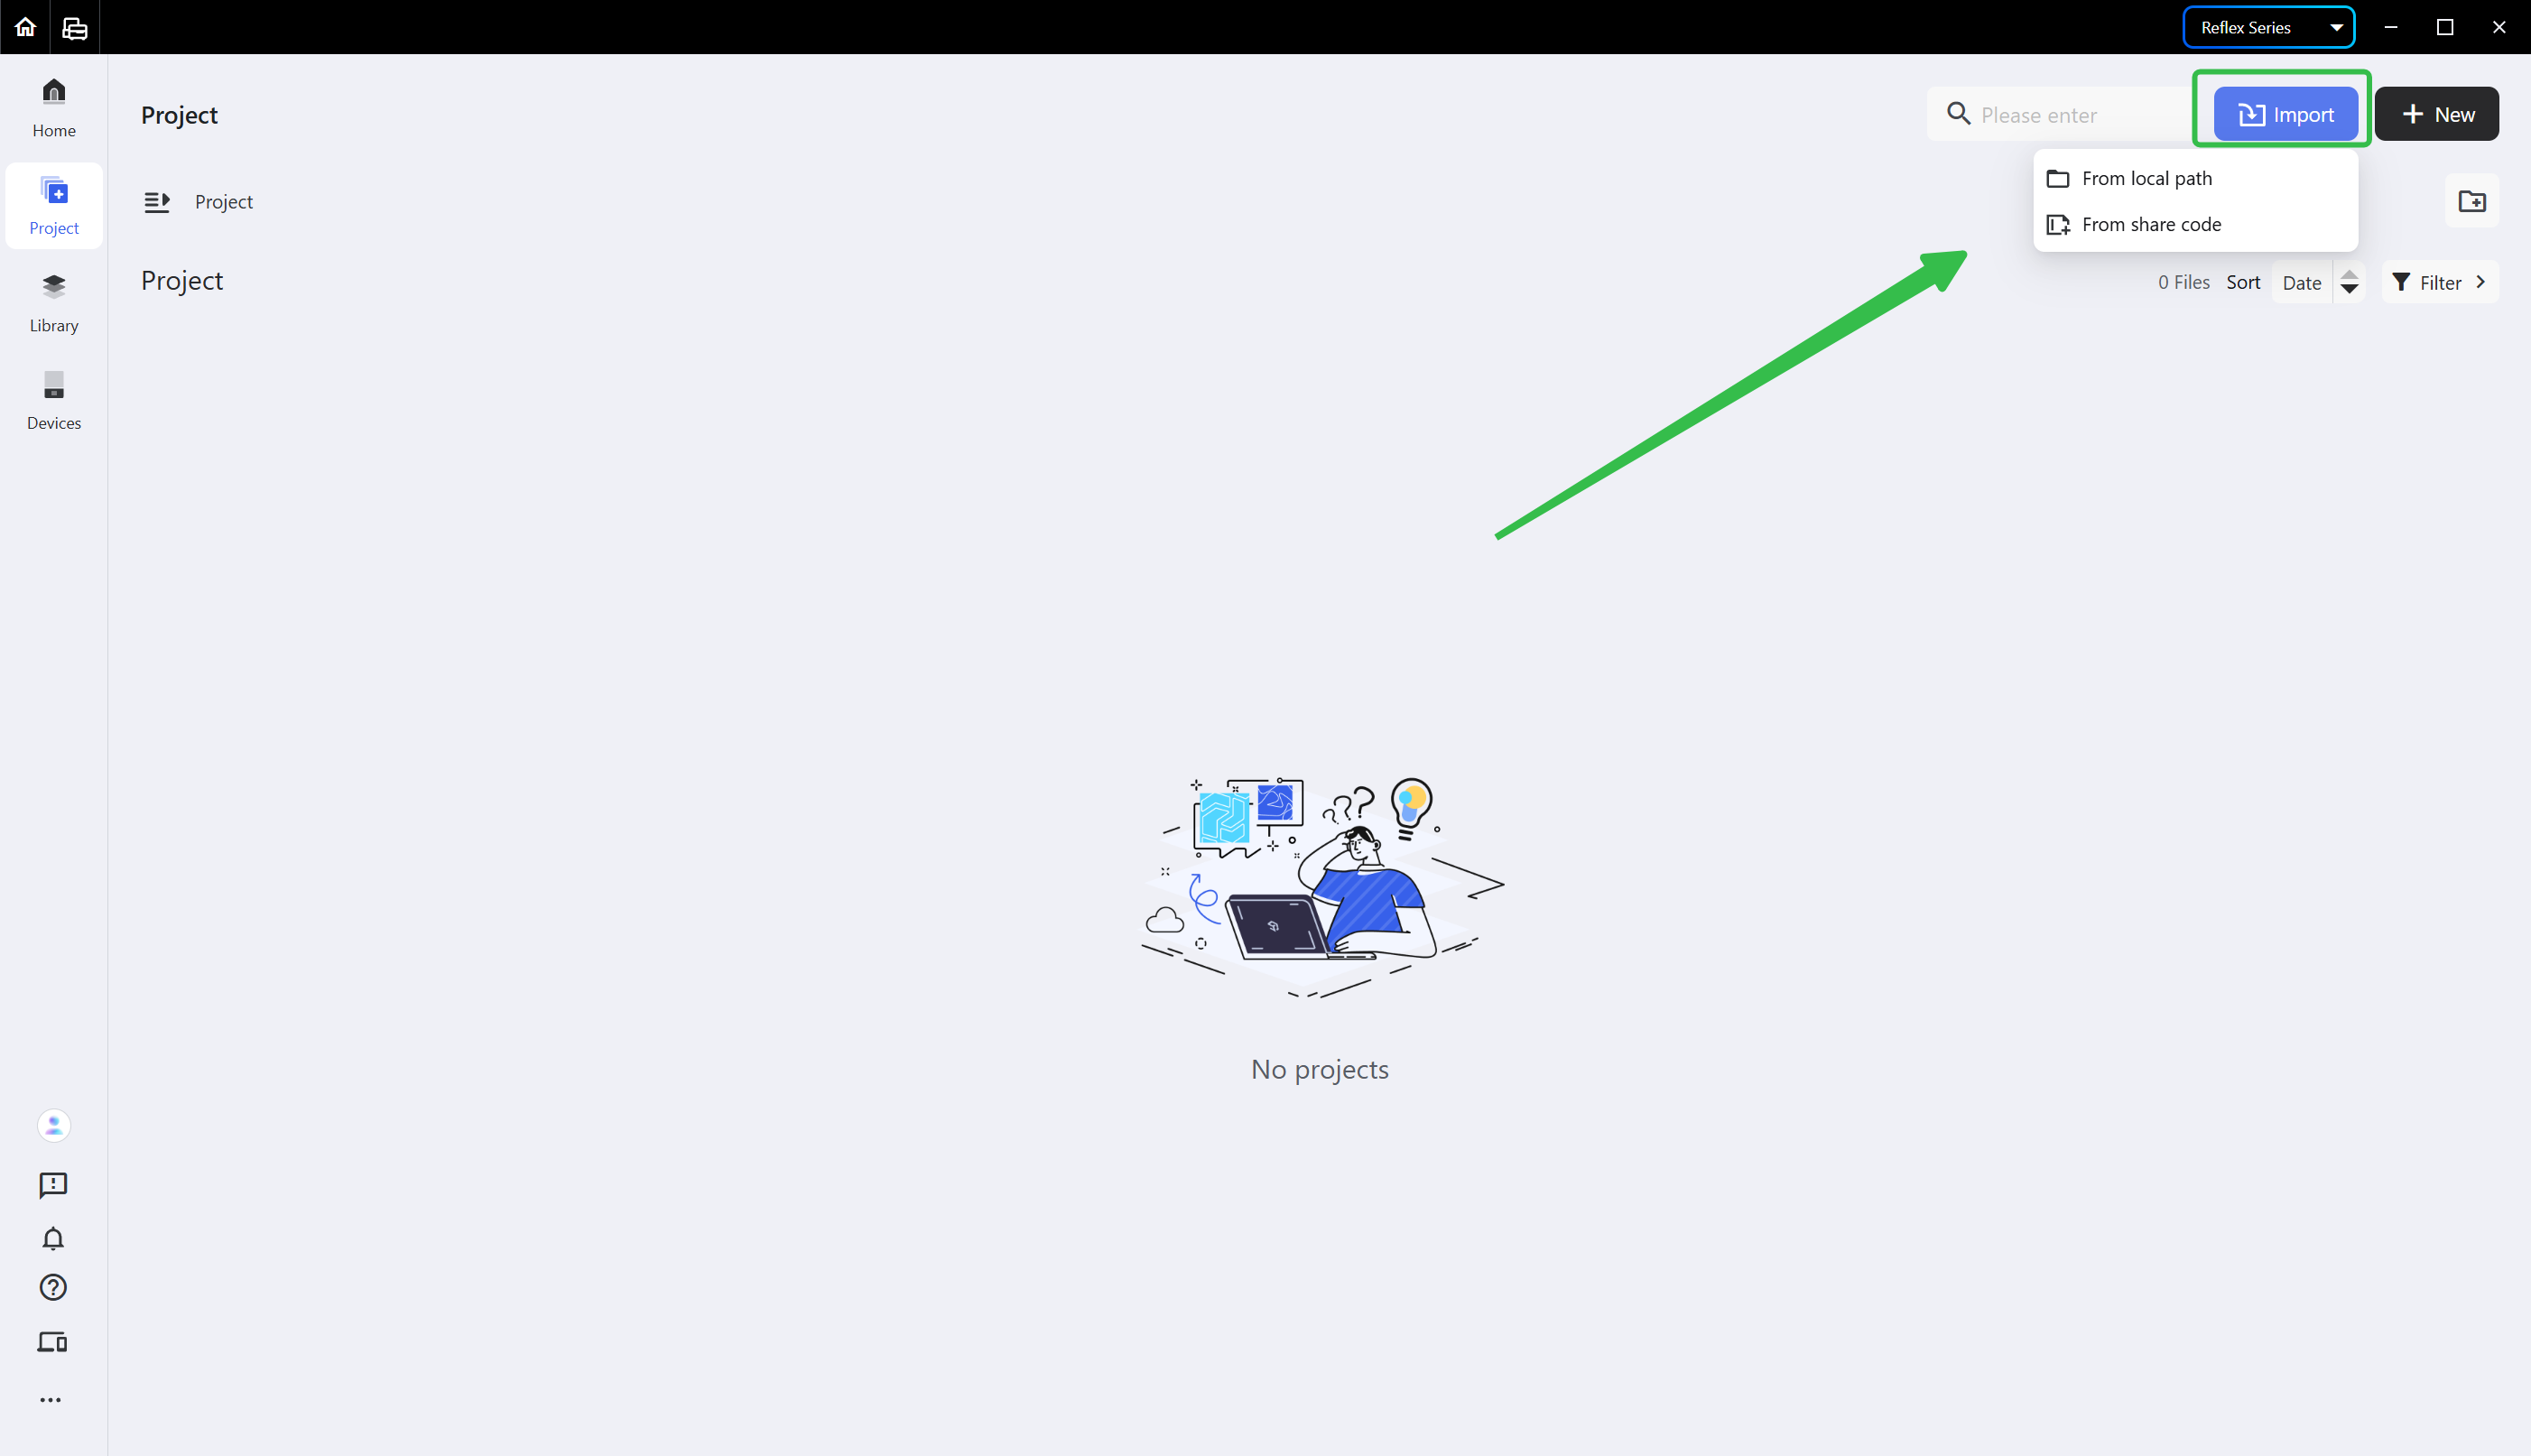
- From Local Path: import a local project file.
Note: Only the Custom File Type (*.bpsp) is supported for import.
Note: A project imported with a share code will be saved to Cloud.
¶ 2.2 Import in the Pre-processing Interface
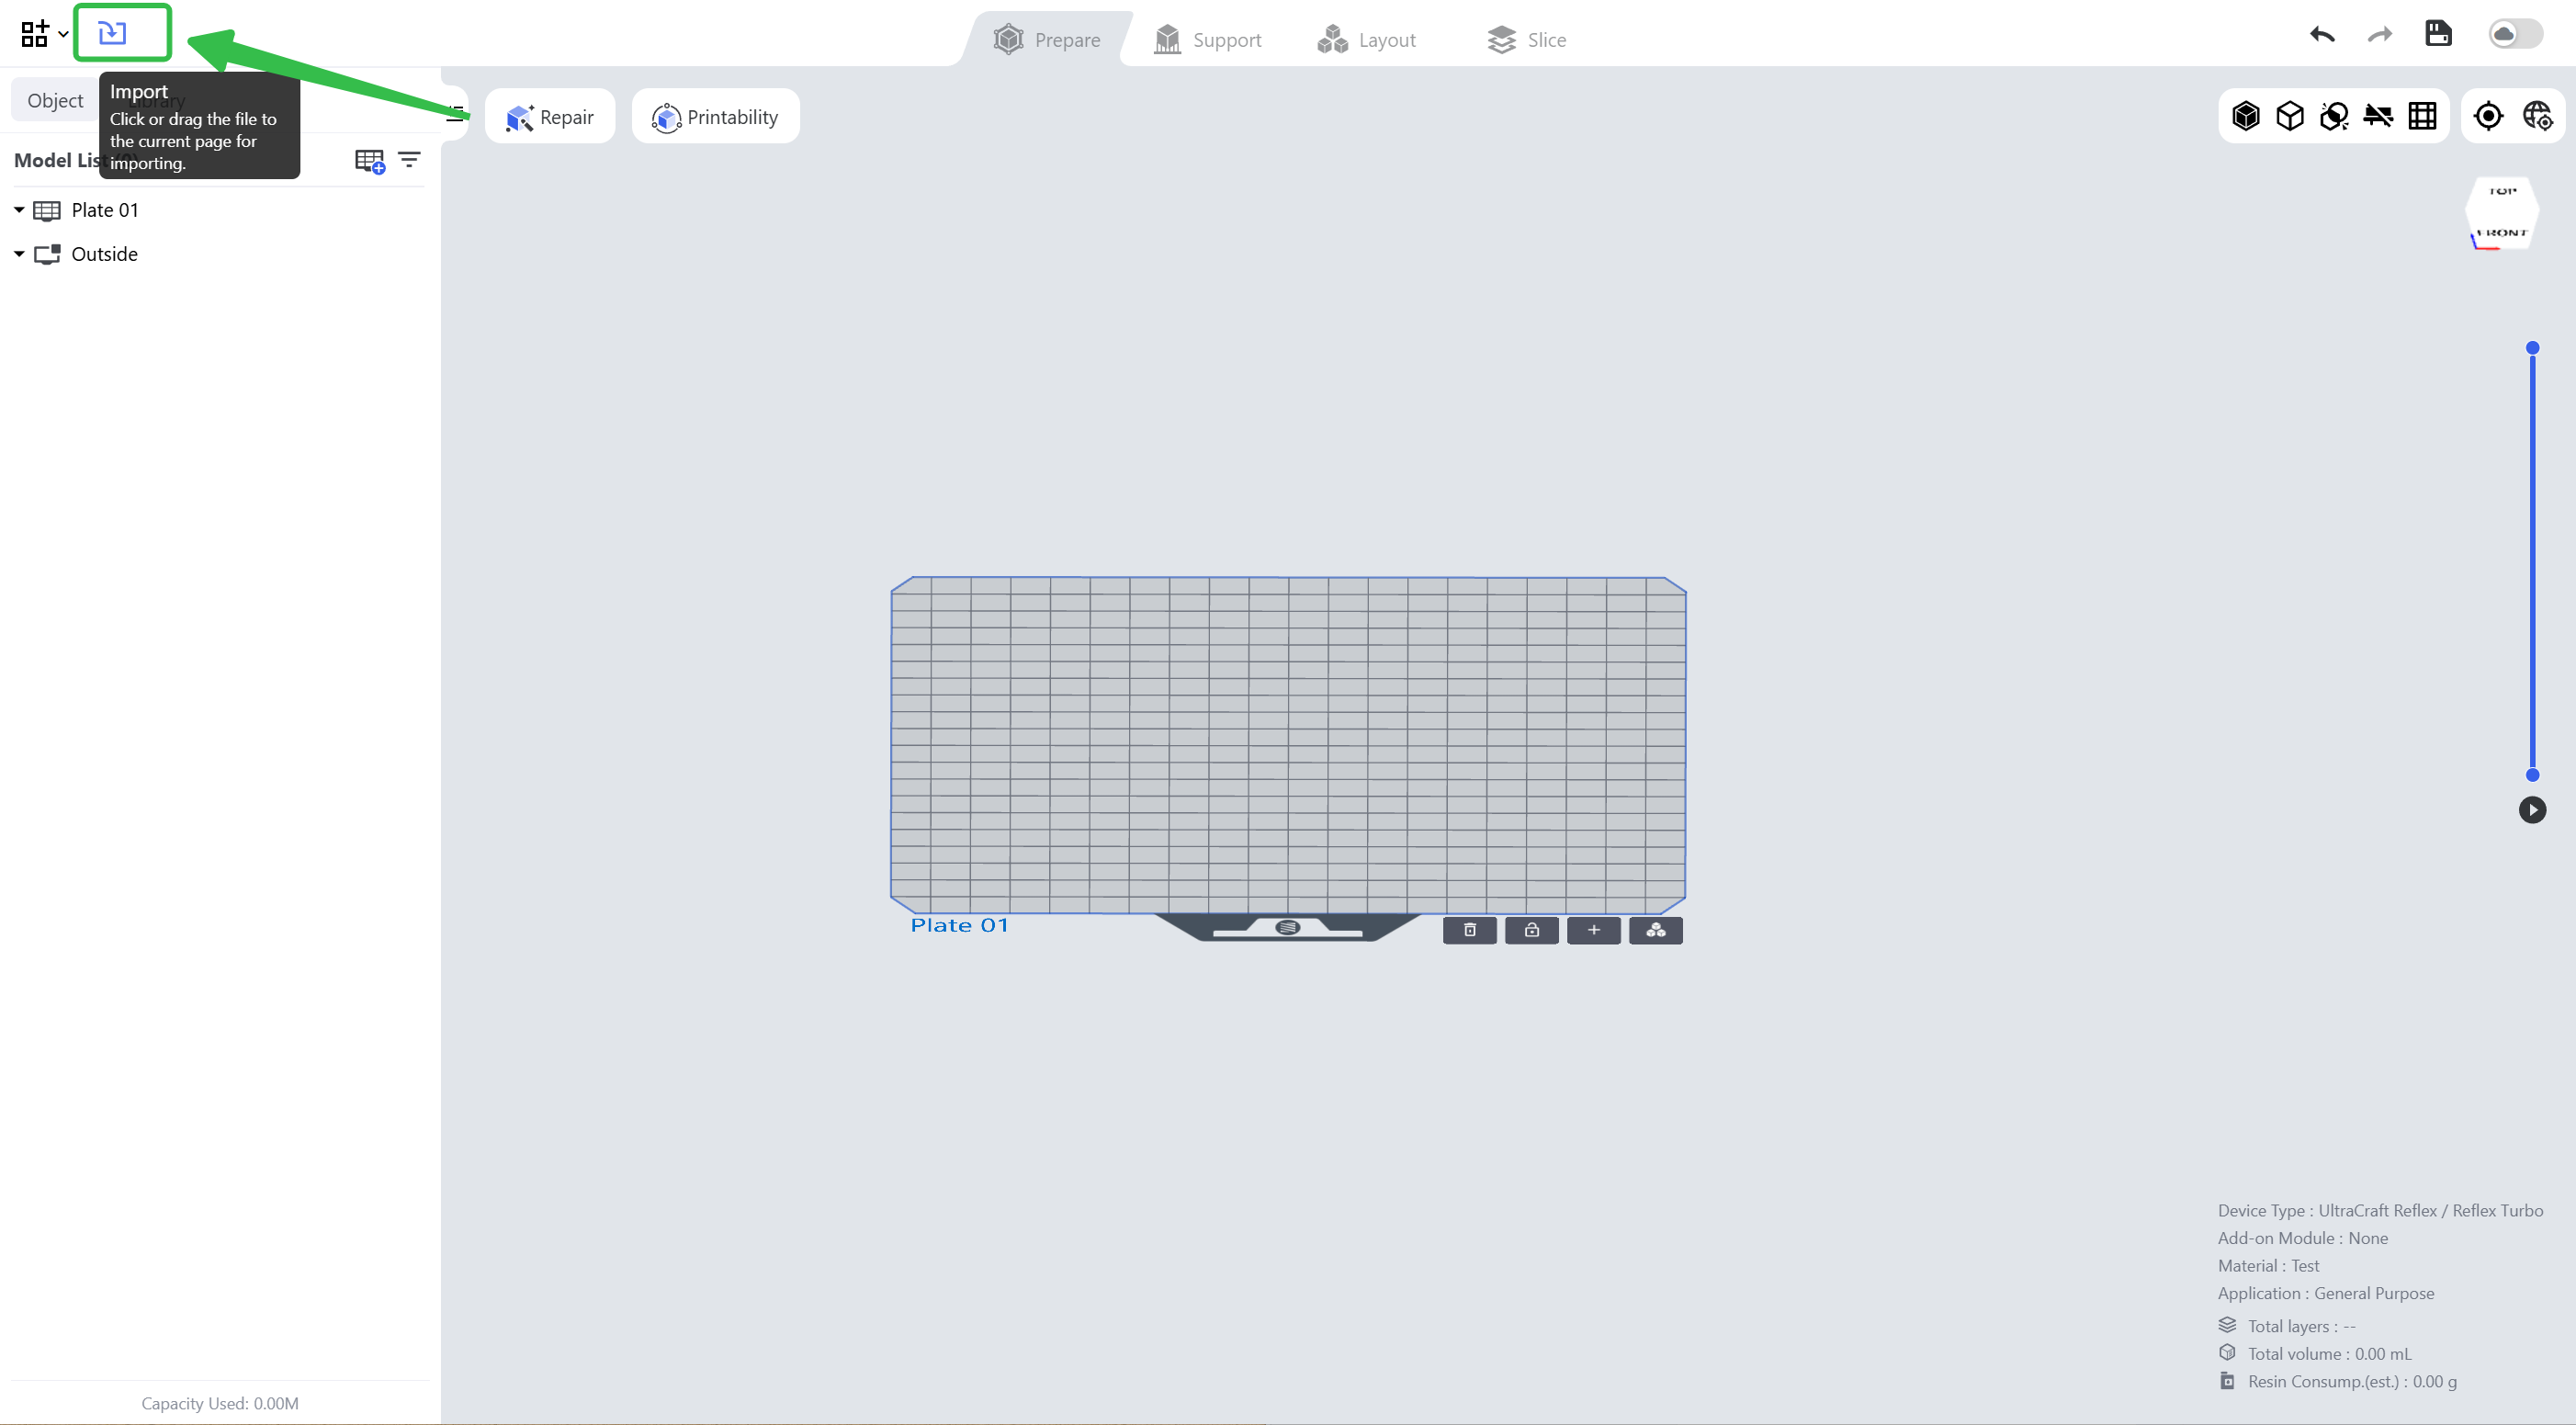
If you want to import another project file while working, click the import button above the Model List and choose the project file to import.
¶ 3. Share a Project
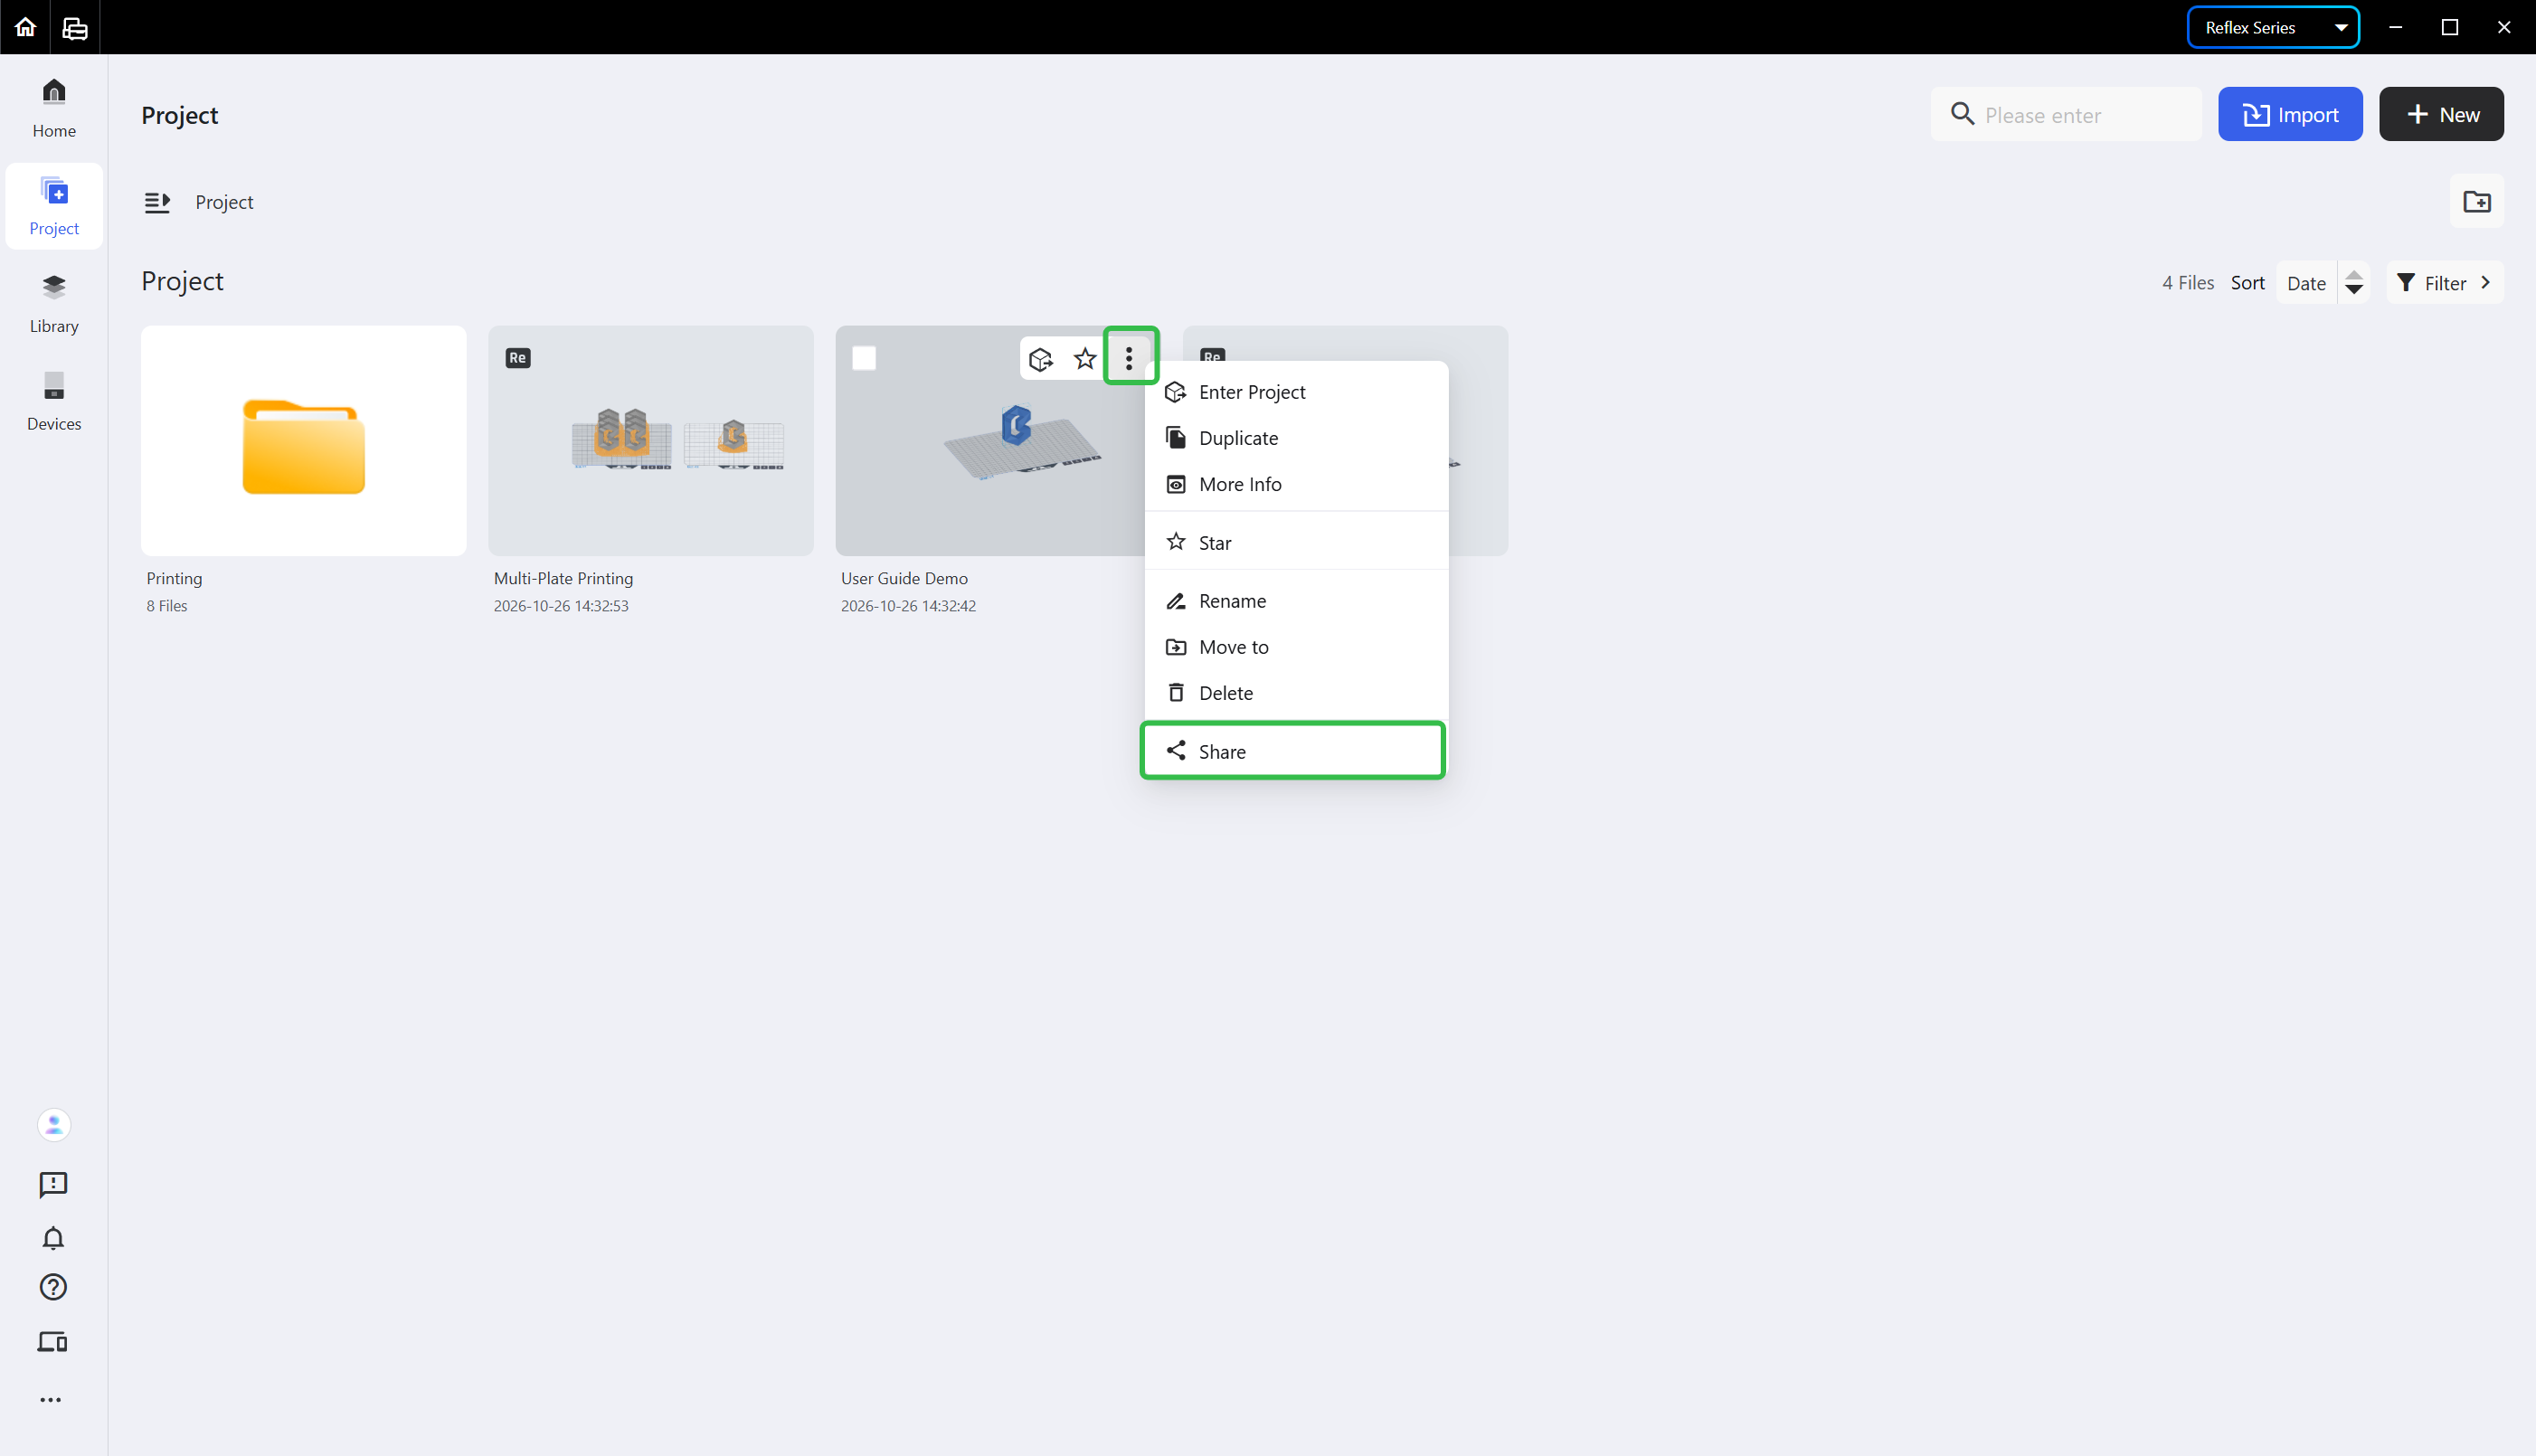
To share a project, find its card on the [Project] page, click the ellipsis icon <...> at the rightmost side and click <Share> to generate a share code.
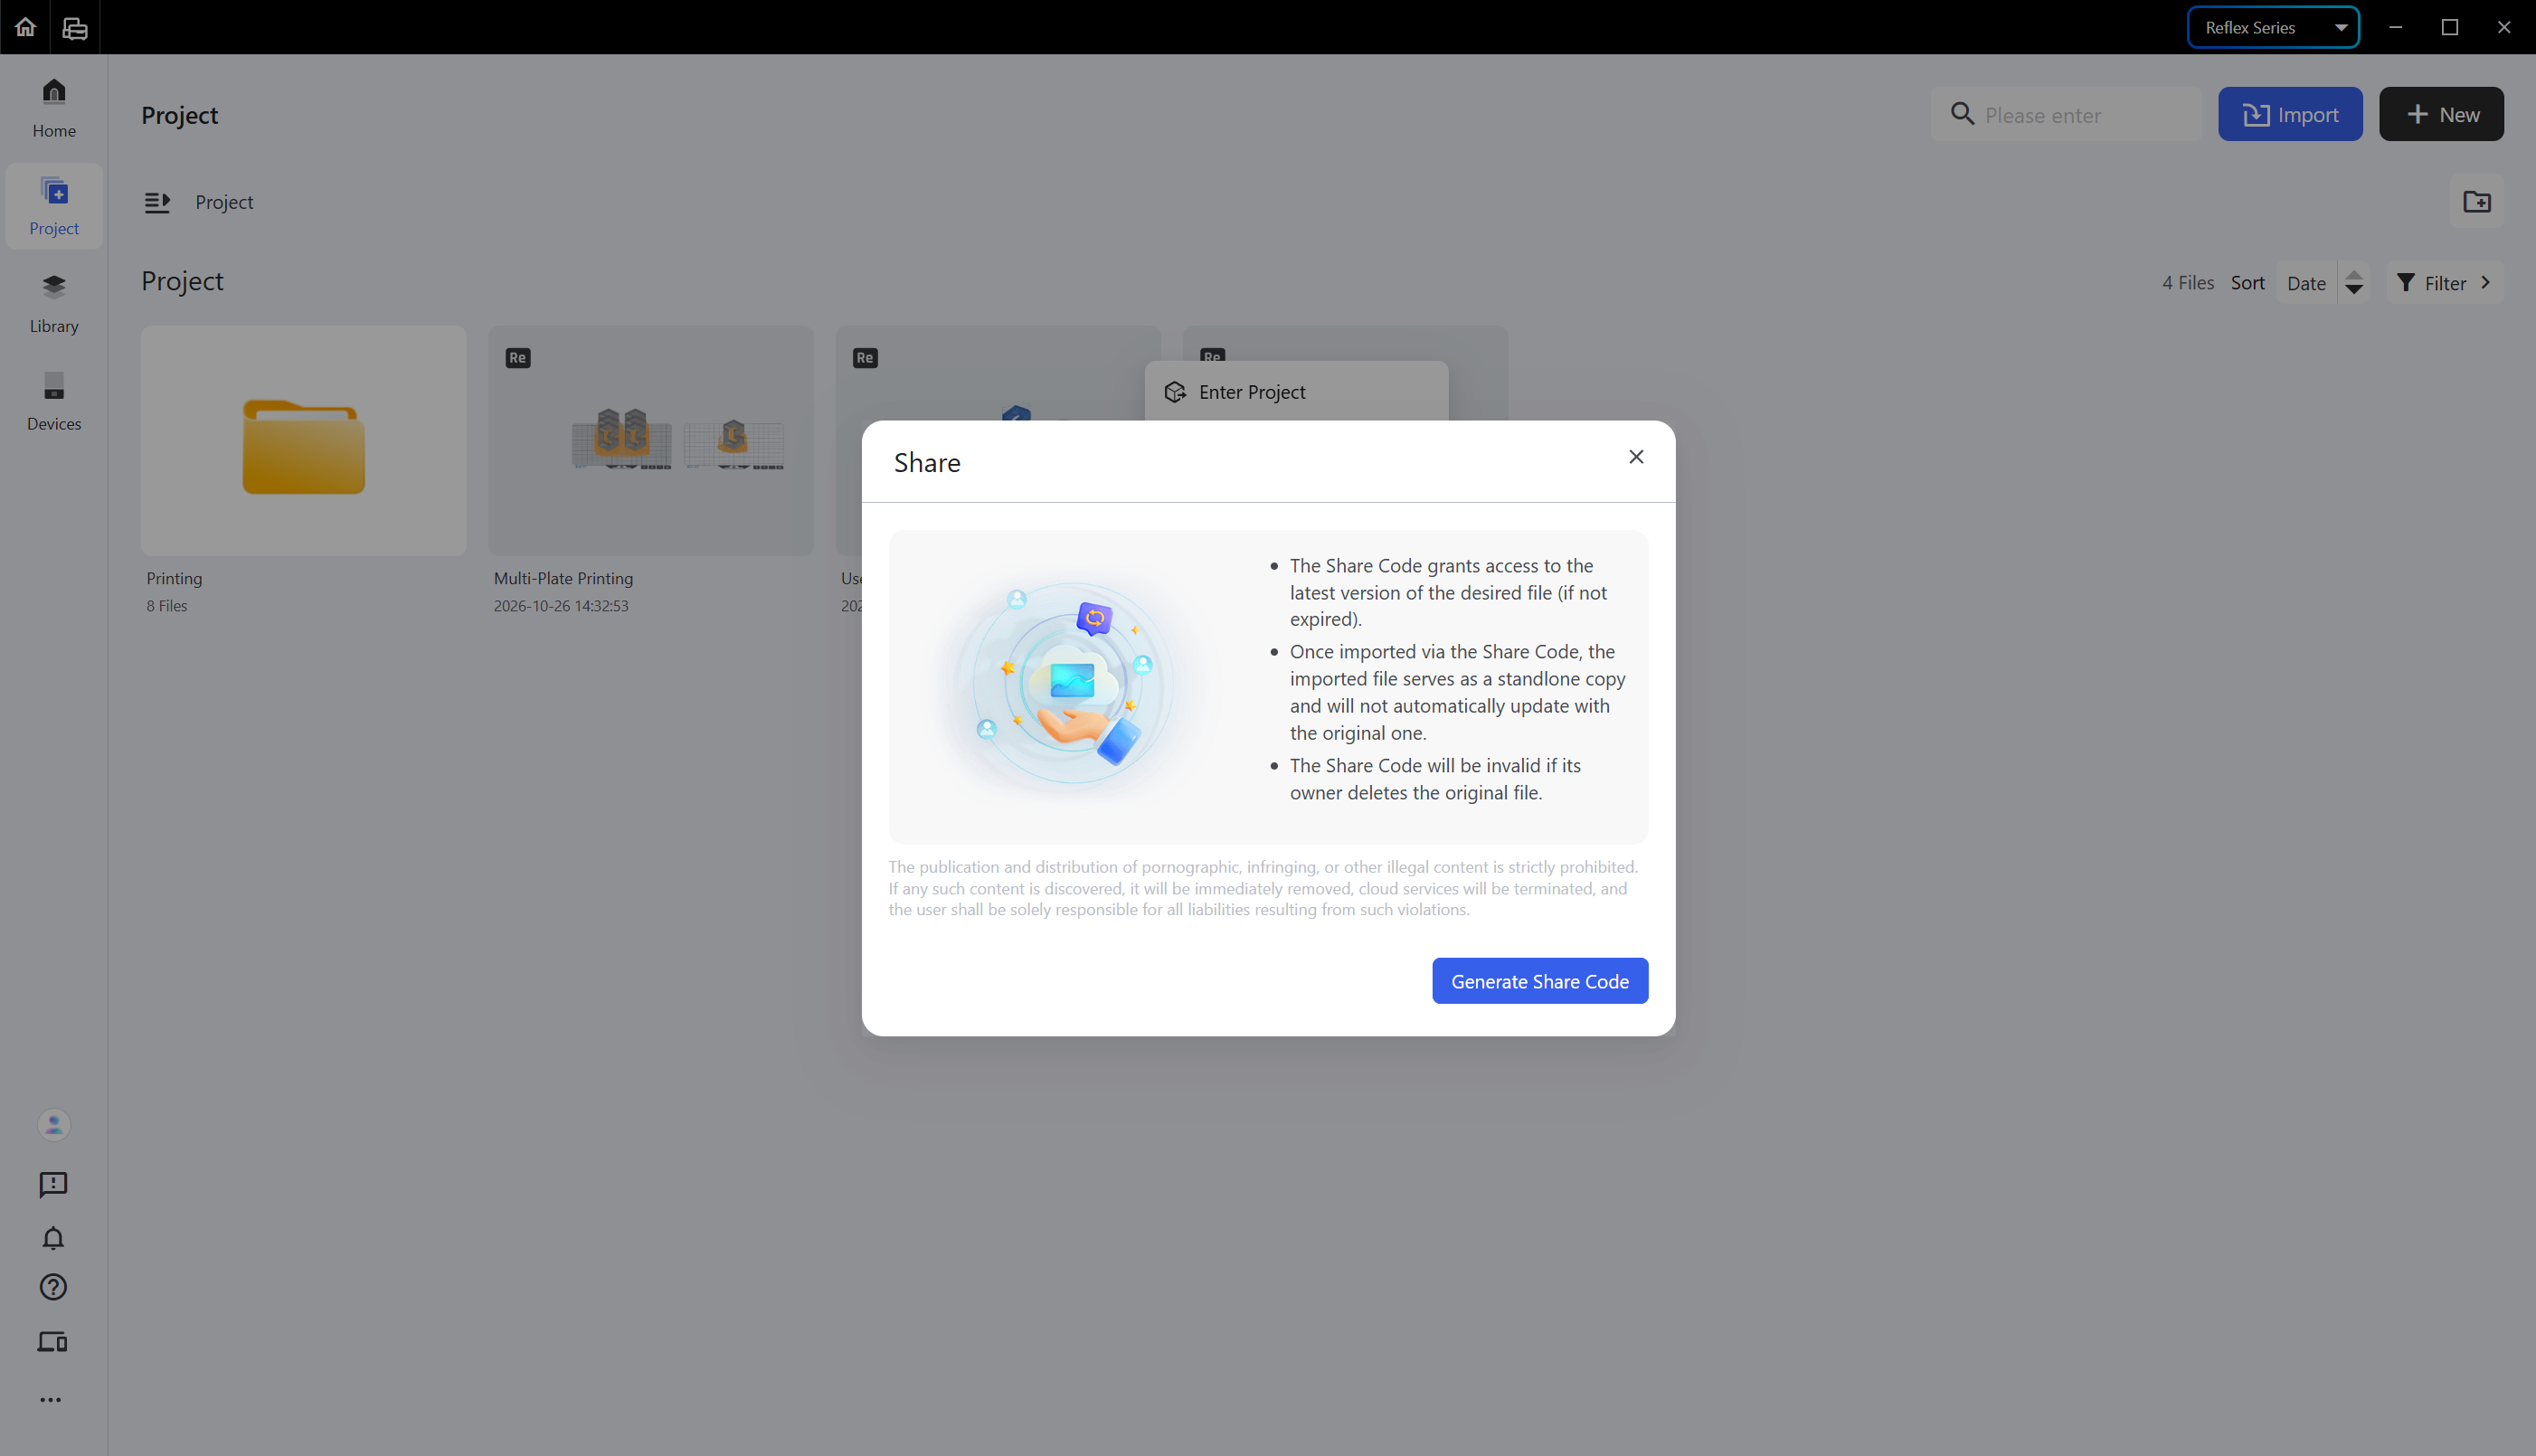
With the share code, the recipient can get the latest version of the target file (within the validity period). For details, see From Share Code above.
Note:
- The imported file is an independent copy and will not be updated along with the original file;
- Deleting the file by its owner will invalidate the share code;
- Publishing and spreading pornographic, infringing or other illegal content is strictly prohibited. Once found, the related content will be deleted immediately and the service will be stopped, and the user shall bear all the resulting liabilities independently.
¶ 3.1 Check Shared Projects
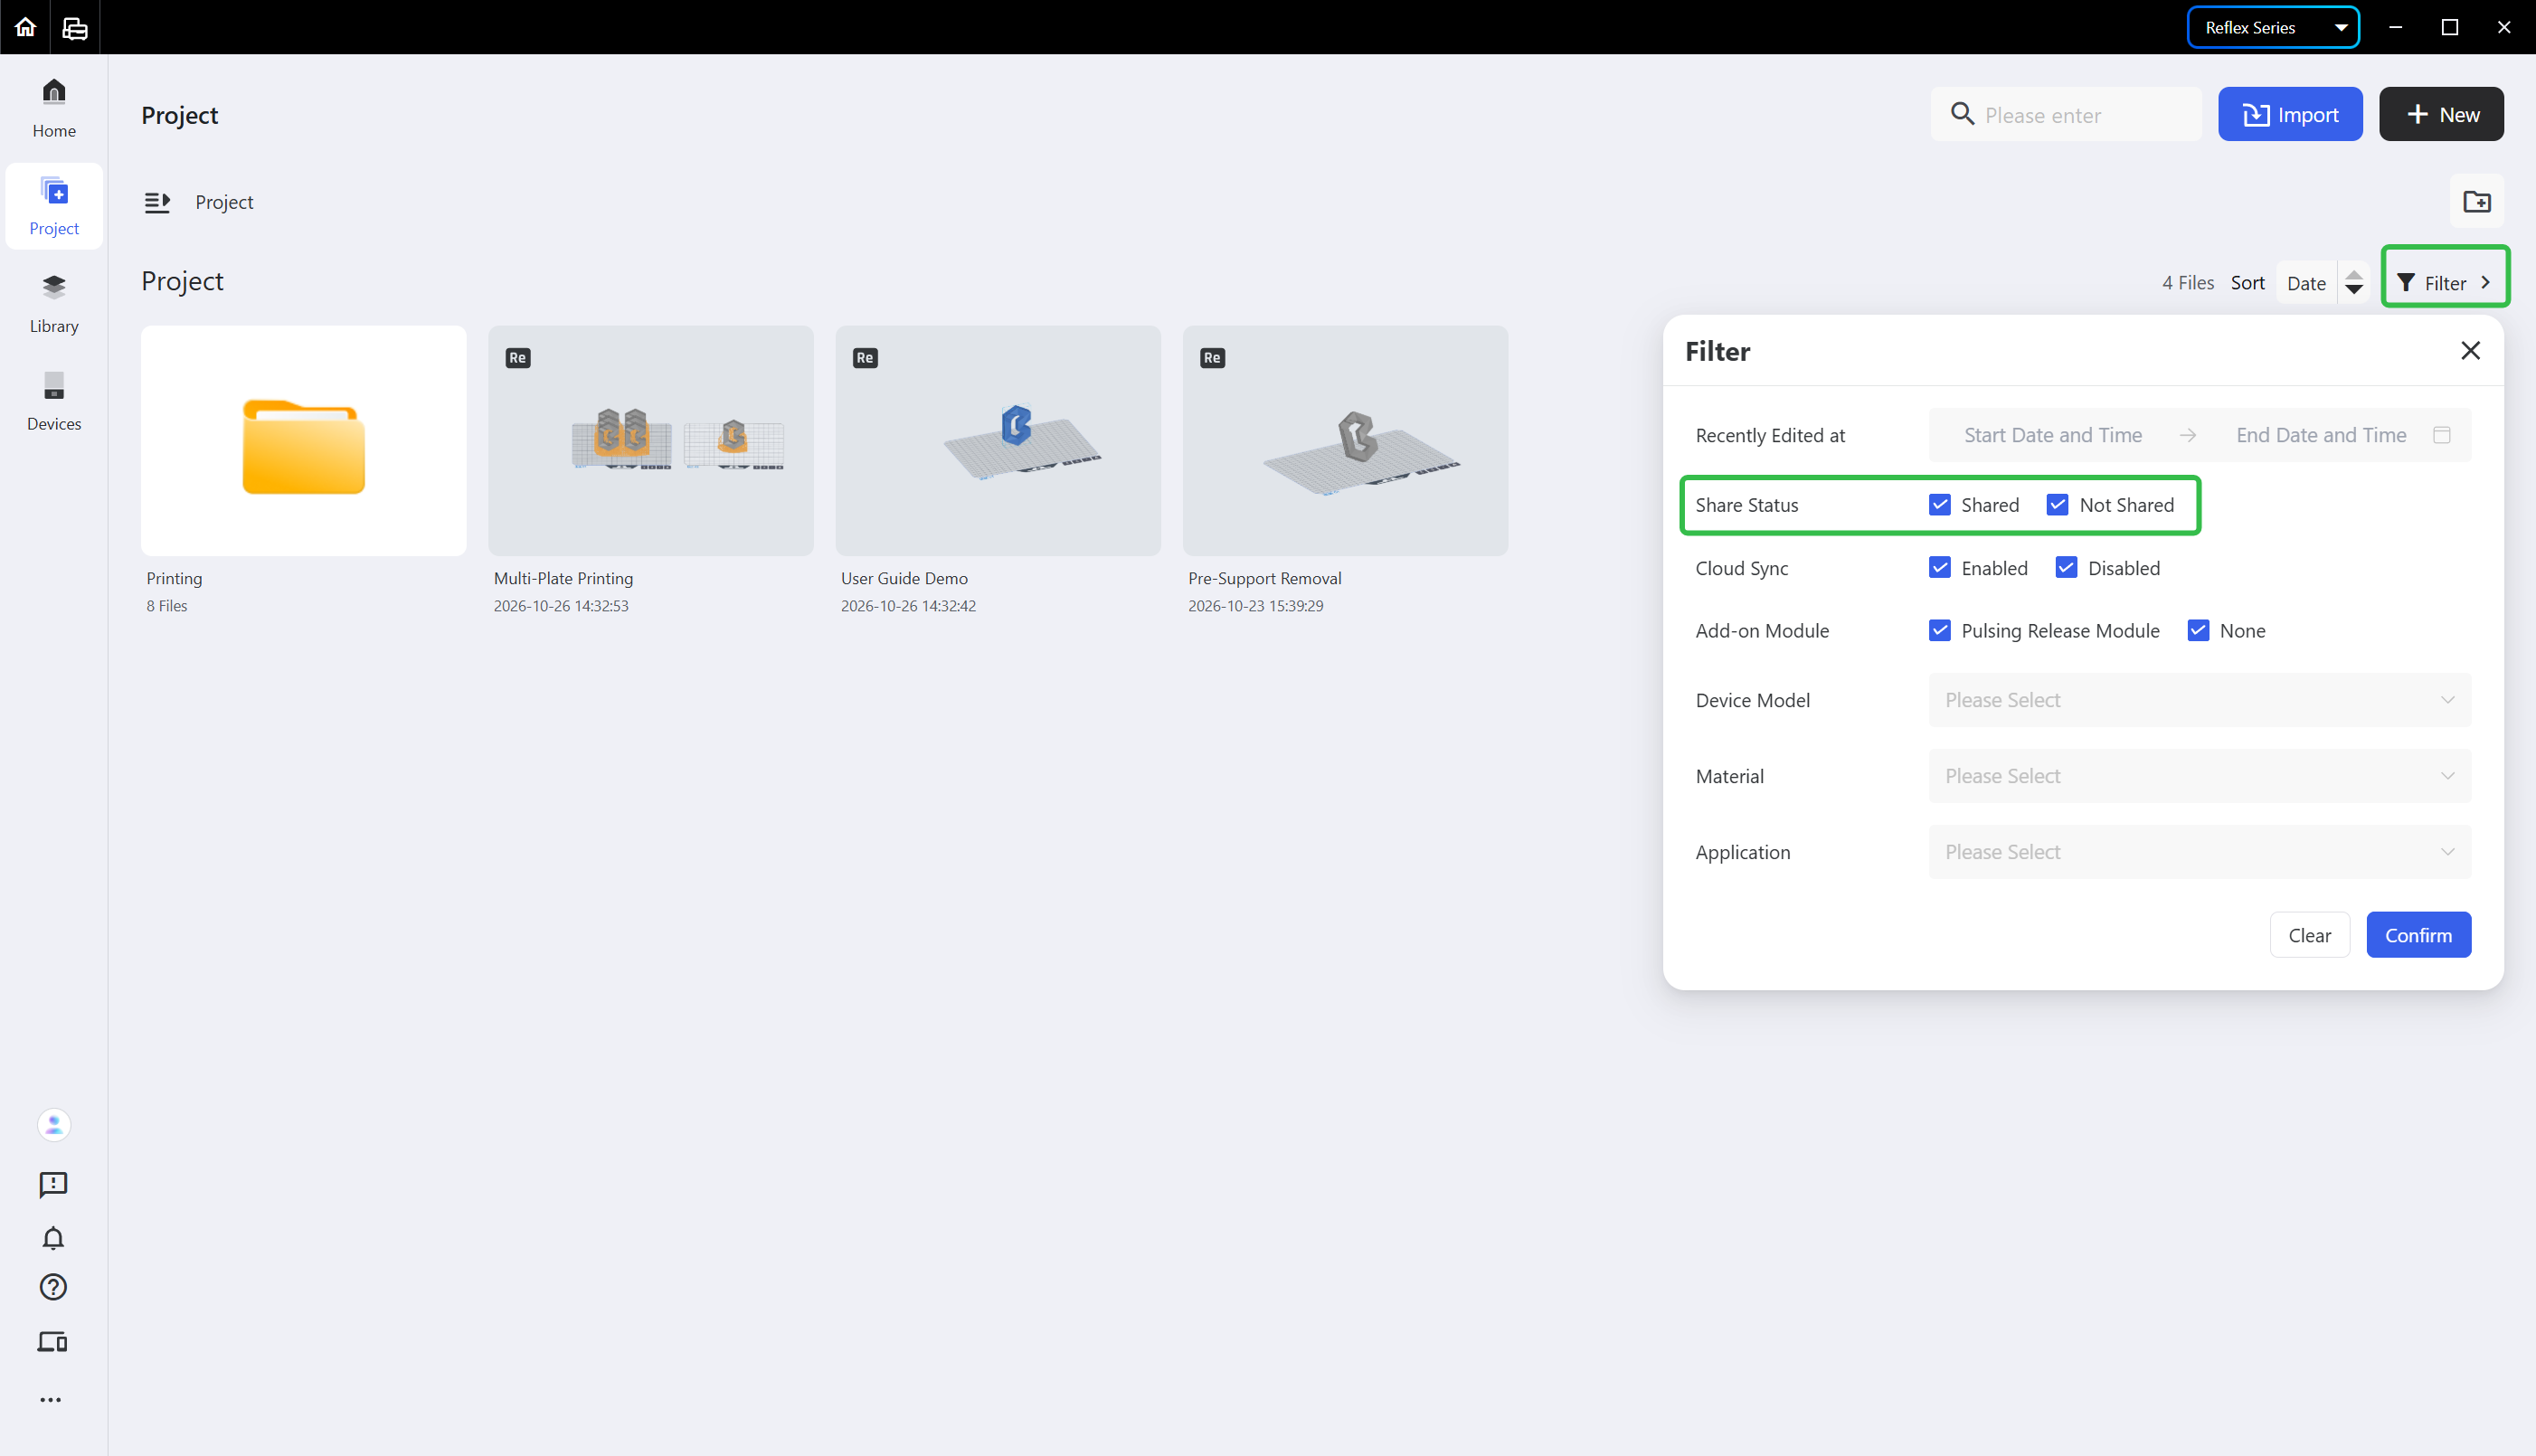
You may check shared projects by hitting <Filter> in the upper right corner of the project tab.
¶ 4. Manage Projects
You may star, move, rename and otherwise manage existing projects, so as to manage and process your designs more efficiently.
¶ 4.1 Quick Entry to Pre-processing
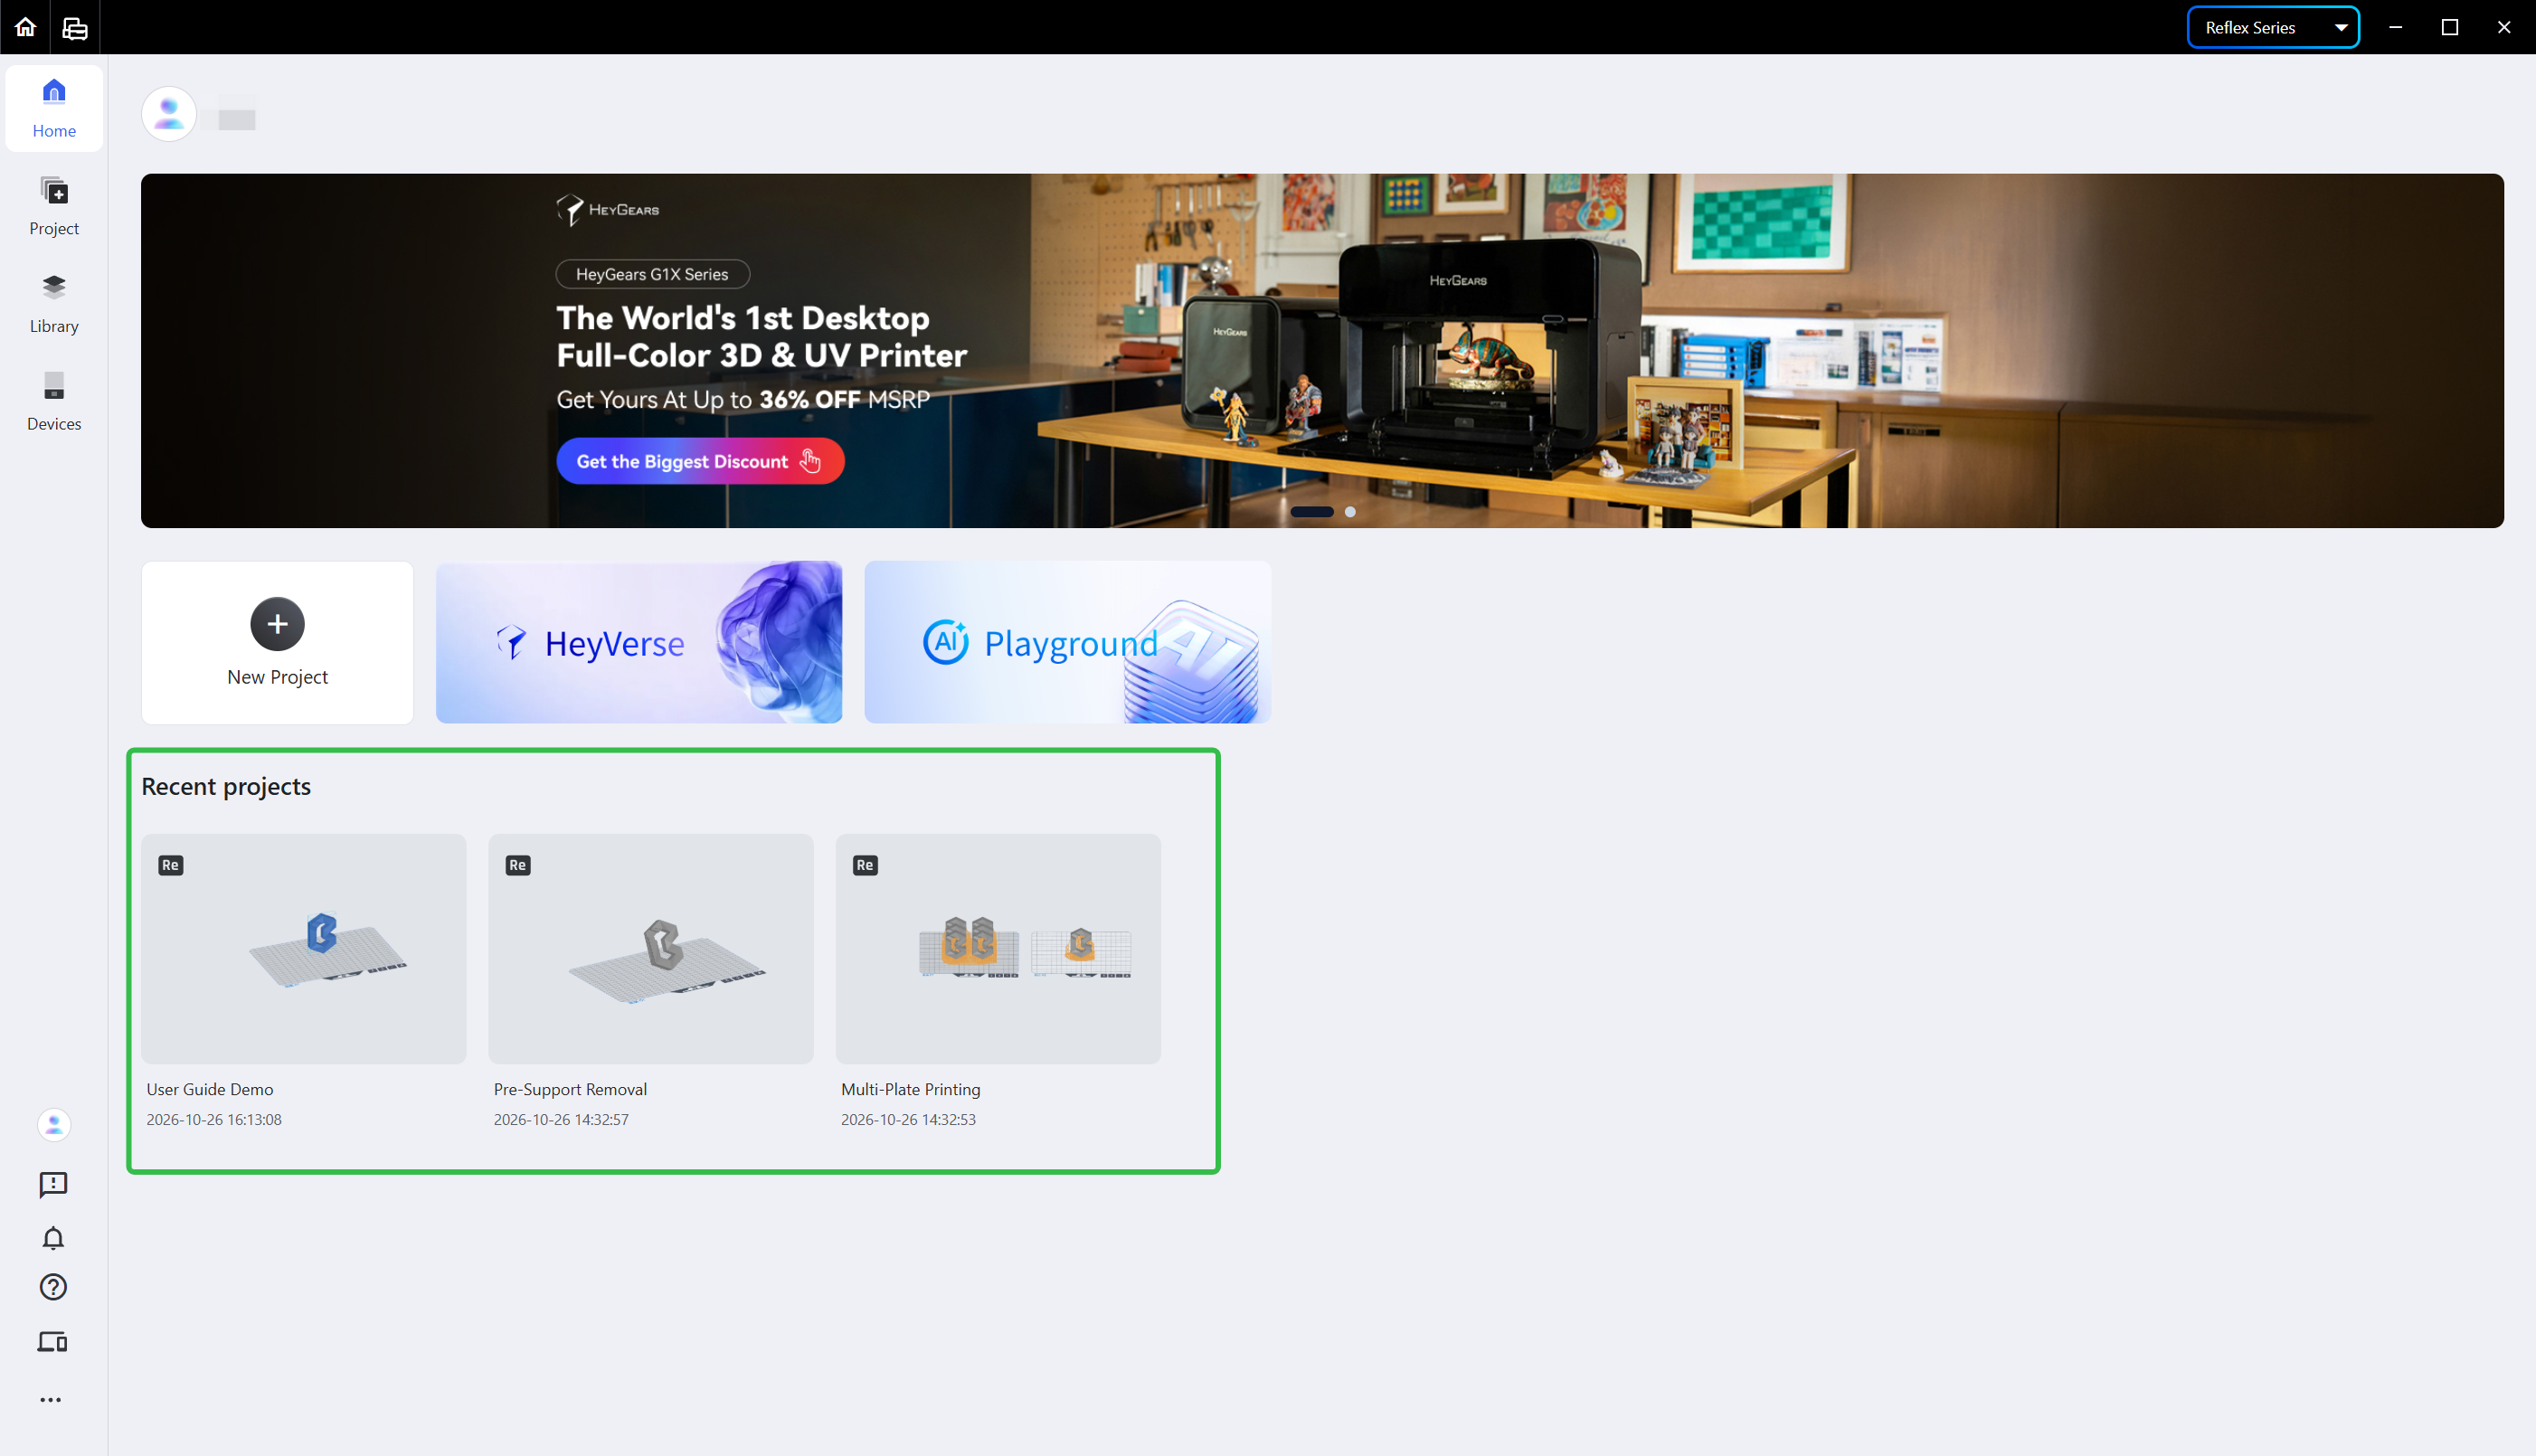
Recent projects are shown on the homepage; double-click a project card to enter the pre-processing interface.
¶ 4.2 Manage a Single Project
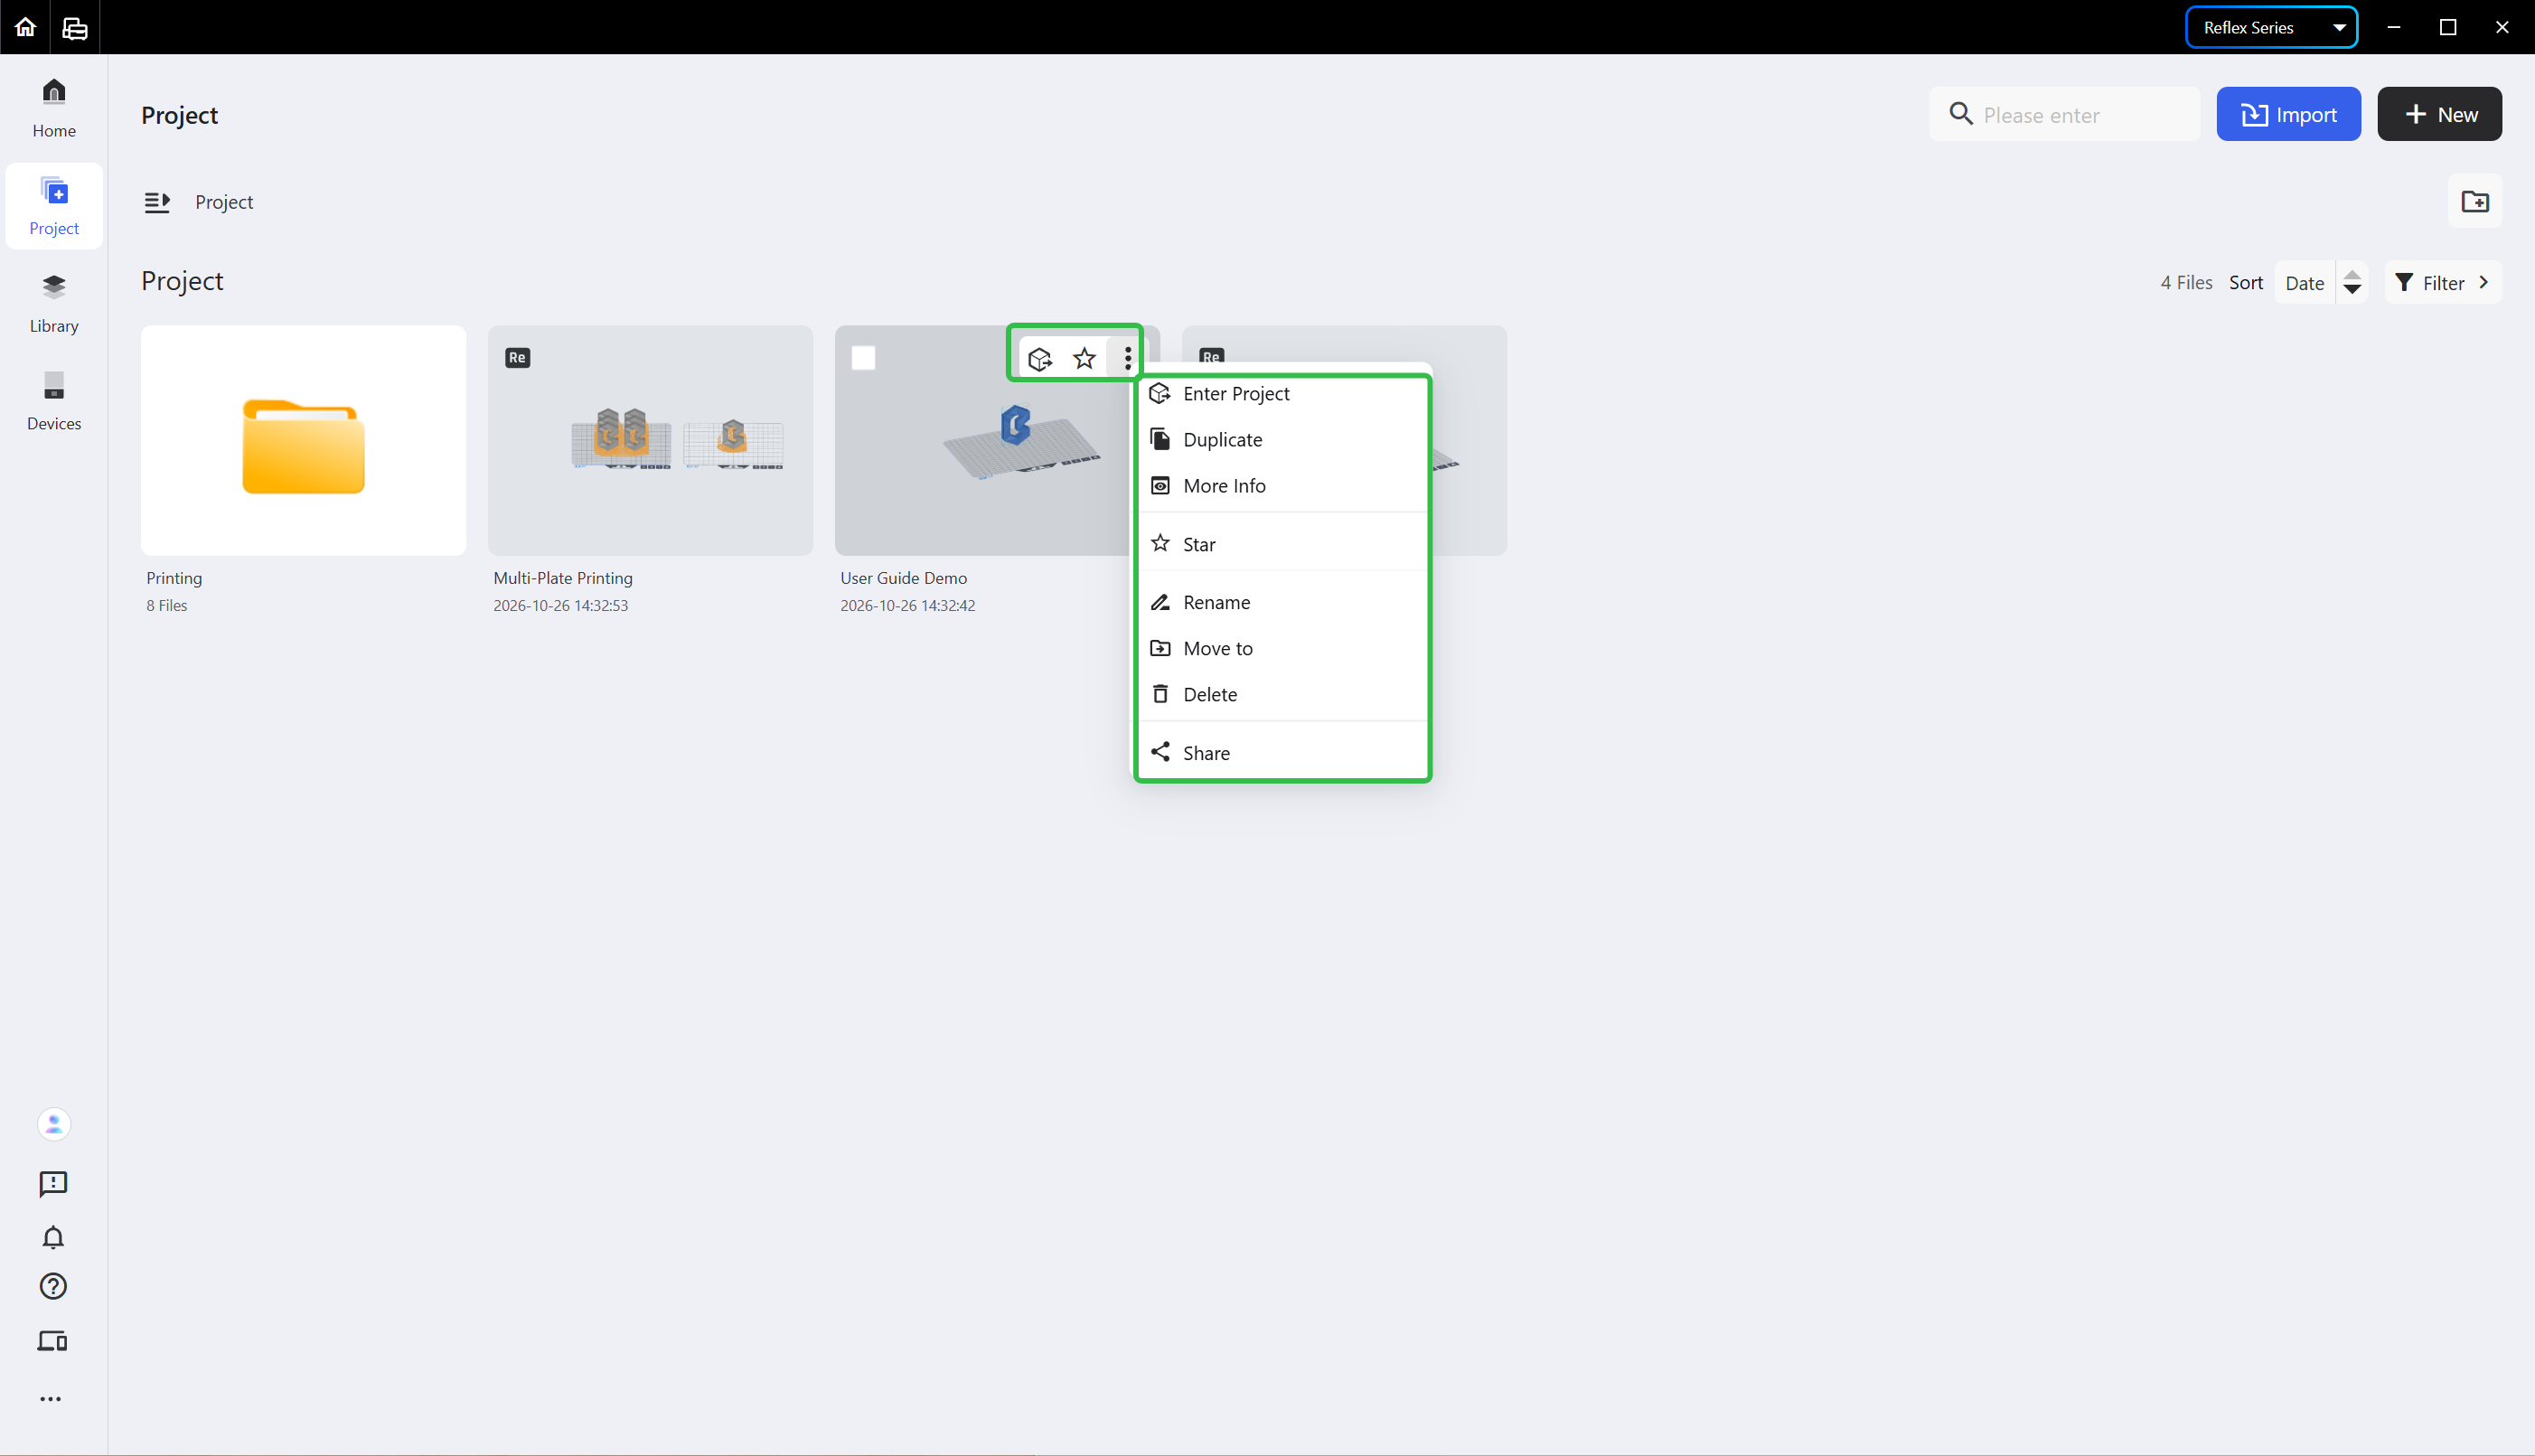
You may manage a single project by using its card on the project tab.
-
Select: click the box icon in the upper left corner of the project card to select the project.
-
Open:
- Click the first icon in the upper right corner of the project card to open the pre-processing interface.
- Click the ellipsis icon <...> in the upper right corner of the project card and choose <Enter Project>.
-
Duplicate: click the ellipsis icon <...> in the upper right corner of the project card and choose <Duplicate>.
-
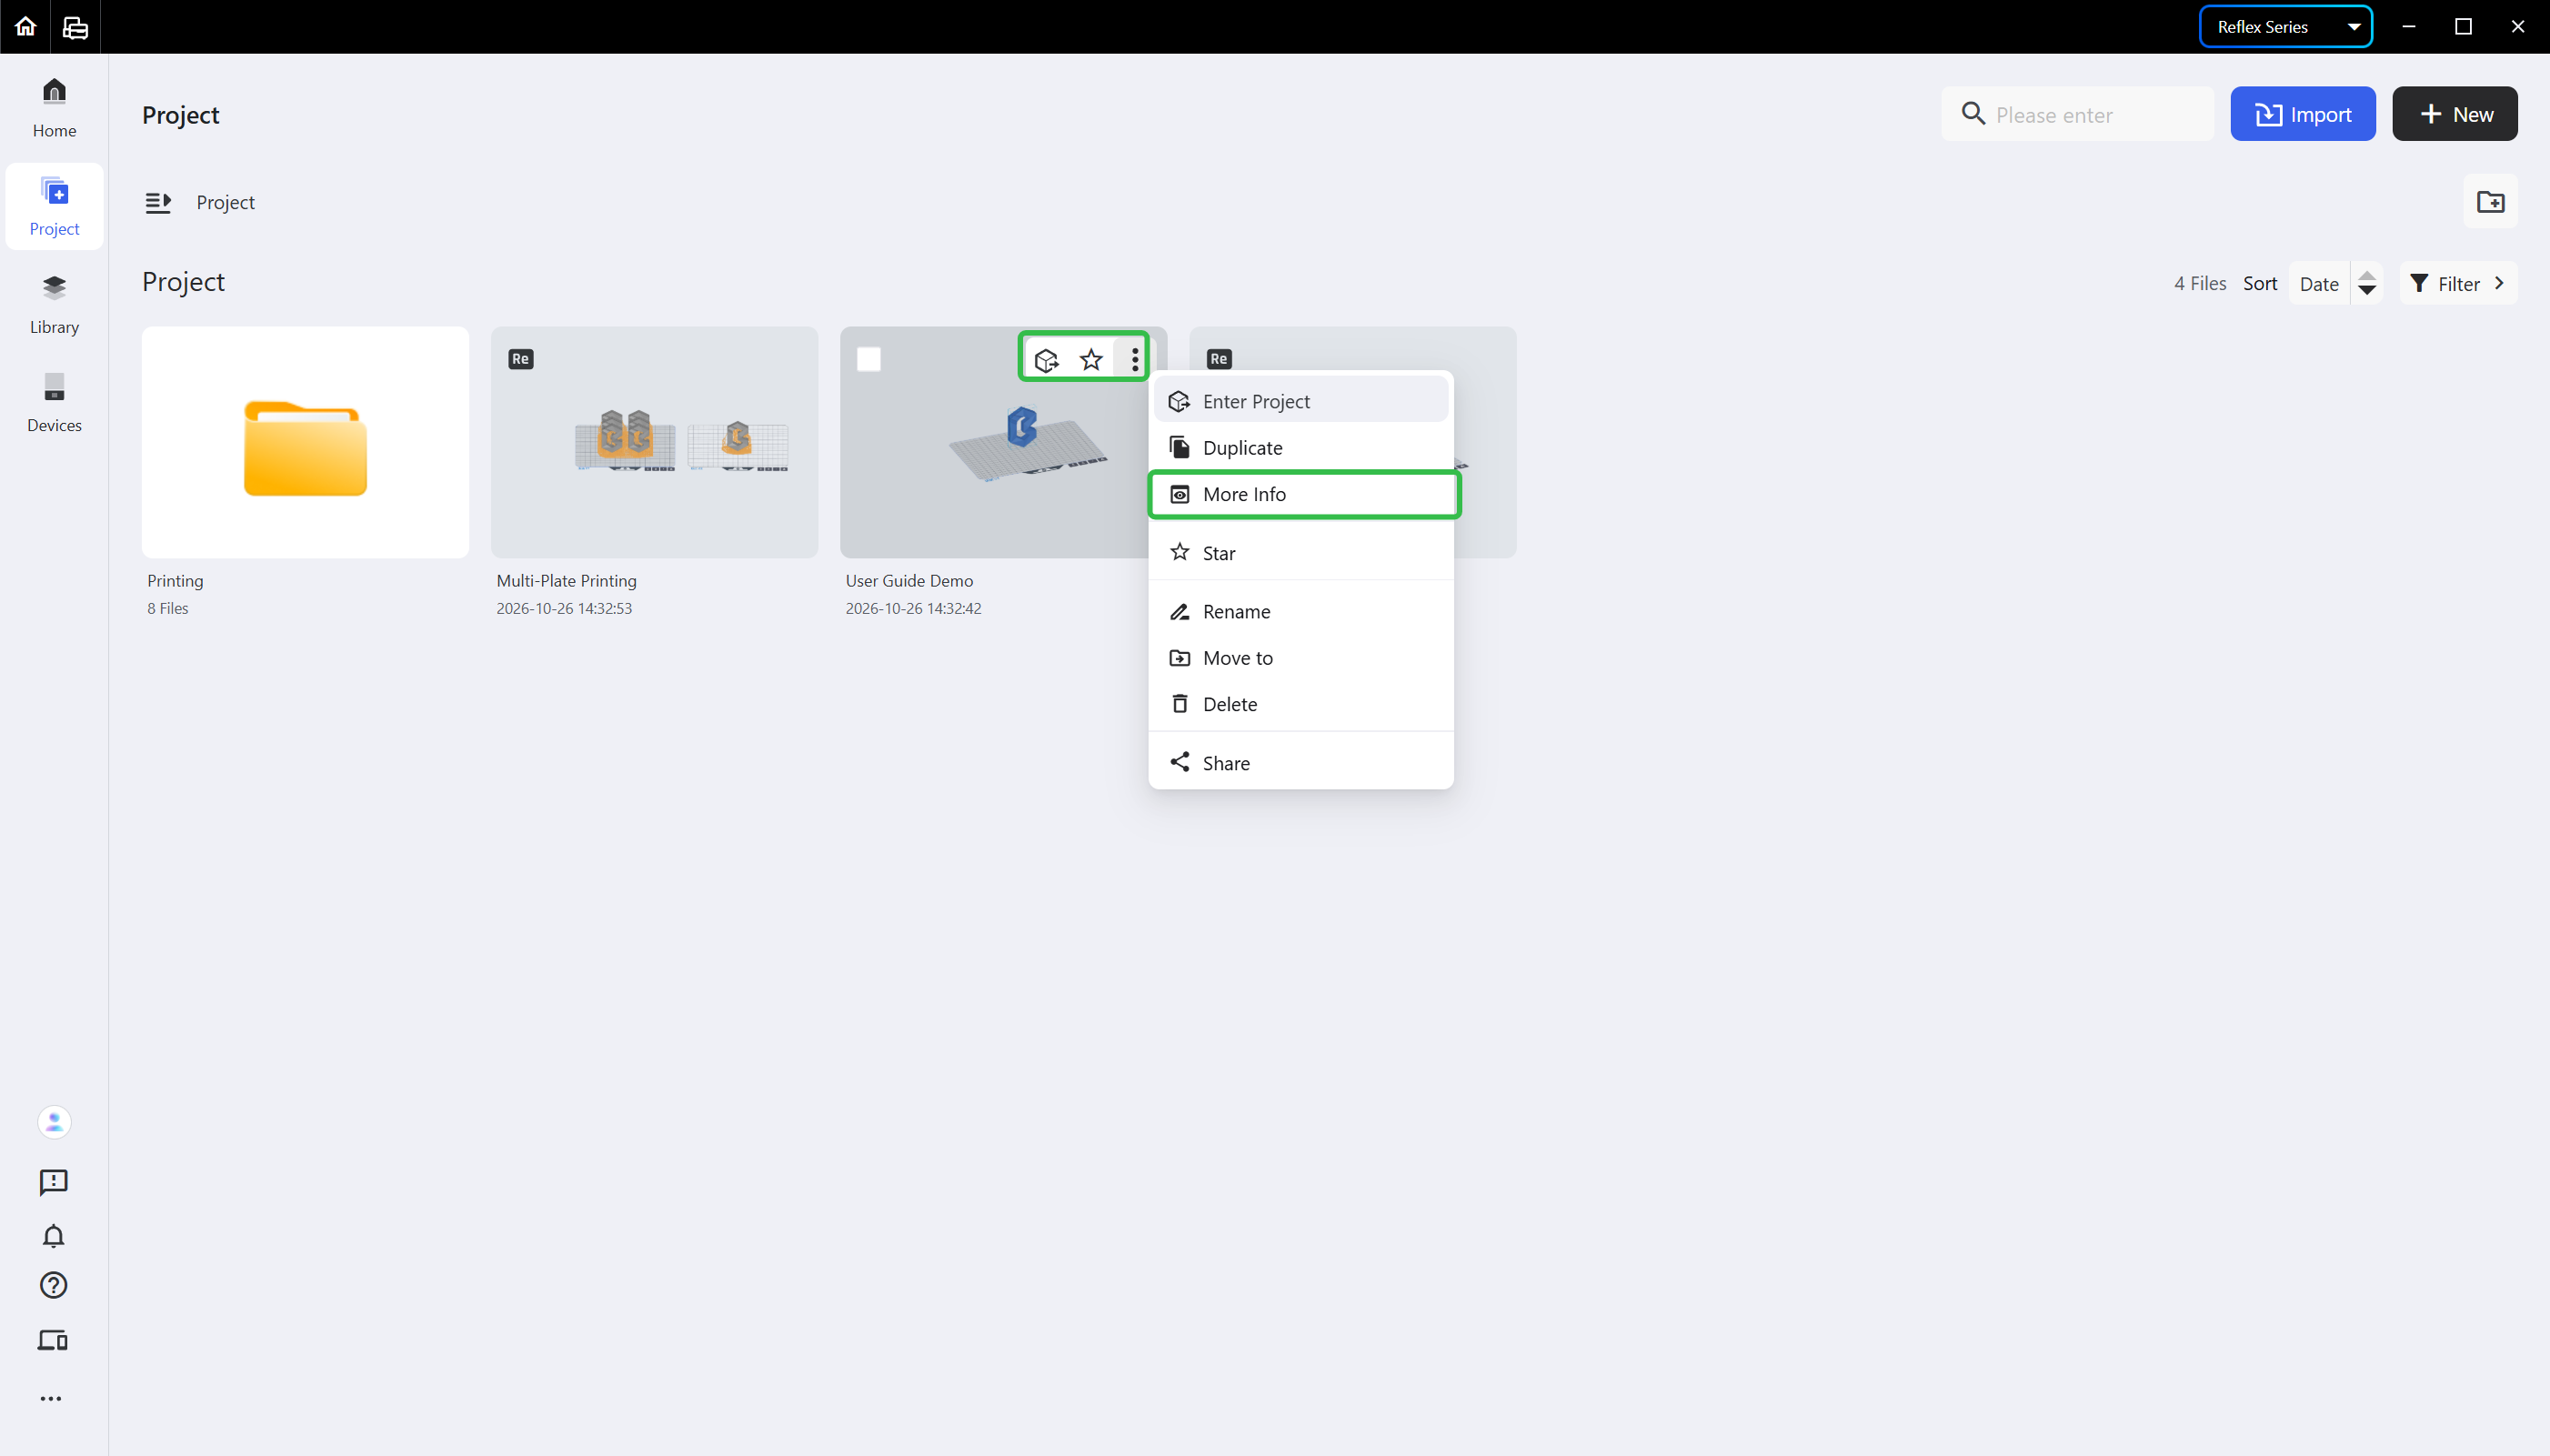
View Project Info: click the ellipsis icon <...> in the upper right corner of the project card and choose <More Info> to check the last modified time and other project information.
-
Star: click the star icon in the upper right corner of the project card, or click the third icon in the upper right corner and choose <Star>.
-
Rename: click the ellipsis icon <...> in the upper right corner of the project card and choose <Rename>.
-
Move: click the ellipsis icon <...> in the upper right corner of the project card and choose <Move Into> to move the project into or out of a folder.
-
Delete: click the ellipsis icon <...> in the upper right corner of the project card and choose <Delete>.
-
Share: click the ellipsis icon <...> in the upper right corner of the project card and choose <Share>.
¶ 4.3 Manage Folders
You may create folders to manage multiple projects.
Click the folder icon in the upper right corner of the project tab to create a folder.
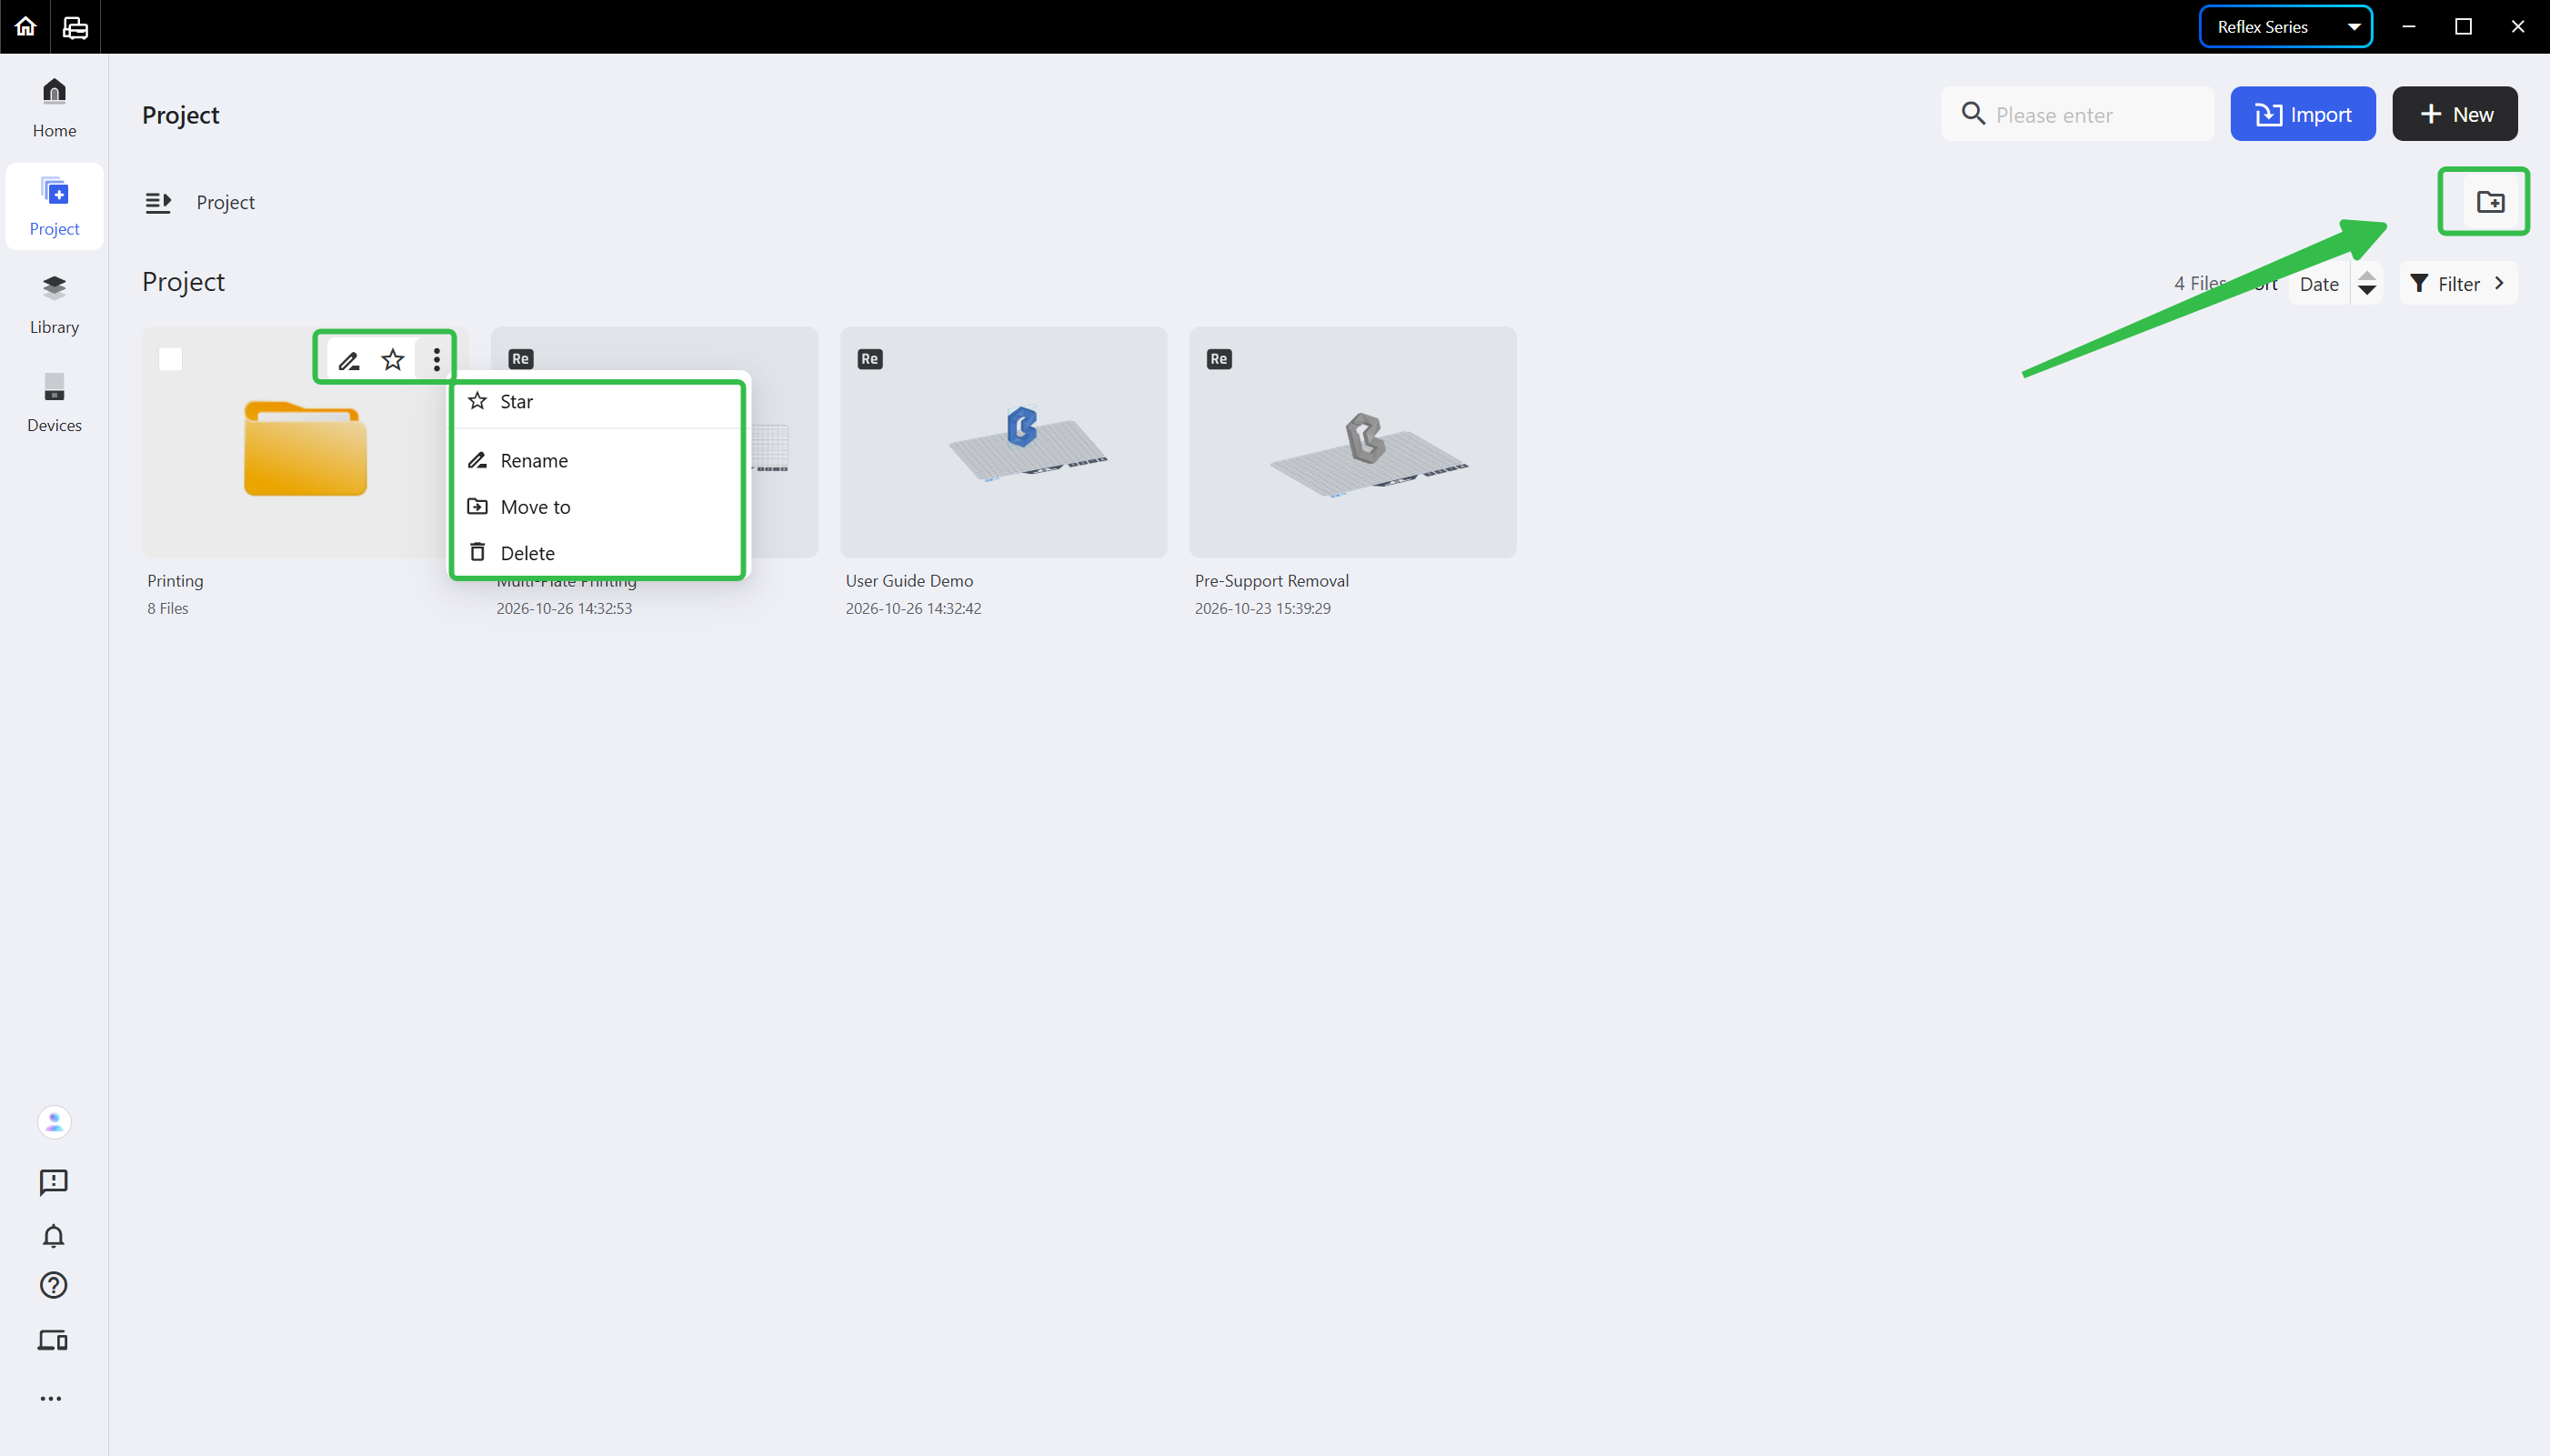
Once created, a folder can be renamed, moved, deleted and otherwise managed by using its card.
¶ 4.4 Manage Projects in Bulk
Drag the selected projects directly into the corresponding folder.
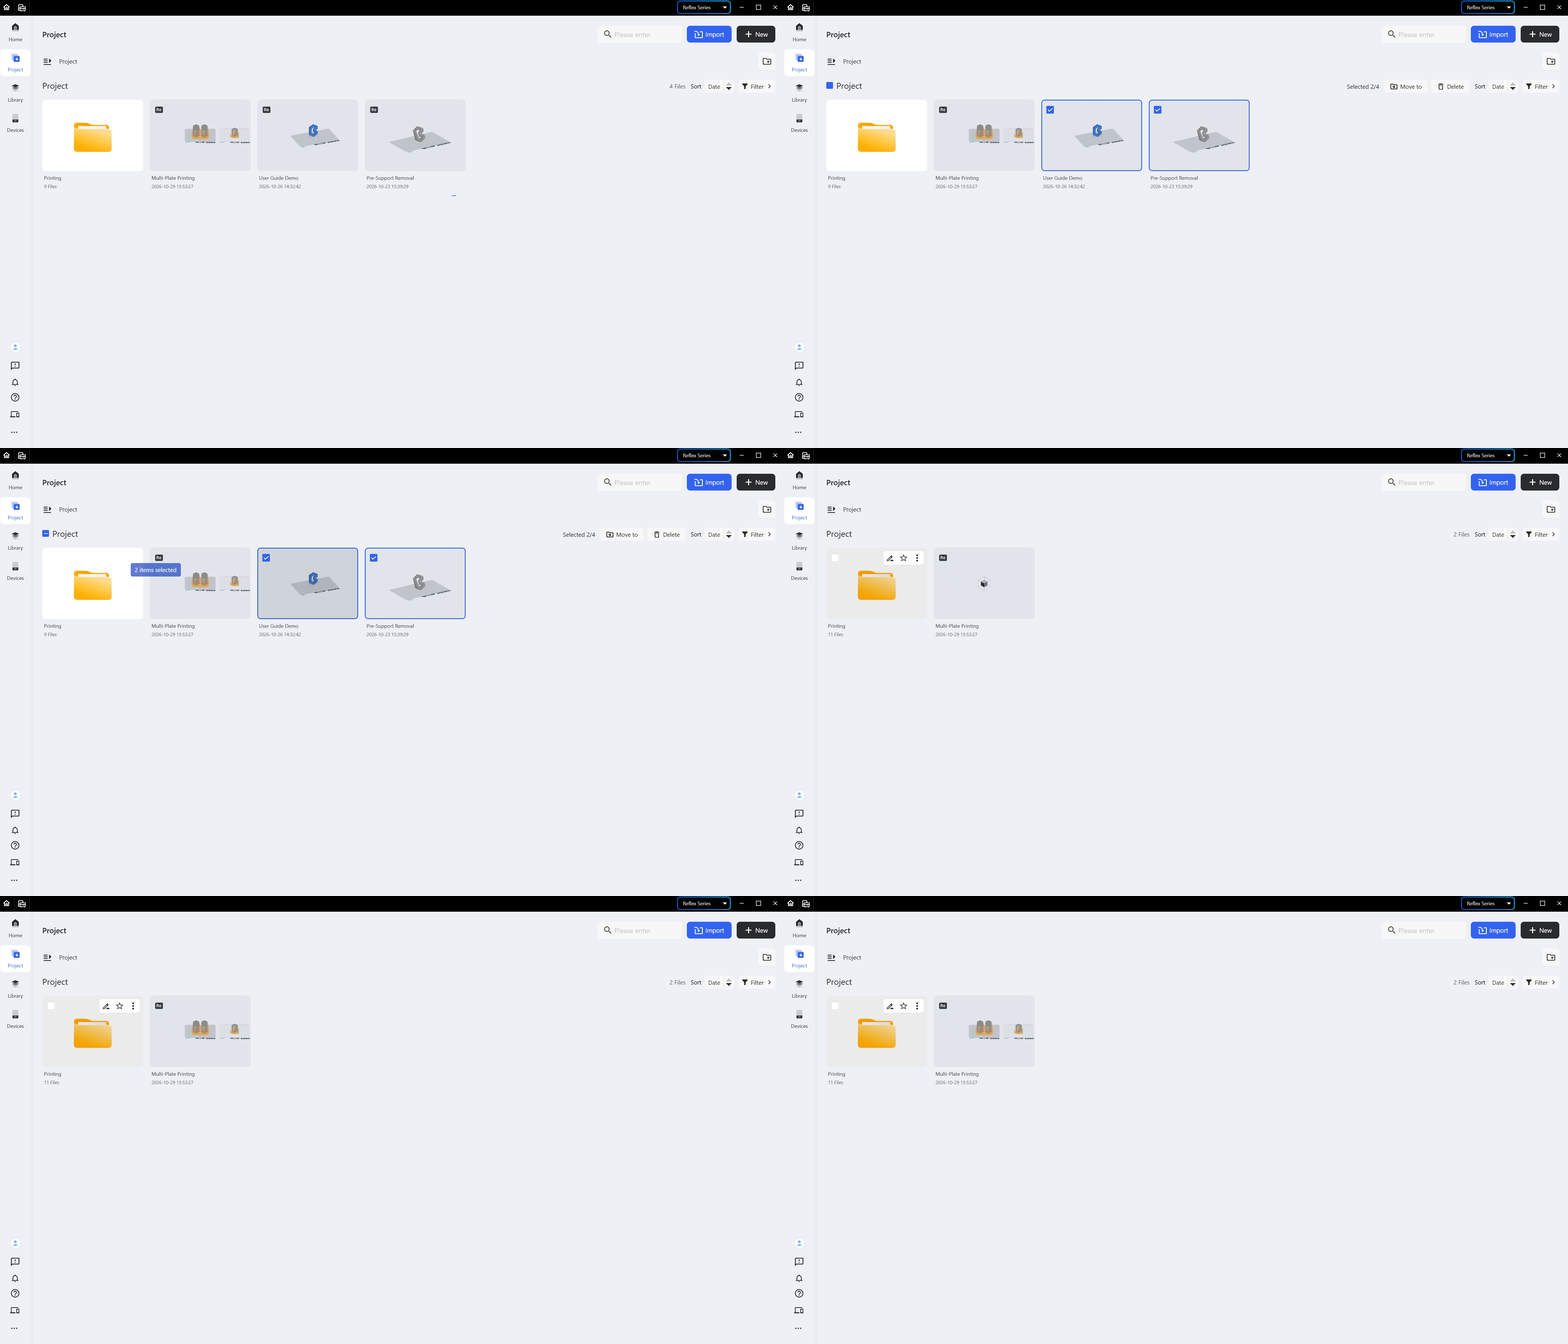
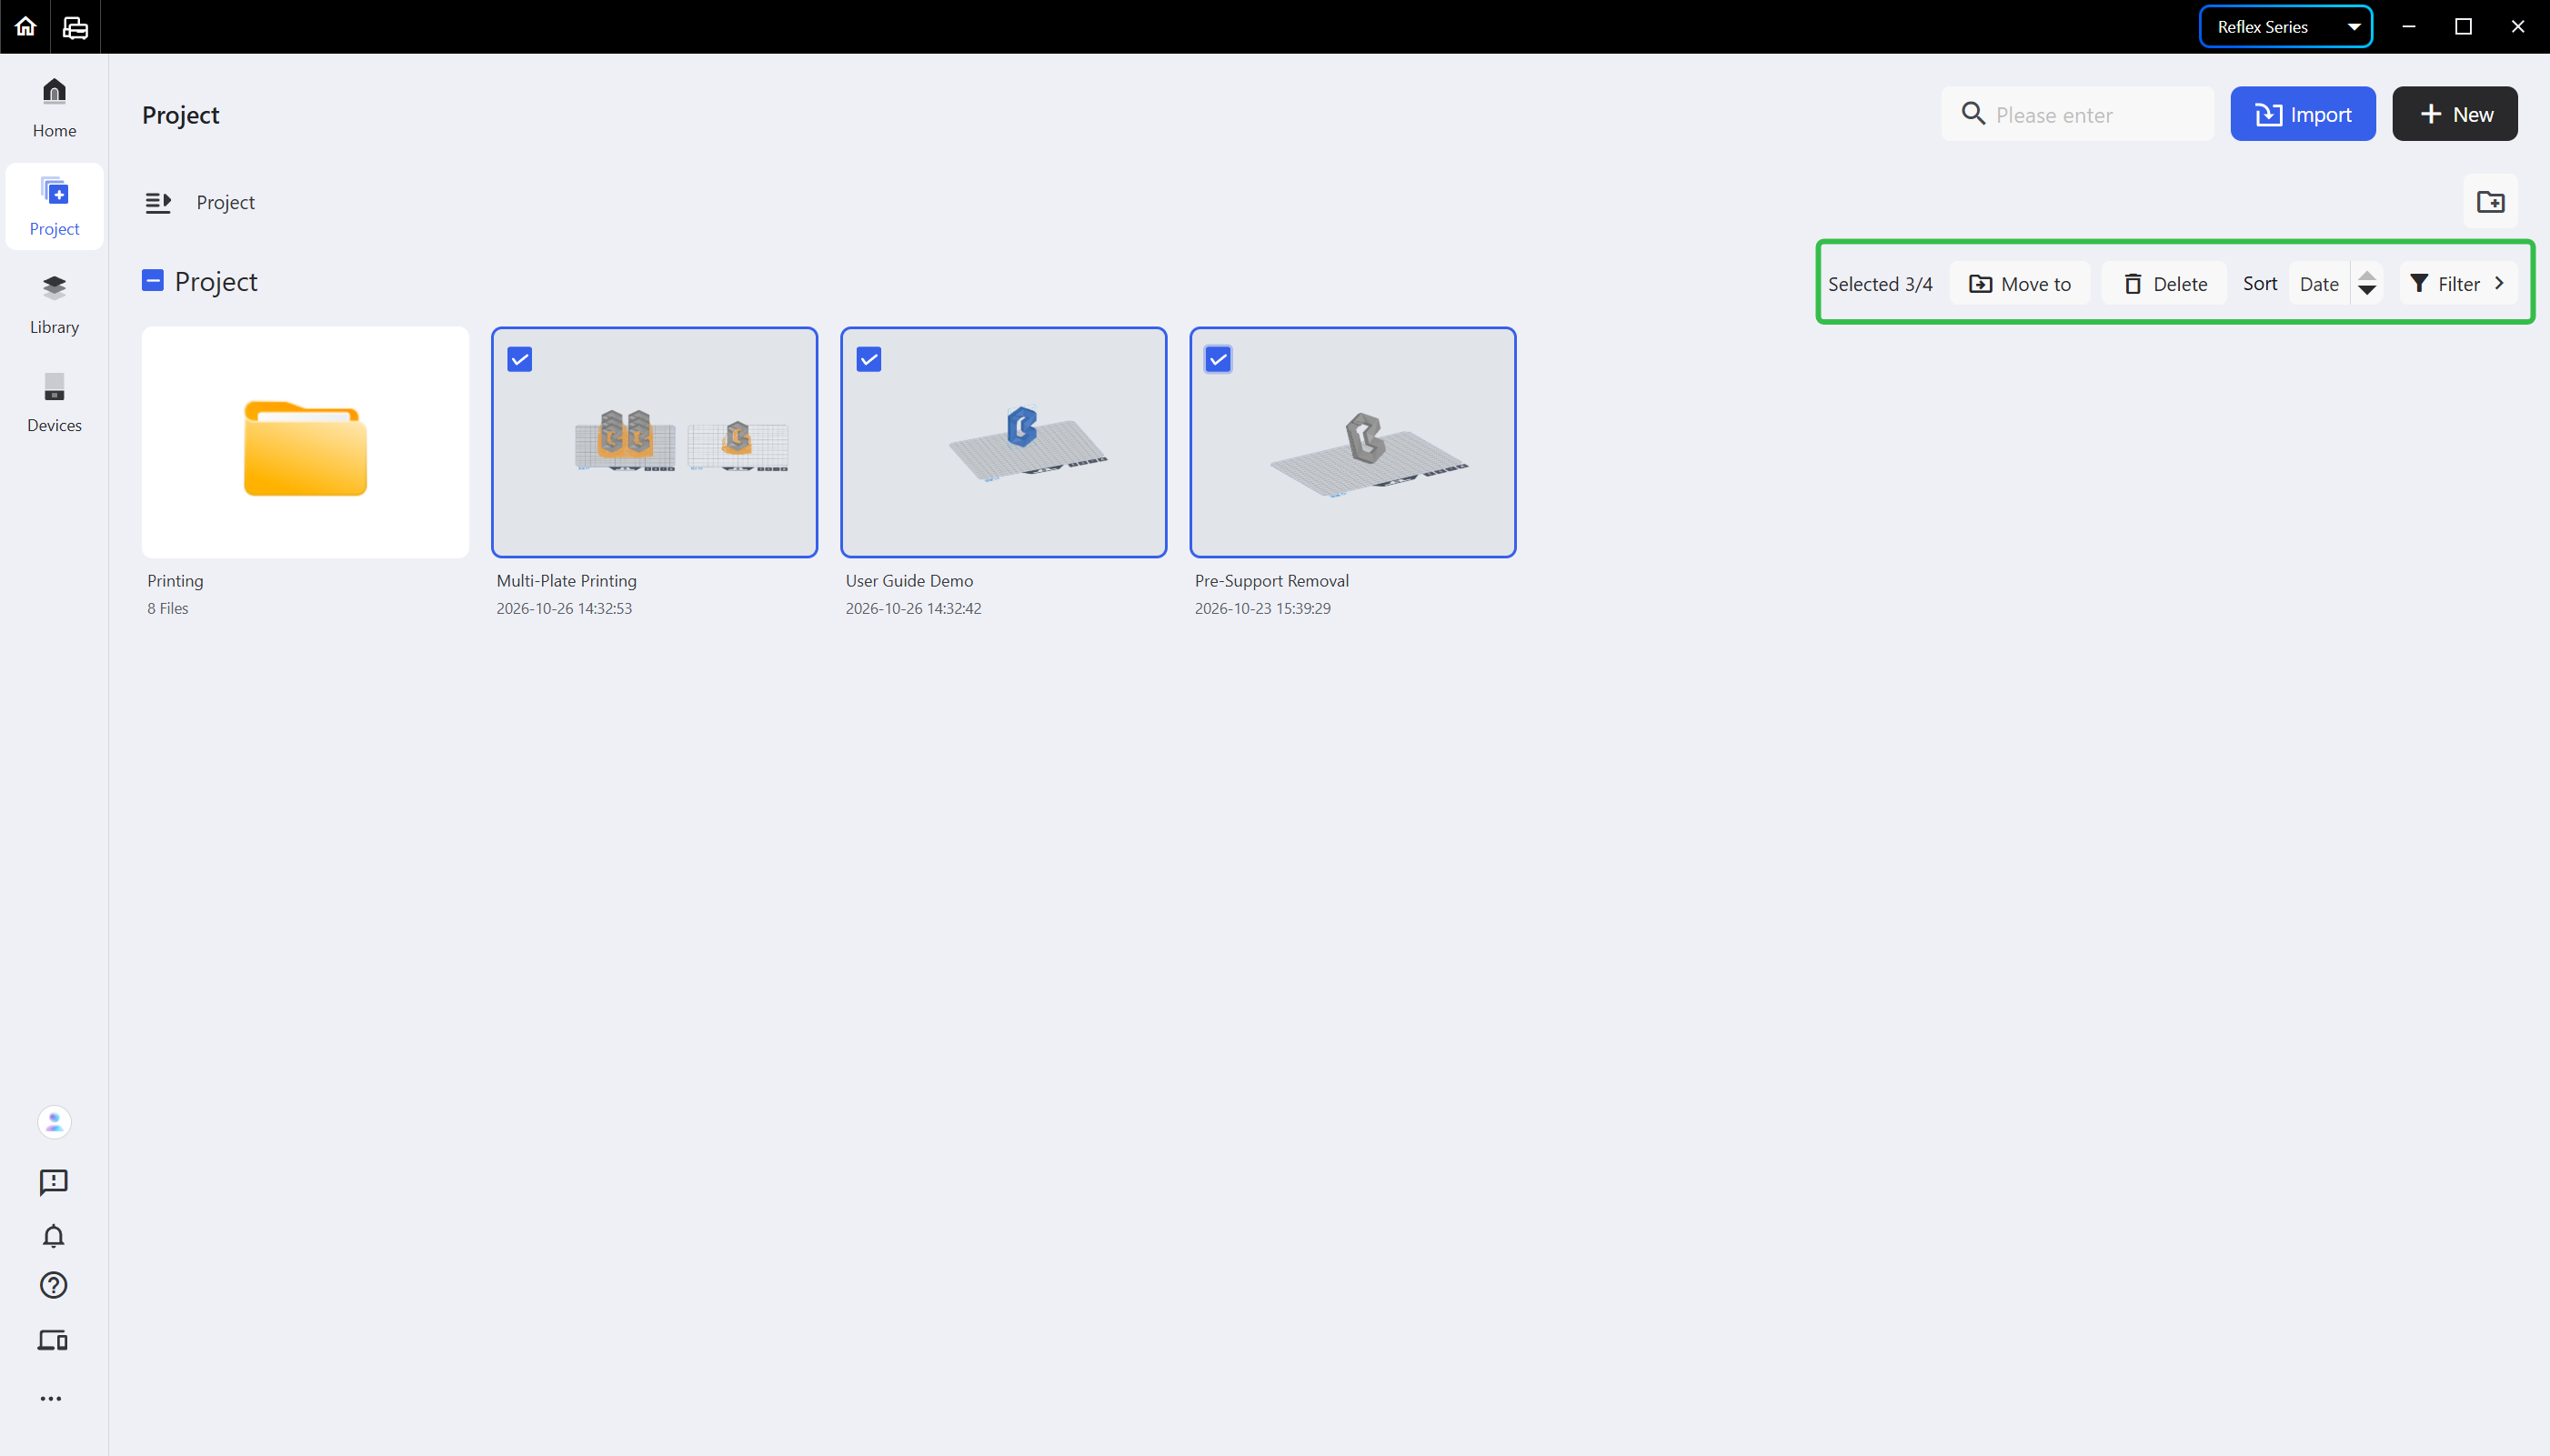
Click the icons in the upper right corner to move, delete and otherwise operate them in bulk.
¶ Update History
| Version | Date |
|---|---|
| 1.0 | 2026-10-26 |