¶ I. DESIGN SOURCE
¶ Design Principles
| Design Principles | Proposed Design Solution | Issues Avoided |
| Progressive change in shape | 1. Avoid sharp edges or abrupt transitions between perpendicular sides. 2. Minimize abrupt changes in cross-sections |
1. Sharp edges cannot be fully sanded flat. 2. Abrupt changes can lead to uneven stress during printing, resulting in lines. |
| Consistent wall thickness | The wall thickness should be as consistent as possible. | Inconsistent thickness will lead to inconsistent light refraction, resulting in ripples or cloudy areas. |
| Hollowing | Avoid large solid parts, and shell parts if possible. | Solid parts will lead to significantly more bubbles generated inside and thus the printed item not meeting transparency requirements. |
| Drain holes | Avoid structures with blind holes and vacuum inner cavities. | Resin in blind holes and vacuum inner cavities is challenging to clean, which affects transparency. |
| Self-supporting | Reasonably utilize the self-supporting characteristic of 3D printing to reduce the number of required supports. | Excessive supports significantly increase the post-processing area and time. |
| Washability | The number and design of gaps, texture lines and holes should be proper, which may increase the efficiency of washing. | Resin in unreasonable gaps, textures, and holes is difficult to clean, increasing the time required for post-processing and making it impossible to thoroughly clean. |
| Internal polishing | Not recommended. If necessary, please leave a larger internal space and openings, as well as small features. | Difficult to polish/spray. |
The software design details can be found in the HeyGears Transparent Solution Design Principles
¶ Component Combination
One advantage of 3D printing is that it significantly increases the flexibility in design compared to conventional manufacturing methods and enables the production of countless shapes and functions that conventional manufacturing cannot achieve, completely changing the assembly of components. Therefore, when a model needs to be assembled by multiple components, you can try to combine them into fewer components during design, which will reduce assembly time and difficulty.
¶ Topology Optimization
Topology optimization can make printed parts lighter, giving a more sci-fi vibe, but it also increases the difficulty of post-processing to a certain extent.
¶ Component Assembly
For two components that need to be assembled together through clearance fit, it is recommended to orient their assembly joints in the same direction for printing, to achieve the best assembly effect. The clearance fit is recommended to be greater than 0.1mm to avoid scratching the inner wall.
¶ II. DESIGN REQUIREMENTS BASED ON MATERIALS
¶ Transparent Engineering Materials
¶ Material Information
Modeling PAT10 is a highly transparent material with a low price. It features excellent construction performance and the ability of fast printing. It can print complex and exquisite models with its stunning ability of appearance reproduction. Its print parts are easy to post-process (sanding and polishing, etc.) as it has a proper viscosity and little odor and is fast to be cured. Thanks to its proper toughness, its print parts do not easily crack even if falling from desktop.
¶ Recommendations on Applications
1. Transparent figure parts;
2. Prototyping validation of consumer electronics and so;
3. Transparent parts in end applications;
4. Transparent applications with demands in long-term anti-yellowing.
¶ DESIGN REQUIREMENTS BASED ON MATERIALS
¶ Transparent Engineering Materials
¶ Transparent Modeling Materials
¶ III. DATA PREPARATION
¶ Detailed Instructions
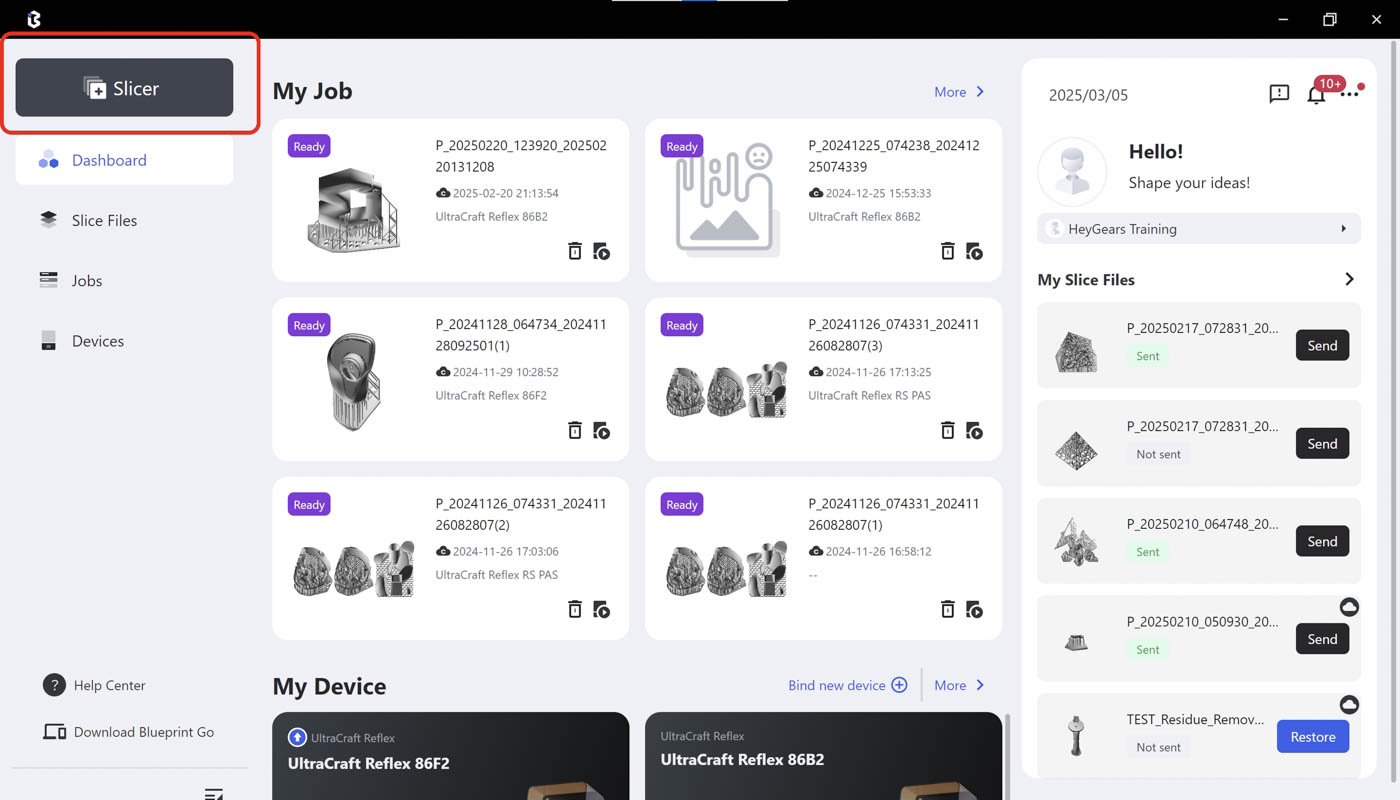
¶ Quick Guide
Note: Select the resin tank according to the actual situation. If you use the Pulsing Release Module + Pulsing Release Resin Tank, select Pulsing Release Resin Tank during slicing on Blueprint Studio (BPS). Default support parameters are generally more refined than those for a regular resin tank, resulting in lower material consumption and higher printing success rate.
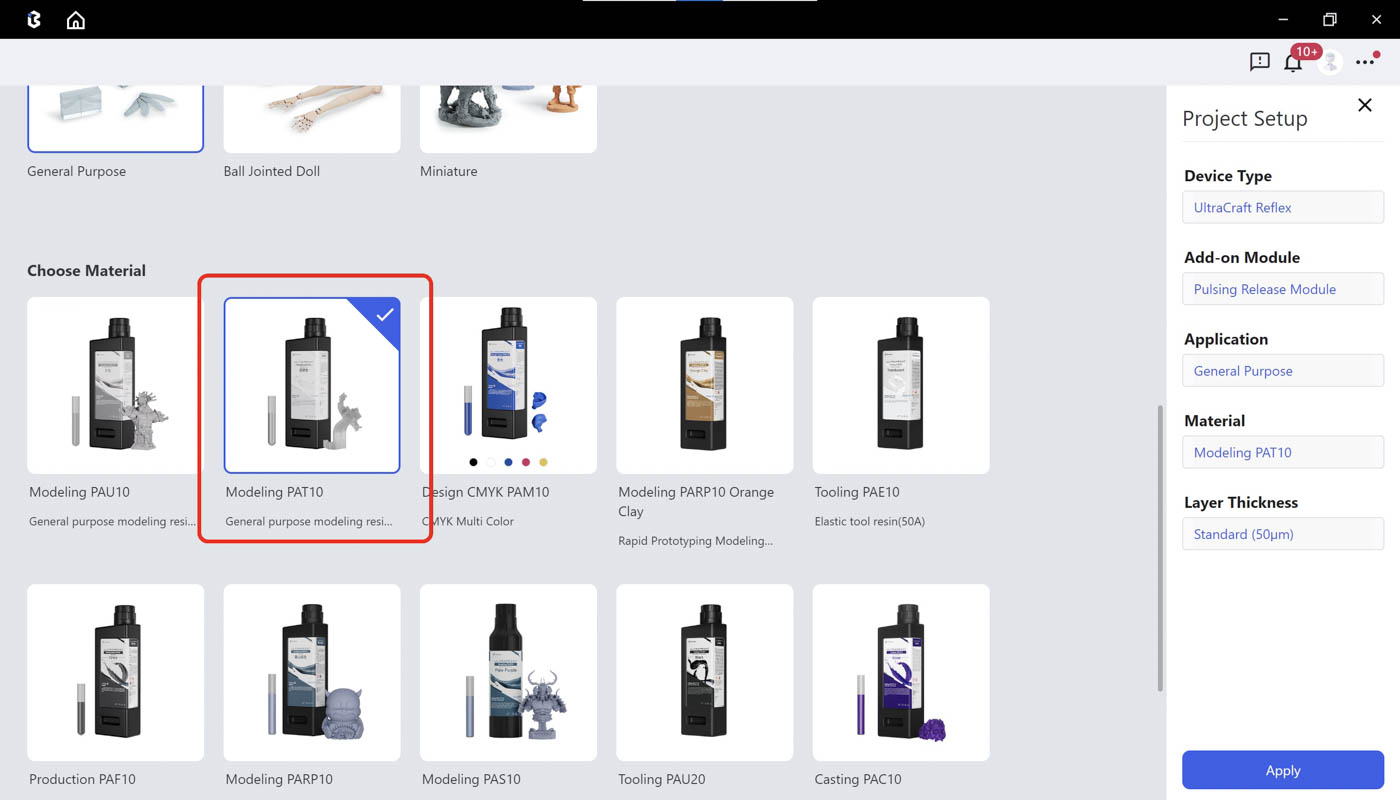
| Step 1: Enter Slicer in Blueprint Studio. | Step 2: Choose the corresponding material. |
 |
 |
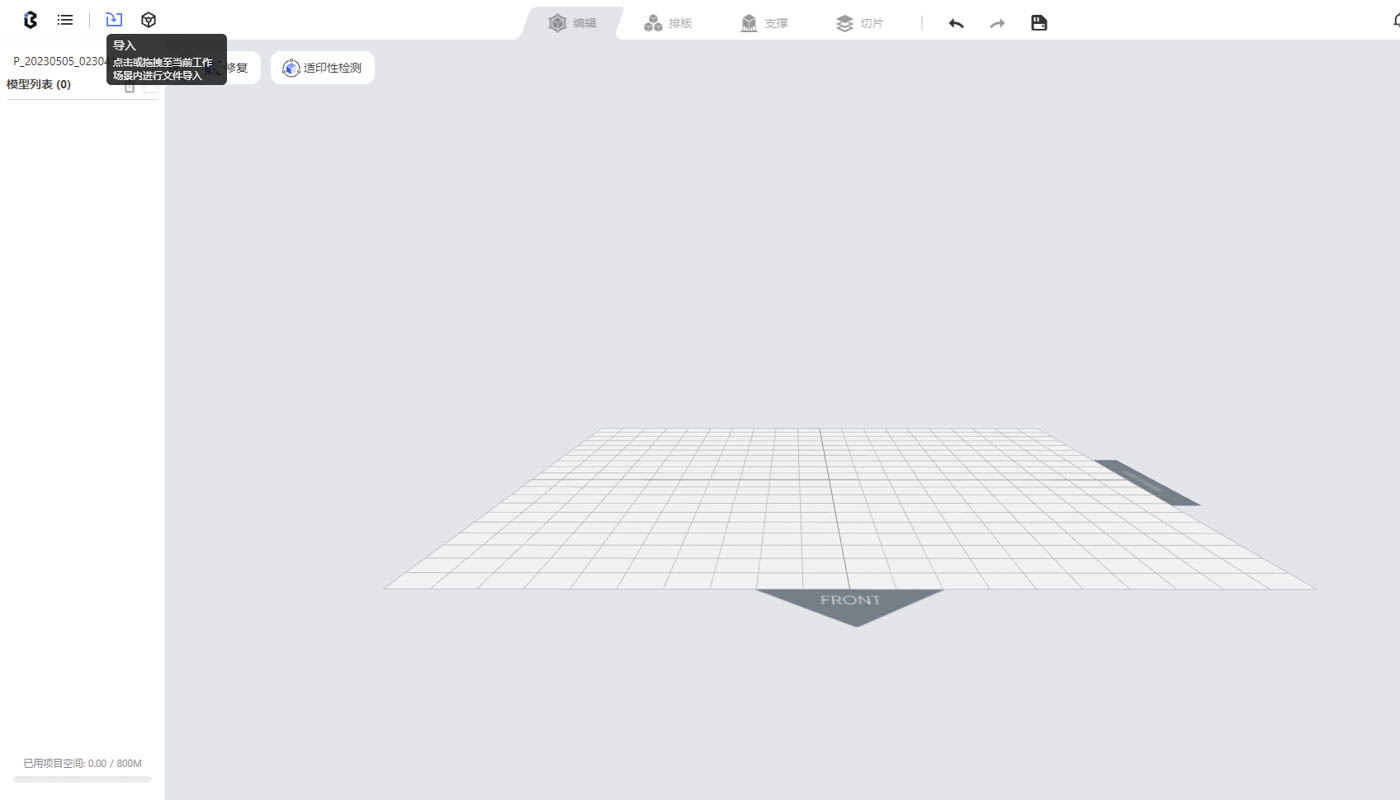
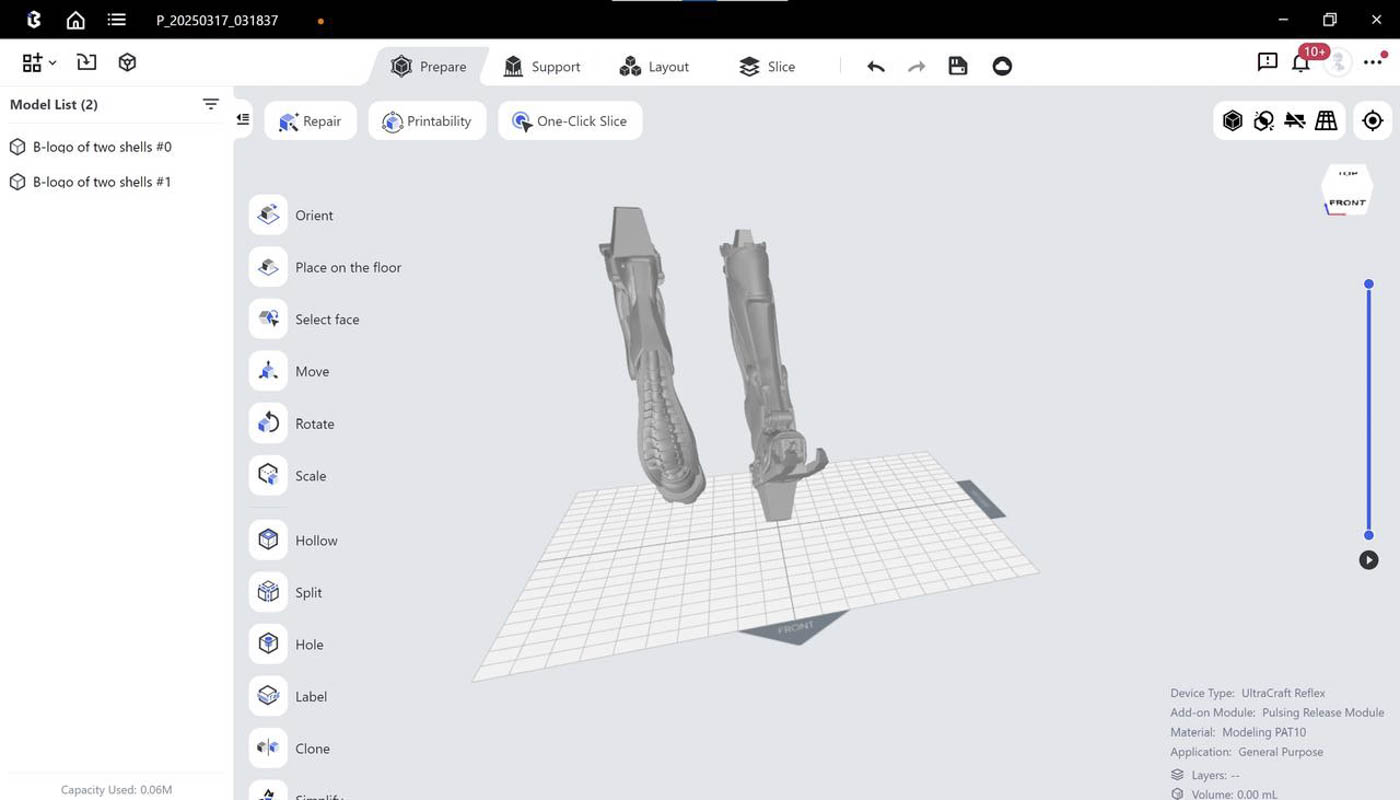
| Step 3: Import models in a new project by clicking the Import icon or directly dragging models to the Studio. | Step 4: In the Prepare page, use Rotate, Scale, Hollow, Hole, Label, Duplicate and other tools based on your needs. |
 |
 |
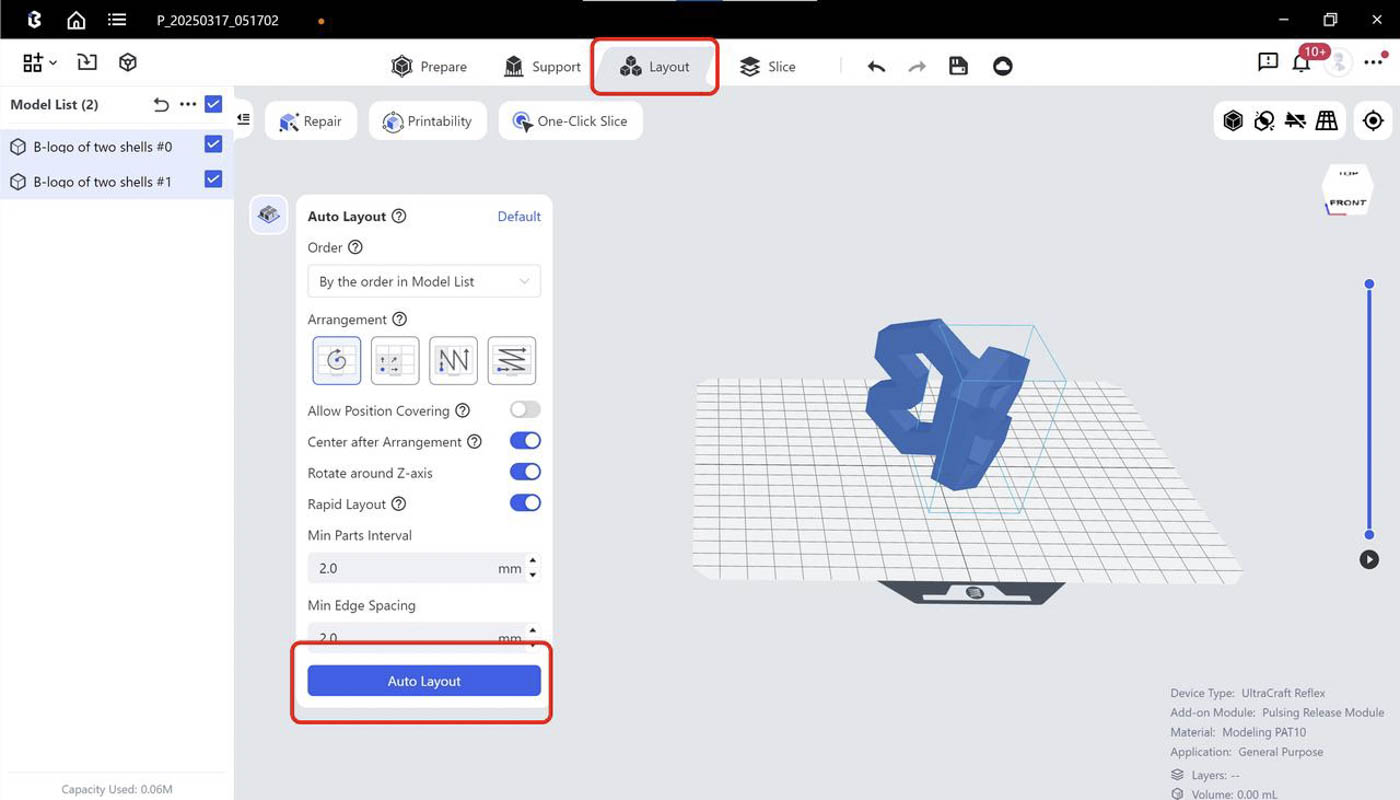
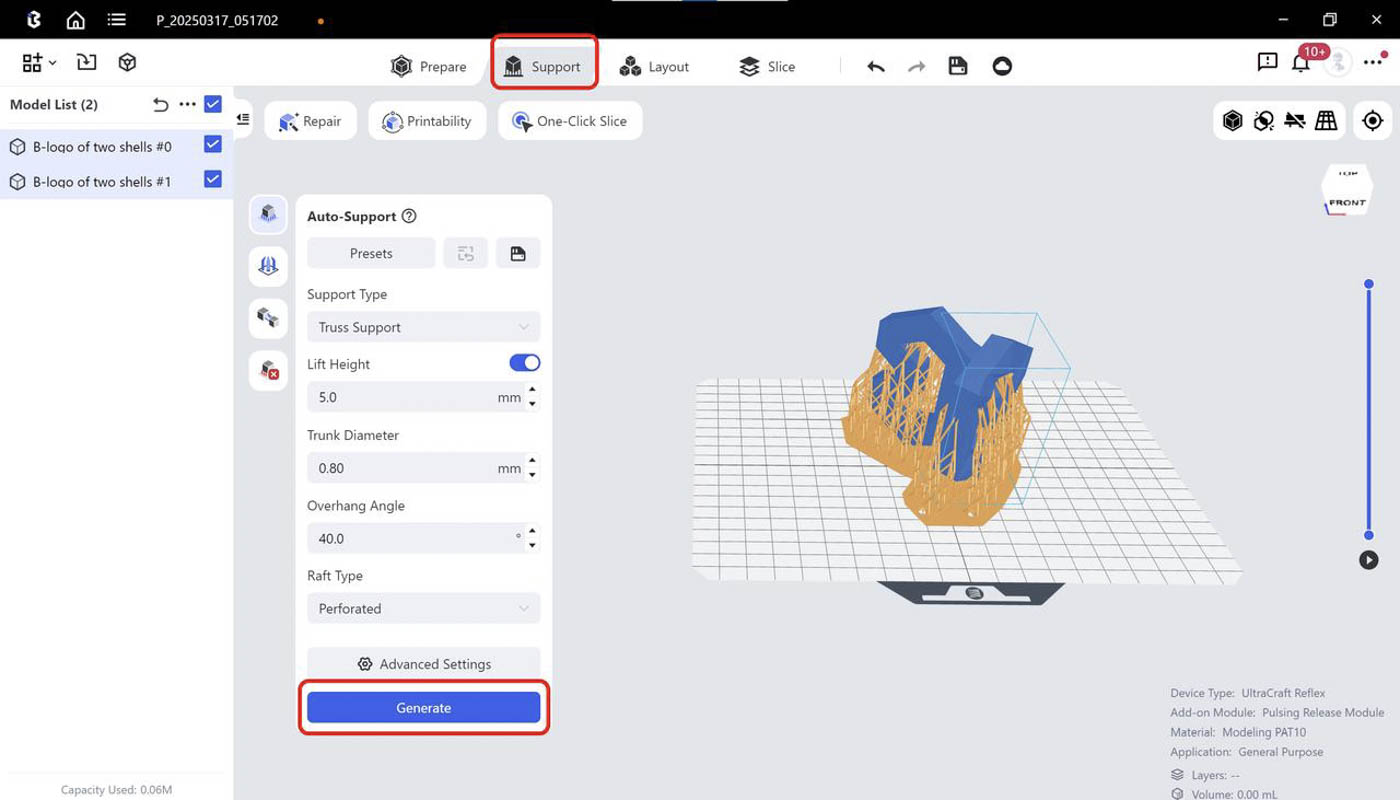
| Step 5: Run Auto-layout. | Step 6: Run Auto-support, choose Truss support and generate supports. |
 |
 |
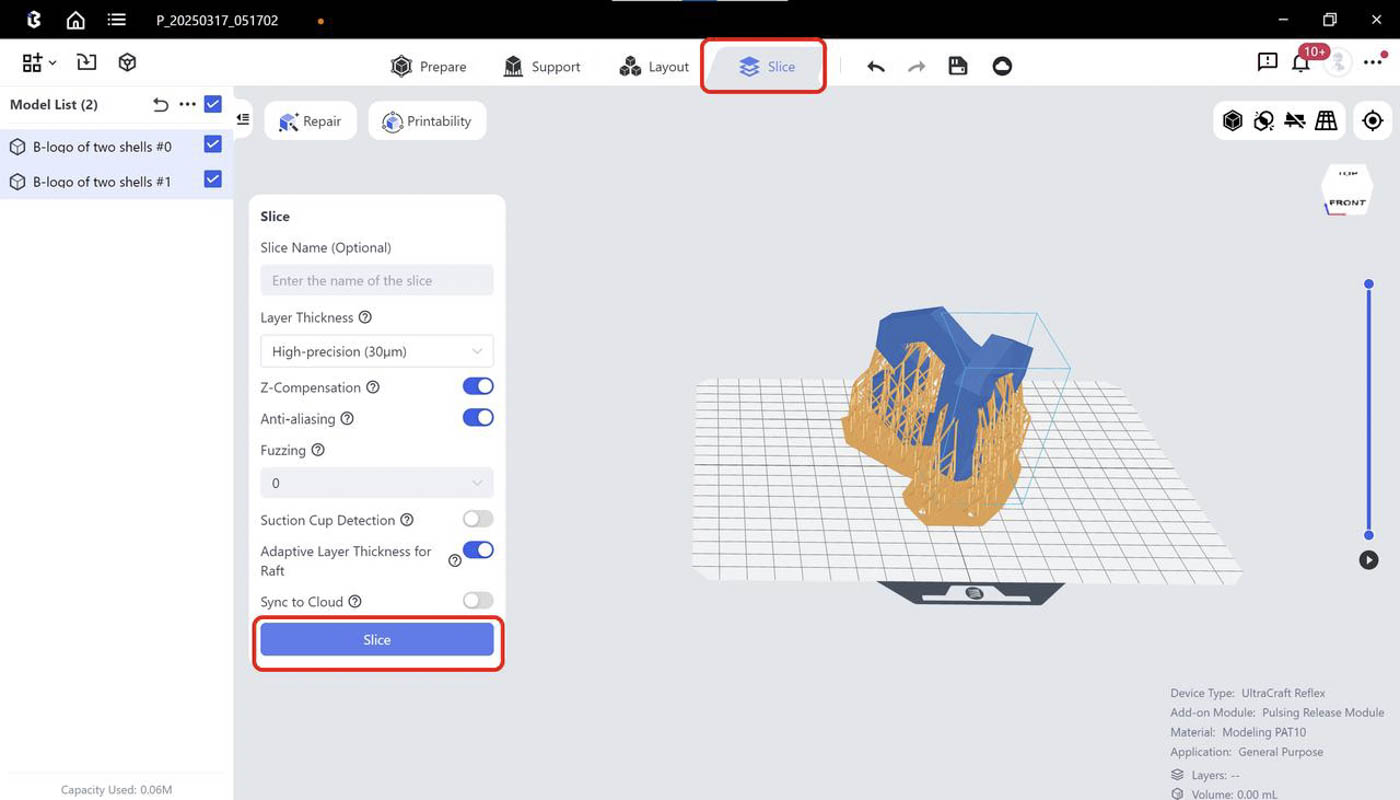
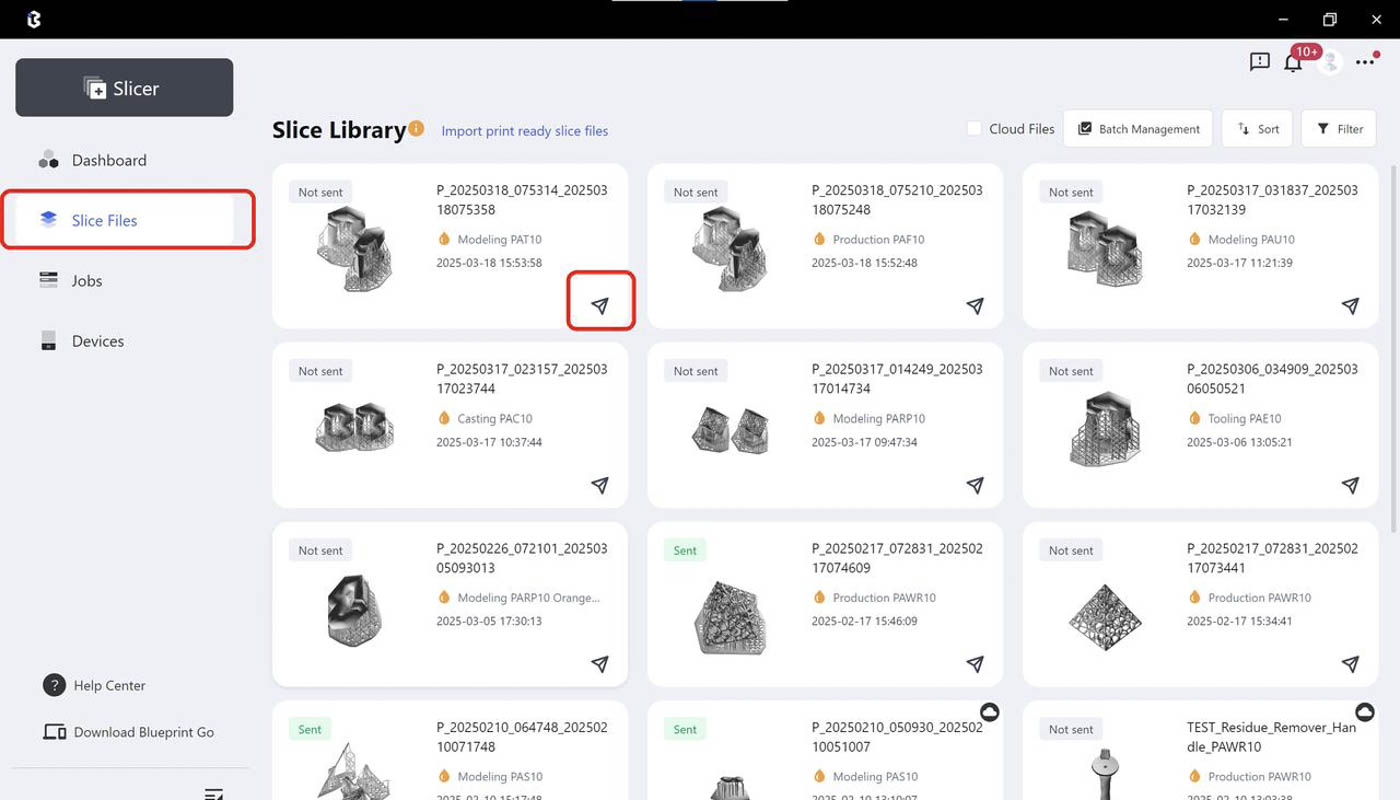
| Step 7: Run Slicing. You may edit the slice file name if needed. | Step 8: After slicing is done, you may check slice files and send print jobs at the [Slice Files] page |
 |
 |
¶ Advice on Orientation and Support
Orientation Rules
Enter ’Prepare’ section, adjust the models with ‘Move’, ‘Rotate’ and ‘Select’ tools according to some rules (characteristic parts and acute parts facing up, opening facing down, as few supports as possible and so on).
More details are as follows.
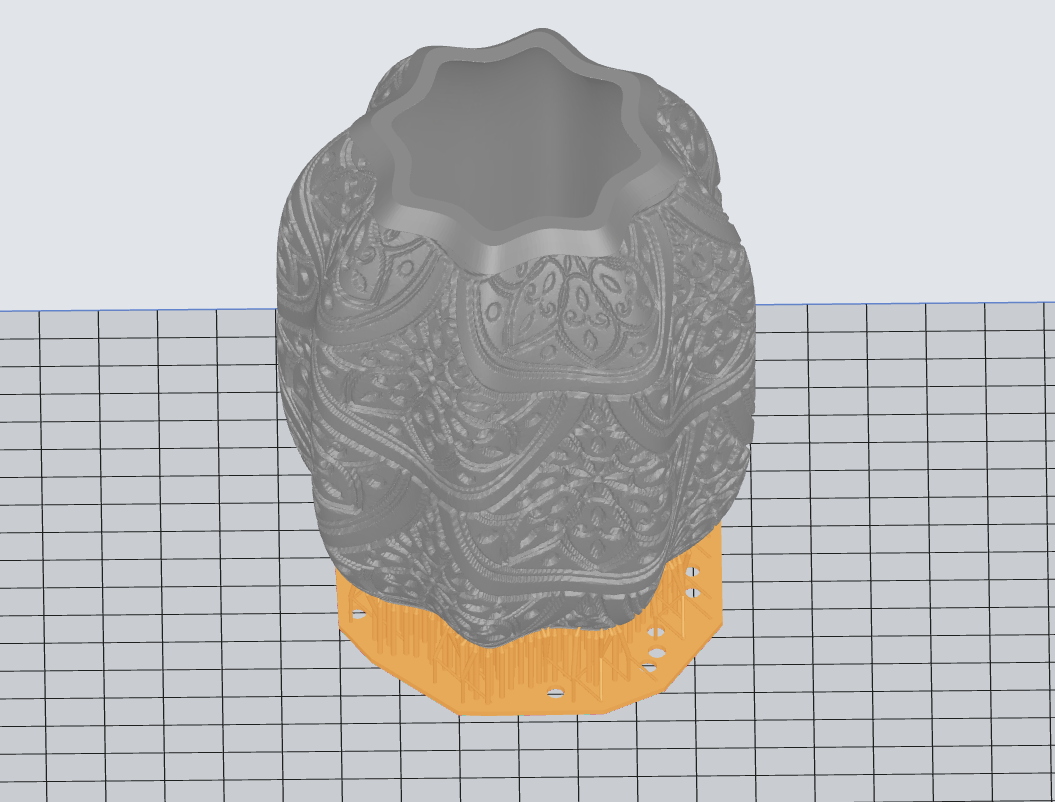
General rule: There is more than one orientation. Typically speaking—
- Characteristic parts - facing upward—to ensure the finish quality of the details;
- Structures with beams - inclined (60° with the floor)—to ensure a flat and smooth beam surface;
- Solid bars and large flat surfaces - inclined (30°-45° with the floor)—to ensure the printability of the structures.
Avoid having long straight edges or flat planes parallel to the printing platform, and minimize the printing area of each layer as much as possible, which can effectively reduce the risk of excessive peeling force and deformation during printing.
Important detailed surfaces are usually placed facing upwards, or the supports generated will affect the details and sanding will be required after supports are removed.
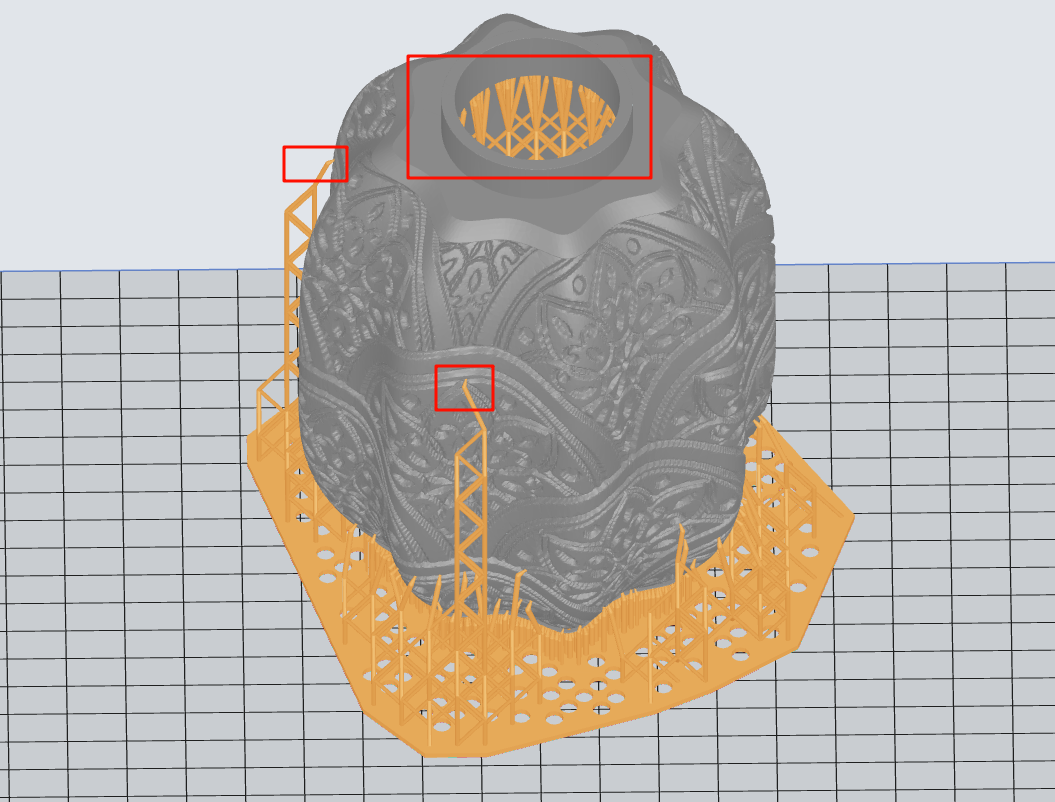
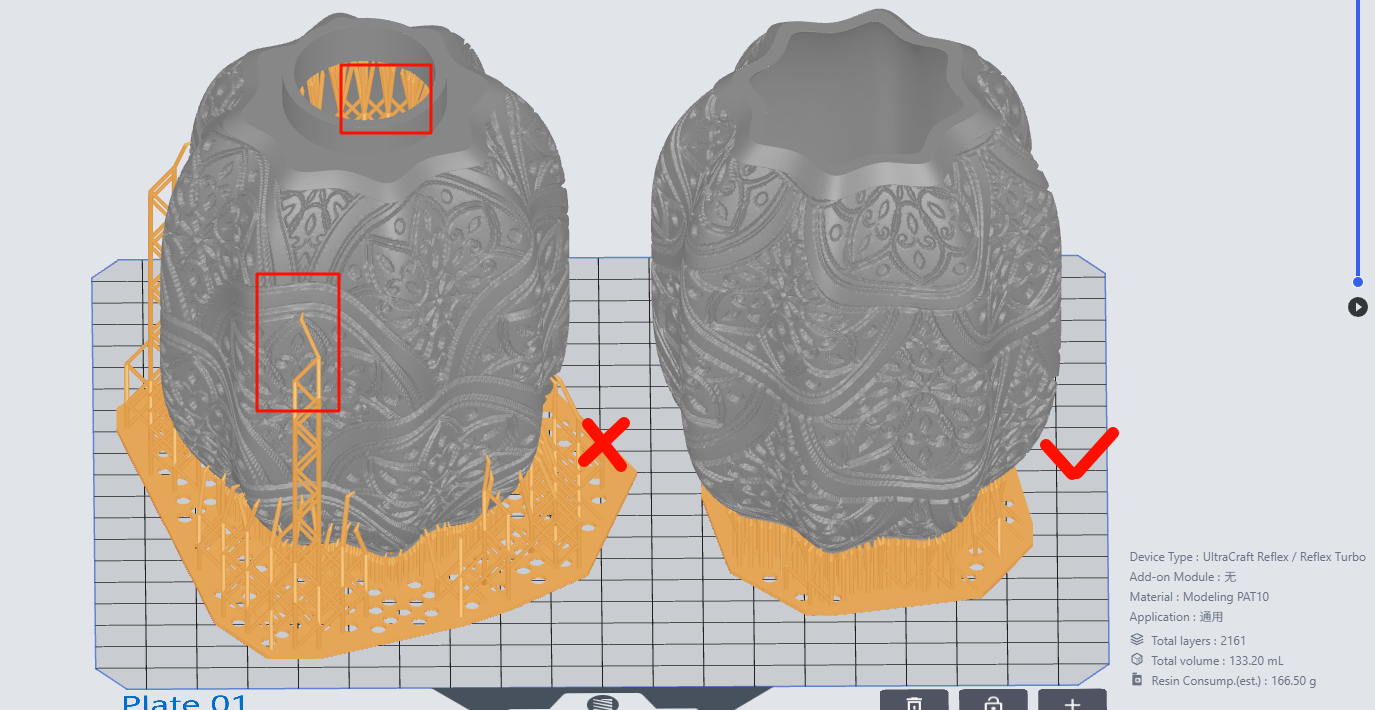
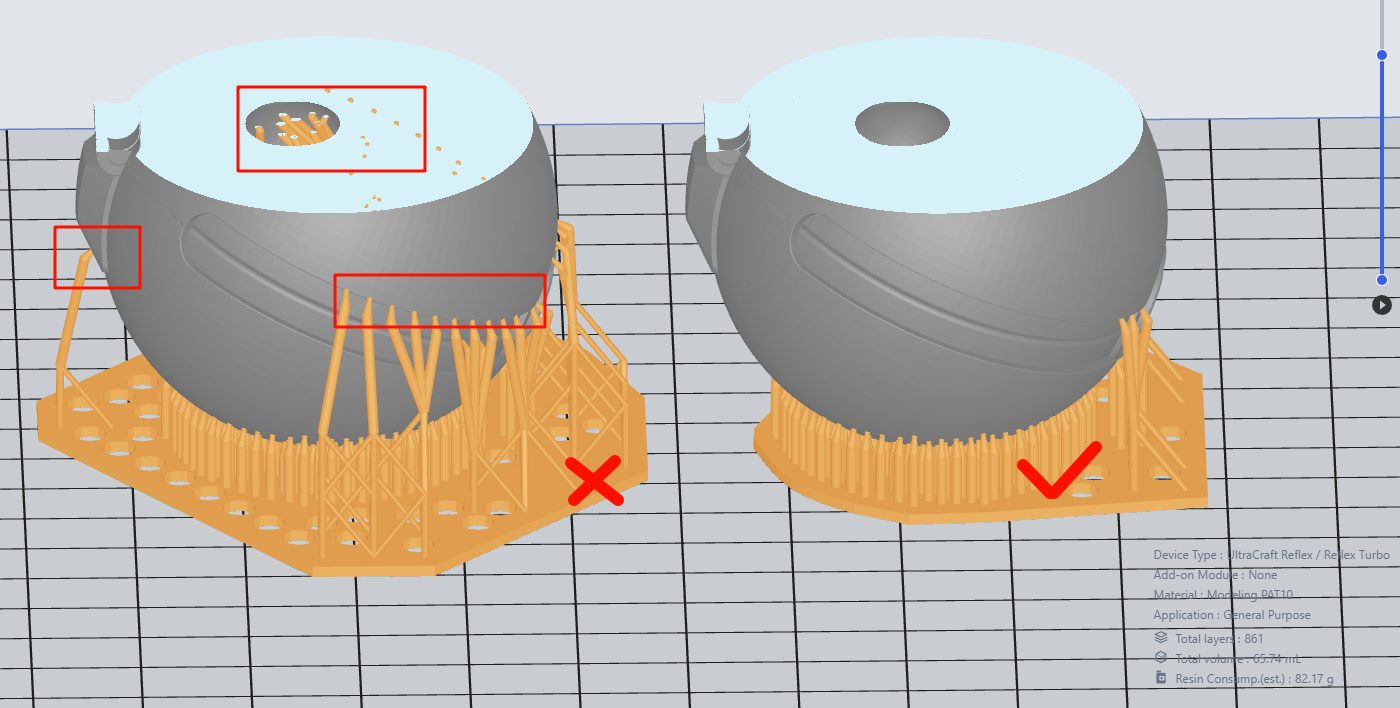
(a) Avoid supports that cannot be manually removed inside cavities;
(b) Remove supports on cantilevers within 0.8mm;
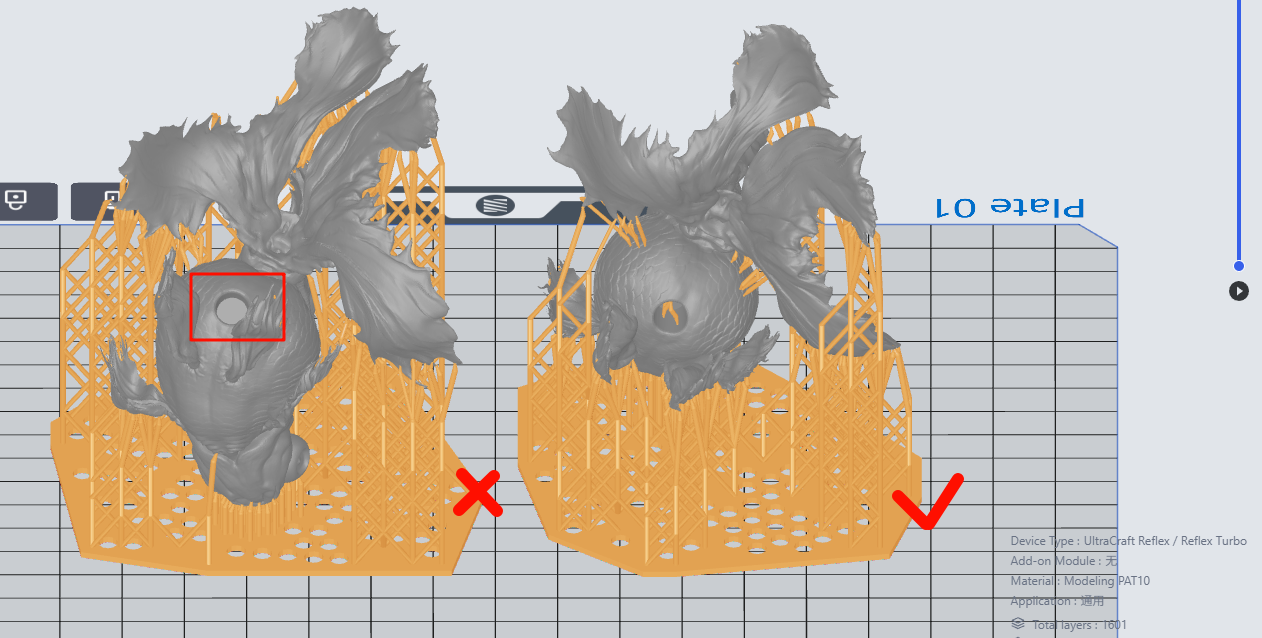
(c) Orient fine parts/acute angles upwards—to prevent damages to them when removing supports.
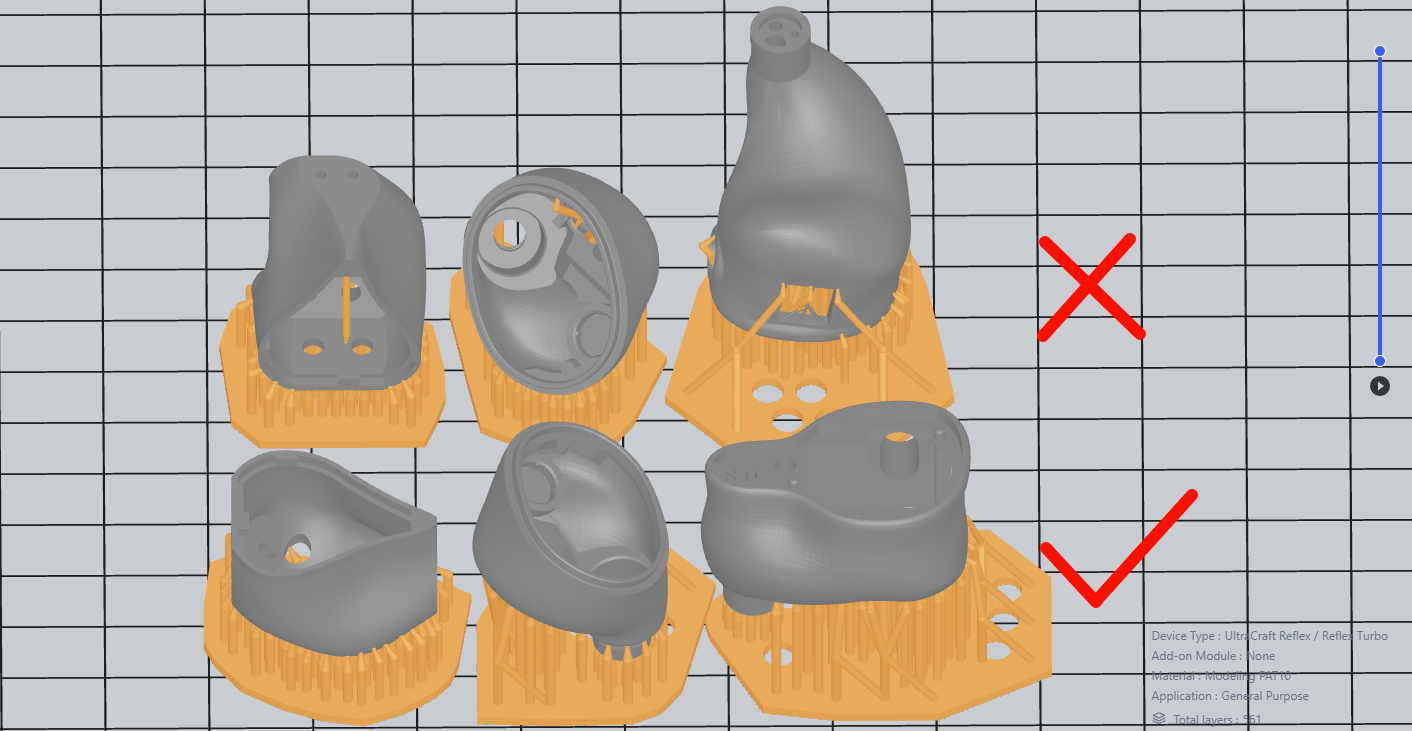
Orientation is flexible. With the general rules followed, after automatically generating supports, you can inspect the model, edit or delete the supports, or adjust the model's orientation and regenerate supports again for comparison.
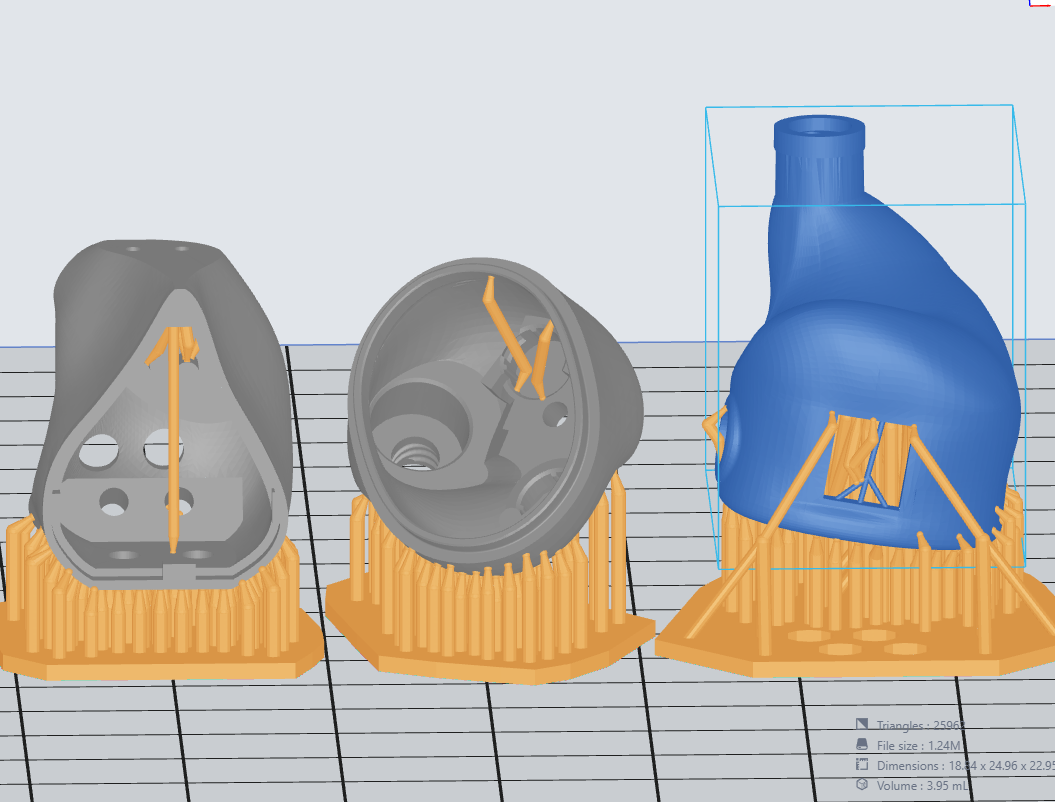
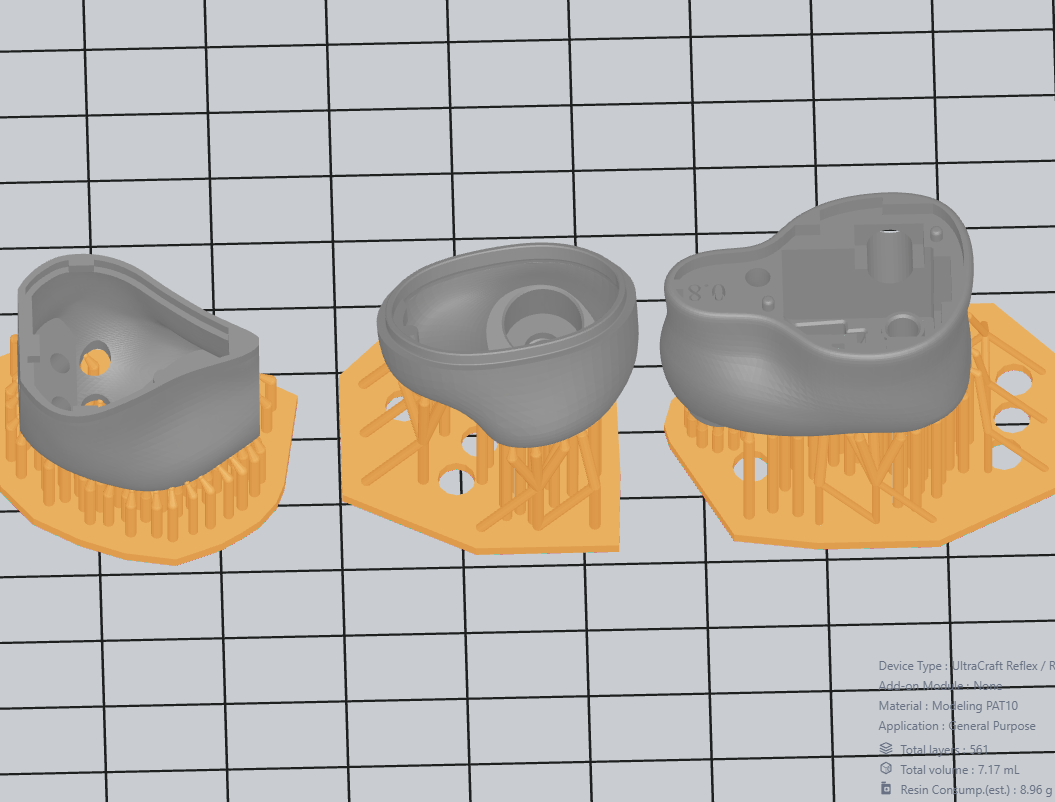
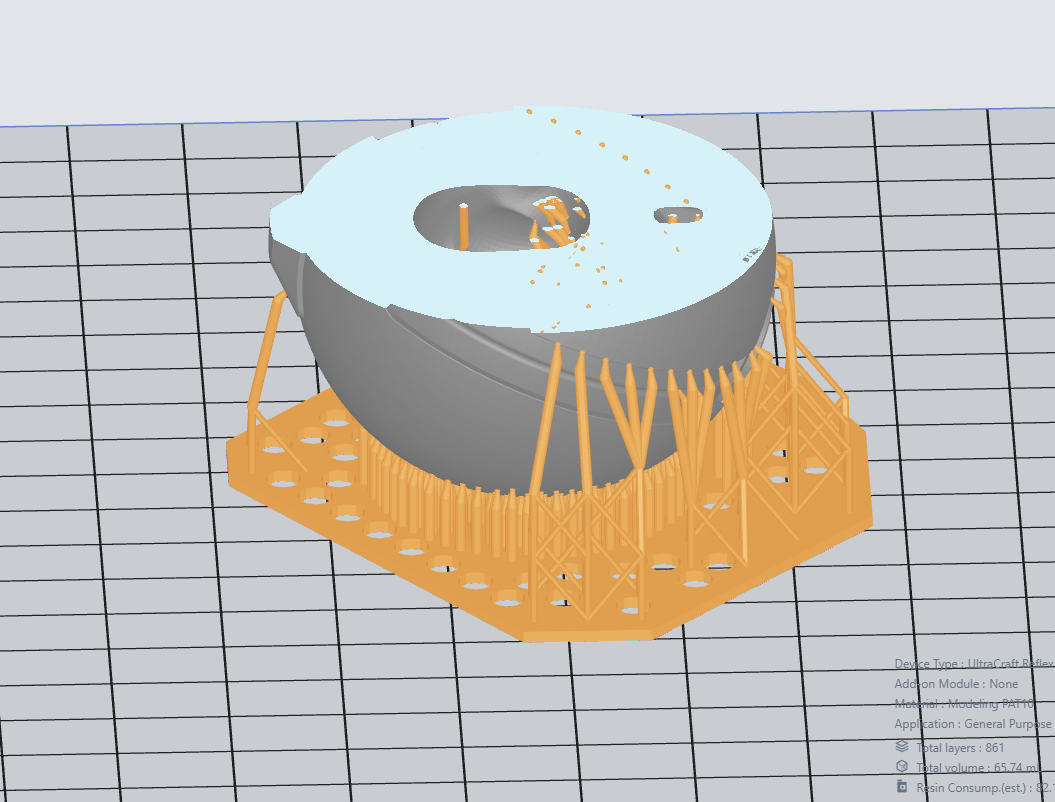
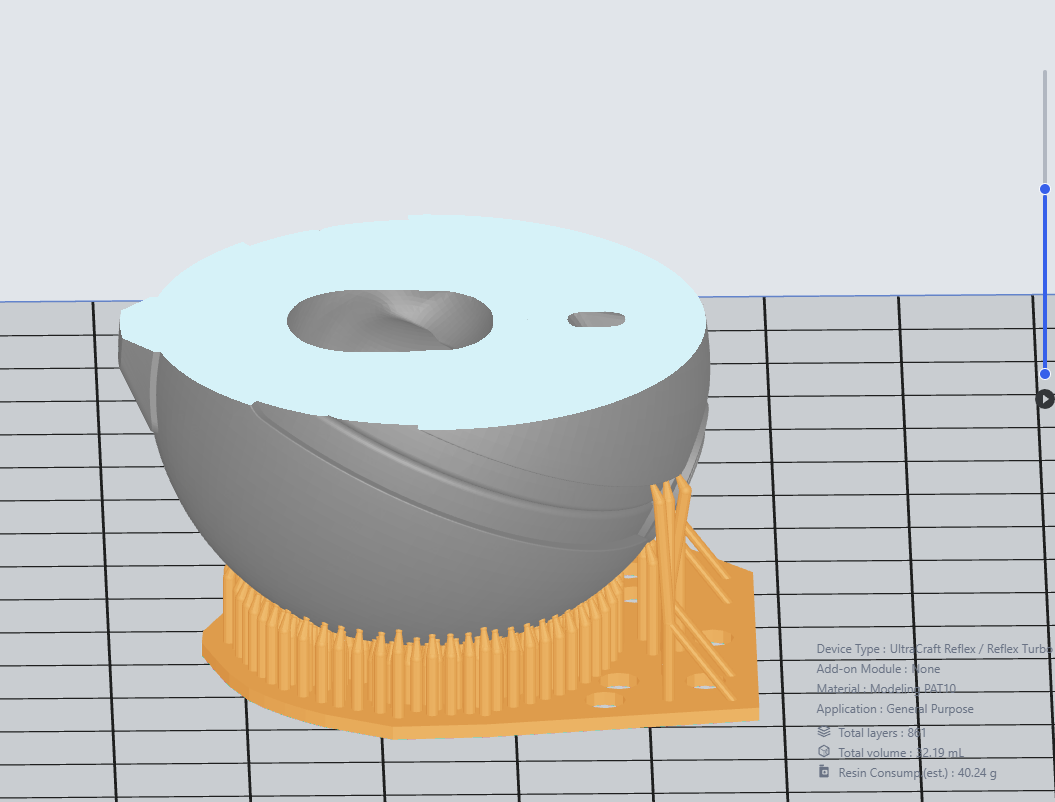
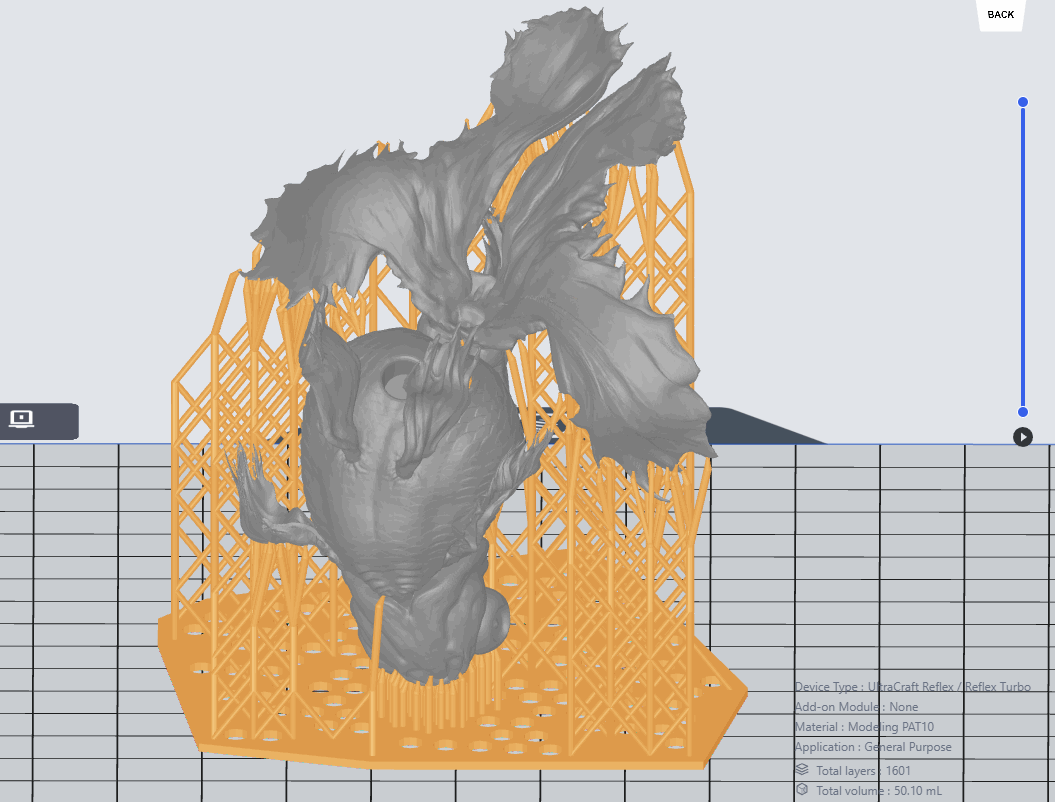
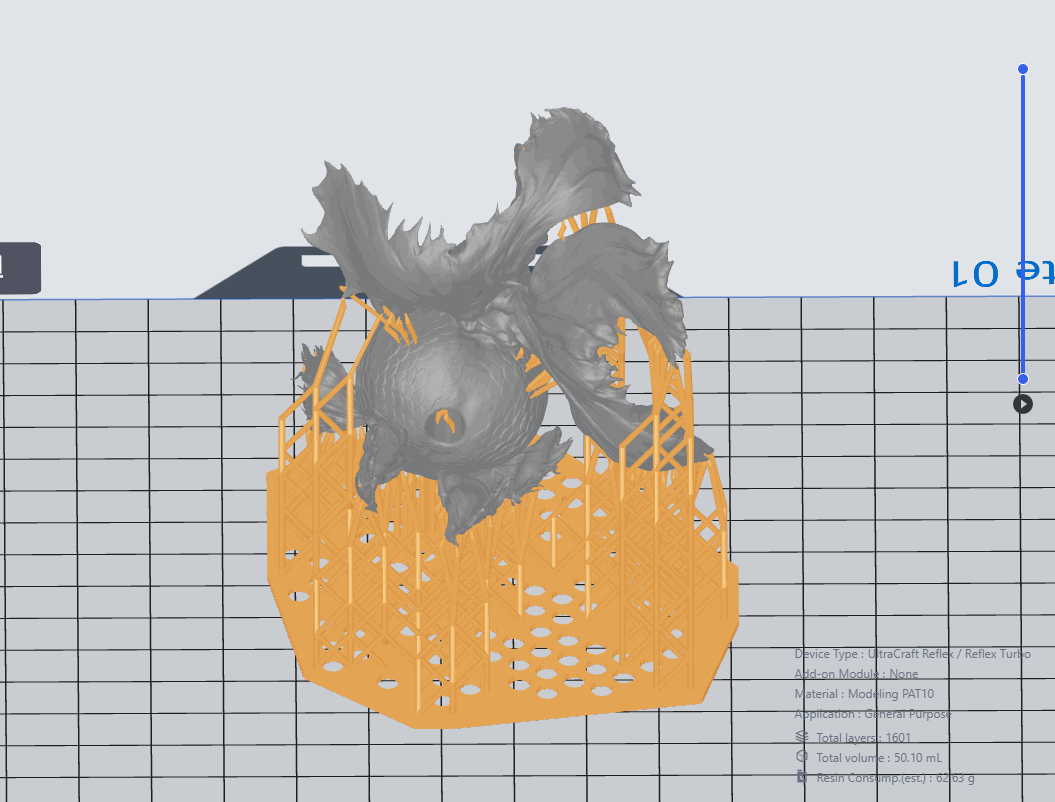
| Lamp shade - PAT10 | Earbud - PAT10 | Pokeball - PAT10 | Goldfish(fish body) - PAT10 | ||||
| Bad | Good | Bad | Good | Bad | Good | Bad | Good |
|
|
|
|
|
|
|
|
| Fewer supports. Delete the supports on cantilevers within 0.8mm. | Sound holes facing downward to prevent the supports from generating between earbud models. Check and reinforce supports if needed. | Remove the supports inside that are not at the lowest points. Remove the supports outside on cantilevers within 0.8mm. Check and reinforce supports if needed. | Fine parts/acute angles facing upwards, to avoid suction cups. Check and reinforce supports if needed. | ||||
|
|
|
|
||||
¶ IV. PRINTING & POST-PROCESSING
¶ Quick Guide
| Step 1: Send the slice files to your printer on Blueprint platform, or import them to your printer via USB flash drive. | Step 2: Printing. |
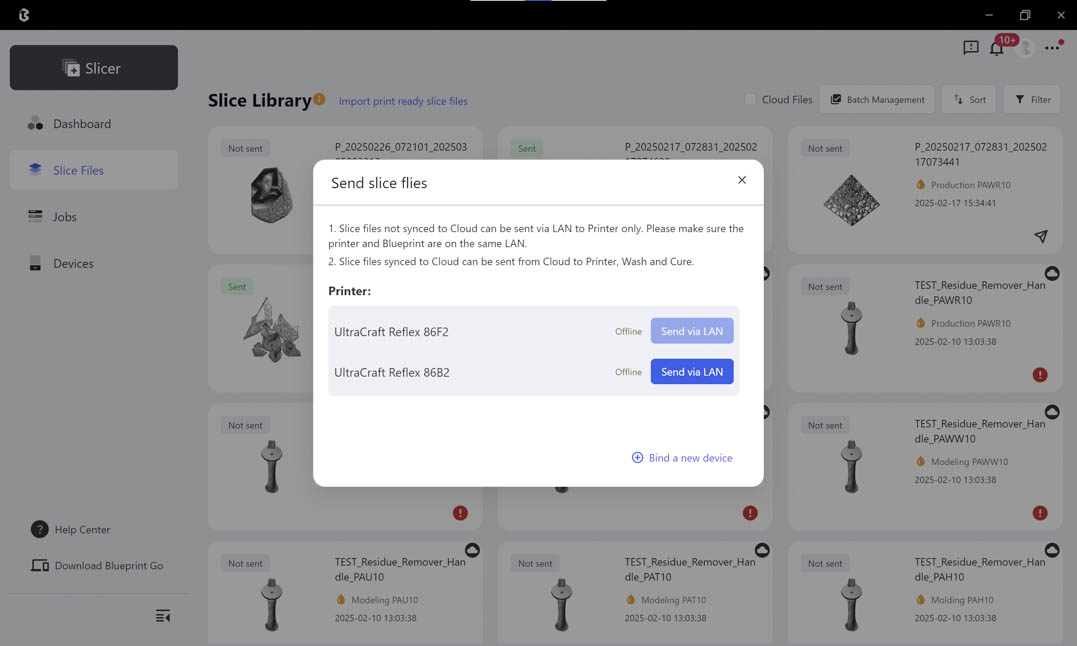 |
 |
| Step 3: Set the washing settings on UltraCraft Wash or in Blueprint platform when sending wash jobs. | Step 4: Set the curing settings on UltraCraft Cure or on Blueprint platform when sending curing jobs. |
 |
 |
¶ Detailed Instructions
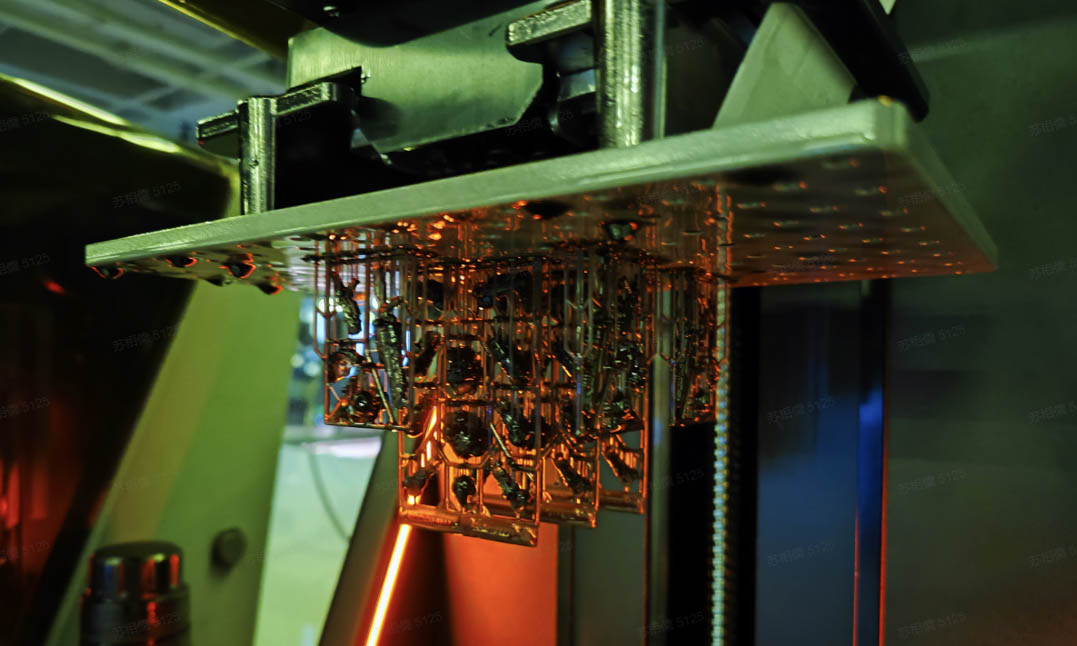
¶ 2.1 Printing According to Different Printer Models
¶ 2.1.1 Reflex: Reflex Operation Guidelines
¶ 2.1.2 Reflex RS/RS Turbo:Reflex RS/RS Turbo
¶ 2.1.3 Reflex 2.0: Reflex 2 Operation Guidelines
¶ 2.1.4 Reflex 2.0 Pro: Reflex 2 Pro Operation Guidelines
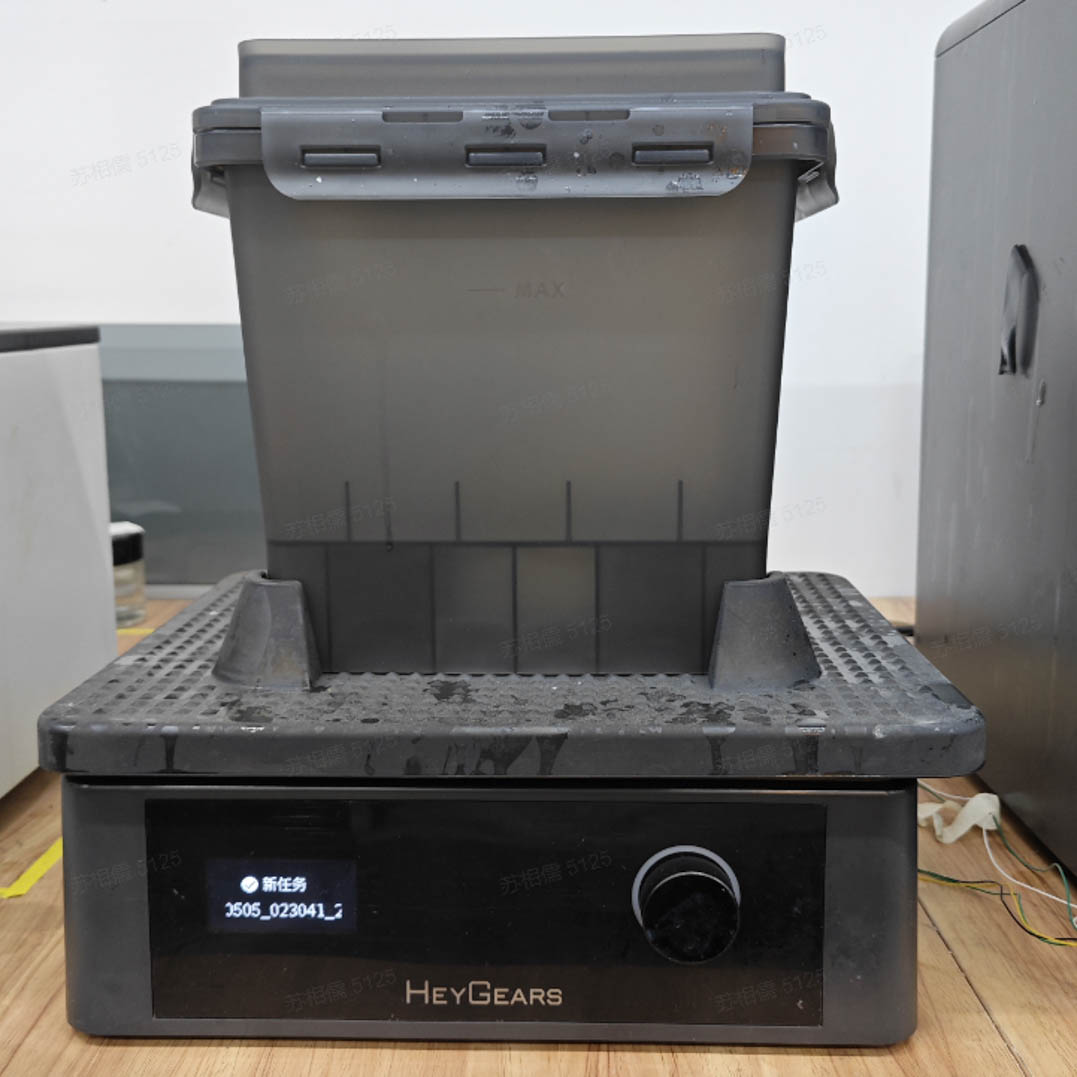
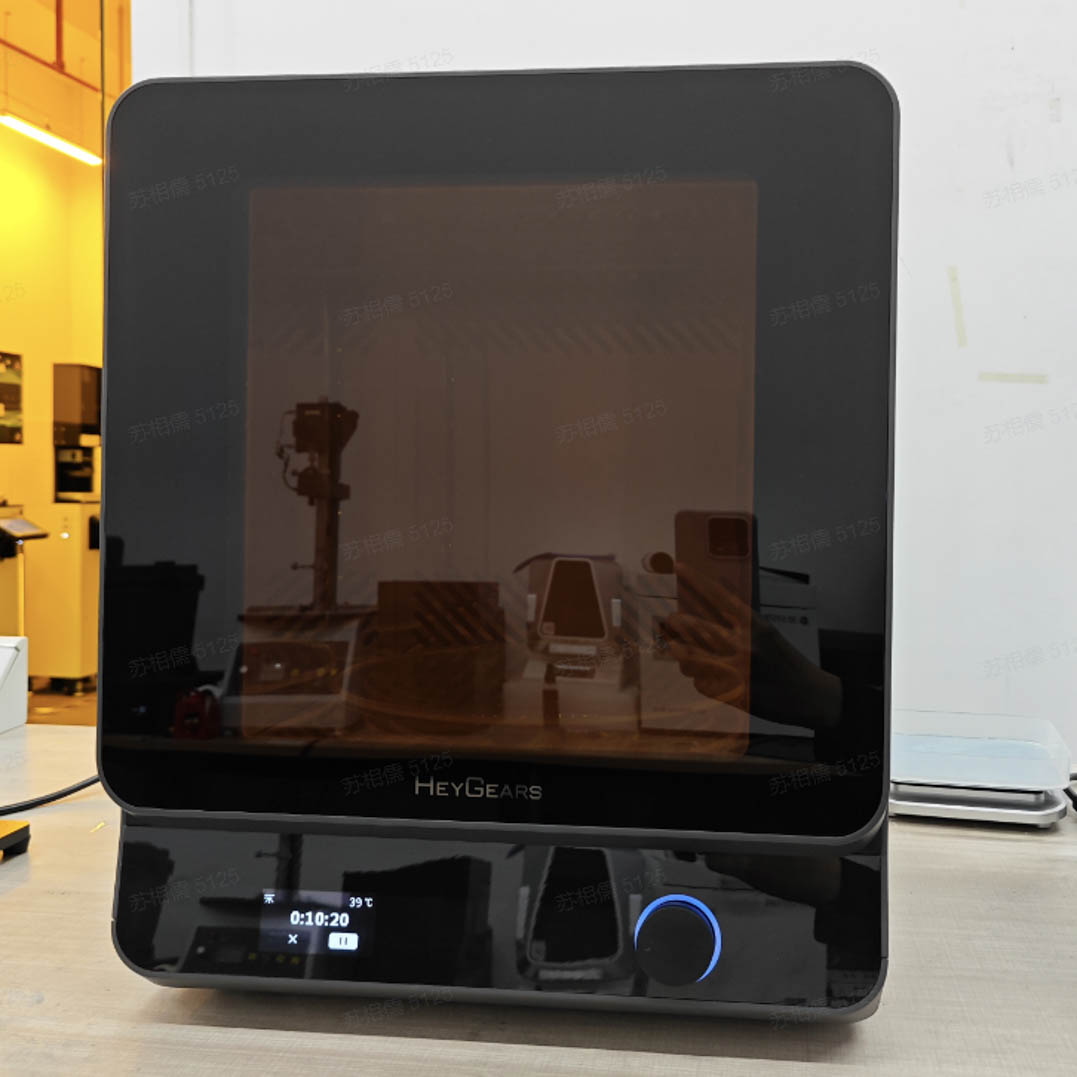
¶ 2.2 Post-Processing According to Washing & Curing Device Models
¶ 2.2.1 Reflex Wash & Cure
A. Operation Instructions: RS Wash&Cure.mp4
B. Washing and Acceptance:Transparent Solution - Washing and Acceptance
¶ 2.3 Printing Using Pulsing Release Module
¶ 2.3.1 Pulsing Release Module
Quick Start of Pulsing Release Module.pdf
4.Pulsing Release Module Installation.mp4
¶ 2.4 Accessory Maintenance
¶ V. WORKPIECE PREPARATION
¶ 1. Tool List
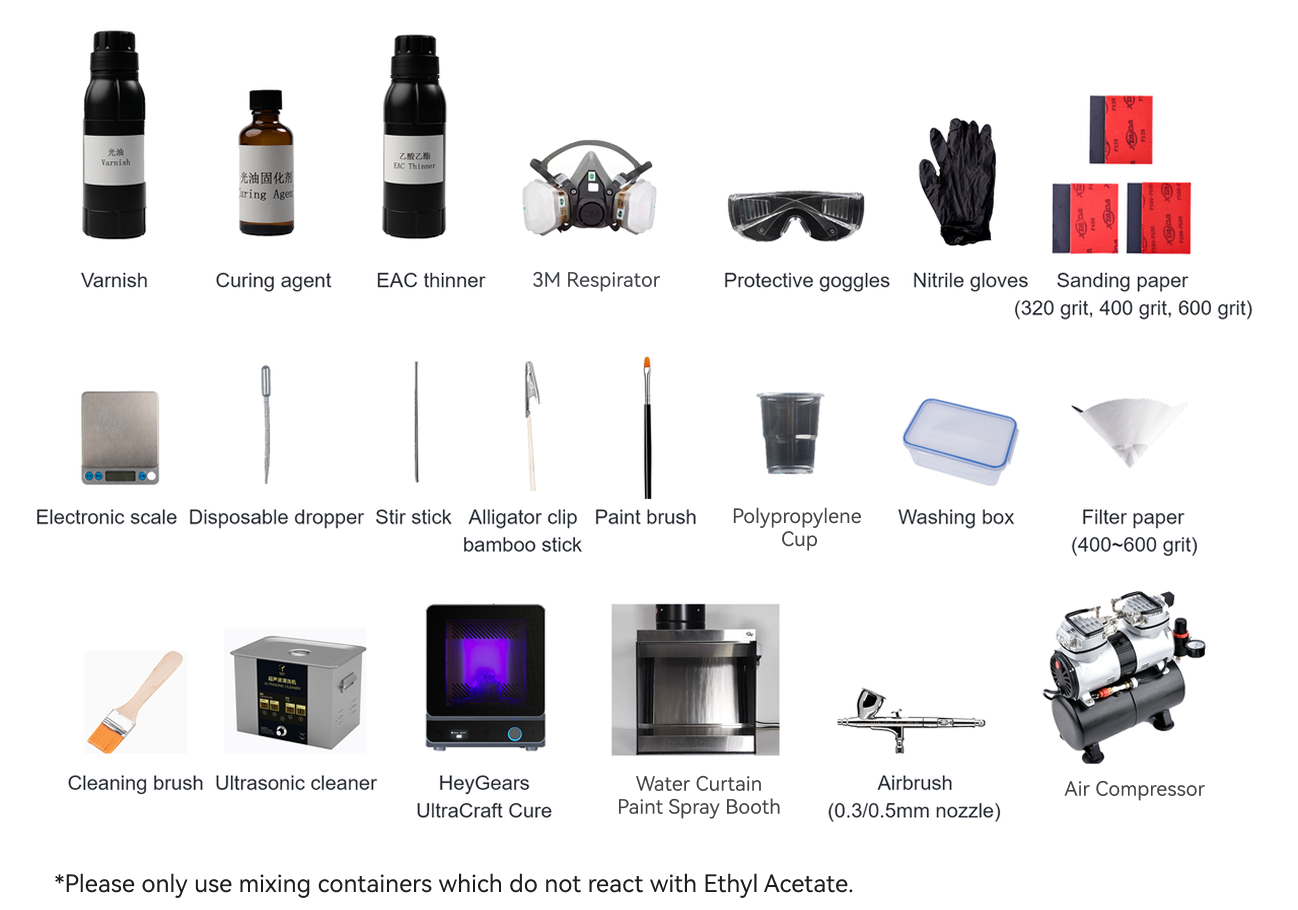
Sanding
| Categories | Items |
| Solvent | Water |
| Devices | Ultrasonic Cleaner |
| Tools | Sponge sandpaper (320, 400, 600 grit), cleaning brush, washing box, lint-free cloth, air blow gun. |
Varnish spray-painting
| Categories | Items |
| Solvent | UltraGlaze ClearG115, EAC thinner (concentration ≥ 99.5%, water content ≤0.10%), curing agent (optional aliphatic polyisocyanate resin such as Covestro/Bayer N75, etc.). |
| Devices | HeyGears UltraCraft Cure, water curtain paint spray booth, air compressor, airbrush (0.3/0.5mm-diameter nozzle). |
| Tools | Protective goggles, 3M respirator, nitrile gloves, disposable plastic cup, disposable dropper, glass stir stick, 400-600 grit filter paper, lint-free cloth, alligator clip bamboo sticks, electronic scale (accuracy 0.1g or above). |
Varnish brush-painting
| Categories | Items |
| Solvent | UltraGlaze ClearG115, curing agent (optional aliphatic polyisocyanate resin such as Covestro/Bayer N75, etc.). |
| Devices | HeyGears UltraCraft Cure, rotating unit with a hole that fits an alligator clip stick |
| Tools | Protective goggles, 3M respirator, nitrile gloves, paint brush, disposable plastic cup, glass stir stick, alligator clip bamboo sticks, painting stand base. |
Painting
| Categories | Items |
| Solvent | Water-based paint, water |
| Devices | Constant-temperature water bath, constant-temperature hot air oven |
| Tools | Timer, Nitrile gloves, 2000ML beaker, glass stir stick, disposable dropper, electric scale (accuracy 0.1g or above), 400-600 grit filter paper, thermometer (range 100°), N95 respirator. |
¶ 2. Print Part Preparation
Before spraying the print part, essential sanding and washing is essential in order to eliminate the support remains and layer lines, and to enhance the varnish's adhesion, ensuring a smooth and glossy finish. This is a key step for achieving the desired effect.
Sanding
| Solvent | Water | |
| Devices | Ultrasonic Cleaner | |
| Tools | Sponge sandpaper (320, 400, 600 grit), cleaning brush, washing box, lint-free cloth, air blow gun. |
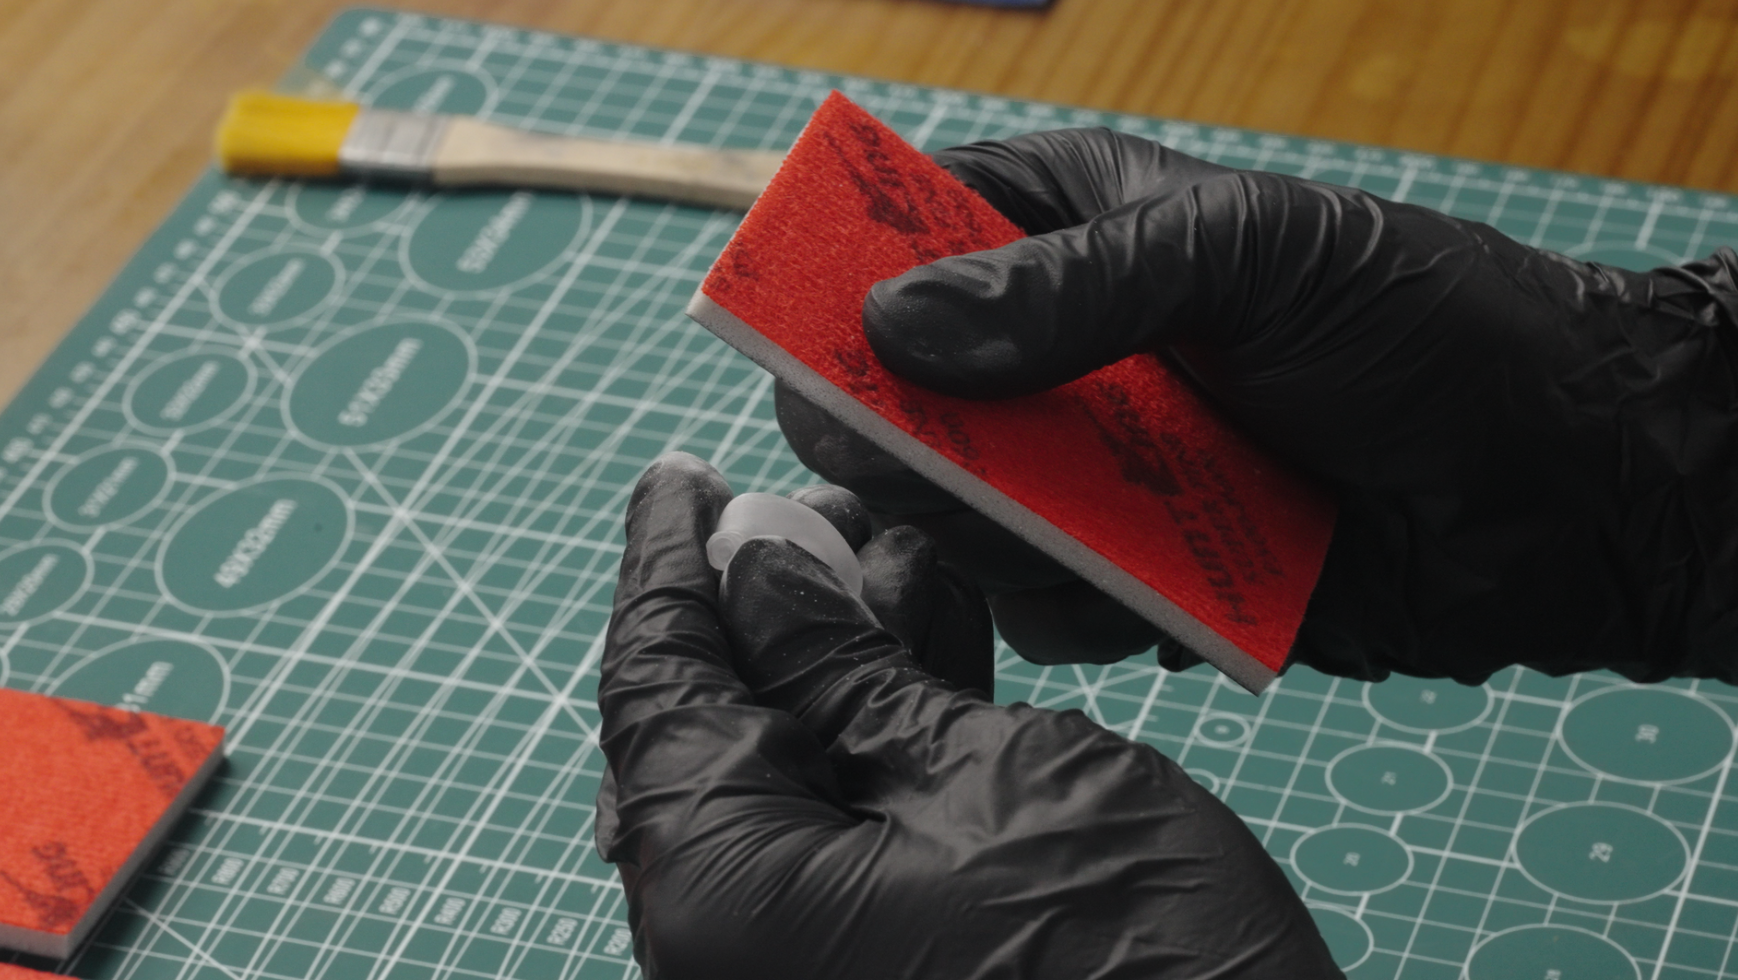
¶ 2.1 Sand
Use sand paper with lower grit (320/400) to sand the support breaks to even. Then use 600-grit paper to sand again. Marks by the sand paper will be covered by the varnish.
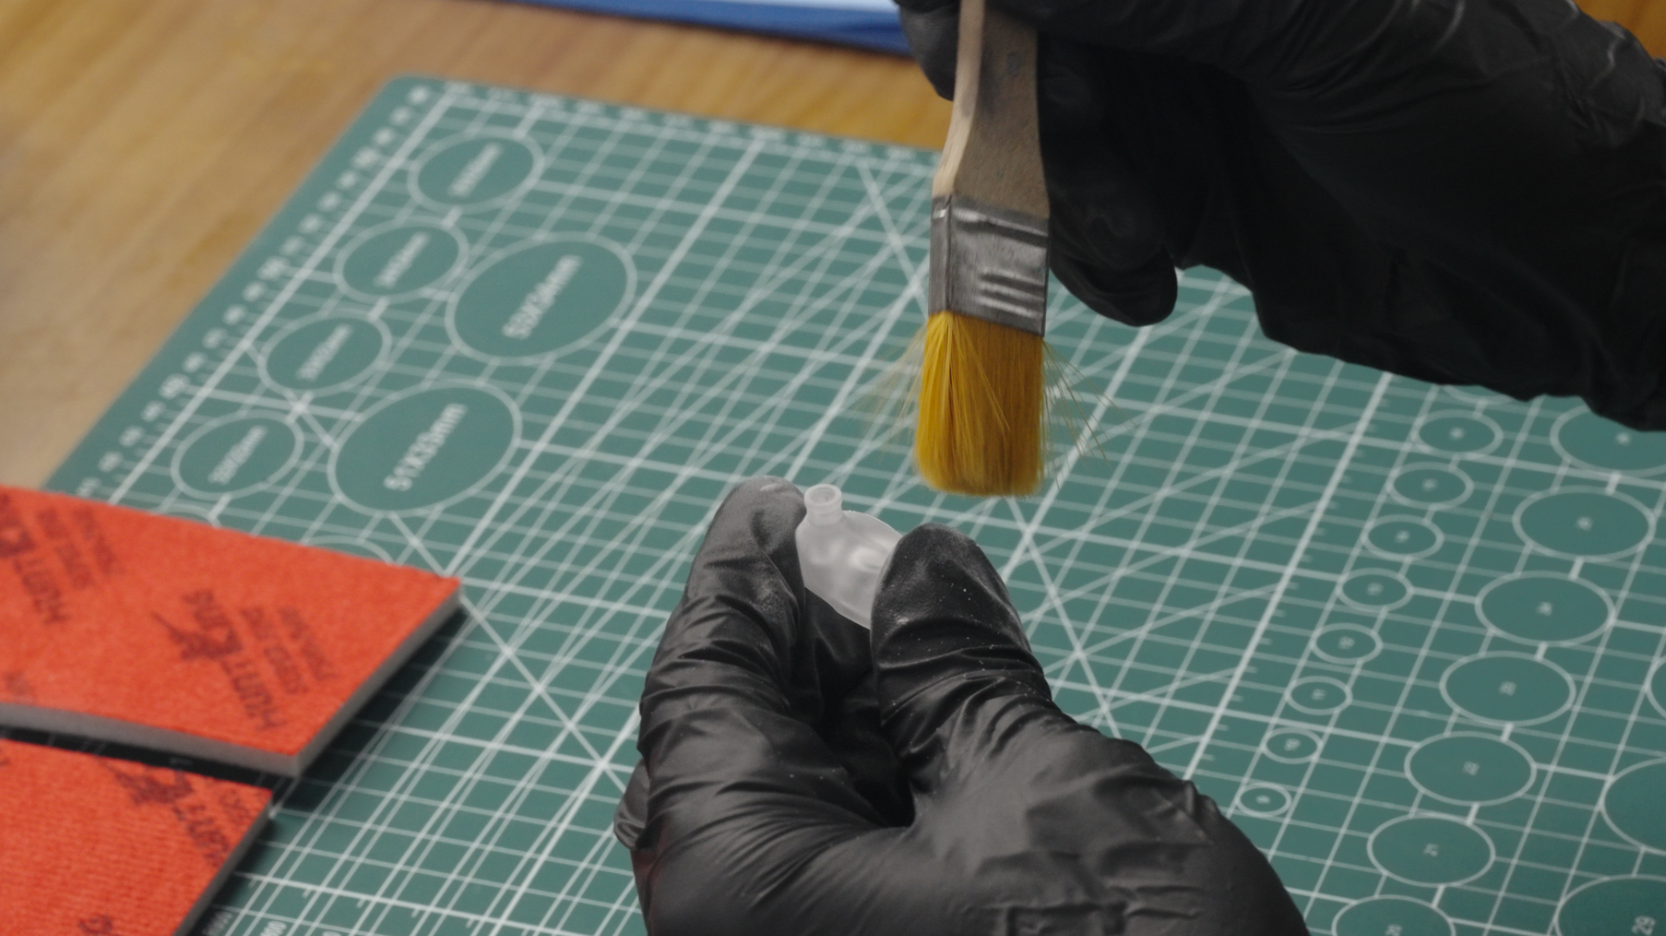
¶ 2.2 Wash
Use a cleaning brush to swipe the dust off the print's surface and especially between gaps.
Put the print into a washing box with clean water, and then put the box into an ultrasonic cleaner to thoroughly wash it for 3 min.
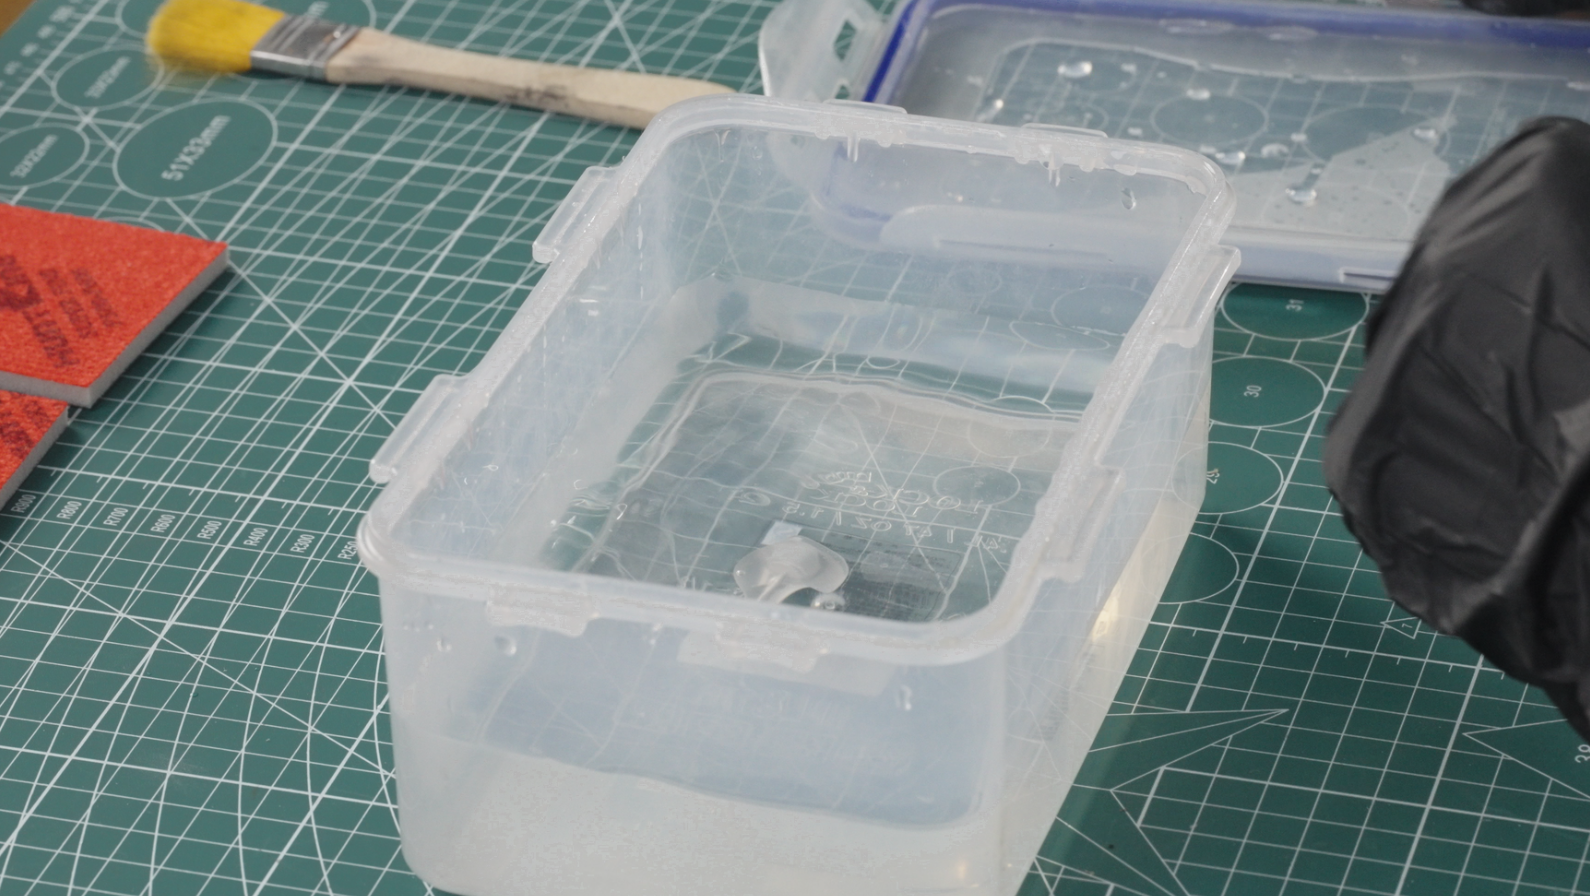
Take out the washed print, blow it dry with an air blow gun, and bake it with a baker for 30 min to dry the water in the gaps. Baking temperature depends on the heat resistance of the printing material. Lower the temperature if there are samples deforms after baking.
¶ 3. Painting Preparation
¶ 3.1 Immersion Dyeing
Painting
| Categories | Items |
| Solvent | Water-based paint, water |
| Devices | Constant-temperature water bath, constant-temperature hot air oven |
| Tools | Timer, Nitrile gloves, 2000ML beaker, glass stir stick, disposable dropper, electric scale (accuracy 0.1g or above), 400-600 grit filter paper, thermometer (range 100°), N95 respirator. |
¶ 3.1.1 Paint Preparation
Dilution ratio of water-based paint
Darker: paint/water = 1/5
Medium color: paint/water = 1/20
Lighter: paint/water = 1/50
Select the dilution ratio based on the color you need, stir the mixed solution evenly, and filter it through 400-mesh filter paper. Then pour it into a beaker, and heat it in the constant-temperature water bath.
¶ 3.1.2 Water Bath Settings
Set the temperature of the constant-temperature water bath to 65°C. The diluted paint solution is ready when its temperature reaches 60-65°C.
¶ 3.2 Hand Painting
Painting
| Solvent | Water-based paint, water | |
| Devices | Constant-temperature water bath, constant-temperature hot air oven | |
| Tools | Timer, Nitrile gloves, 2000ML beaker, glass stir stick, disposable dropper, electric scale (accuracy 0.1g or above), 400-600 grit filter paper, thermometer (range 100°), N95 respirator. |
¶ 3.2.1 Paint Preparation
Dilution ratio of water-based paint
Darker: paint/water = 1/5
Medium color: paint/water = 1/20
Lighter: paint/water = 1/50
Select the dilution ratio based on the color you need, stir the mixed solution evenly, and filter it through 400-mesh filter paper. Then pour it into a beaker, and heat it in the constant-temperature water bath.
¶ 3.2.2 Water Bath Settings
Set the temperature of the constant-temperature water bath to 65°C. The diluted paint solution is ready when its temperature reaches 60-65°C.
¶ 3.3 Airbrushing
Painting
| Solvent | Water-based paint, water | |
| Devices | Constant-temperature water bath, constant-temperature hot air oven | |
| Tools | Timer, Nitrile gloves, 2000ML beaker, glass stir stick, disposable dropper, electric scale (accuracy 0.1g or above), 400-600 grit filter paper, thermometer (range 100°), N95 respirator. |
¶ 3.3.1 Paint Preparation
Dilution ratio of water-based paint
Darker: paint/water = 1/5
Medium color: paint/water = 1/20
Lighter: paint/water = 1/50
Select the dilution ratio based on the color you need, stir the mixed solution evenly, and filter it through 400-mesh filter paper. Then pour it into a beaker, and heat it in the constant-temperature water bath.
¶ 3.3.2 Water Bath Settings
Set the temperature of the constant-temperature water bath to 65°C. The diluted paint solution is ready when its temperature reaches 60-65°C.
¶ 4. Varnish Preparation
¶ 4.1 Airbrush-Coating
Varnish airbrush-coating
| Solvent | UltraGlaze ClearG115, EAC thinner (concentration ≥ 99.5%, water content ≤0.10%), curing agent (optional aliphatic polyisocyanate resin such as Covestro/Bayer N75, etc.). |
| Devices | HeyGears UltraCraft Cure, water wash, spray machine, airbrush (0.3/0.5mm-diameter nozzle). |
| Tools | Protective goggles, 3M respirator, nitrile gloves, disposable plastic cup, disposable dropper, glass stir stick, 400-600 grit filter paper, lint-free cloth, alligator clip bamboo sticks, electronic scale (accuracy 0.1g or above). |
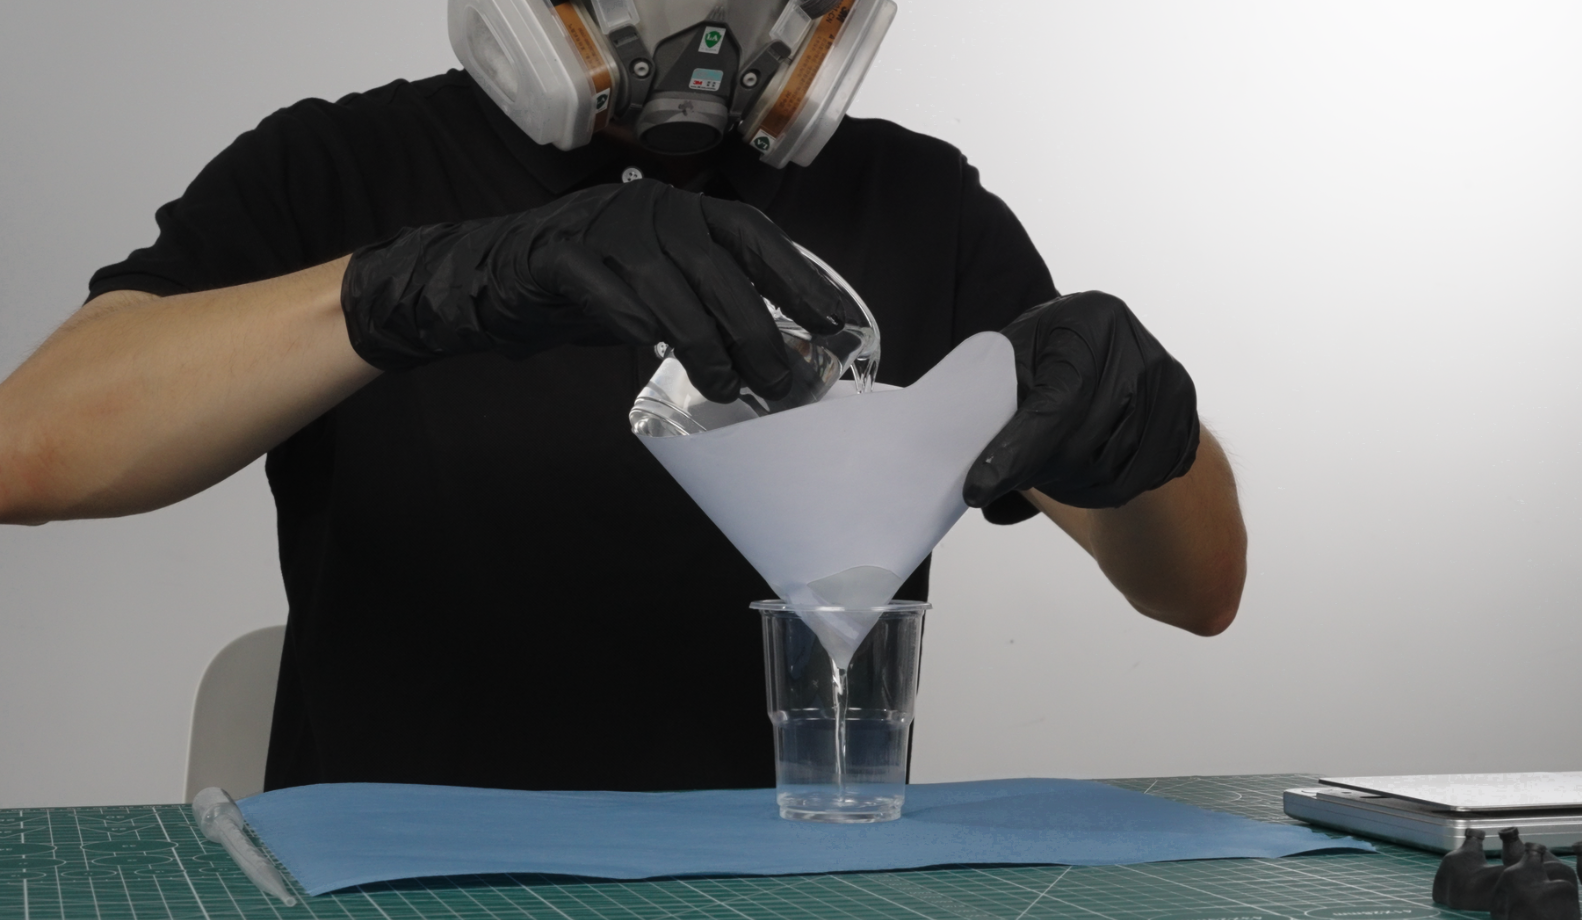
¶ 4.1.1 Varnish Preparation
A. Dilution ratio of varnish
As follows are the dilution ratio for different coat thickness (15 to 35 μm).
- Moderate thickness: 20 to 30 μm — Varnish/EAC thinner = 100g/170g
- Thicker thickness: above 35 μm — Varnish/EAC thinner = 100g/150g
- Thinner thickness: below 15 μm — Varnish/EAC thinner = 100g/200g
Choose the procedure according to your needs:
Direct spraying on the prints: Varnish/EAC thinner = 100g/150g~200g
Spraying on prints after special treatments such as painting or priming: The varnish may result in poor adhesion in this case. A recommendation is diluting the varnish — varnish/EAC thinner = 100g/150~200g — and then add some curing agent — diluted varnish/curing agent = 100g/5g.
If a curing agent is added, please stir slowly while mixing the solvent, to avoid excessive bubbles which could affect the brushing effect.
Notices:
-
Diluted varnish, if is not used up, should be stored in a black container, sealed, and kept away from light, as the EAC thinner is a volatile solvent.
-
Varnish that has been added with curing agent is not recommended is not recommended to be stored, as prolonged storage may lead to difficulties in spraying and poor adhesion.
¶ B. Presentation
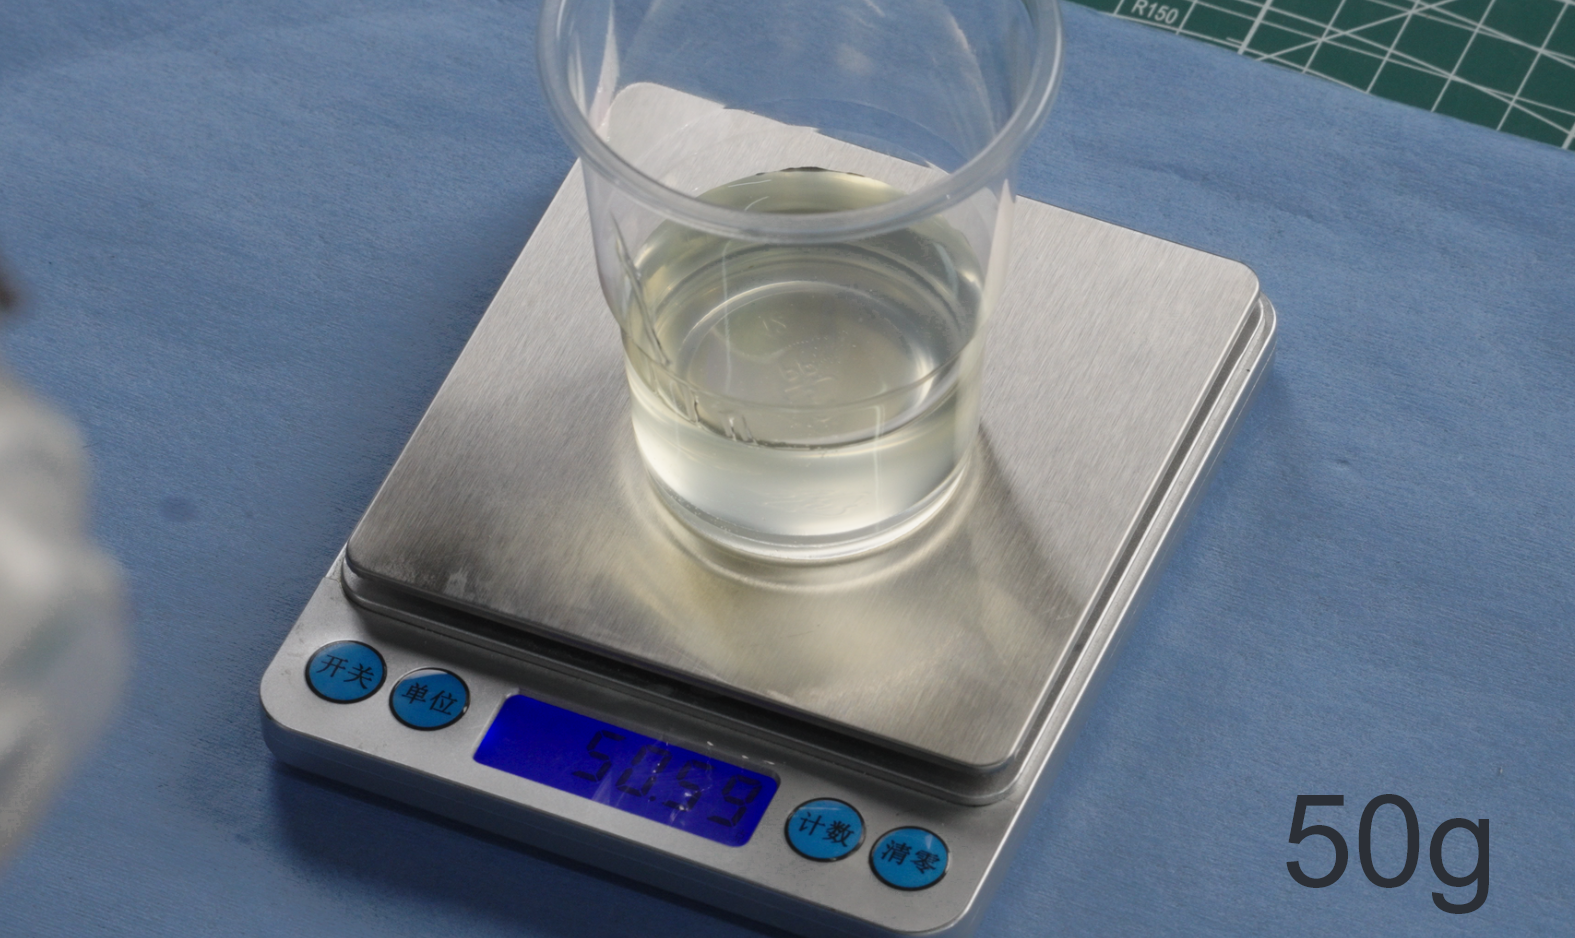
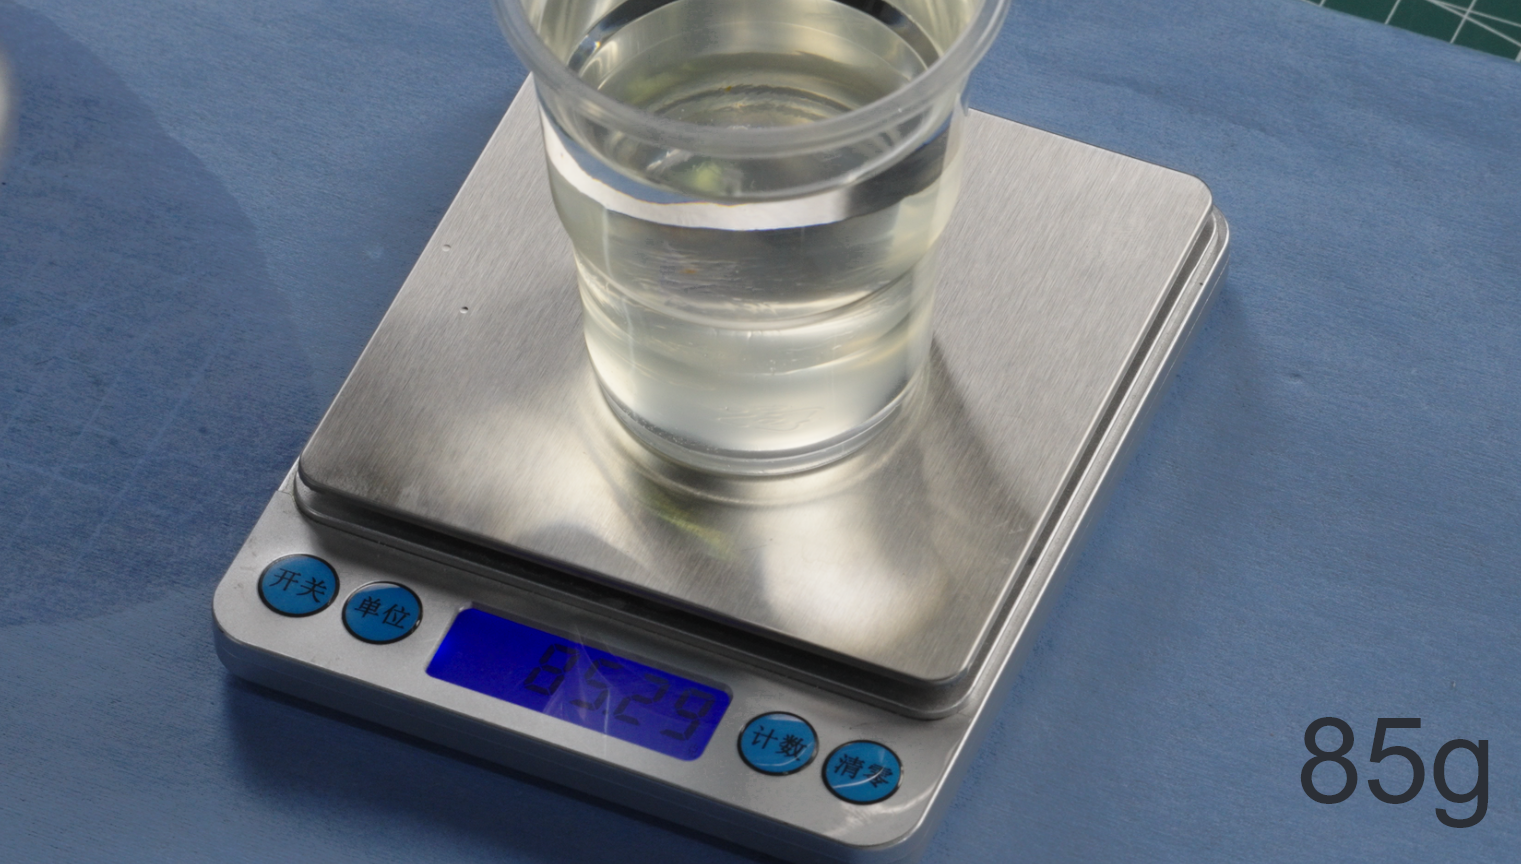
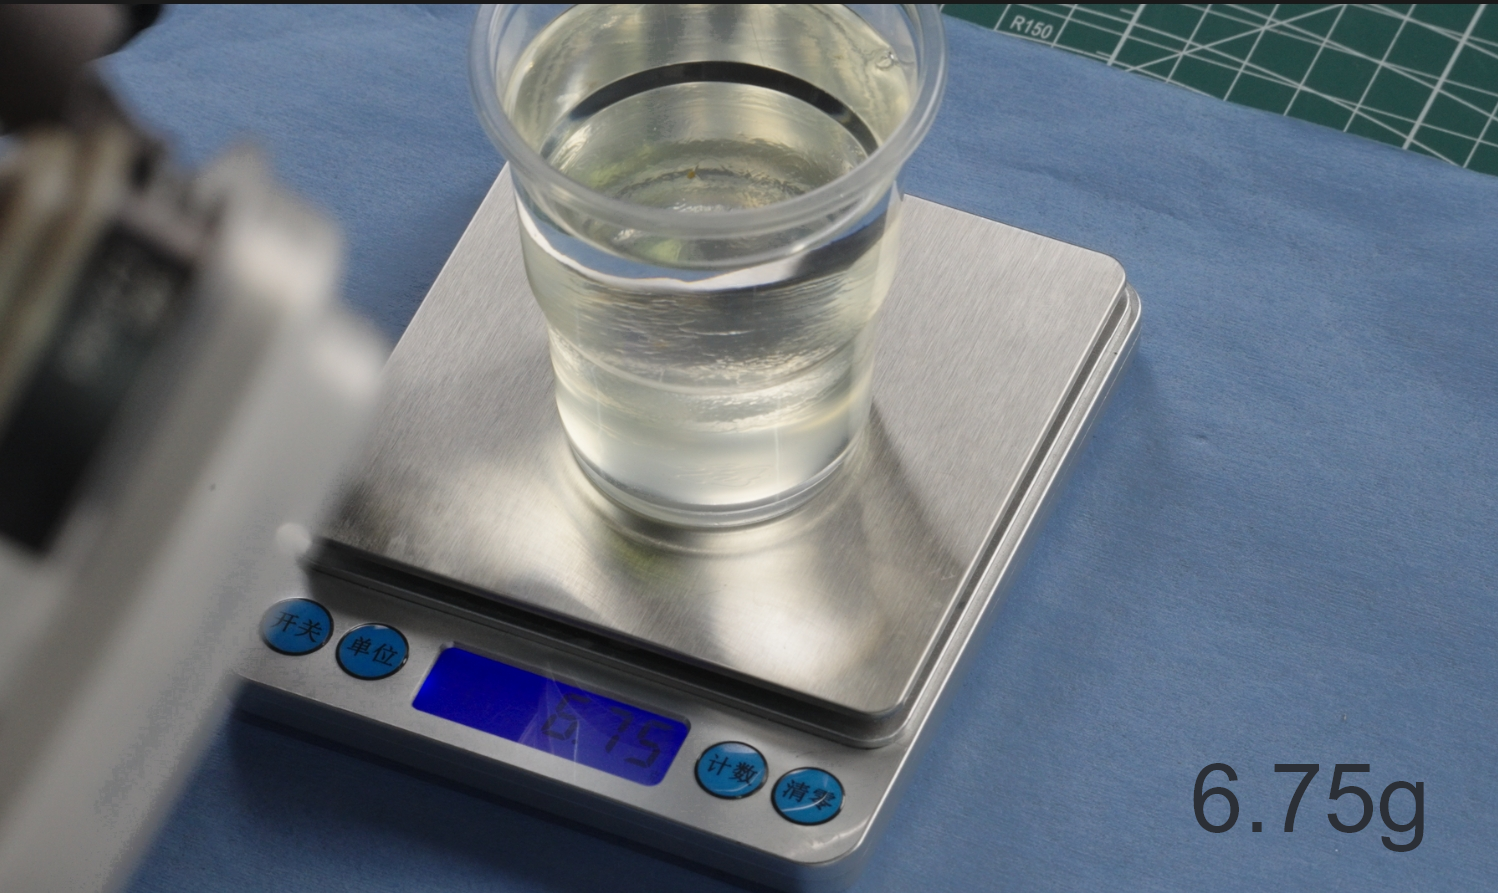
Ex) Adopting the ratio of 100g varnish/170g EAC thinner, prepare 135g of diluted varnish, and then add 6.75g of curing agent to it (diluted varnish/curing agent = 100g/5g).
 |
 |
 |
①When preparing the varnish, use a clean sir stick to fully mix the solvent.
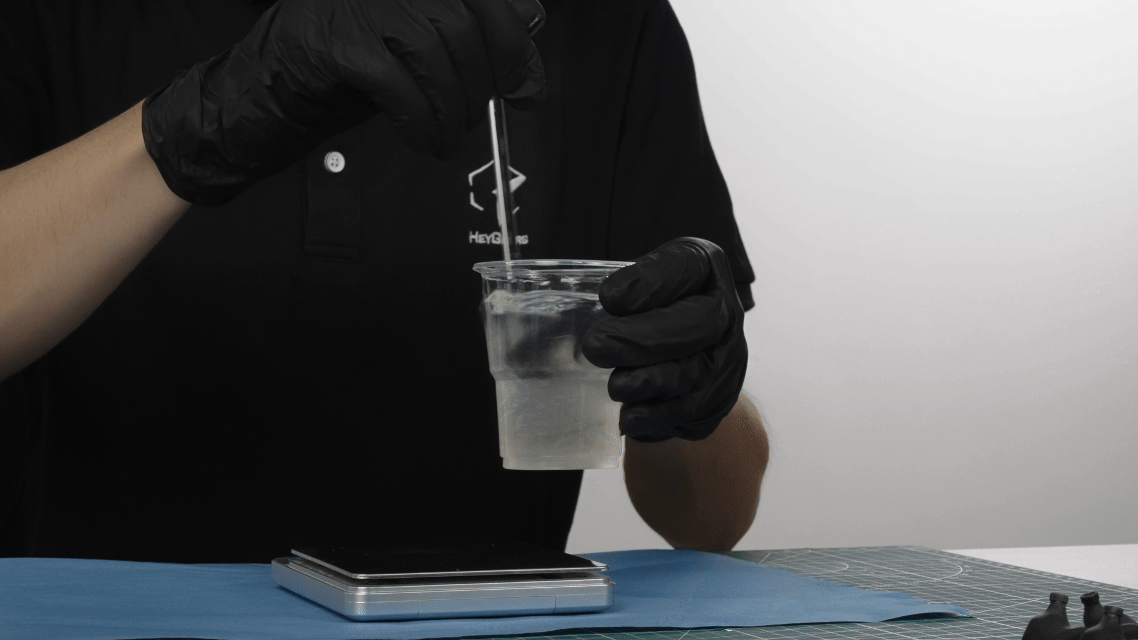
②Filter the final prepared varnish with 400-600 grit filter paper. The varnish after filtering is ready for coating.
¶ Post-Processing of Finished Products
¶ Key Guidelines for Post-Processing Techniques
UltraPrint-Modeling PAT10 Post-Processing SOP
Standardized Sanding Guideline
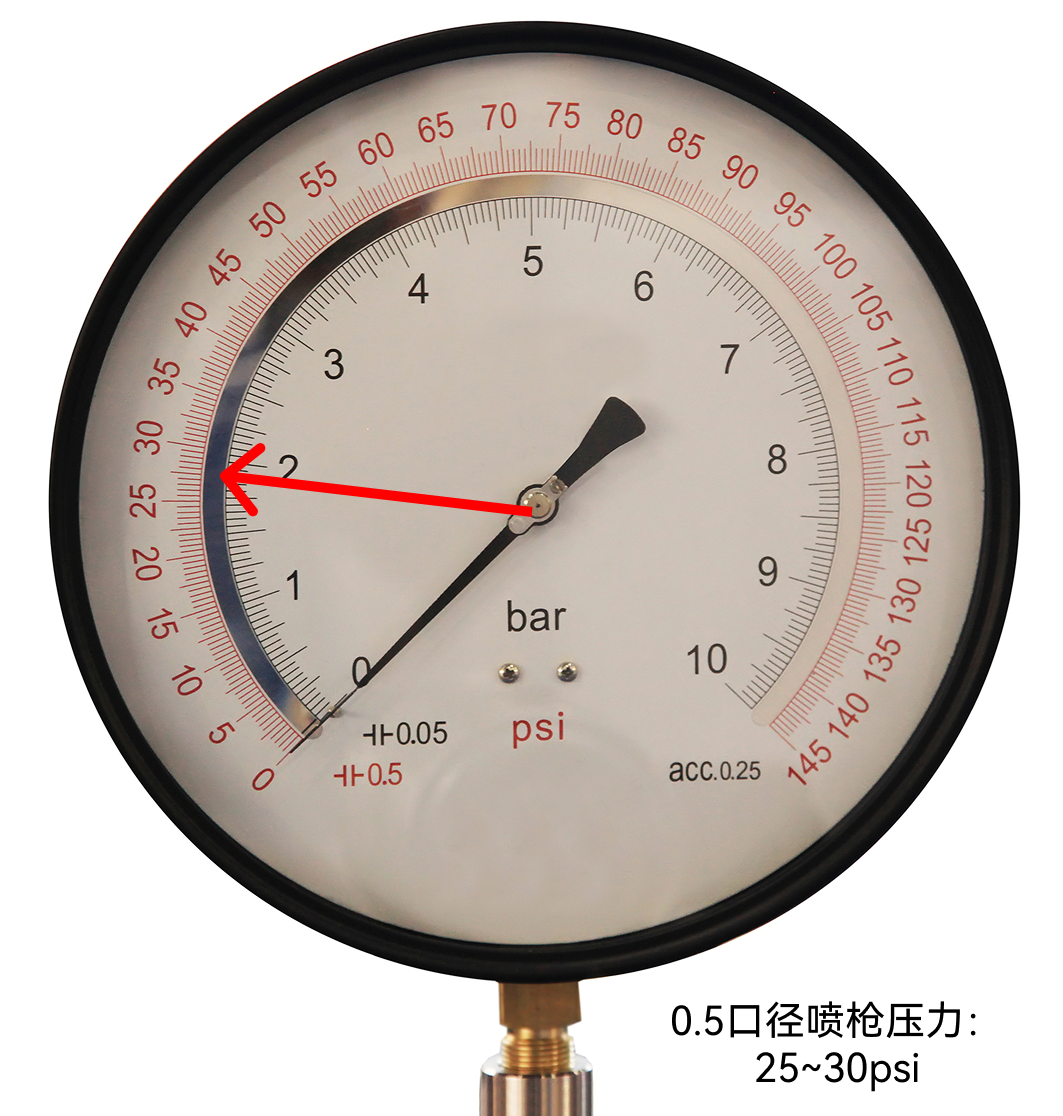
¶ 4.1.2 Airbrush Pressure
Test and adjust the pressures of the airbrush (empty) .
0.3 mm nozzle - Use the pressure at 20 psi, which is generally suitable for models with a volume smaller than 50 mm x 50 mm x 50 mm.
0.5 mm nozzle - Use the pressure at 25-30 psi, which is generally suitable for models with a volume larger than 50 mm x 50 mm x 50 mm.
| Pressure for 0.3 mm nozzle | Pressure for 0.5 mm nozzle |
 |
 |
¶ 4.2 Brush-Coating
Please take protective measures and be prepared with the tools below.
Varnish brush-coating
| Solvent | UltraGlaze ClearG115, curing agent (optional aliphatic polyisocyanate resin such as Covestro/Bayer N75, etc.). |
| Devices | HeyGears UltraCraft Cure, rotating unit with a hole that fits an alligator clip stick |
| Tools | Protective goggles, 3M respirator, nitrile gloves, paint brush, disposable plastic cup, glass stir stick, alligator clip bamboo sticks, painting stand base. |
¶ VI. FINISHING
¶ 2.3 Varnish Coating
¶ 2.3.1 Varnish Airbrush-Coating and Curing
¶ A. Airbrush with Varnish Spraying
①Pour the prepared varnish into the airbrush.
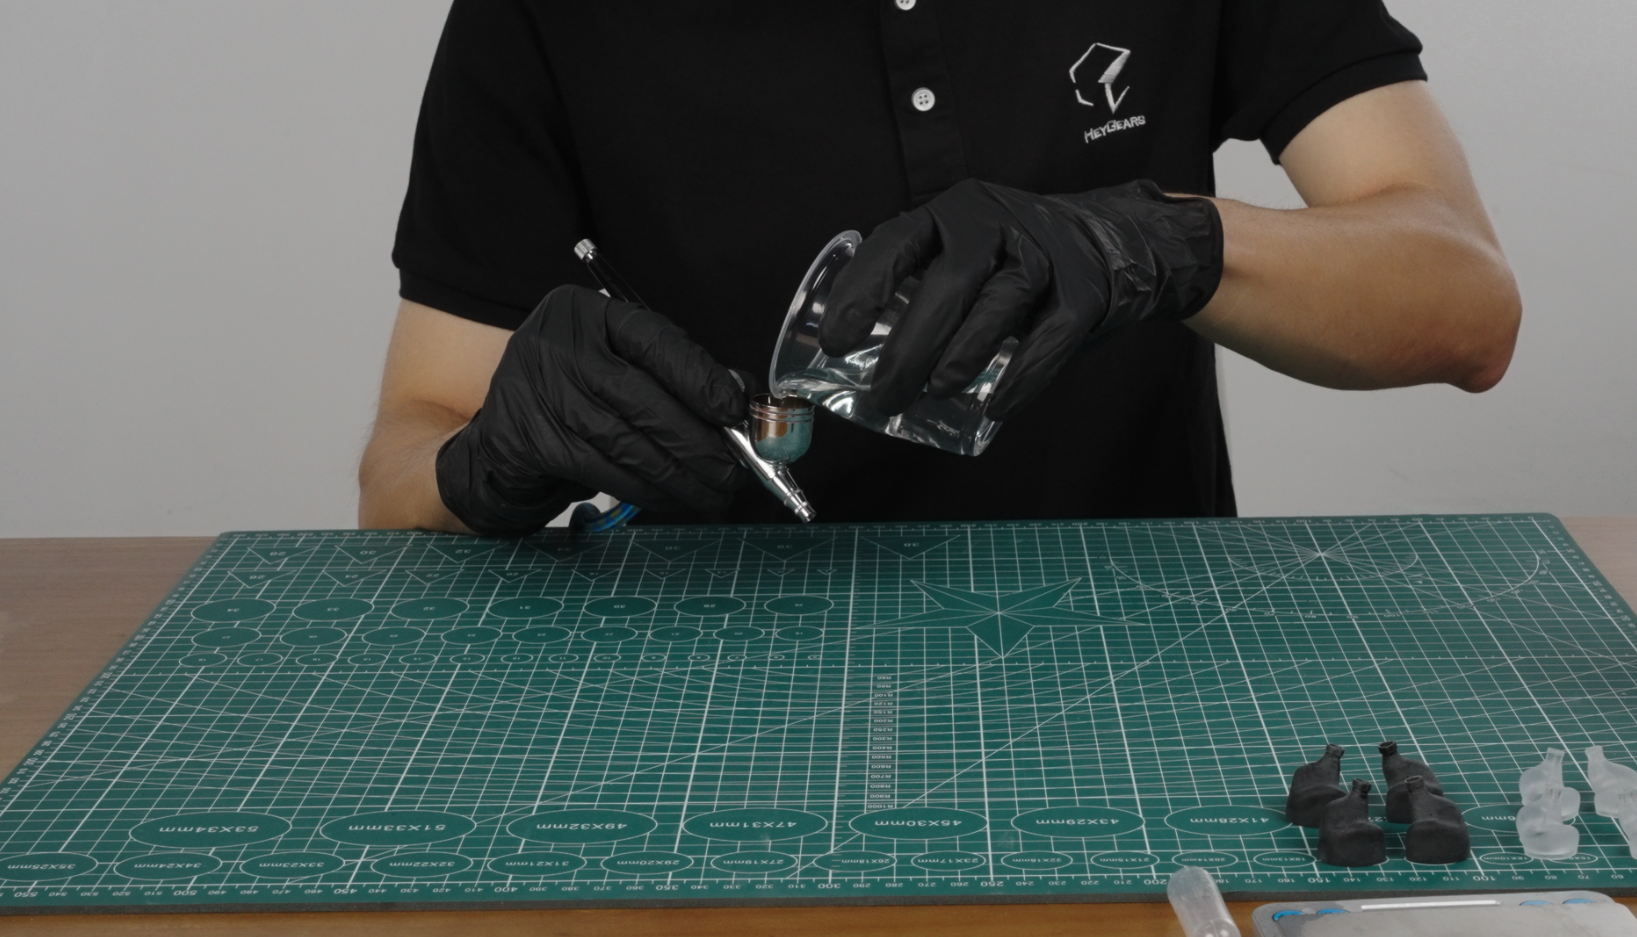
②Spray the model at a suitable distance of about 12-15 cm away.
③Check the model for any areas that have not been properly sprayed, and touch up as needed.
¶ B. Curing
HeyGears UltraCraft Cure is used here, which features both baking and curing UV.
-
Ensure that the curing device is clean and dust-free, and preheat the cabinet to 60°C in baking mode.
-
Carefully place the print part into the curing device. Use baking mode to bake it first, at 60°C (temperature depends on the heat resistance performance of the printing material) for 2.5 mins to allow the varnish coat to level naturally.
-
If you find the model is poorly coated BEFORE curing, you can wash it off and coat it again; If you find this situation (locally) AFTER curing, you can sand the area and apply some varnish on it again.
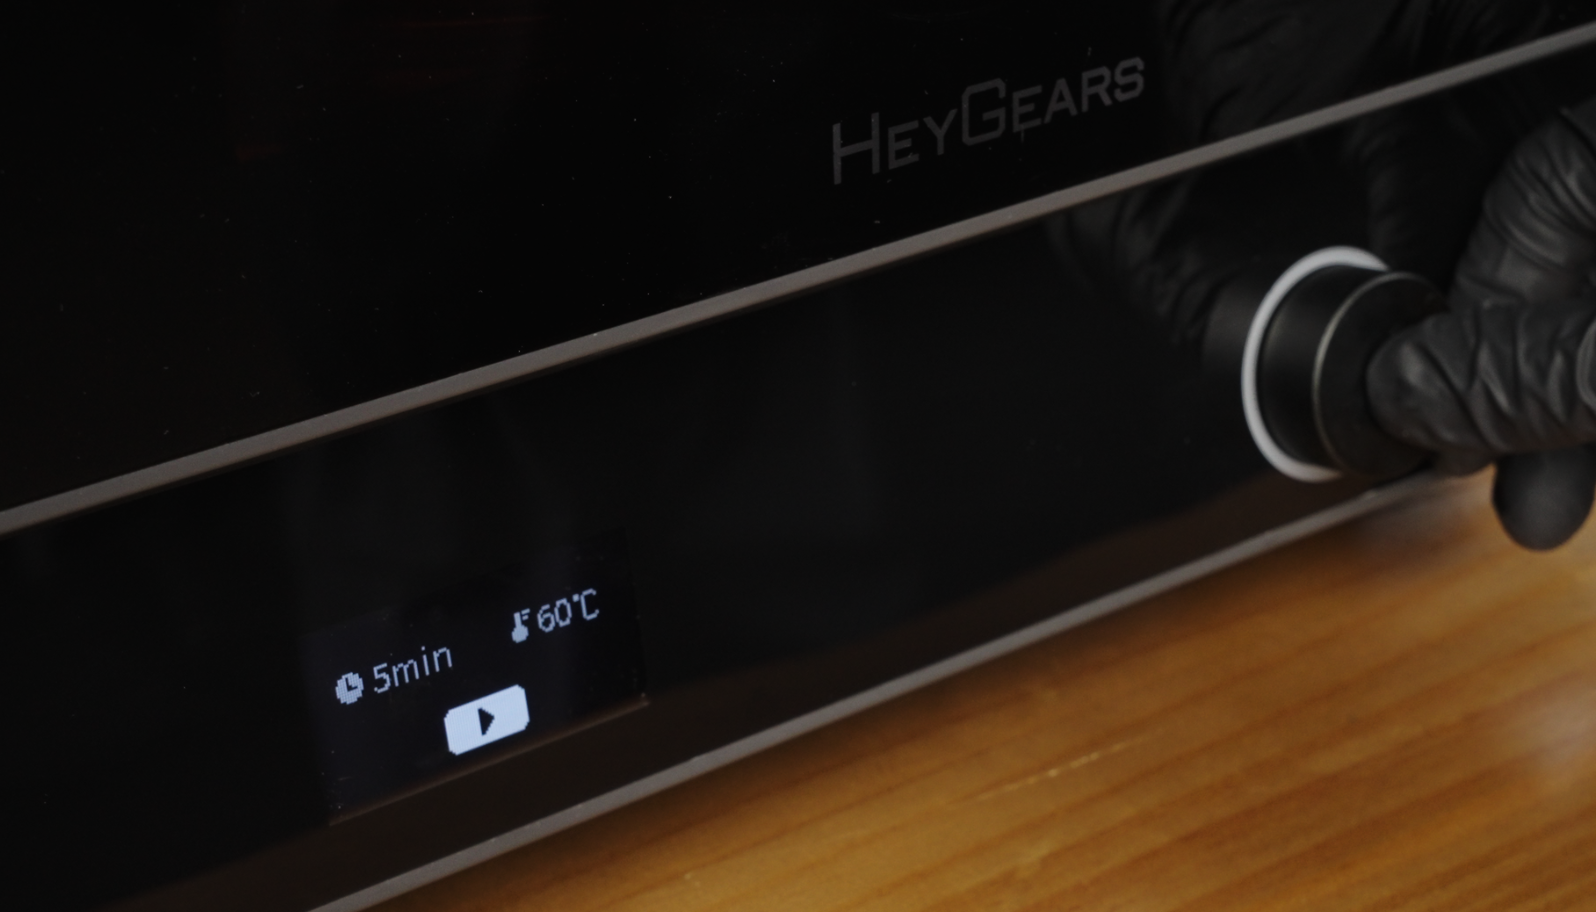
-
Check the condition of the coat to ensure it is uniform and intact. Use the curing mode of the curing device to cure the print part at 60°C 5 mins.
 |
 |
¶ 2.3.2 Varnish Brush-Coating and Curing
¶ A. Varnish Brushing
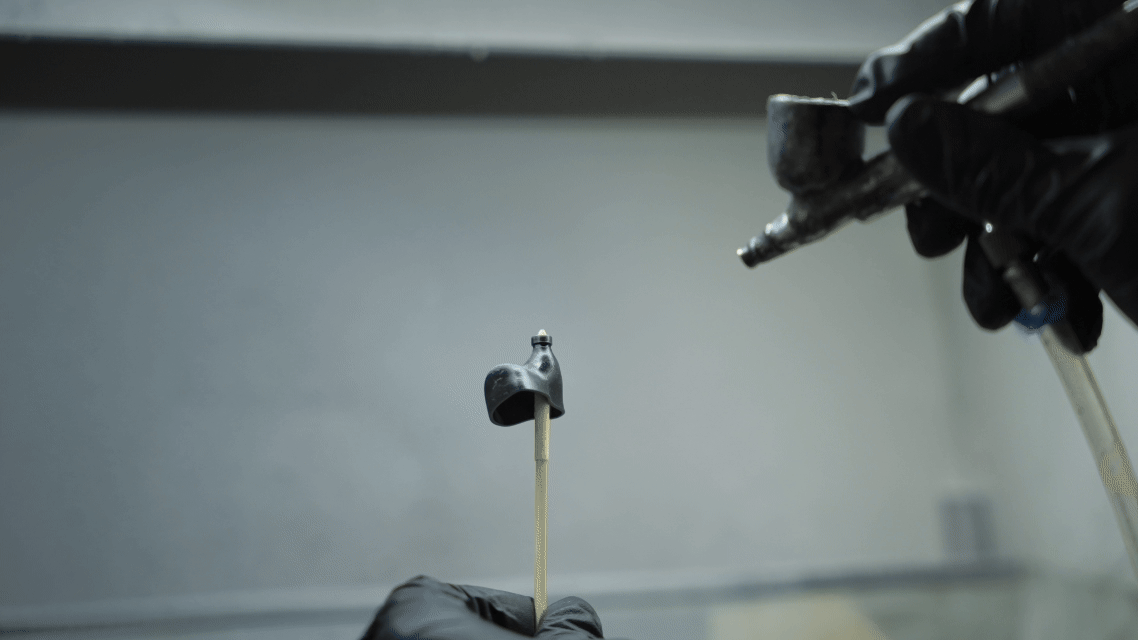
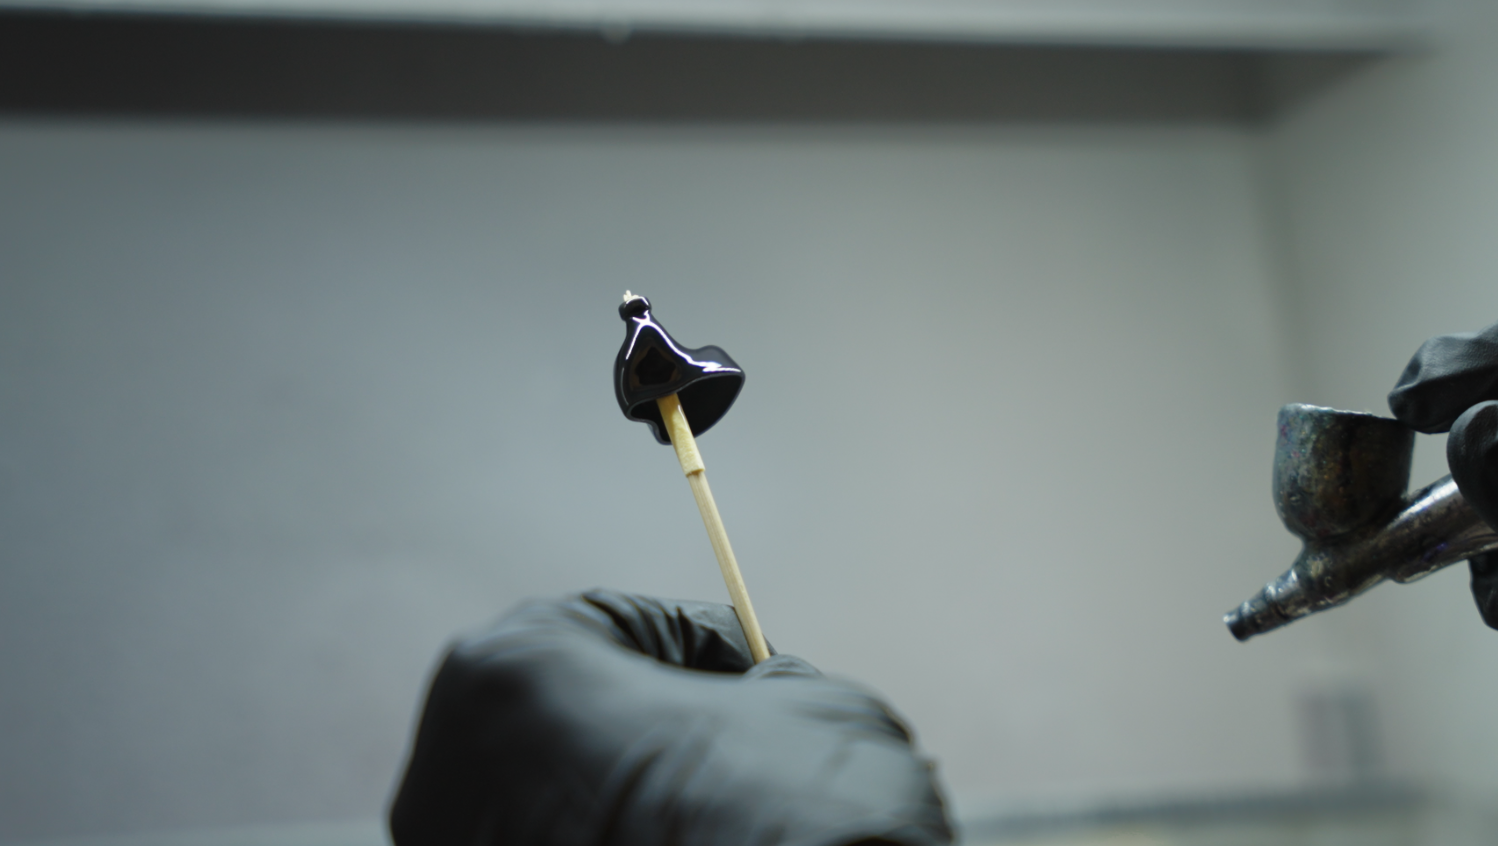
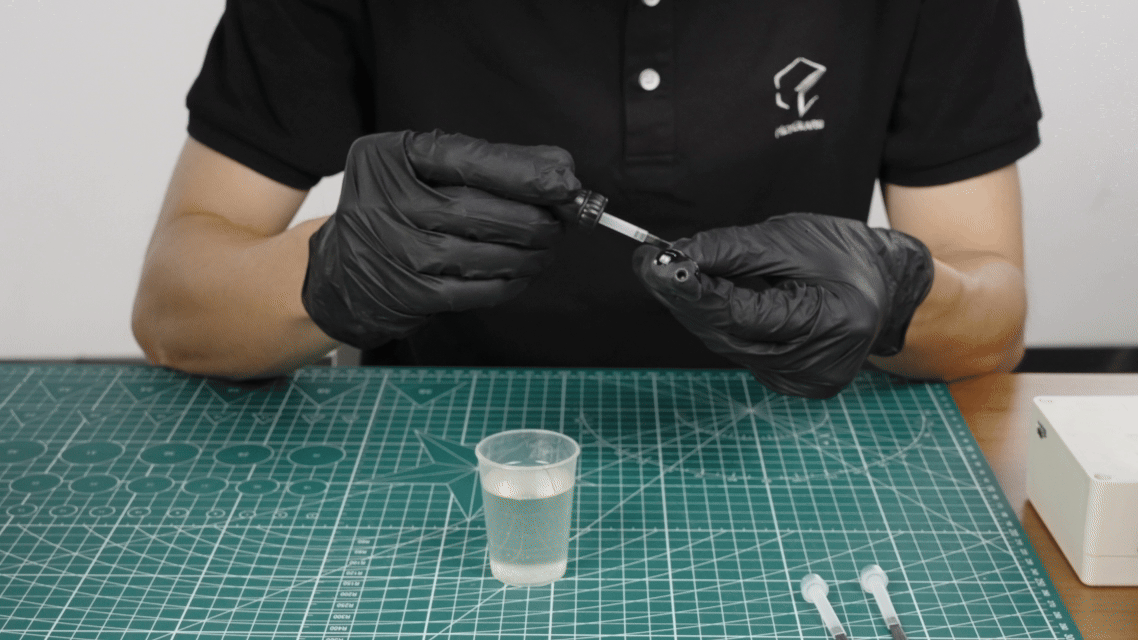
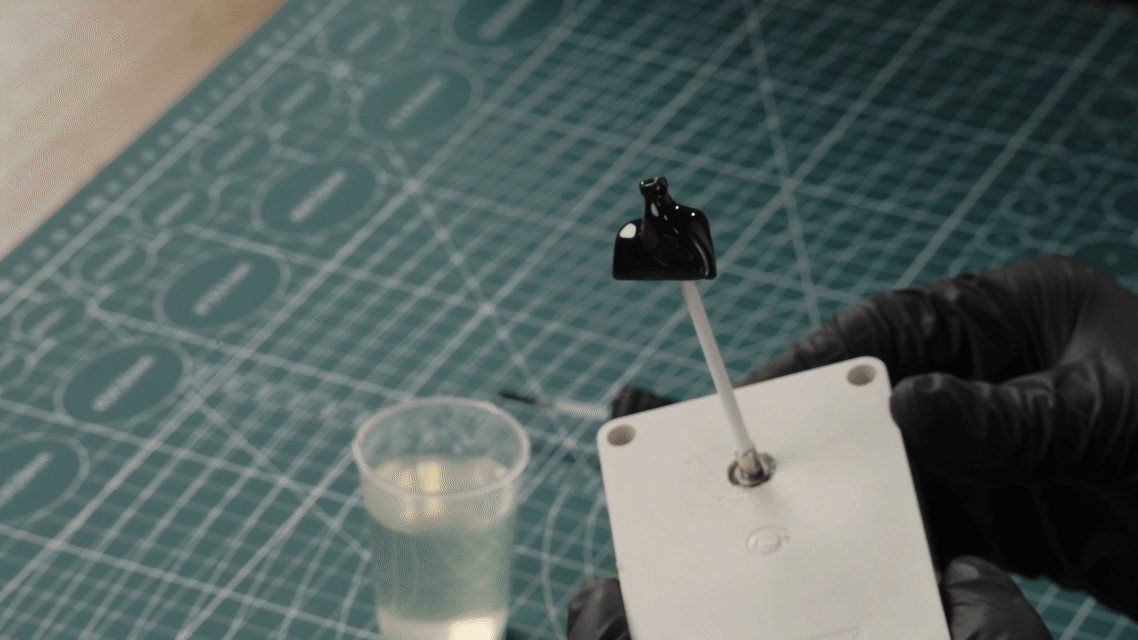
Mount an alligator clip stick to the model, so to avoid touching the model surface with hands (or gloves) during painting.
Pour the required amount of varnish into a container.
Ensure that the fine paint brush is clean and free of debris, then use it to brush the model evenly, keeping in one direction.
| Mount the alligator clip stick | Paint evenly |
 |
 |
Notice:
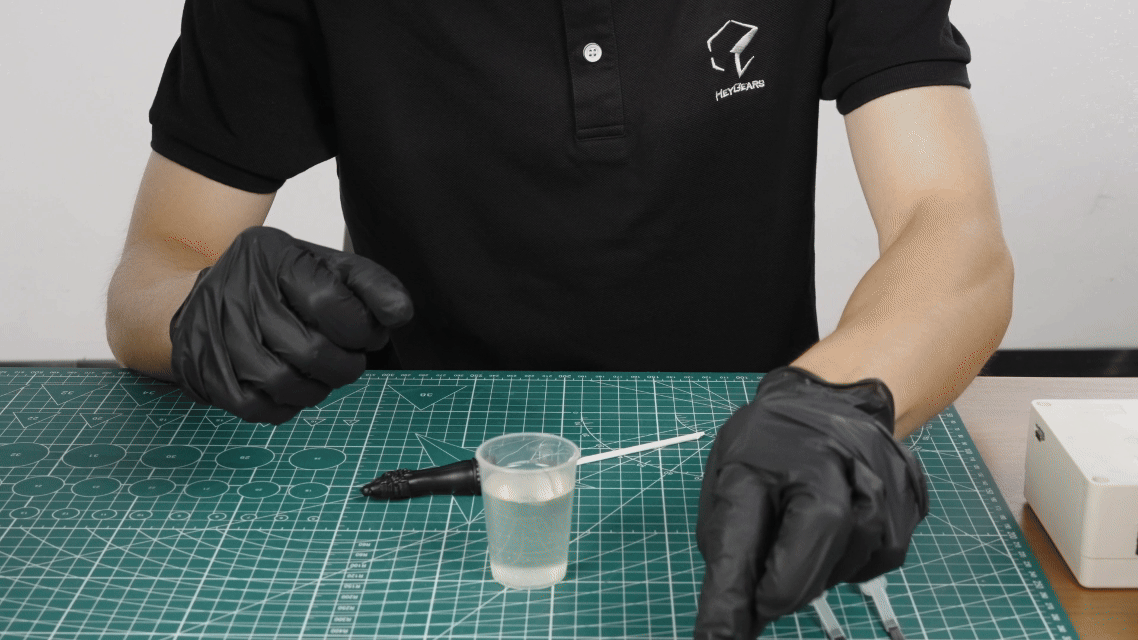
After painting, please place the model into the curing device as soon as possible, to prevent the varnish coat from running, or oil and dust particles settling on the surface.
Unused varnish can be filtered and returned to its bottle, well stored in it away from light.
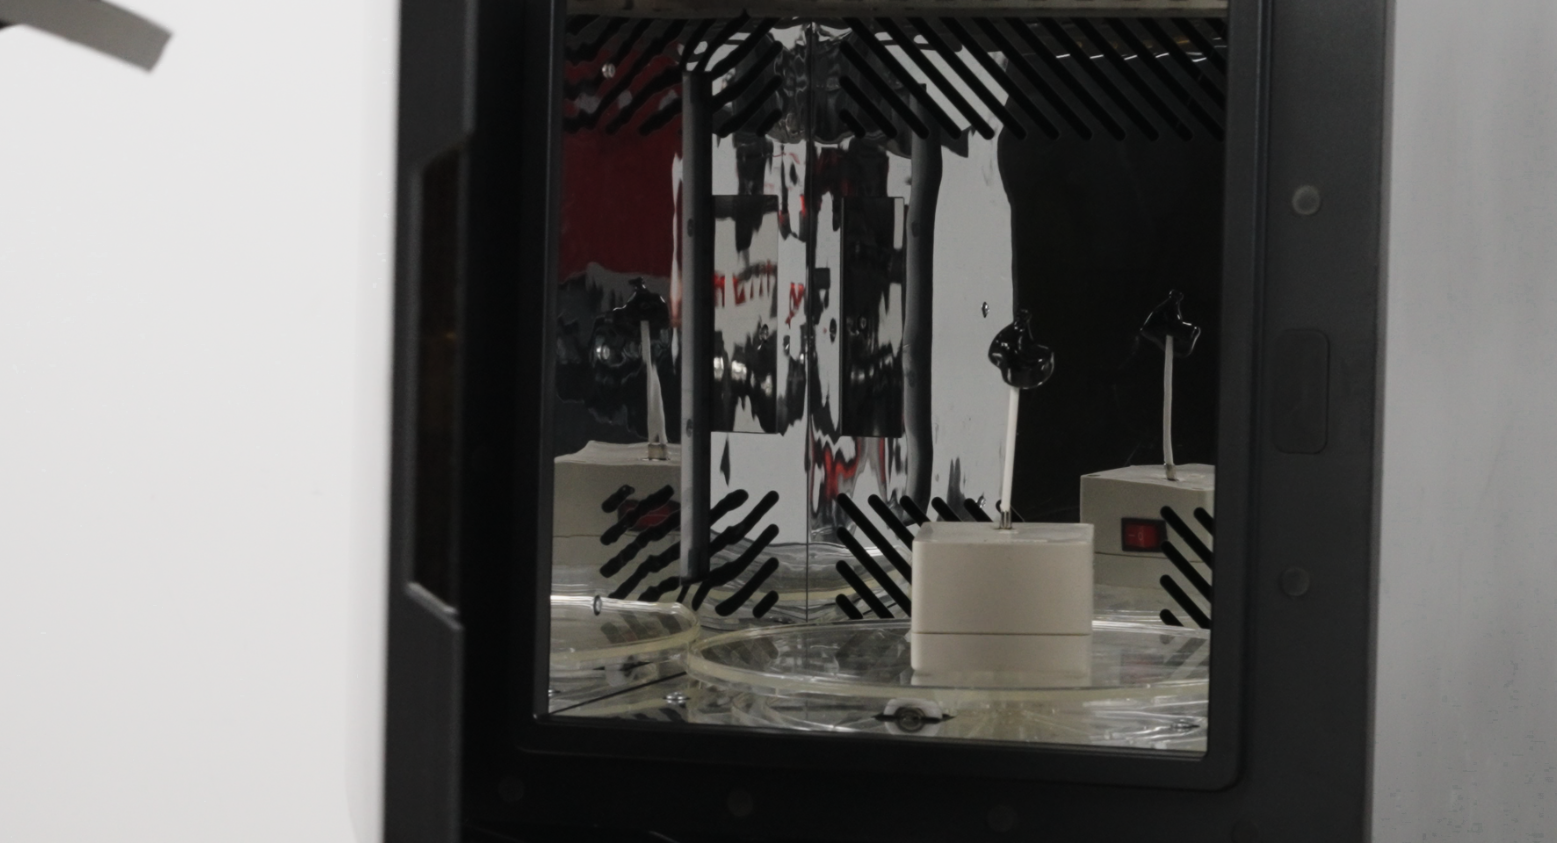
¶ B. Curing
HeyGears UltraCraft Cure is used here, which features both baking and curing UV.
Ensure that the curing device is clean and dust-free, and preheat it to 60°C in baking mode.
Mount the stick with the coated model onto the rotating unit, and put them into the curing device to bake it in the baking mode at 50-60℃ for 1min (Temperature depends on the heat resistance performance of the printing material) to allow the varnish coat to level naturally.
If you find the model is poor coating BEFORE curing, you can wash it off and paint it again; if you find this situation (locally) AFTER curing, you can sand the area and paint some varnish on it again.
Check the condition of the coat to ensure it is uniform and intact. Use the curing mode of the curing device to cure the model at 60°C 5 mins.
| Rotating unit | Curing device - Baking | Curing device - Curing |
 |
|
|
¶ 2.3.3 FAQ in Varnish Coating
¶ 2.4 For Different Transparent Effects
HeyGears Transparency Solution includes the following 6 effects in total.
| Highly Transparent Demonstration | Matt & Transparent |
| Painted & Translucent | Painted Matt & Translucent |
| Internal Patterns | Internal Transparent Channels |
¶ VII. Quality Assurance Standards
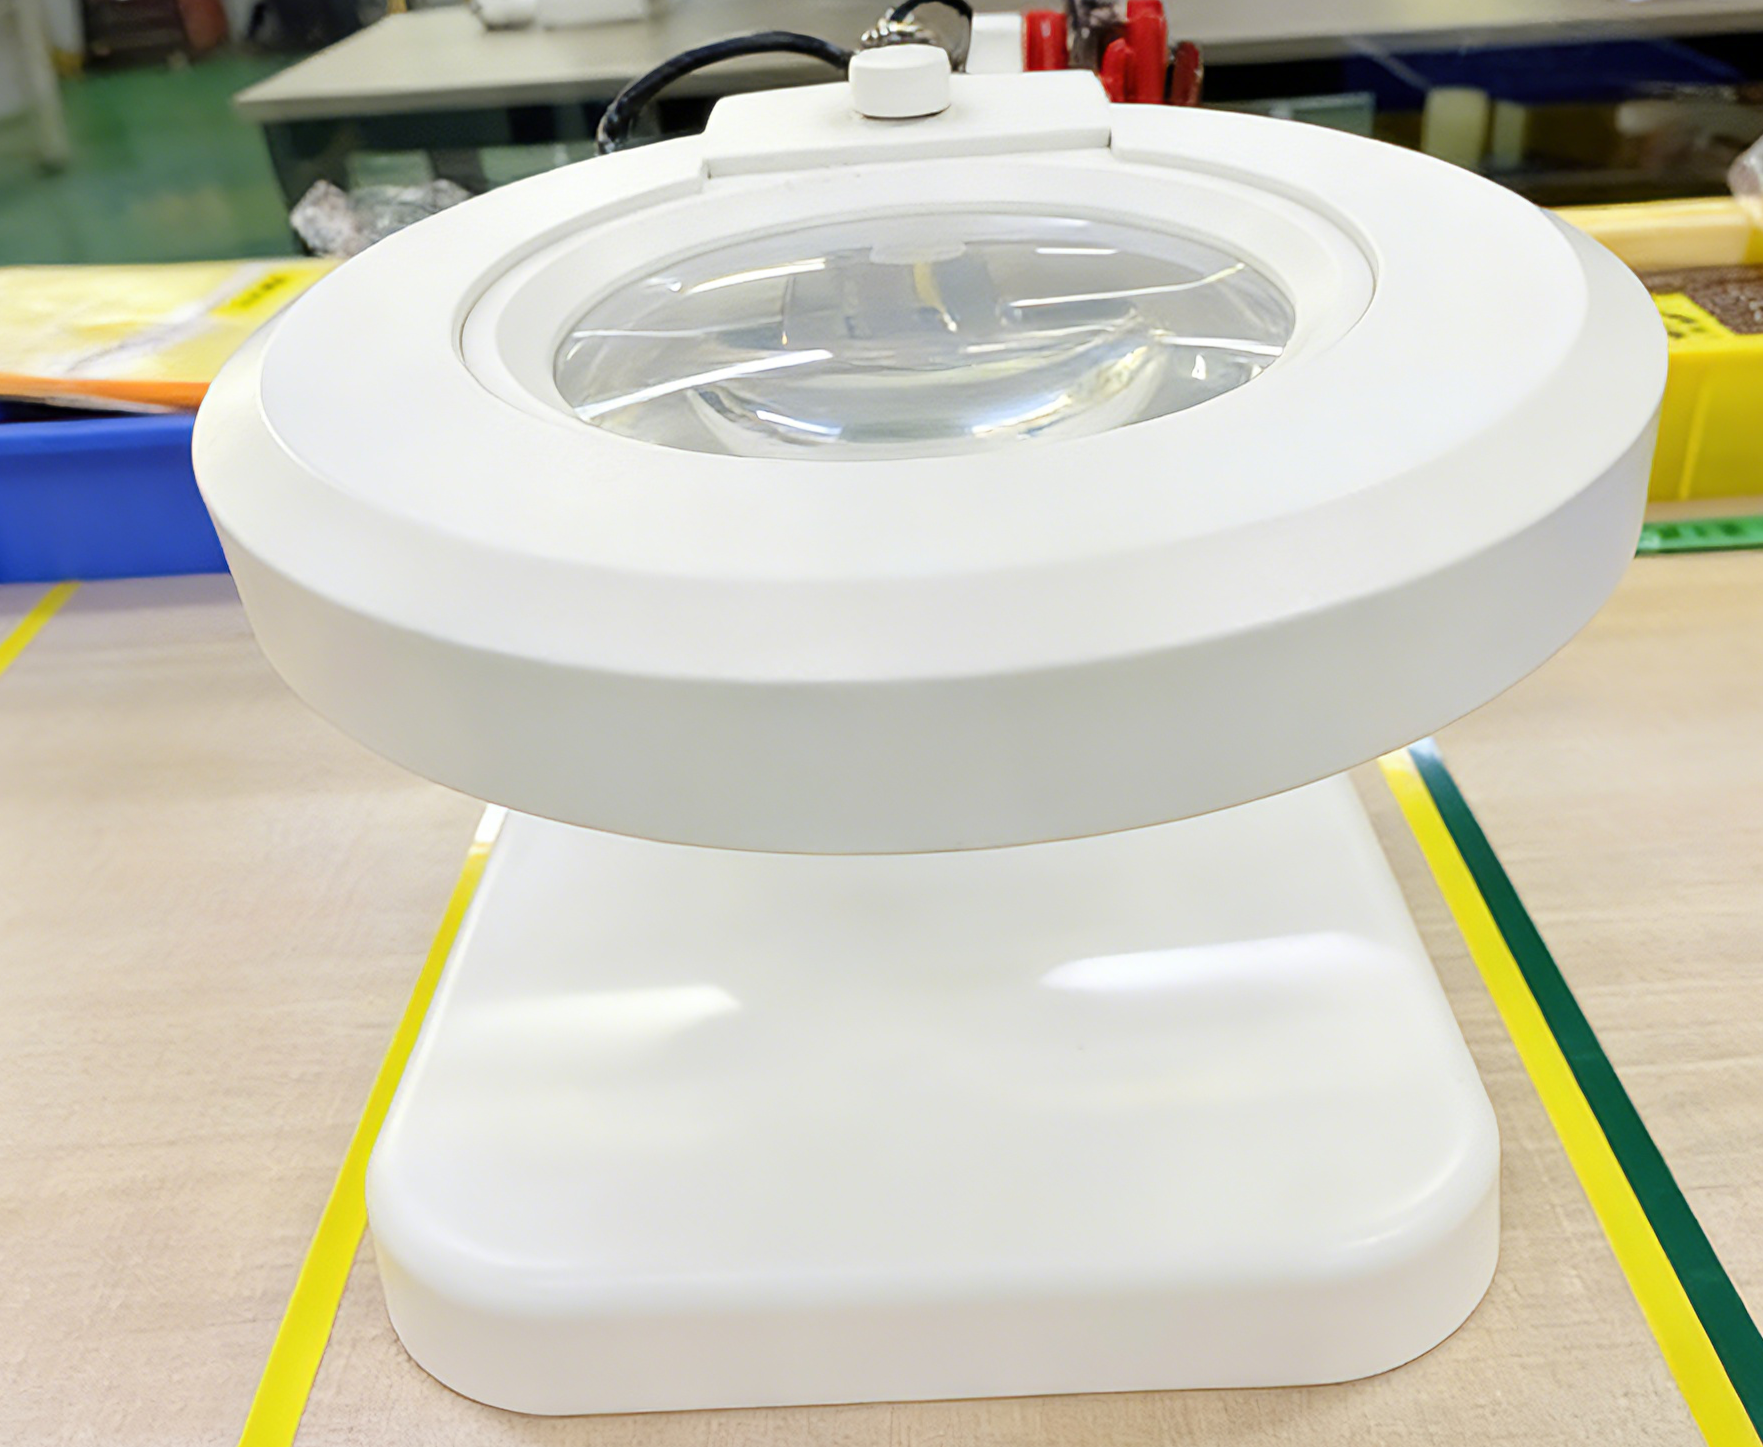
Inspection Tools:
LEY-X01 desktop magnifier with HD LED Light
Luminous flux: 4200-5000 LM
Power: 15 W
Color temperature: 5500 K
Inspection Method:
Inspect with eyes at a distance of 30-40 cm.
Reference tool: Inspection gauge template
Compared against a reference standard: Film Card.
| Defect Types | Images | Inspection Method/Reference | Standards |
| External bubbles | Visual inspection/Inspection gauge template | Based on diameters, bubbles can be categorized into: 1.Class A: Diameter ≤0.30mm, Number ≤3. 2.Class B: Diameter ≤0.30mm, no requirements on Number |
|
| Impurities | Visual inspection/Inspection gauge template | Based on surface areas, impurities can be categorized into: 1.Class A: Surface Area ≤0.03, Number ≤2. 2. Class B: Surface Area ≤0.05, Number ≤5. |
|
| Defects | Visual inspection/Inspection gauge template | Based on surface areas, impurities can be categorized into: 1.Class A: Surface Area ≤0.03, Number ≤2. 2. Class B: Surface Area ≤0.05, Number ≤5. |
¶ VIII. HeyGears Original Case
| Goldfish | 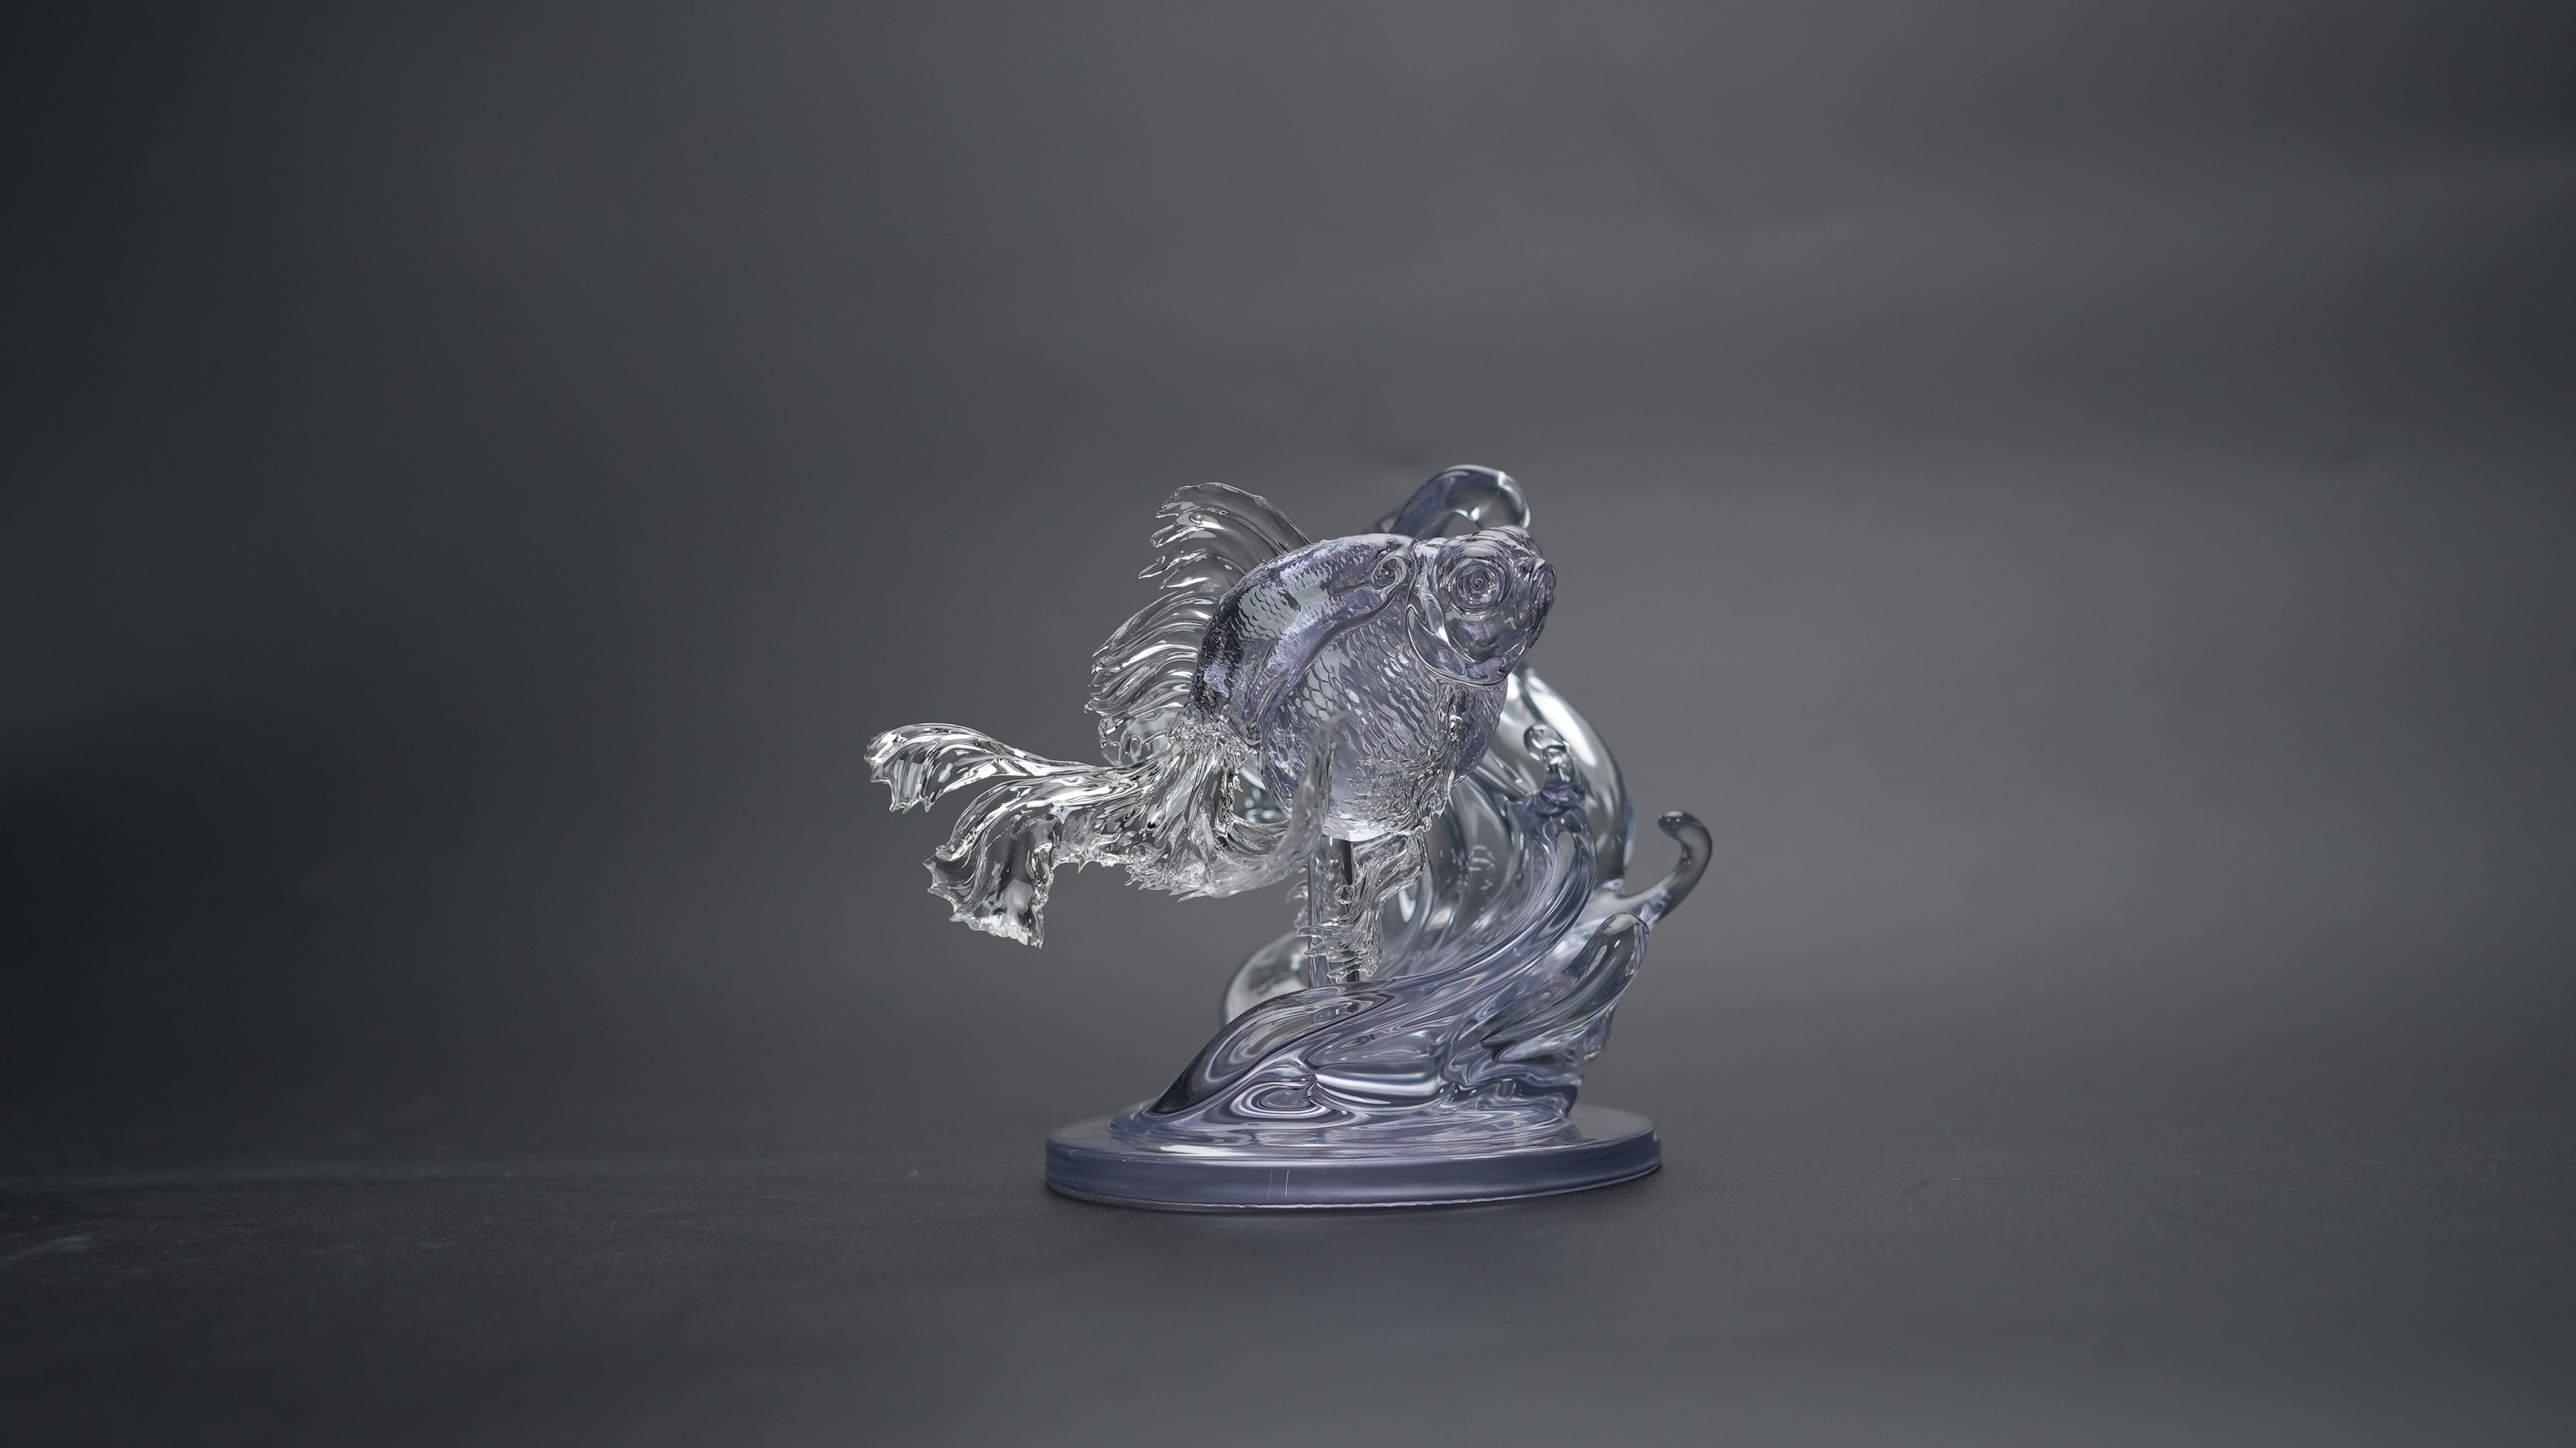 |
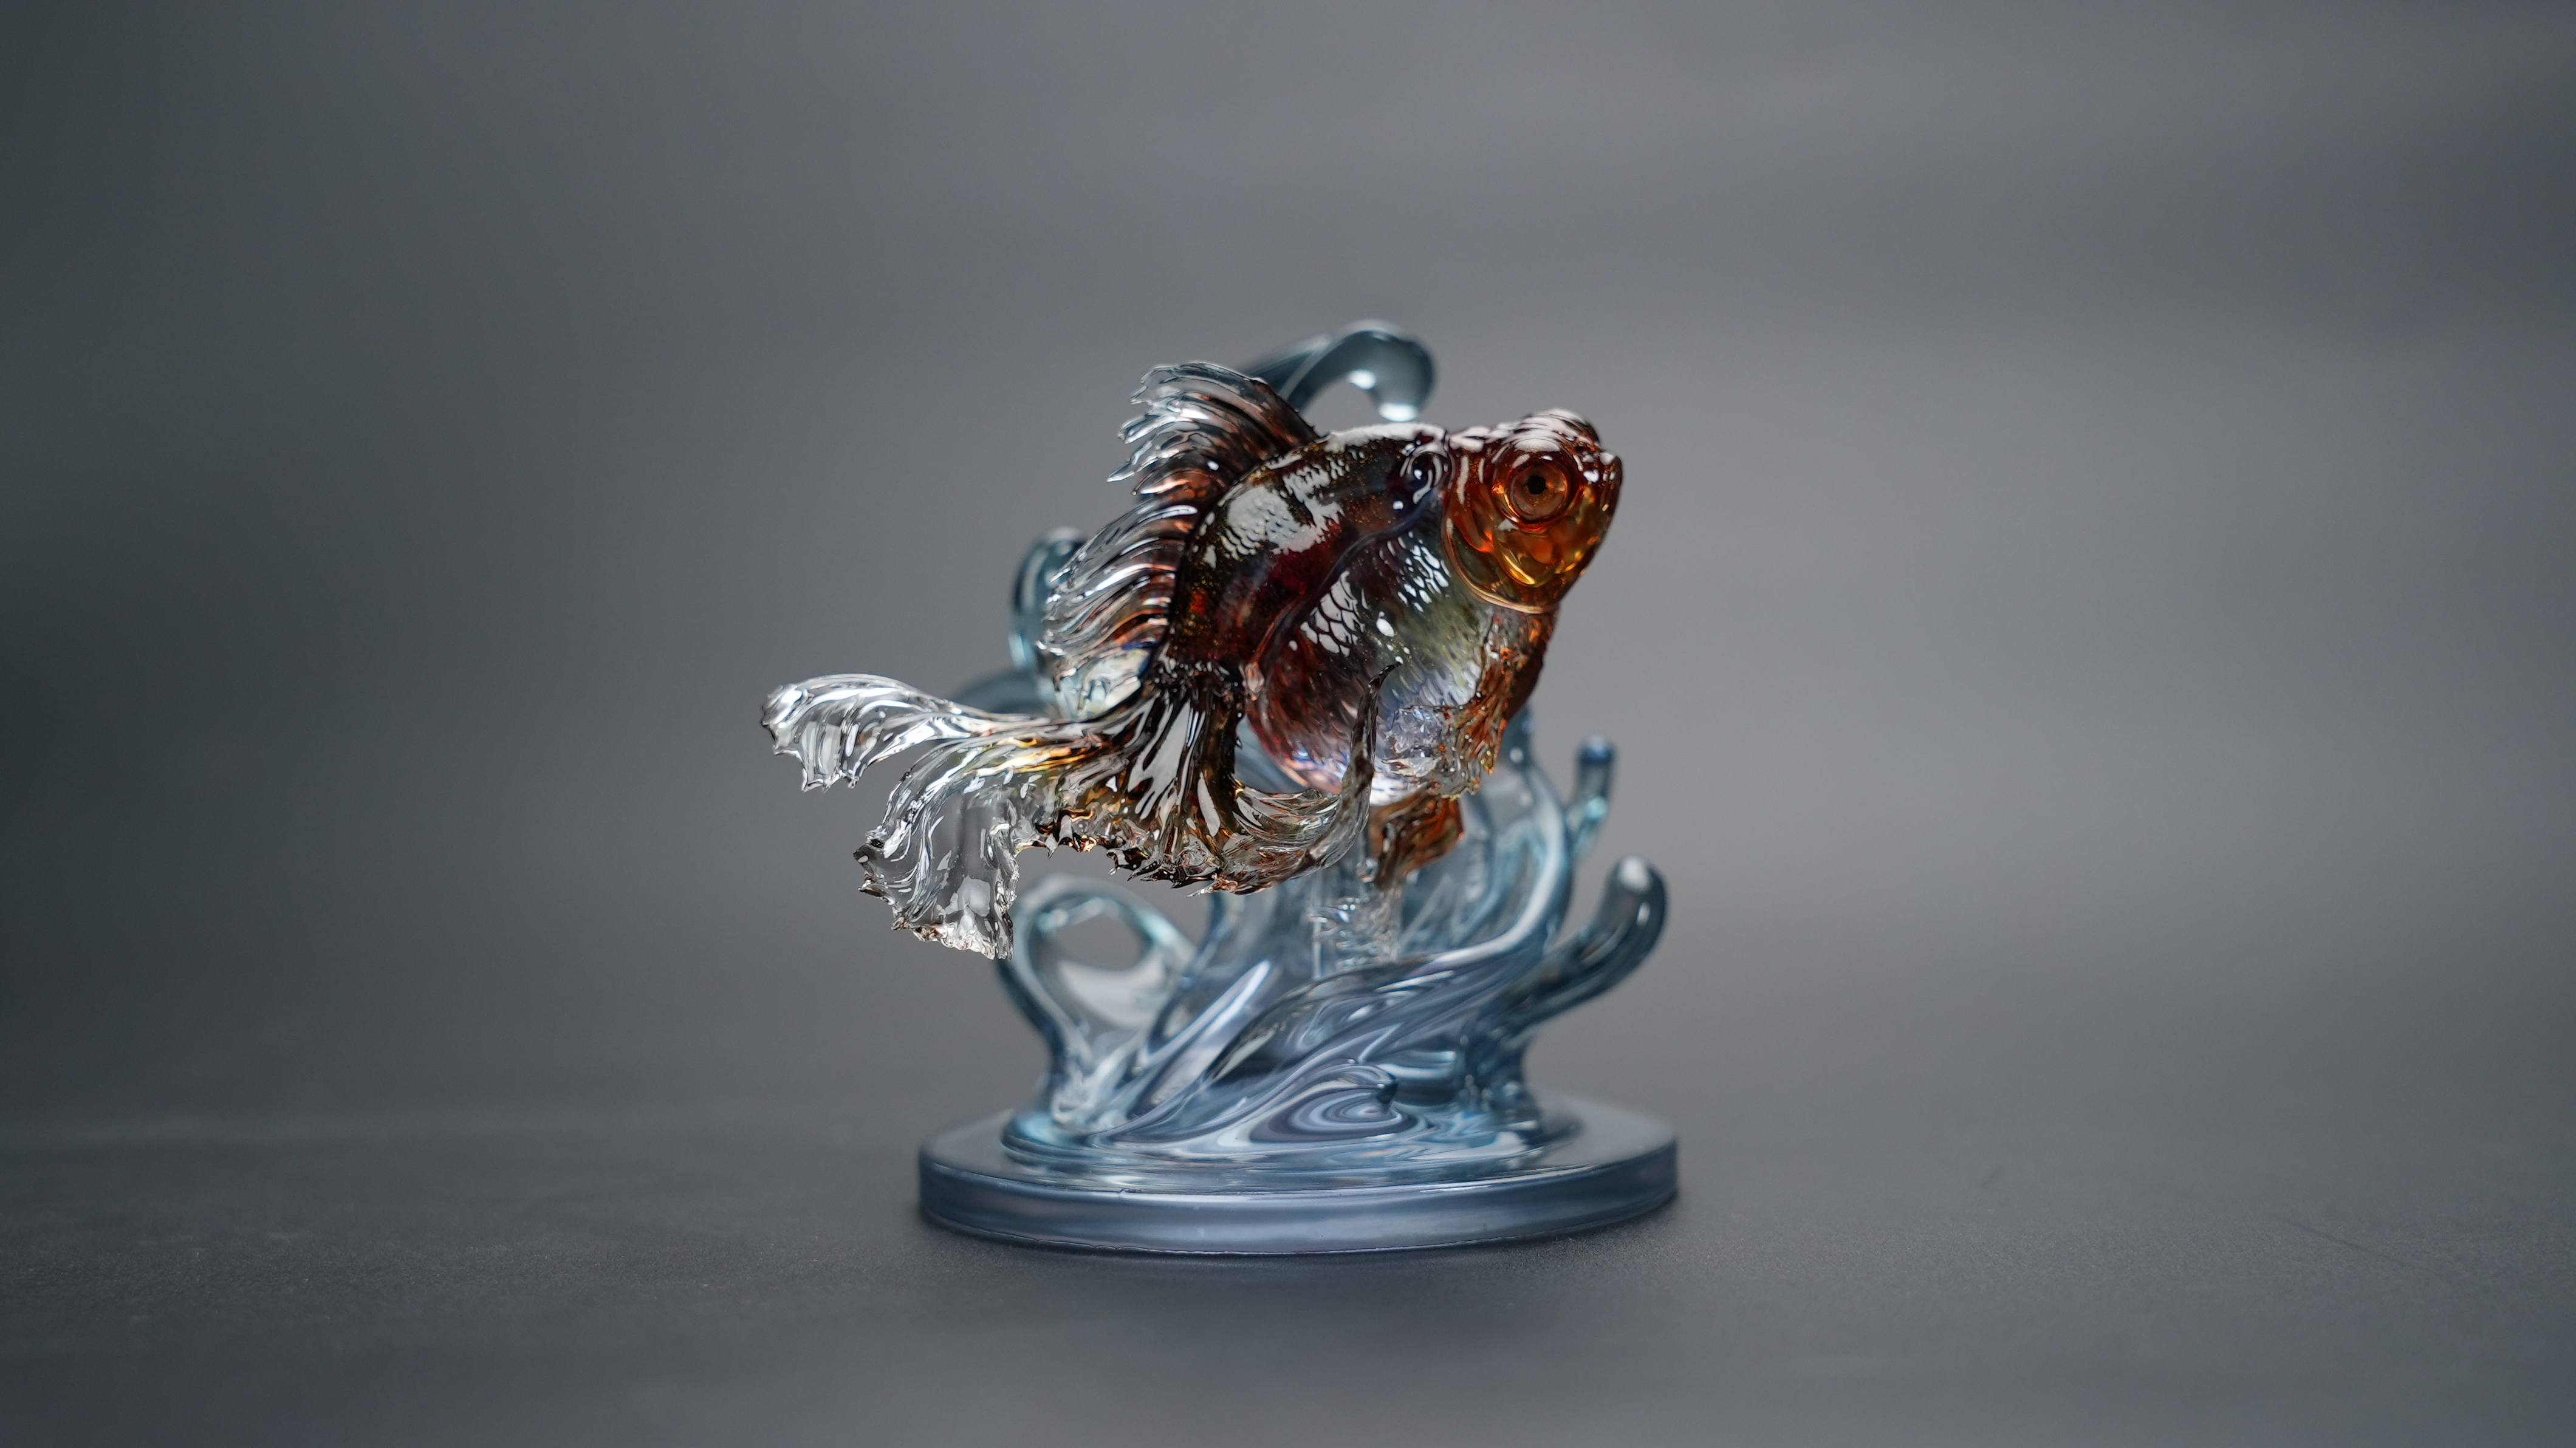 |
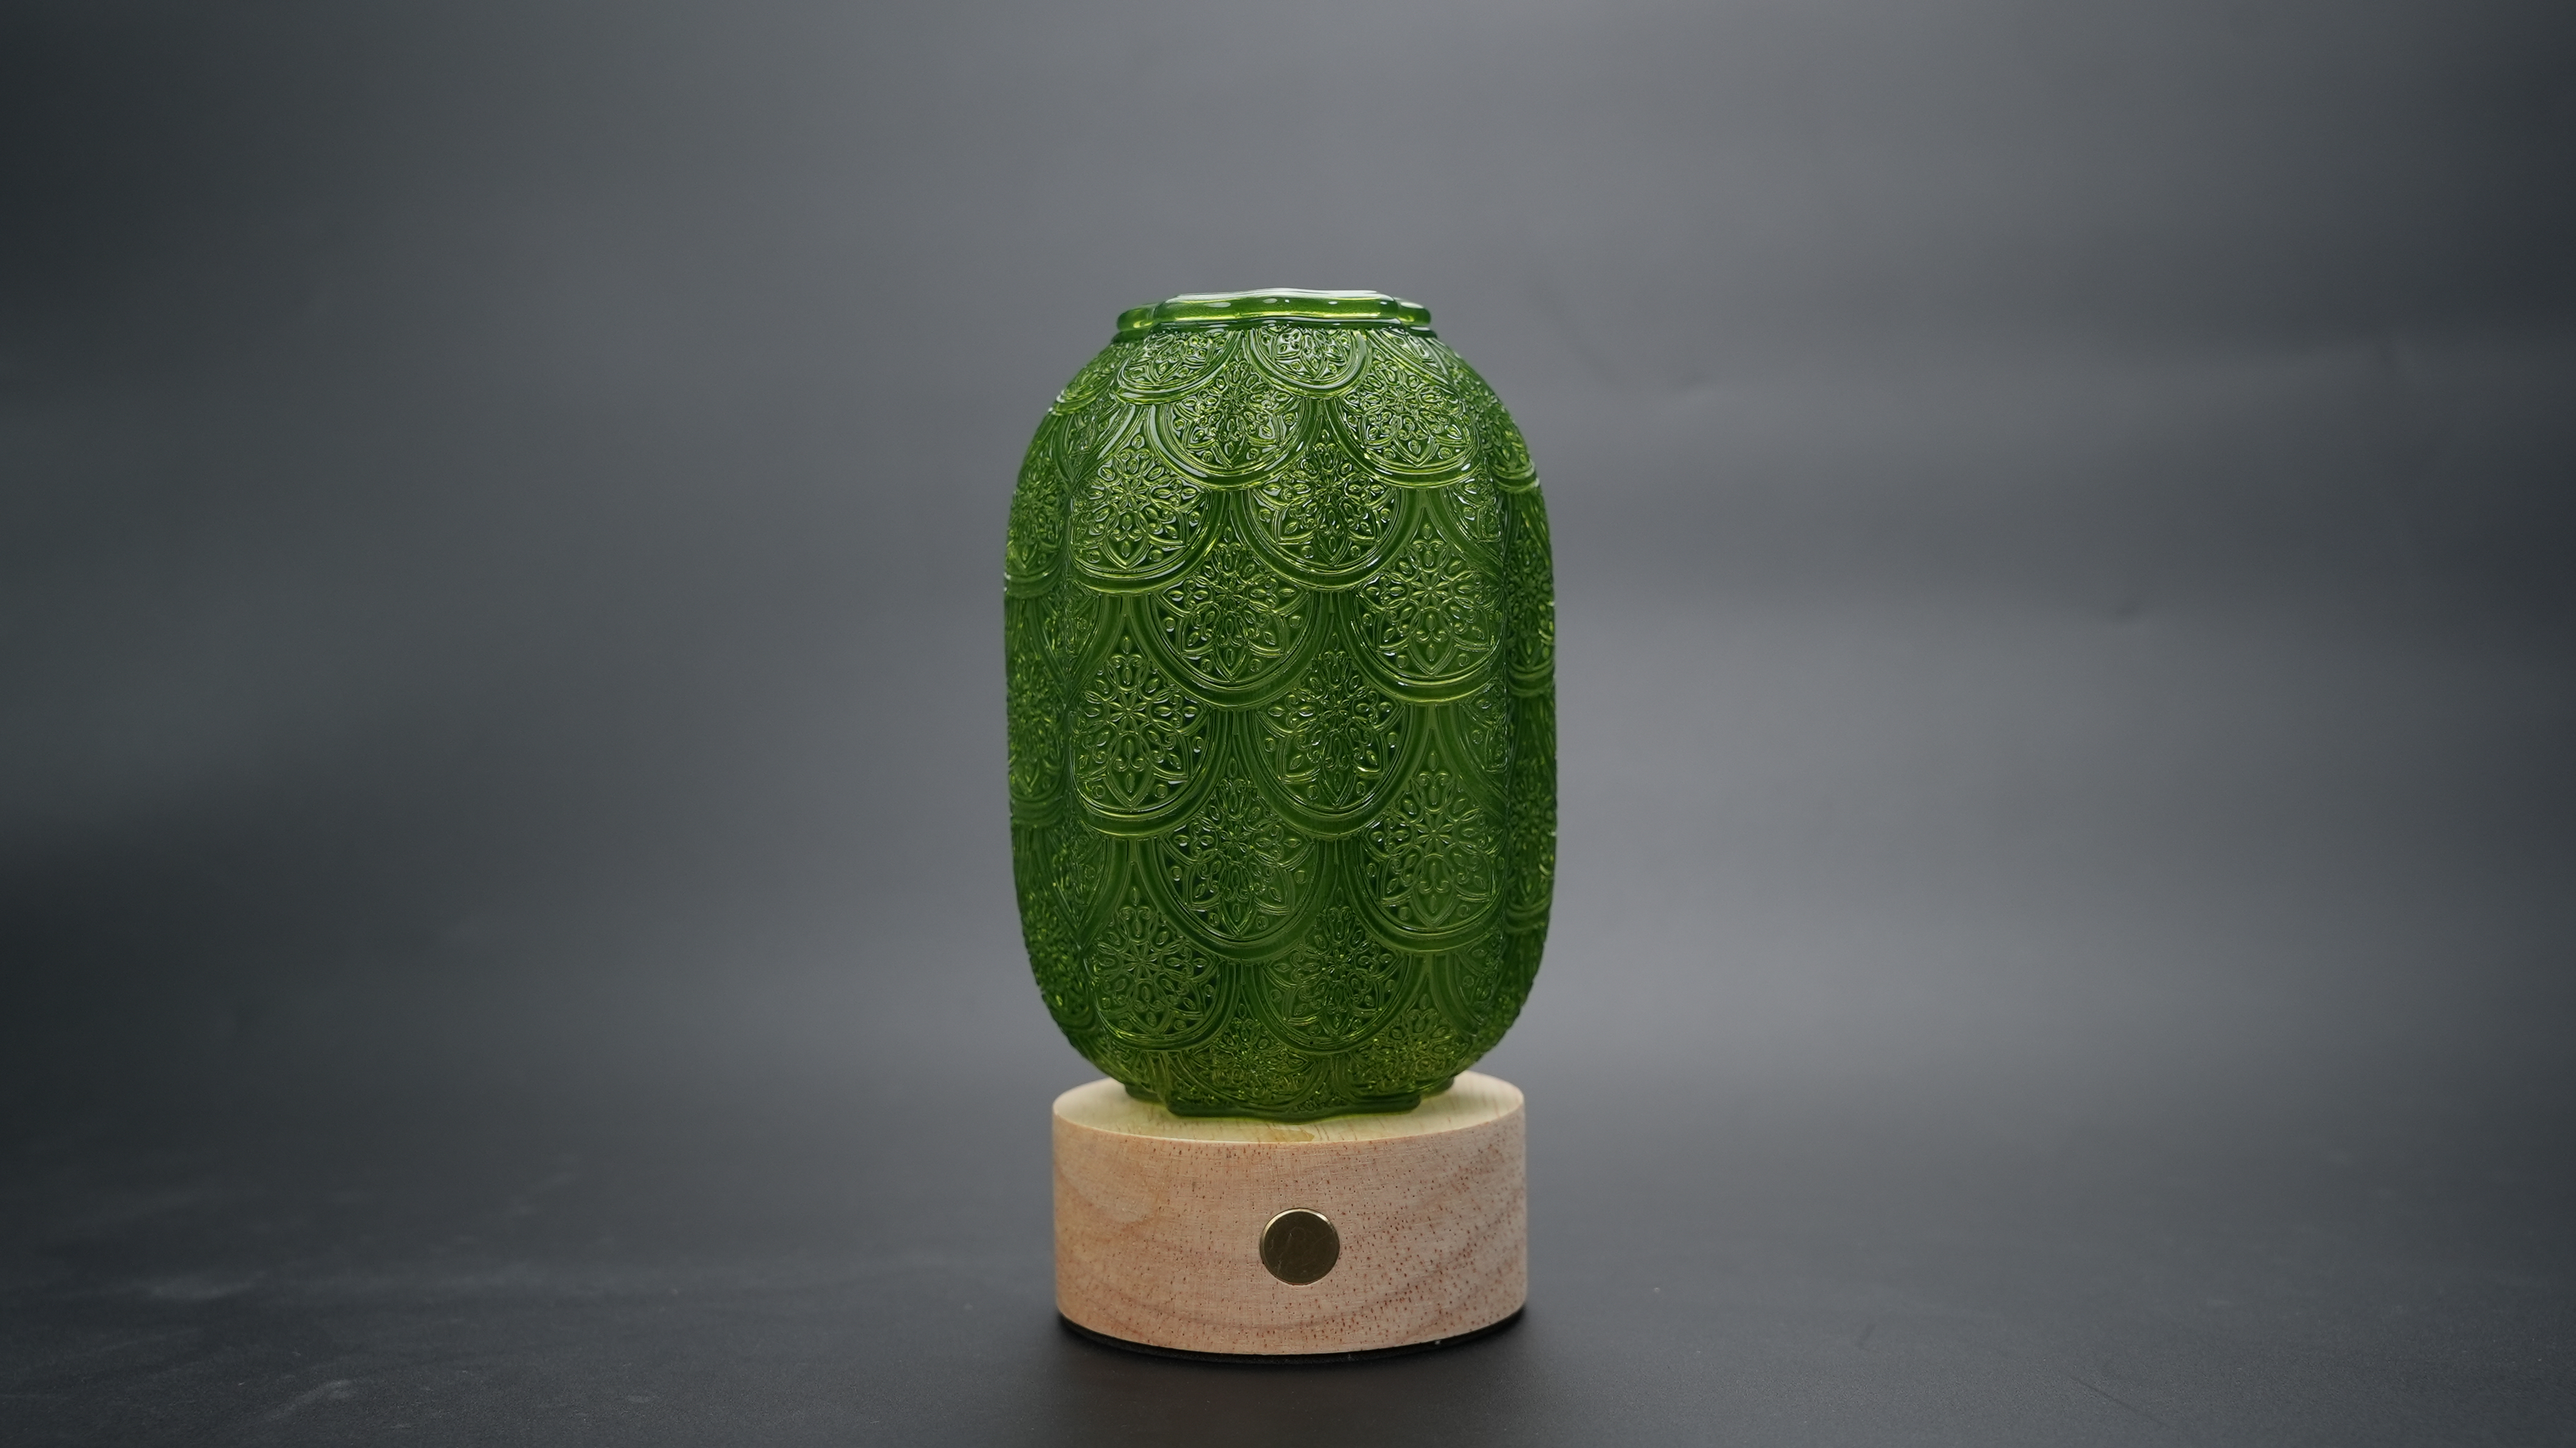
| Lamp shade A |  |
 |
| Lamp shade B | 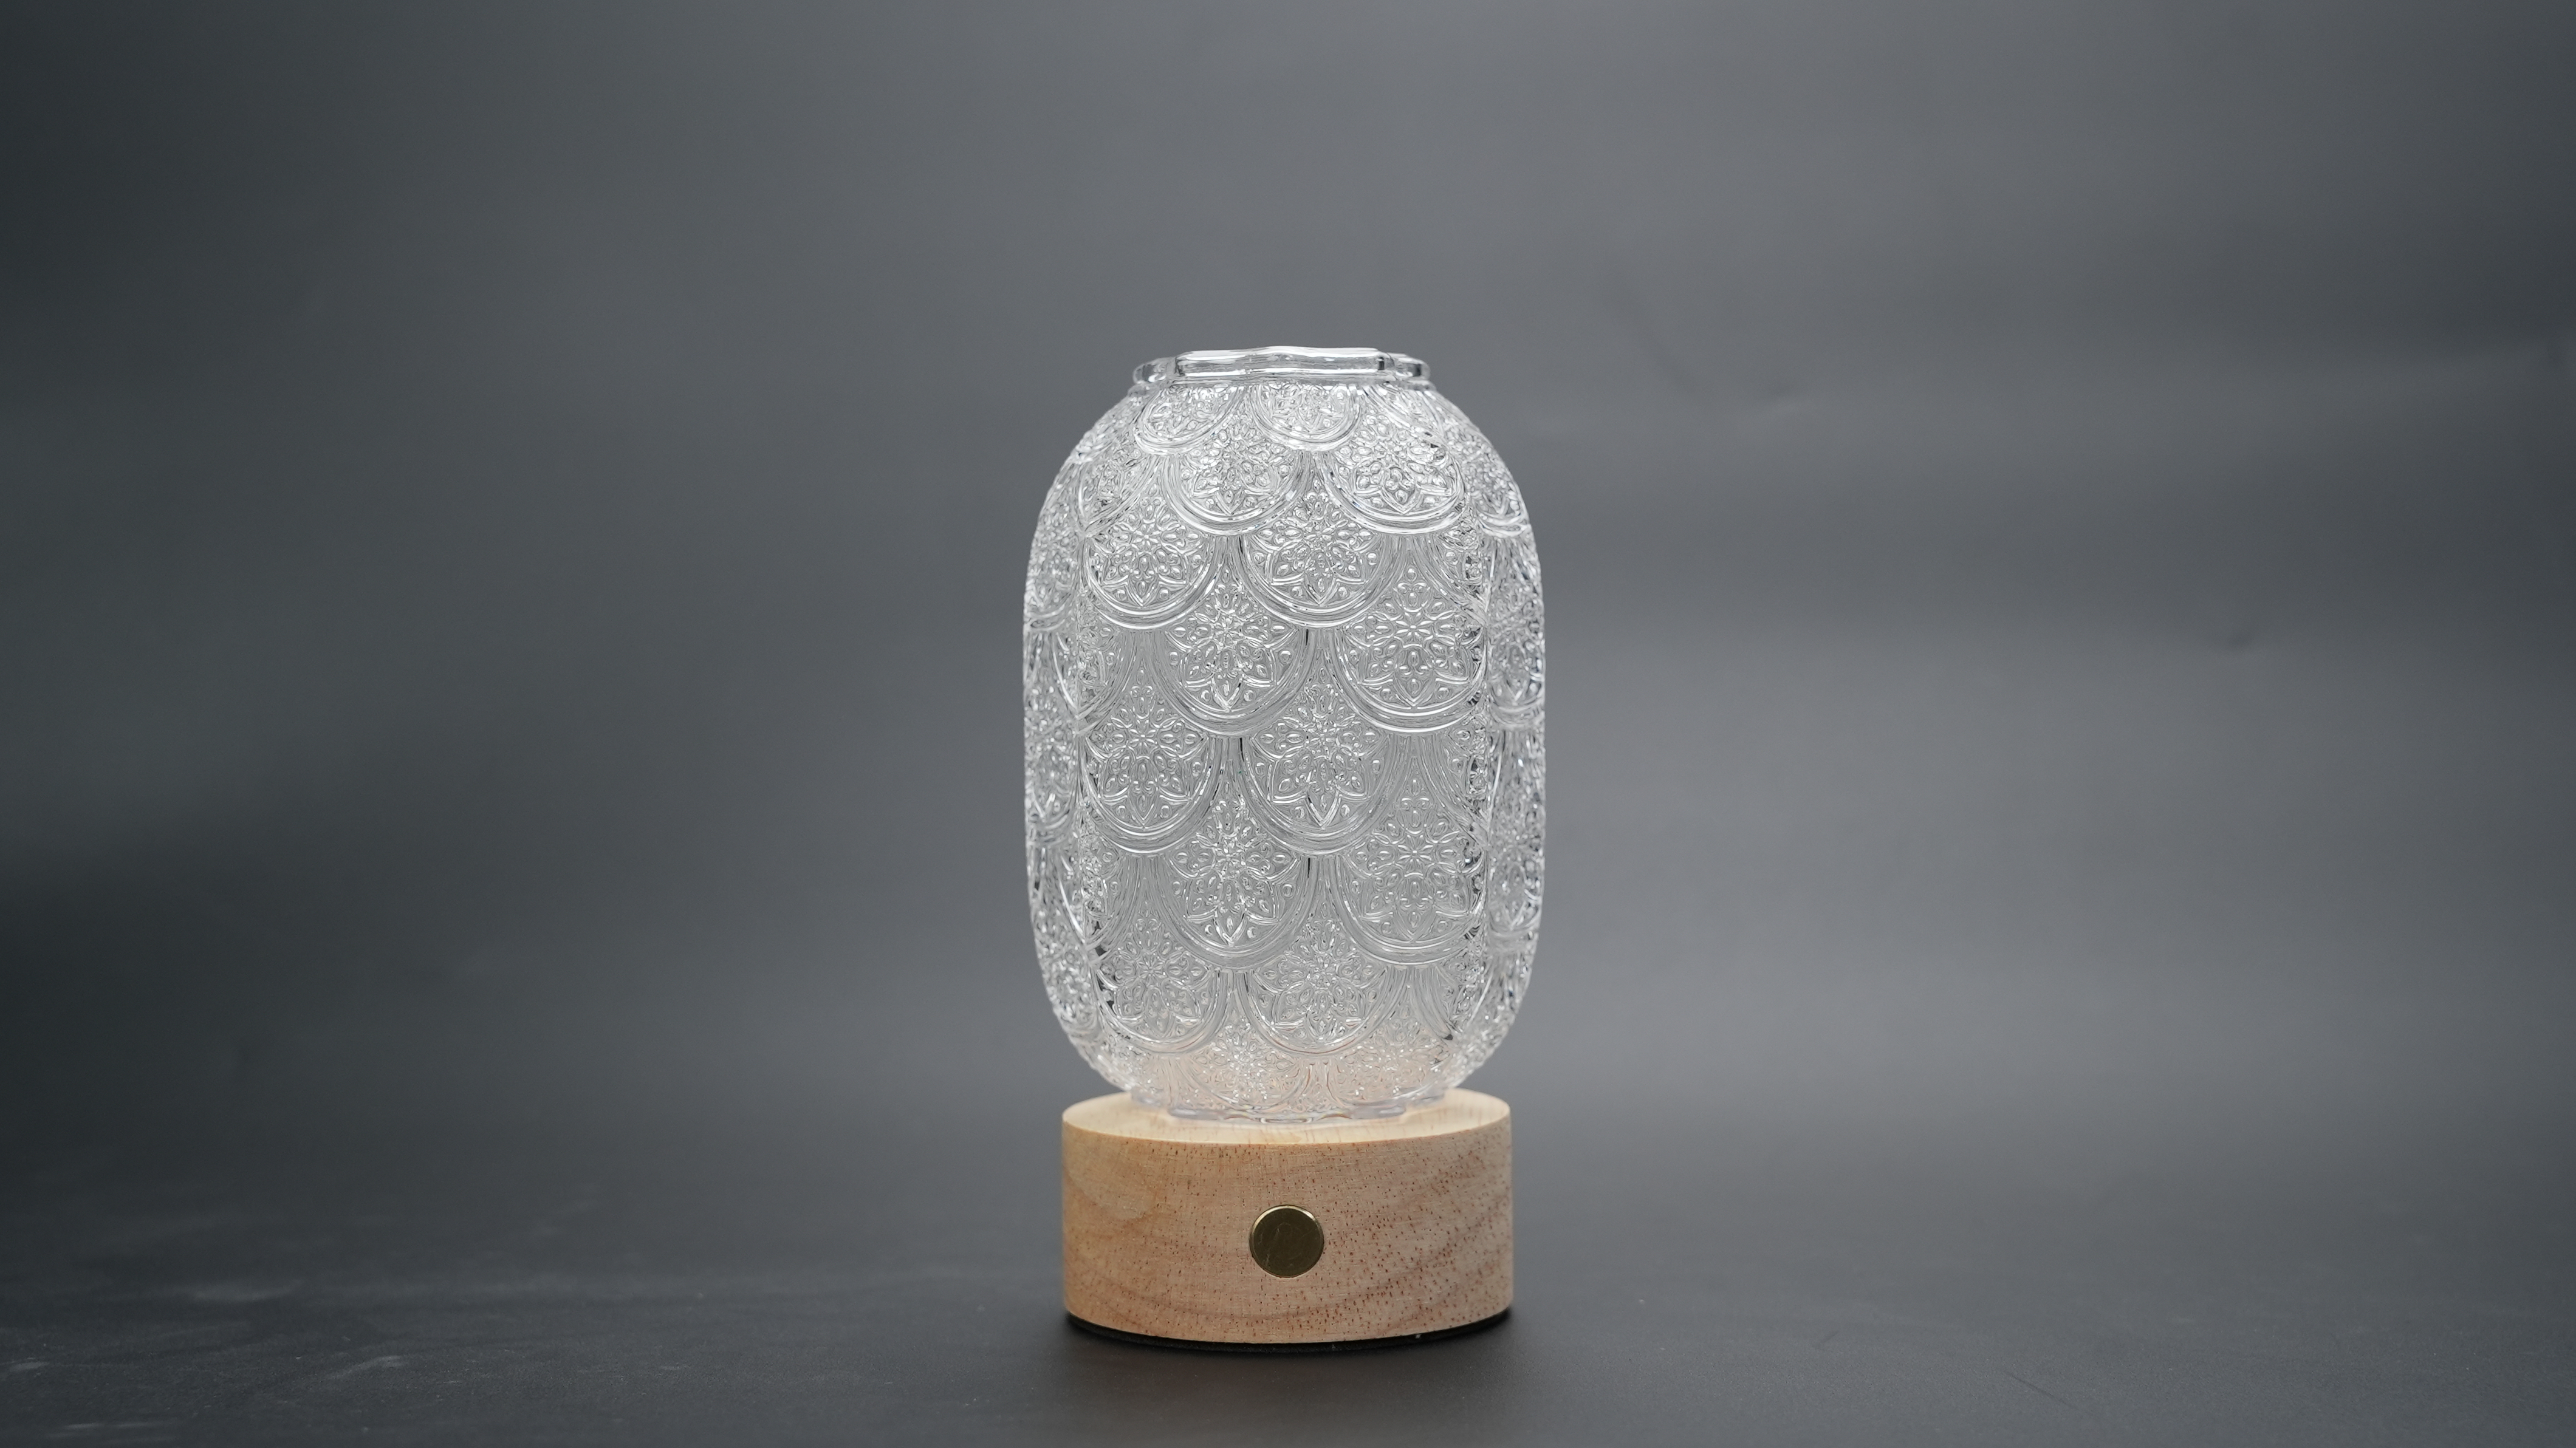 |
 |
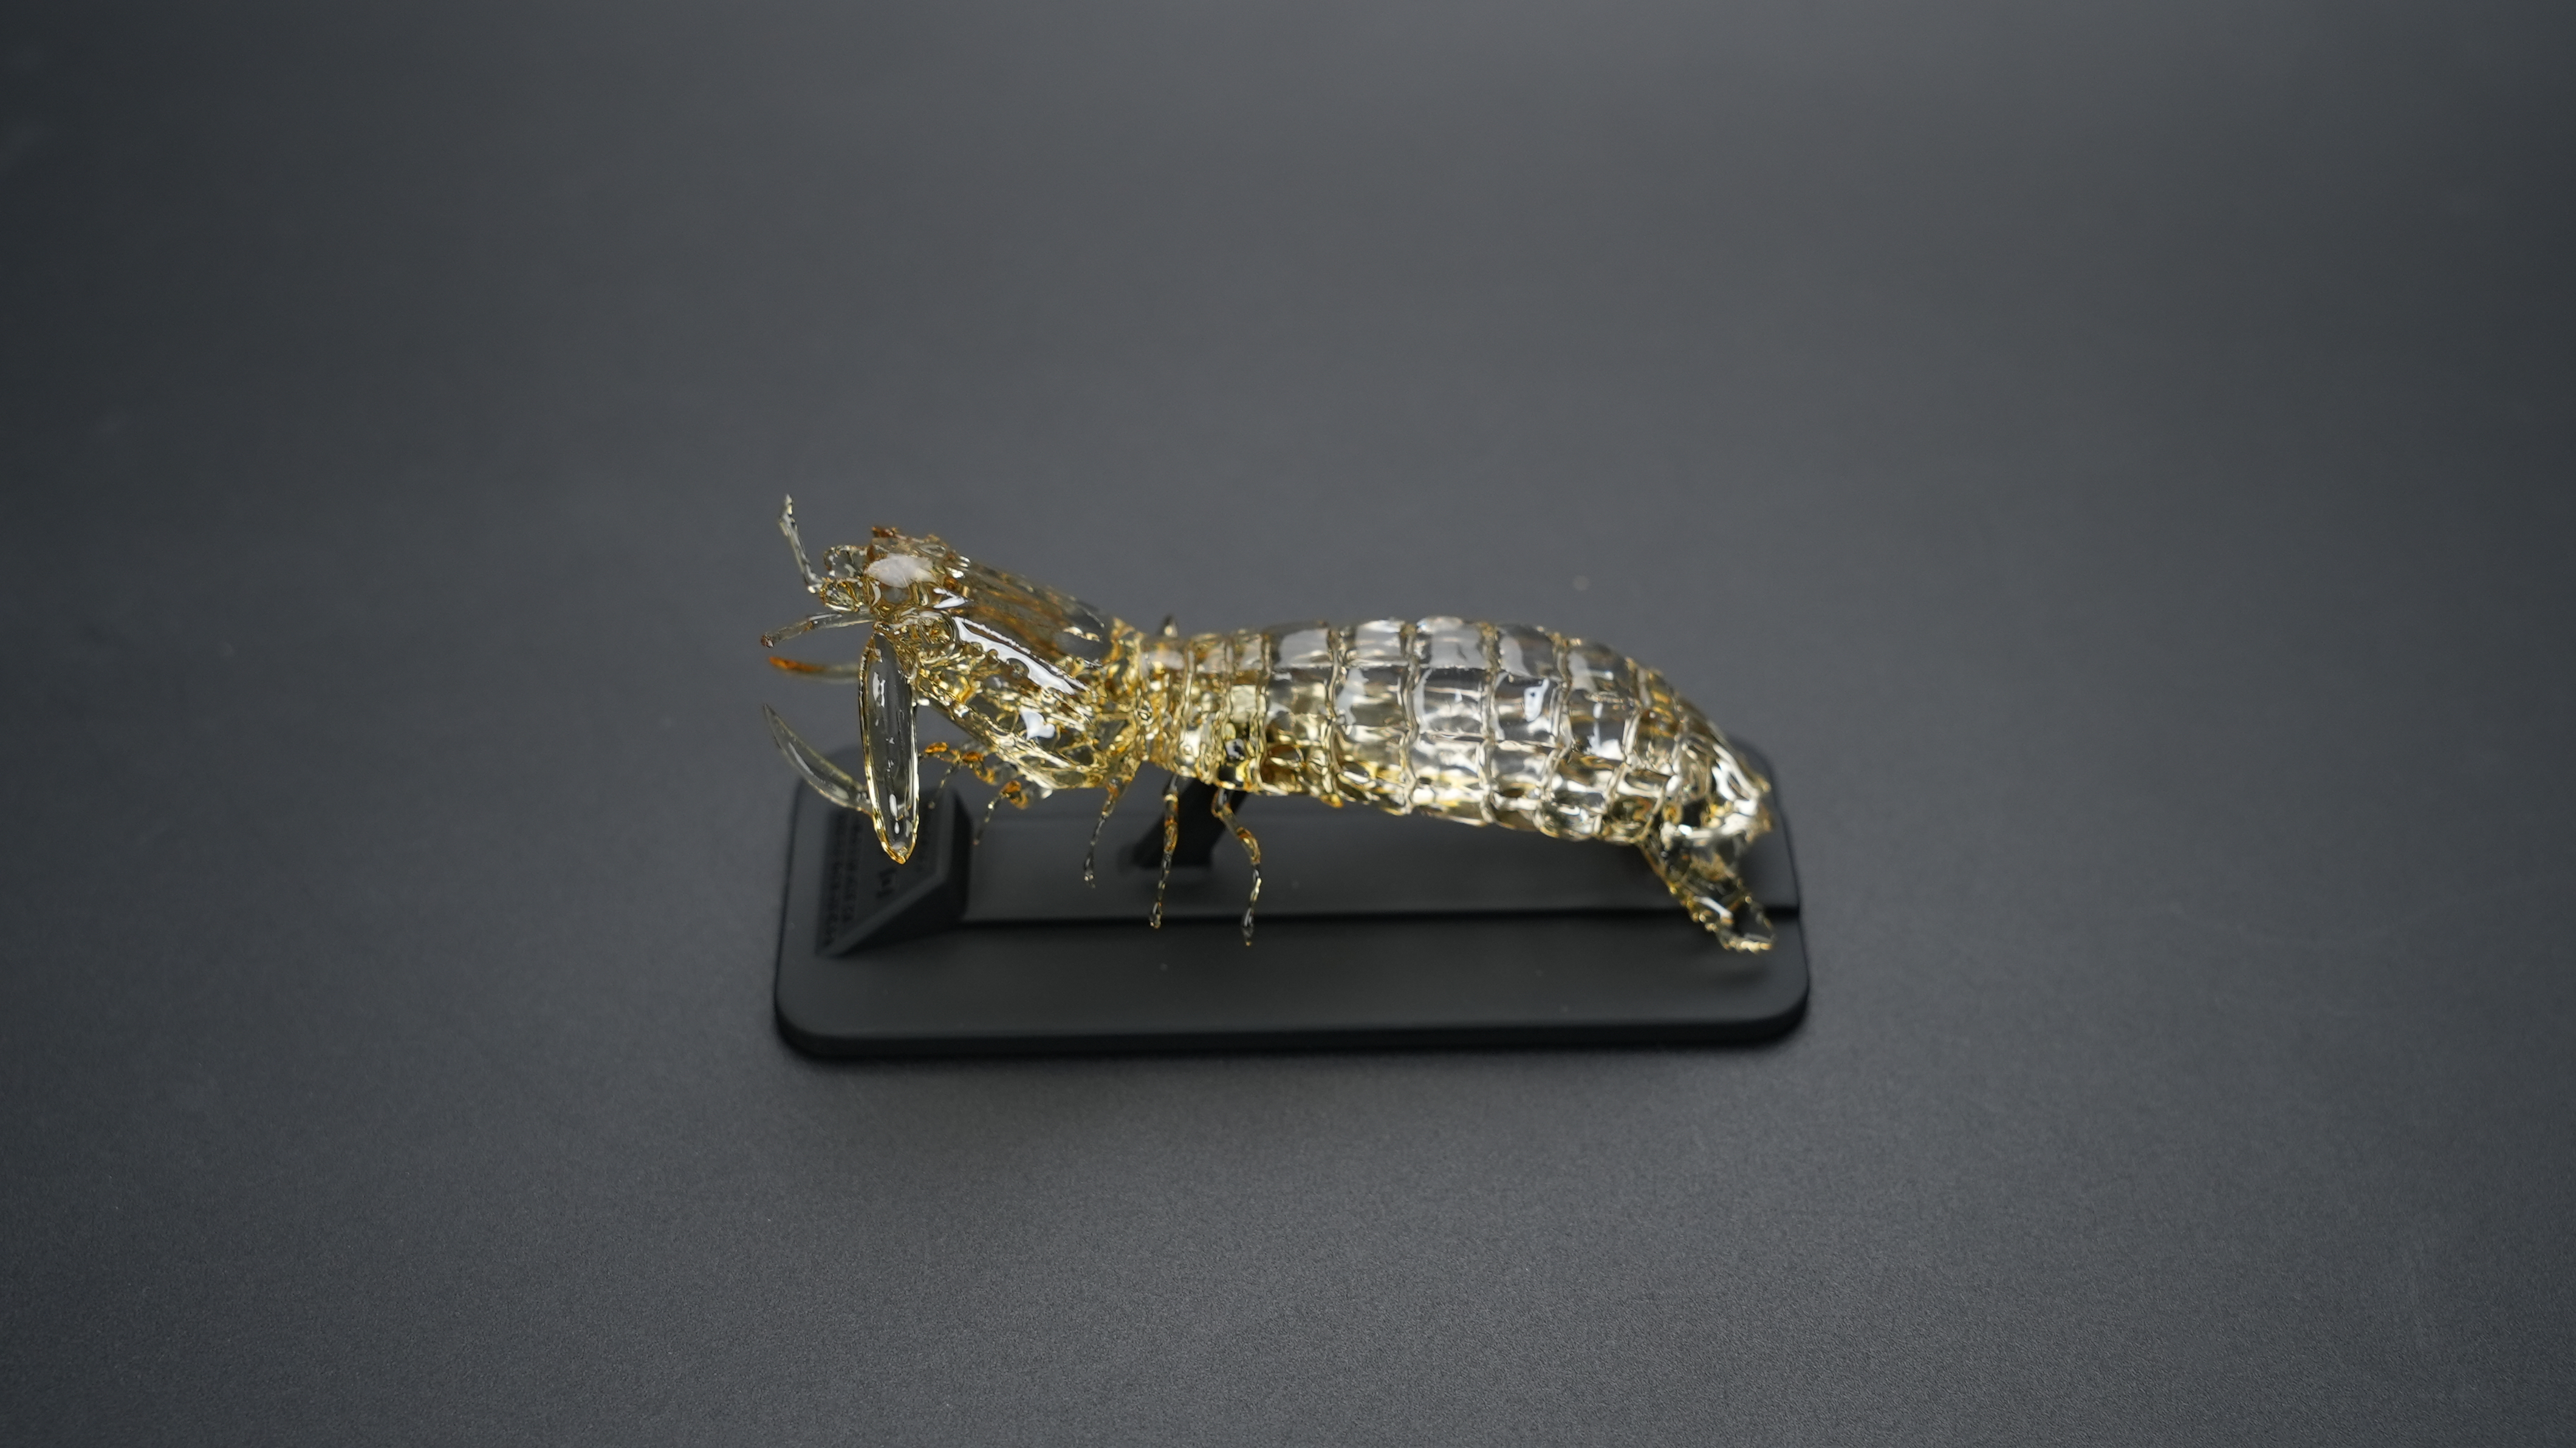
| Mantis shrimp | 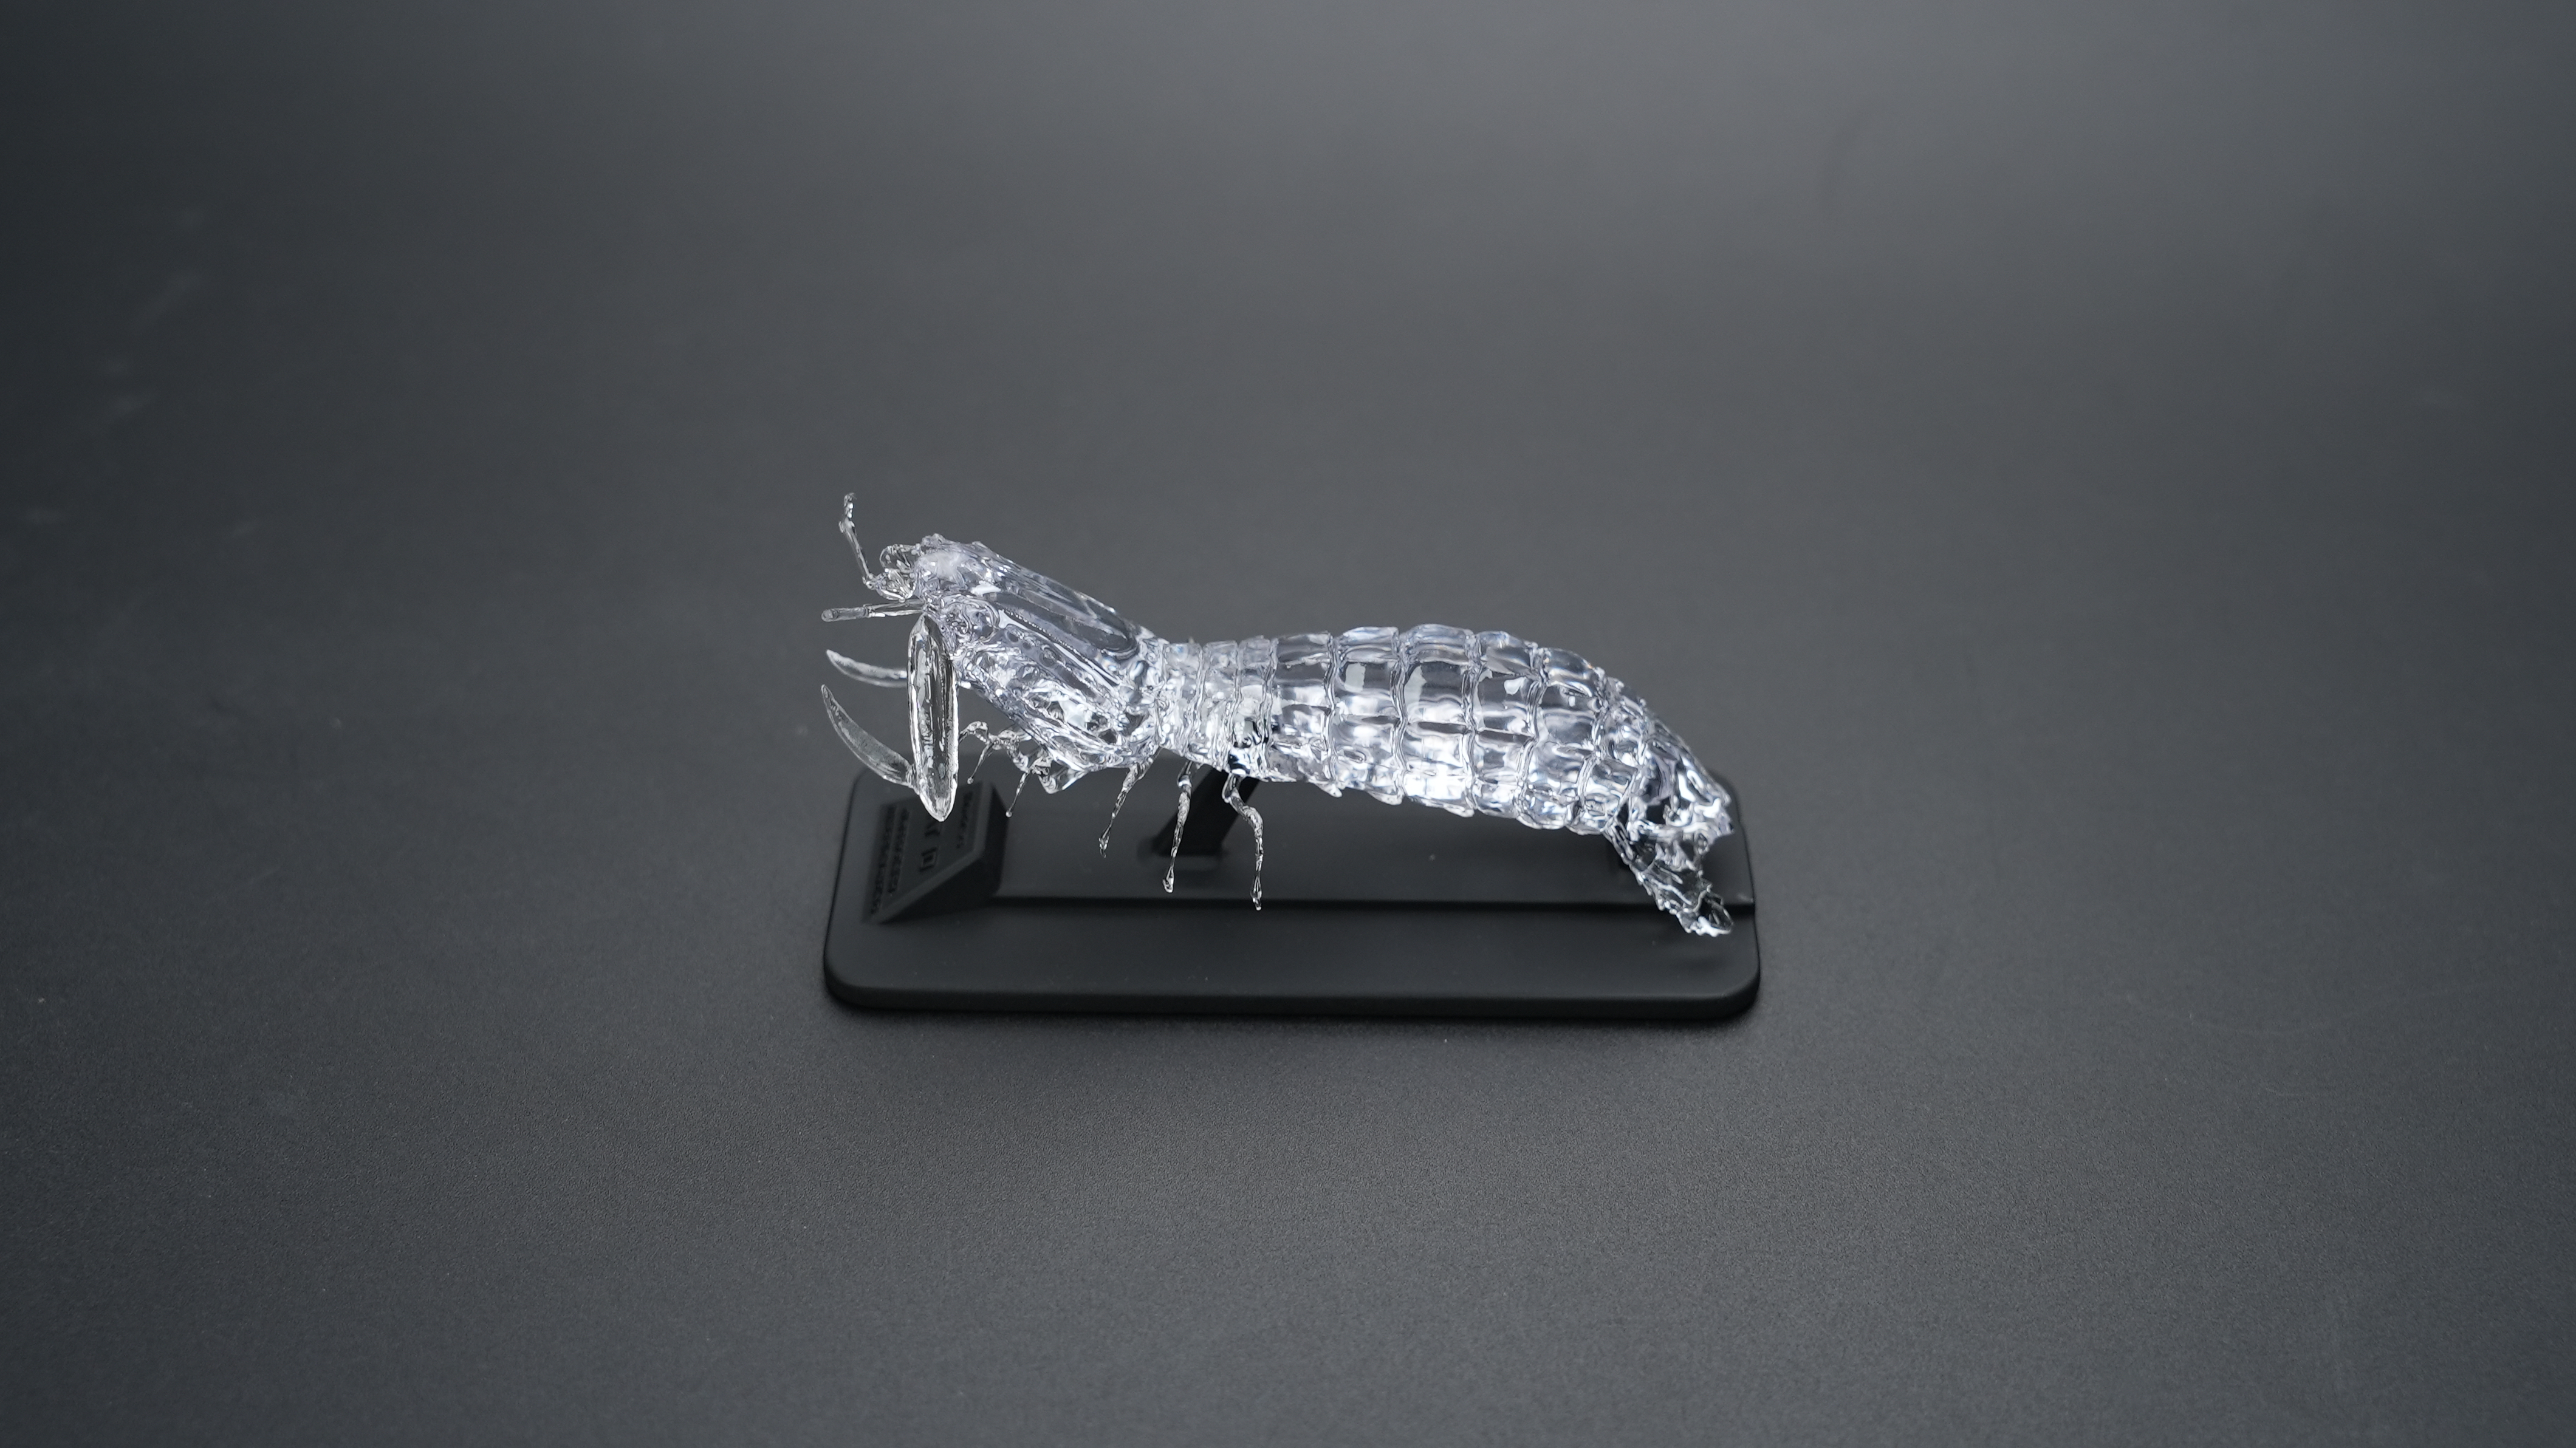 |
 |
¶ Internal Printing & High Transparent Effect
Double-layered structure:HeyGears Transparent Solution: Pokéball
Second polishing after dipping: HeyGears Transparent Solution: Internal Painted Hearables
¶ Painted & Translucent
Dipping: HeyGears Transparent Solution: Lamp shade A
Drawing: HeyGears Transparent Solution: Goldfish